Welcome to the beautiful world of waterfall braids! If you've ever admired those stunning, flowing hairstyles that look like they belong in a fairy tale, you’re in the right place. Waterfall braids are not only elegant but also surprisingly simple to create. This tutorial will guide you through the steps, making it easy for beginners and a delightful challenge for seasoned braiders. Let’s dive into the basics of this enchanting hairstyle!
Tools and Products Needed for Waterfall Braiding
Before we get started, it’s essential to gather the right tools and products to make your waterfall braid experience smooth and enjoyable. Here’s a handy list to help you prepare:
- Brush or Comb: A wide-tooth comb works best for detangling hair without causing breakage.
- Hair Tie: Choose a clear or colored one that matches your hair to keep your braid secure at the end.
- Hair Clips: These will help section off your hair and keep it tidy while you work.
- Hairspray: A light hold hairspray will help keep your braid in place without making it stiff.
- Serum or Oil: A small amount can tame flyaways and give your hair a glossy finish.
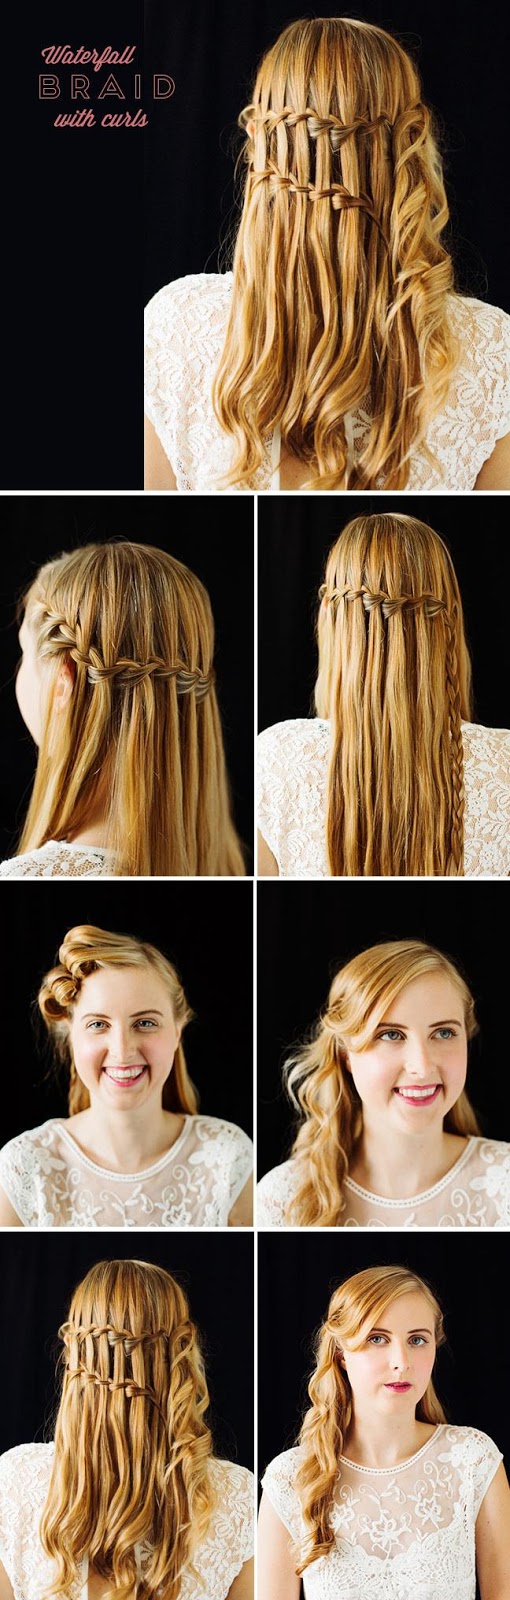
Now that you've got your tools lined up, let’s talk about the hair type that works best for waterfall braids. While this style can work with most hair types, medium to long straight or wavy hair tends to hold the braid's shape better and allows the waterfall effect to shine. However, if you have curly hair, don’t shy away! With a bit of product, you can create a stunning waterfall effect that highlights those beautiful curls.
Once you have your tools and hair prepped, you’re ready to embark on your waterfall braid journey. Grab your brush, put on some music, and let’s get those creative juices flowing! In the next section, we’ll cover the step-by-step process to create your own breathtaking waterfall braid.
Also Read This: How to Download Dailymotion Videos on Mobile
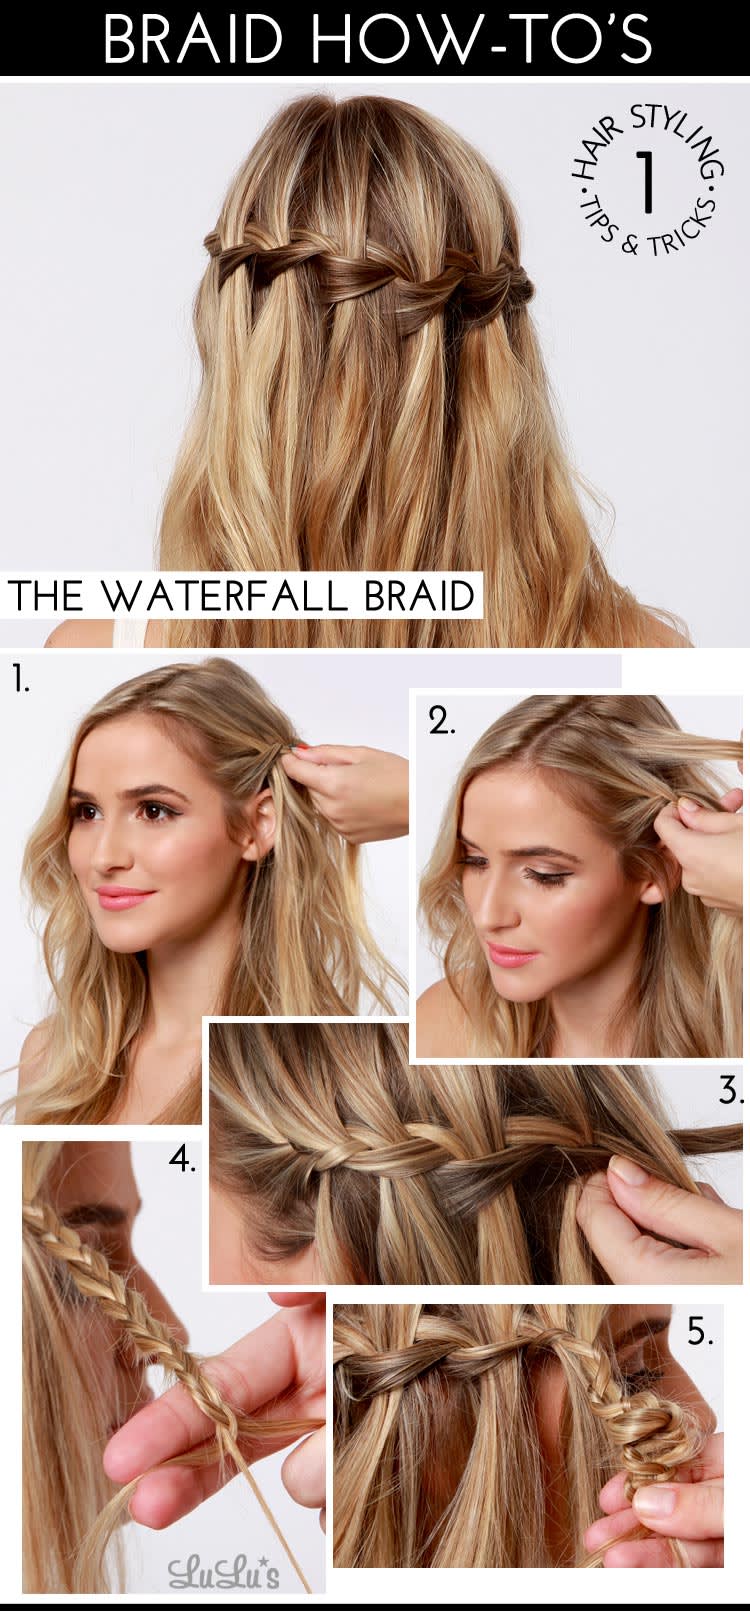
3. Step-by-Step Instructions for Waterfall Braiding
Ready to dive into the world of waterfall braids? Let’s break it down into simple steps so you can master this beautiful style in no time!
Step 1: Prep Your Hair
Start with clean, dry hair. If your hair tends to be slippery, a little texturizing spray or mousse can help give it some grip. You might want to use a heat protectant if you plan to style it with hot tools first.
Step 2: Section Your Hair
Using a comb, section off a portion of hair on one side of your head. This section should be about 2-3 inches wide. Clip the rest of your hair out of the way for now.
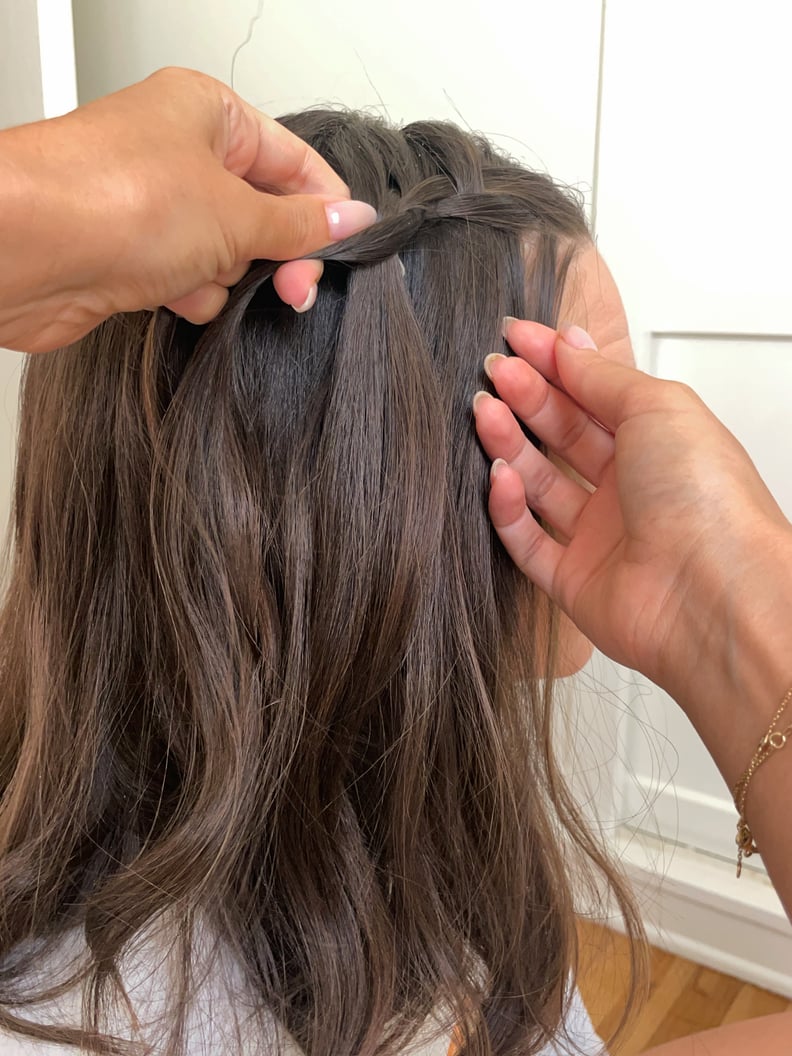
Step 3: Begin the Braid
Divide the section into three equal parts. Just like a regular braid, cross the right strand over the middle strand, then the left strand over the new middle strand. Here's where it gets fun!
Step 4: Incorporate New Hair
Instead of bringing all the hair from the left side into the braid, let the bottom strand fall out after crossing it over. Grab a new section of hair from the left side and add it to the middle strand. This is what creates the waterfall effect!
Step 5: Repeat
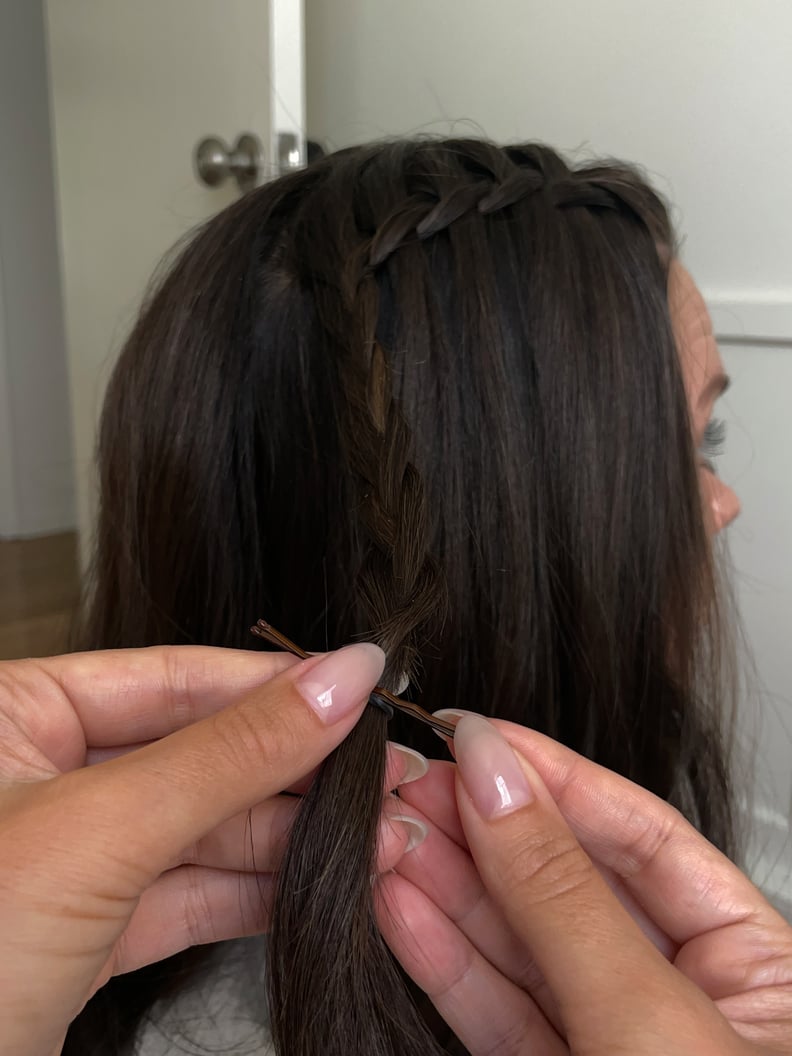
Continue this pattern: cross the right strand over the middle, let the bottom strand from the left fall, and add a new section from the left. Repeat as you move down, securing the braid with a hair tie when you reach the end of your hair.
Step 6: Finish It Off
For a touch of elegance, gently pull on the edges of the braid to loosen it slightly for a fuller look. You can also add some hairspray to keep everything in place. And voilà! You’ve got a gorgeous waterfall braid.
Also Read This: How to Change TP-Link Password Quick and Easy Instructions
4. Common Mistakes to Avoid When Braiding
Now that you know how to create a stunning waterfall braid, let’s discuss some common pitfalls. Avoiding these mistakes will make your braiding experience smoother and your results even prettier!
- Not Using the Right Tools: Ensure you have a good quality comb and hair ties. A wide-tooth comb is great for detangling, while a fine-tooth comb helps with sectioning.
- Skipping the Prep: Don’t skip the texturizing product! Straight, slippery hair can make it difficult to hold the braid. A little texture goes a long way.
- Pulling Too Tight: While it’s important to make your braid secure, pulling too tight can lead to discomfort and a stiff-looking braid. Keep it snug but not painful.
- Forgetting to Practice: Don’t be discouraged if it doesn’t look perfect the first time. Waterfall braiding takes practice. Keep trying, and you'll get the hang of it!
- Neglecting to Secure the End: Always use a hair tie at the end of your braid. If you don’t, you risk having your hard work unravel throughout the day.
By keeping these tips in mind, you’ll not only avoid common mistakes but also enhance your overall braiding skills. Happy braiding!
Also Read This: How to Download Dailymotion Videos on Chromebook: A Simple and Effective Guide
5. Styling Tips for Perfecting Your Waterfall Braid
So, you've mastered the art of creating a waterfall braid—fantastic! But let’s talk about how to take your braid to the next level with some styling tips. These little tricks will not only enhance the look of your braid but also make it more suitable for various occasions.
1. Choose the Right Products: Before you start, consider using a lightweight mousse or texturizing spray. This will give your hair some grip, making it easier to weave the strands without slipping. Avoid heavy gels that can weigh your hair down.
2. Add Some Waves: For a romantic look, you can curl the hair that’s not in the braid. Loose waves add texture and volume, making your waterfall braid stand out even more. Use a curling wand with a larger barrel to create soft, beachy waves.
3. Incorporate Accessories: Don’t shy away from embellishments! Adding flowers, hairpins, or even ribbons can give your waterfall braid a unique touch. For a bohemian vibe, try inserting small blooms along the braid.
4. Experiment with Positioning: While the classic waterfall braid usually sits at the side of the head, you can try different placements. Center your braid for a more traditional style, or place it low at the nape for an elegant look. This can change the entire vibe of your hairstyle!
5. Finish with Hairspray: To keep your braid intact throughout the day, finish with a light mist of hairspray. This will help control any flyaways without making your hair feel stiff. Remember, you want your braid to look soft and effortless!
Finally, don’t be afraid to make your waterfall braid your own. Whether you prefer a sleek finish or a more tousled look, the key is to be confident in your style.
6. How to Maintain Your Waterfall Braid
After putting in the effort to create a beautiful waterfall braid, you’ll want it to last! Here are some practical tips to maintain your braid throughout the day and keep it looking fresh.
1. Avoid Over-Touching: It might be tempting to keep adjusting your braid, but too much fiddling can cause it to lose shape. Try to leave it alone as much as possible, and only make adjustments if absolutely necessary.
2. Use a Silk Scarf or Pillowcase: If you’re going to bed with your waterfall braid still in, consider wrapping it in a silk scarf or sleeping on a silk pillowcase. This reduces friction, preventing frizz and helping your braid stay intact.
3. Refresh with Water: If your hair starts to feel dry or frizzy, spritz some water on it to rejuvenate the look. You can also mix in a bit of leave-in conditioner for extra moisture.
4. Plan for Touch-Ups: Depending on your hair type, you may need to schedule a quick touch-up during the day. Keep a few bobby pins on hand to secure any loose sections or flyaways. A small travel-sized hairspray can also be a lifesaver!
5. Regular Wash and Care: Maintain healthy hair by sticking to a good hair care routine. Regular washing, conditioning, and occasional deep conditioning treatments will keep your hair in top shape and help your braid look its best.
By following these maintenance tips, your waterfall braid can stay stunning from morning until night. Enjoy sporting your gorgeous braid, and don’t forget to show it off!
 admin
admin


