Cutting out parts of an image in Photoshop is a valuable skill for designers, photographers, and anyone working with digital images. Whether you're removing unwanted objects, isolating a subject, or creating a composite image, knowing how to accurately cut out sections of an
Preparing the Image for Cutting Out

Before you start cutting out a part of your image in Photoshop, it's important to prepare the image properly. Proper preparation can save you time and ensure a cleaner cut. Here’s what you need to do:
- Open your image: Start by opening the image you want to work with in Photoshop.
- Duplicate the original layer: It's a good practice to duplicate the original image layer. This way, if something goes wrong, you still have the original image untouched.
- Zoom in: Zooming in on the image helps you see more details, which can be crucial when making precise selections.
- Check the resolution: Make sure the resolution of your image is appropriate for the final output. Higher resolution images allow for more detailed cuts.
Once your image is prepared, you’re ready to begin the actual selection process. Having a clear idea of what you want to cut out will make this step much smoother.
Also Read This: Stretching Images on iPhone Step-by-Step
Choosing the Right Tool for the Job

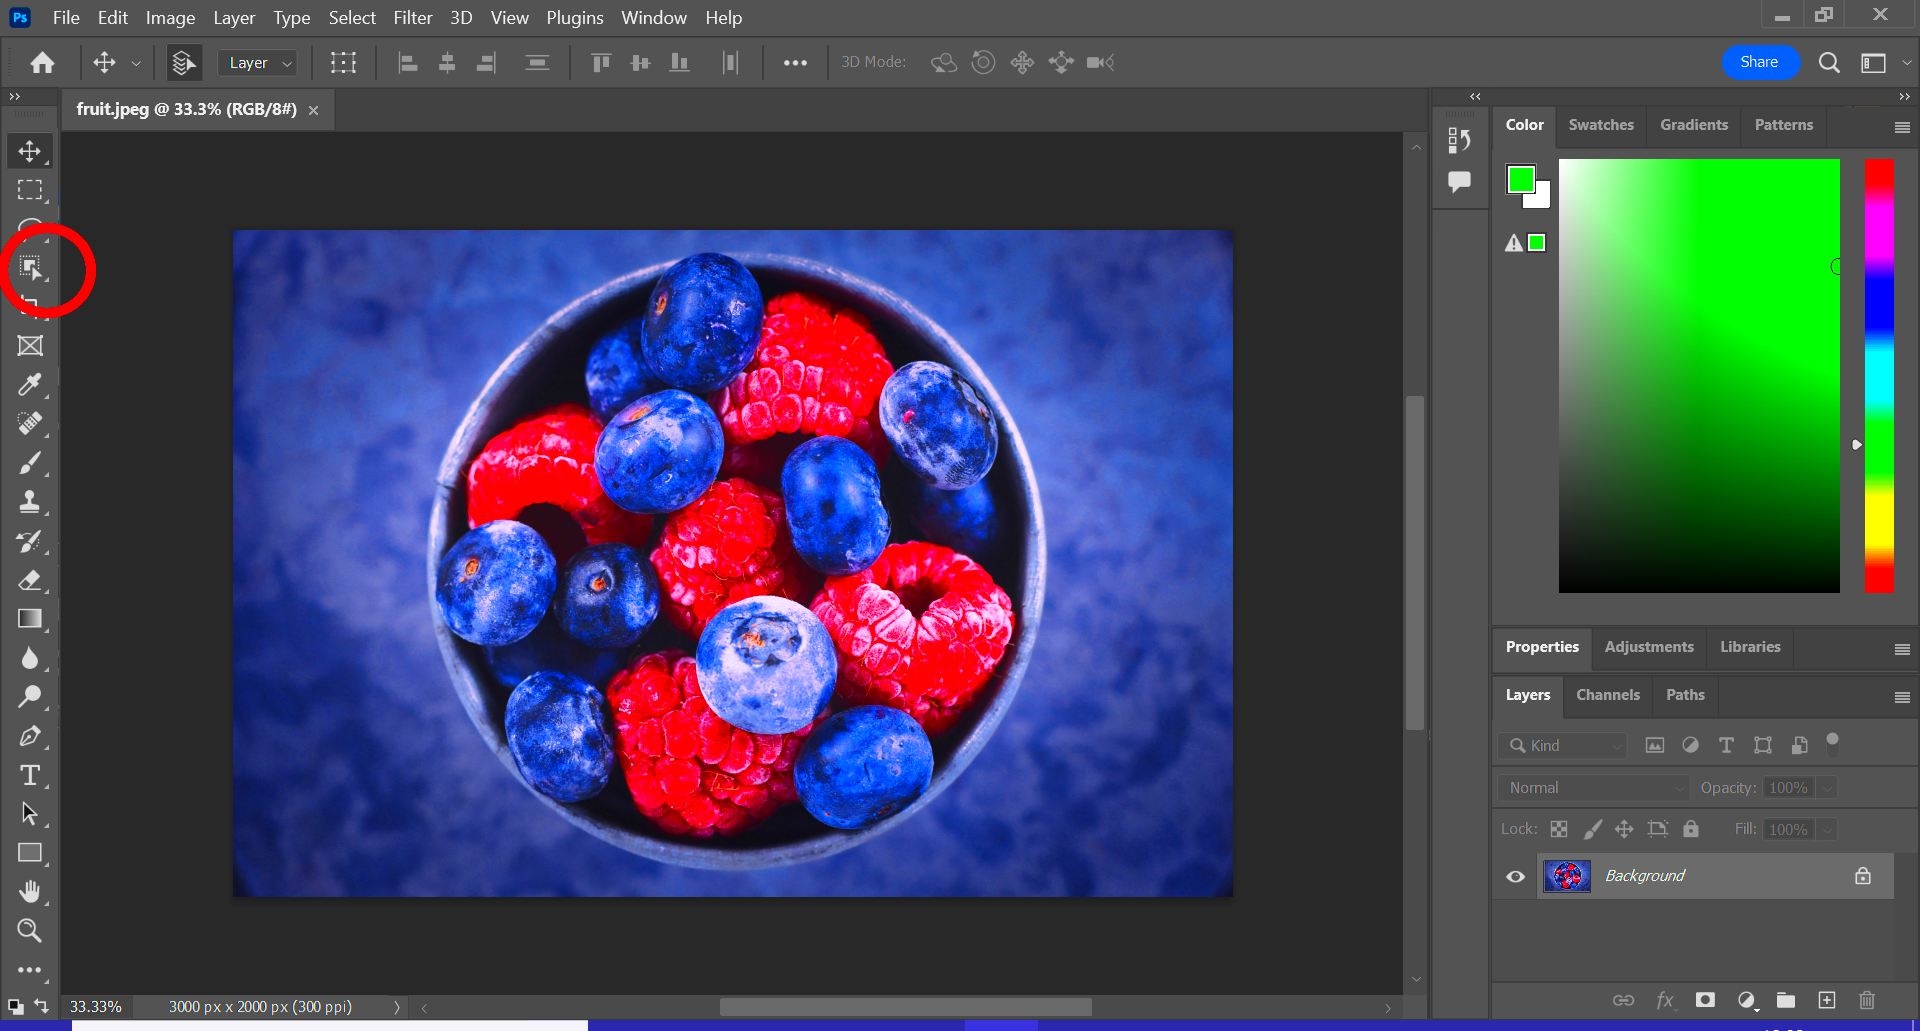
Photoshop offers a range of tools for cutting out parts of an image. Each tool has its strengths, so choosing the right one depends on the complexity of the image and the precision required. Below are some of the most commonly used tools for cutting:
| Tool | Best For |
|---|---|
| Lasso Tool | Best for freehand selections or cutting out irregular shapes. |
| Polygonal Lasso Tool | Ideal for selecting straight-edged areas, like architectural objects. |
| Magnetic Lasso Tool | Perfect for selecting areas with high contrast, as it "snaps" to edges automatically. |
| Pen Tool | Great for precise, clean selections and paths, especially on curved edges. |
| Quick Selection Tool | Ideal for selecting areas with similar colors and textures quickly. |
| Magic Wand Tool | Perfect for selecting areas of a single color, such as a solid background. |
Each of these tools has its use cases, and sometimes, you'll find yourself using a combination of them. For example, you might start with the Quick Selection Tool to select a broad area, then switch to the Lasso Tool to refine the edges. Knowing which tool to use for your specific needs will help you make the process faster and more accurate.
Also Read This: Ultimate Guide to Downloading Images from Imago Images Platform
Making the Selection of the Area to Cut Out

Once you’ve prepared your image and chosen the right tool, the next step is to make the selection of the area you want to cut out. This is a critical part of the process because the accuracy of your selection will determine how clean your final cut will be. There are several ways to select an area, depending on the tool you’re using. Here are a few common techniques:
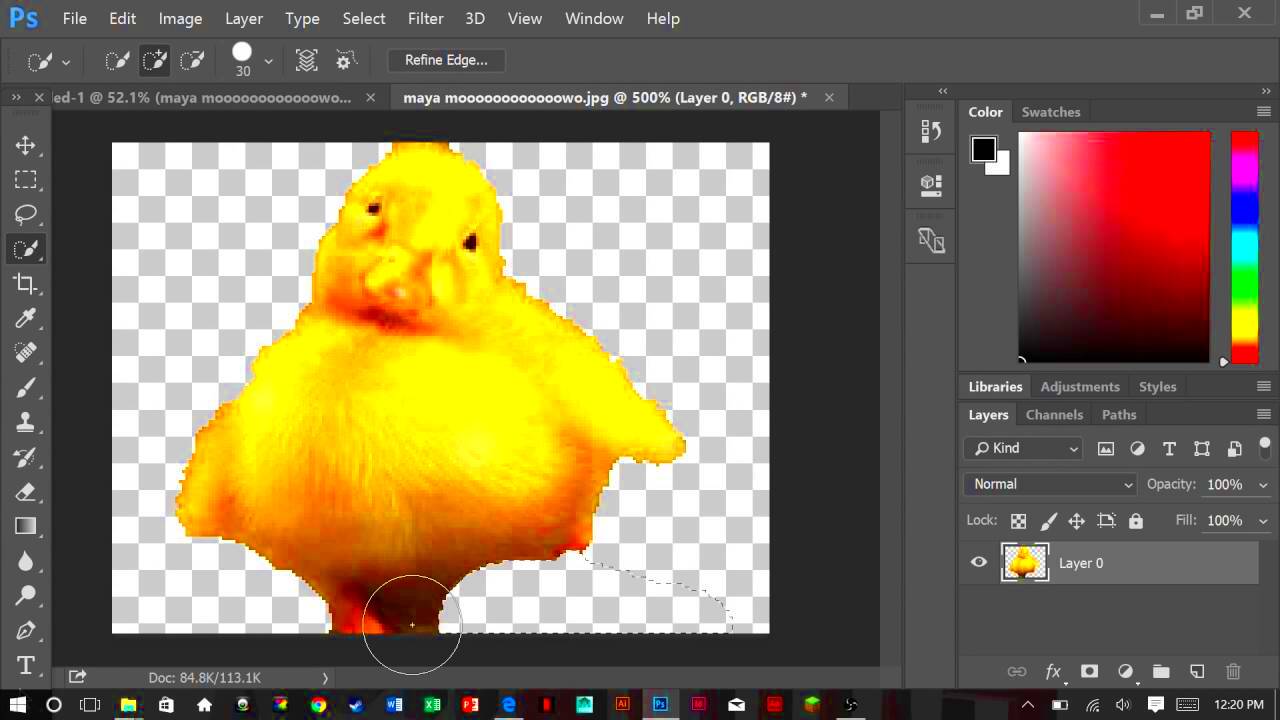
- Quick Selection Tool: Simply click and drag over the area you want to select. Photoshop automatically detects edges and highlights the selected region.
- Lasso Tool: With the Lasso Tool, draw a freehand selection around the area. This is great for irregular shapes or areas that don't have clean edges.
- Pen Tool: For more precision, the Pen Tool lets you create anchor points around the area you want to cut out. Once your path is closed, convert it into a selection.
- Magic Wand Tool: If the area you want to cut out has a solid or distinct color, the Magic Wand Tool can select it with just a click.
When using any of these tools, it's important to make sure your selection is as accurate as possible. You can always add or subtract from the selection using the options in the toolbar. For complex images, it might take a few tries to get the selection just right, so don’t be afraid to refine it as you go.
Also Read This: File Facelift: Rearranging Photos in a File on Photobucket
Refining the Selection Edges

Once you’ve made your initial selection, the next step is refining the edges. Most selections in Photoshop will leave behind rough or jagged edges, which can be noticeable when you place the cut-out image on a different background. Refining the edges helps create a smoother transition and makes the cut-out appear more natural. Here's how you can refine your selection:
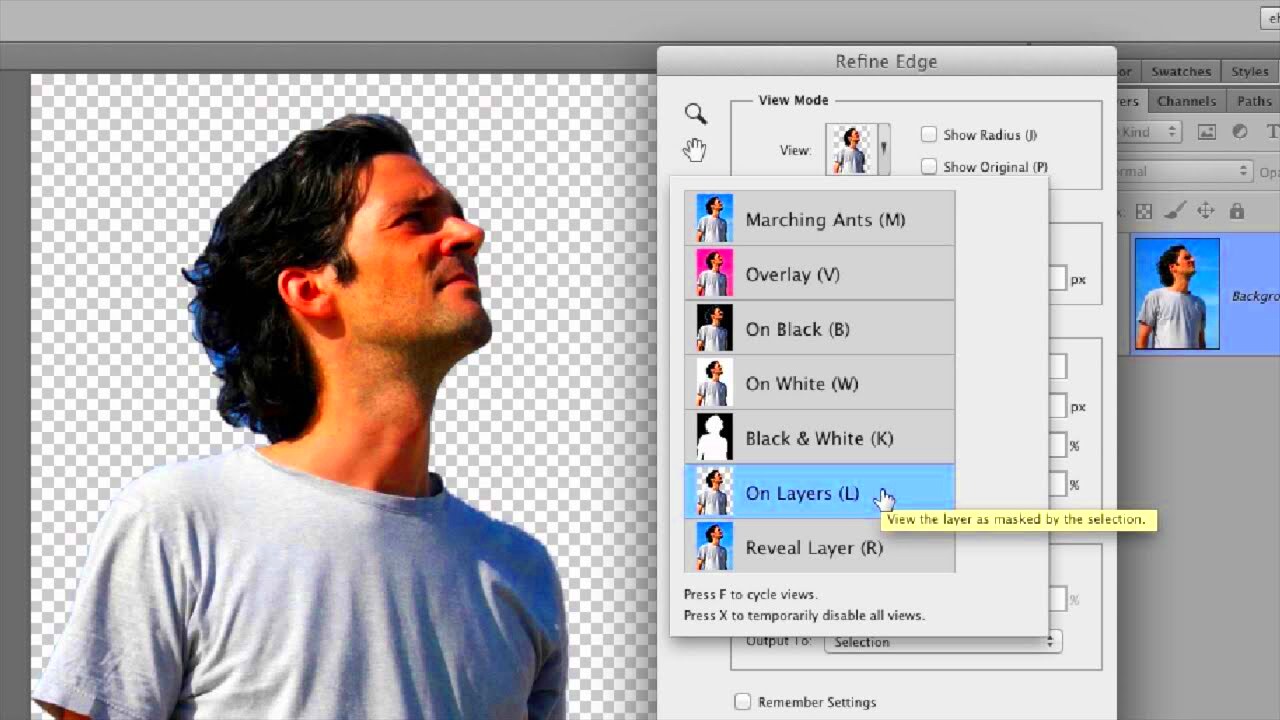
- Refine Edge/Select and Mask: After making your selection, go to the "Select" menu and choose "Select and Mask." This brings up a workspace that allows you to refine the edges by adjusting the radius, smoothness, feather, and contrast.
- Feathering: Feathering softens the edges of your selection, giving it a more natural look. In the "Select and Mask" workspace, you can adjust the feathering slider to fine-tune the edges.
- Refine Radius Tool: If you're working with complex edges, like hair or fur, the Refine Radius Tool can help Photoshop detect and smooth out these areas, making the transition more seamless.
- Contrast and Smooth: Adjusting the contrast and smoothing the selection further refines the edges, ensuring that they don’t look harsh or artificial.
Taking the time to refine your selection will give you a much cleaner cut-out, especially when working with detailed images or complex backgrounds. This step is especially crucial if you're planning to use the cut-out image in another project or on a different background.
Also Read This: Making a PDF From Multiple Images Quickly
Cutting and Removing the Image Section
With your selection refined and ready, it’s time to actually cut out the part of the image you no longer need. There are different ways to remove or isolate your selection in Photoshop, depending on how you want to use the cut-out. Here’s what you can do:
- Layer Mask: One of the best ways to cut out part of an image without permanently deleting it is by using a layer mask. Simply click the "Add Layer Mask" button in the Layers panel after making your selection. This will hide the selected area, but it’s still editable in case you want to bring it back later.
- Cut and Paste: If you’re sure you want to remove the selection, you can simply cut it (Ctrl + X) and paste it (Ctrl + V) onto a new layer. This is helpful if you want to move the cut-out part to another document or background.
- Delete the Selection: If you want to permanently remove the selected area, press the Delete key after making the selection. This will leave a transparent space in the image where the selection was.
Once the image section is cut, you can move it, adjust it, or place it into a new composition. If you’ve used a layer mask, you can always return to refine or change your selection later without losing any of the original image.
Also Read This: How to Sell Feet Pics on Foap: A Step-by-Step Guide
Saving the Image After Cutting Out the Part
Once you’ve successfully cut out the desired part of your image, it’s time to save your work. Saving your image in the right format is crucial, especially if you plan to use it for different purposes, like web design or print. Photoshop offers various file formats, and each one has its own benefits. Here’s a breakdown of the most common formats and when to use them:
| File Format | Best For |
|---|---|
| PSD | Best for preserving layers and edits for future adjustments. Great for ongoing projects. |
| PNG | Ideal for images with transparency, such as logos or cut-out images. No background color. |
| JPG/JPEG | Perfect for final images to be used on websites or for printing. It’s a compressed format, so the file size is smaller. |
| TIFF | Best for high-quality images and print production, as it retains most of the image's detail without significant compression. |
To save your image in Photoshop, simply go to File > Save As and select the appropriate format. If you’re saving a file with a transparent background, make sure to choose a format like PNG that supports transparency. Don’t forget to give your file a meaningful name so it’s easy to find later!
Also Read This: how to change the background colour of an image
Tips and Tricks for Better Results
Getting the perfect cut-out isn’t always as simple as it seems, but with a few tips and tricks, you can improve the accuracy and quality of your work. Here are some helpful strategies to try:
- Use Layer Masks: Instead of deleting parts of the image, use a layer mask. This allows you to hide unwanted areas without losing them permanently, giving you more flexibility to make changes later.
- Zoom In: When cutting out detailed parts of an image, zoom in to get a closer look. This makes it easier to refine your selection and avoid mistakes around intricate edges.
- Refine Your Edges: Always take time to refine the edges of your selection. Using the "Select and Mask" workspace in Photoshop can help smooth out rough edges and make your selection blend better with the new background.
- Feather the Selection: Feathering softens the edges of your selection, making the cut-out look more natural when placed against a new background. This is especially helpful when working with subjects like hair or fur.
- Use the Pen Tool for Precision: The Pen Tool is perfect for making precise, clean selections, especially on objects with curved edges. It requires more time but offers the most accurate results.
- Adjust the Brightness and Contrast: After cutting out an image, you may notice that the lighting and contrast don’t match the new background. Use adjustment layers to fine-tune brightness, contrast, or color balance for a more seamless blend.
By applying these tips, you can enhance the quality of your cut-out images and ensure a professional finish every time.
Also Read This: Checking Image Resolution for High-Quality Results
FAQ
Q: What if I make a mistake while cutting out an image?
A: If you make a mistake, don’t worry! Photoshop has several ways to fix it. You can use the Undo function (Ctrl + Z) to go back to a previous step, or you can use a layer mask to hide any mistakes without deleting them. You can also use the Refine Edge or Select and Mask tool to adjust your selection.
Q: Can I cut out an image with a blurry background?
A: Yes, you can cut out an image with a blurry background. However, it may be a bit more difficult because the edges of the subject may blend with the background. Using tools like the Pen Tool or Refine Edge can help you create a clean selection even in this case.
Q: How do I remove the background completely?
A: To remove the background completely, use the Layer Mask technique or delete the selected background area. If your image has a solid color background, the Magic Wand Tool can make this process quicker. After cutting out the subject, you can save the image as a PNG to preserve transparency.
Q: What should I do if the edges of my selection are jagged?
A: Jagged edges can often be smoothed out using the Feather option or by refining the edges in the "Select and Mask" workspace. Feathering softens the edges and blends them more naturally with the background.
Conclusion
In conclusion, cutting out part of an image in Photoshop is a valuable skill that can elevate your photo editing and design projects. By following the steps outlined—from preparing your image and selecting the right tool to refining edges and saving the final product—you can achieve clean, professional-looking cutouts. Remember that practice is key, and using the right tools and techniques will make the process faster and more precise. Whether you're working on a personal project or creating content for clients, mastering these Photoshop techniques will help you produce high-quality results every time. Keep experimenting and refining your skills, and soon cutting out parts of an image will become second nature!


