If you're venturing into the world of crafting with your Cricut machine, curving images can add a unique touch to your projects. Whether you're designing custom stickers, signs, or t-shirts, knowing how to manipulate your images is essential. This guide will walk you through the basics of curving an image in Cricut Design Space, ensuring your creations stand out and look professional. Let’s dive in!
Understanding the Cricut Design Space
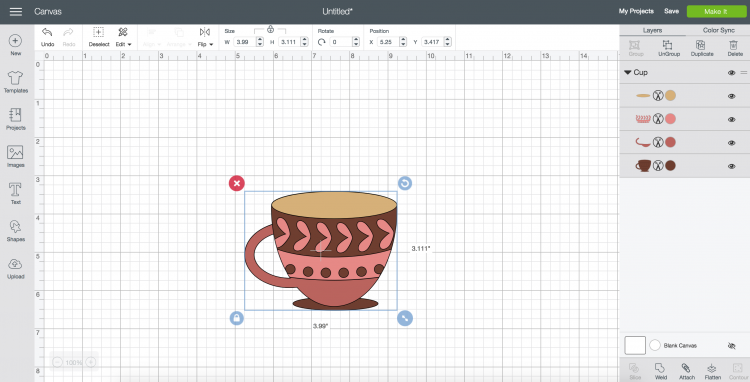
Cricut Design Space is the software that makes your crafting dreams come to life. It's user-friendly and packed with features that allow you to create stunning designs. Here’s a breakdown of some key components you should know:
- Canvas: This is your workspace where all the magic happens. You can drag and drop images, shapes, and text to create your design.
- Toolbar: Located at the top, this toolbar gives you access to essential tools like Undo, Redo, and Save. You’ll also find options for uploading images and selecting shapes here.
- Layers Panel: This panel is crucial for managing different elements of your design. Each layer can be independently edited, allowing for precise control over your project.
- Text Tools: The text tool lets you add text to your design, and it includes options for changing fonts, sizes, and styles.
- Curve Feature: This nifty tool allows you to bend and shape your text to fit various designs, crucial for creating a polished look.
Understanding these components makes the design process smoother and more enjoyable. With a little practice, you’ll be able to navigate Cricut Design Space like a pro, setting the stage for beautiful, curved images that elevate your projects!
Also Read This: How Imago Images Is Revolutionizing Stock Photography
Preparing Your Image for Curving
Before you dive into curving your image on Cricut, it’s essential to prepare it properly. This step can make a significant difference in how your final product turns out. Here’s a handy checklist to guide you:
- Choose the Right File Type: Make sure your image is in a compatible format, such as SVG, PNG, or JPG. SVG is preferred for scaling without losing quality.
- Edit Your Image: Use design software like Adobe Illustrator or Canva to resize or tweak your image. Don’t forget to remove any unnecessary backgrounds that might interfere with the curving process.
- Check the Dimensions: Ensure your image fits within your Cricut's cutting area. A general rule of thumb is to keep the width under 11.5 inches for most machines.
- Use High-Resolution Images: For the best results, select high-resolution images. Low-quality images can become pixelated when curving.
- Consider the Design: Simple images with clear lines work best. Intricate designs might lose detail when curved, so choose wisely.
Once you’ve prepared your image, you’ll be ready to take the next steps. Remember, the better the preparation, the smoother the curving process!
Also Read This: Understanding Storyblocks and Its Benefits for Your Creative Projects
Steps to Curve an Image
Now that your image is prepped, it’s time to curve it! Follow these straightforward steps to achieve the desired effect:
- Open Cricut Design Space: Launch the Cricut Design Space software on your device.
- Upload Your Image: Click on “Upload” and select the prepared image file from your computer. Make sure it’s uploaded correctly.
- Insert the Image: Once uploaded, insert the image into your canvas. You can resize it as needed.
- Select the Image: Click on the image to highlight it. Look for the “Curve” option in the top menu.
- Adjust the Curve: Use the slider to curve your image. You’ll see the image change in real-time, allowing you to find the perfect curve.
- Preview the Design: After curving, take a moment to preview your design. Zoom in to check for any distortions.
- Prepare for Cutting: Once satisfied, click “Make It” to proceed to the cutting phase. Select your materials and follow the prompts!
And there you have it! With these steps, curving your image will be a breeze, and you’ll be ready to create stunning designs on your Cricut machine.
Also Read This: How to Record Audio from YouTube on a Mac
5. Tips for Achieving the Perfect Curve
Curving an image on Cricut can be a fun and creative process, but getting it just right might take a bit of practice. Here are some handy tips to help you achieve that perfect curve:
- Start with Quality Images: Choose high-resolution images for the best results. Blurry or pixelated images won’t curve well.
- Utilize the Preview Feature: Before finalizing your design, use the preview feature in Design Space to see how the curve looks. This can save you time and materials.
- Experiment with Different Curvatures: Don’t be afraid to play around with the curve settings. Try varying the degree of the curve to see what enhances your design.
- Adjust the Size: Sometimes, adjusting the size of your image can help achieve a better curve. Larger images may curve differently than smaller ones.
- Check Your Material: Different materials react differently to curves. For instance, vinyl can typically handle curves better than paper, which may crease.
- Practice on Scrap Material: Before working on your final project, practice curving on scrap material. This will help you get a feel for how the software and materials interact.
By following these tips, you'll find that achieving the perfect curve becomes easier, making your Cricut projects even more impressive!
6. Conclusion
Curving images on Cricut can open up a world of creative possibilities. Whether you're designing custom decals, unique cards, or personalized gifts, mastering this technique can elevate your crafting game.
Remember, practice makes perfect! Don’t be discouraged if your first few attempts don’t go as planned. With time, you’ll become more familiar with the tools and settings in Cricut Design Space.
To recap:
- Choose high-quality images for better results.
- Use the preview feature to fine-tune your design.
- Experiment with different settings and sizes.
- Practice on scrap materials to build confidence.
So grab your Cricut, and start curving those images like a pro! Happy crafting!
 admin
admin


