Photopea is a powerful online tool that lets you edit photos without needing any extra software. Whether you're just starting or already familiar with image editing, cropping is one of the easiest ways to improve your photos. Cropping removes unnecessary parts, focuses on your subject, and can change the composition completely. If you want a quick way to enhance your images, learning how to crop effectively in Photopea is a great skill to have.
Steps to Start Cropping in Photopea

Getting started with cropping in Photopea is straightforward. Here are the steps to set you up for a clean and precise crop:
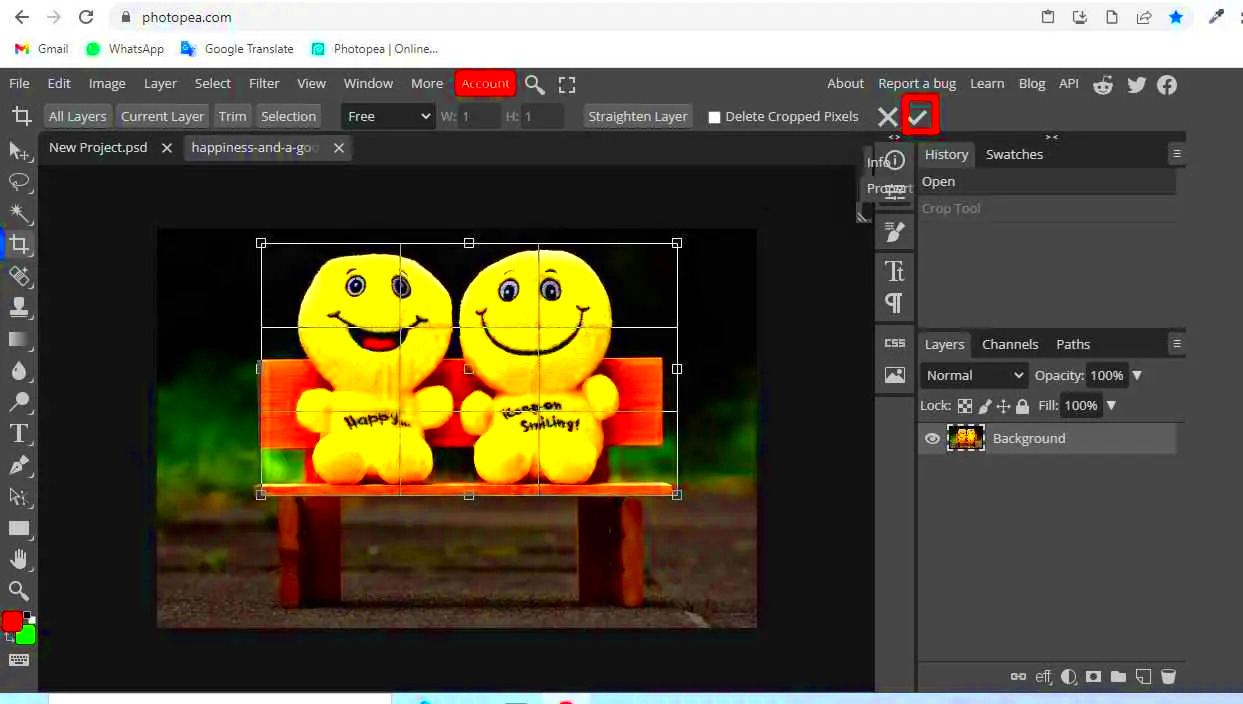
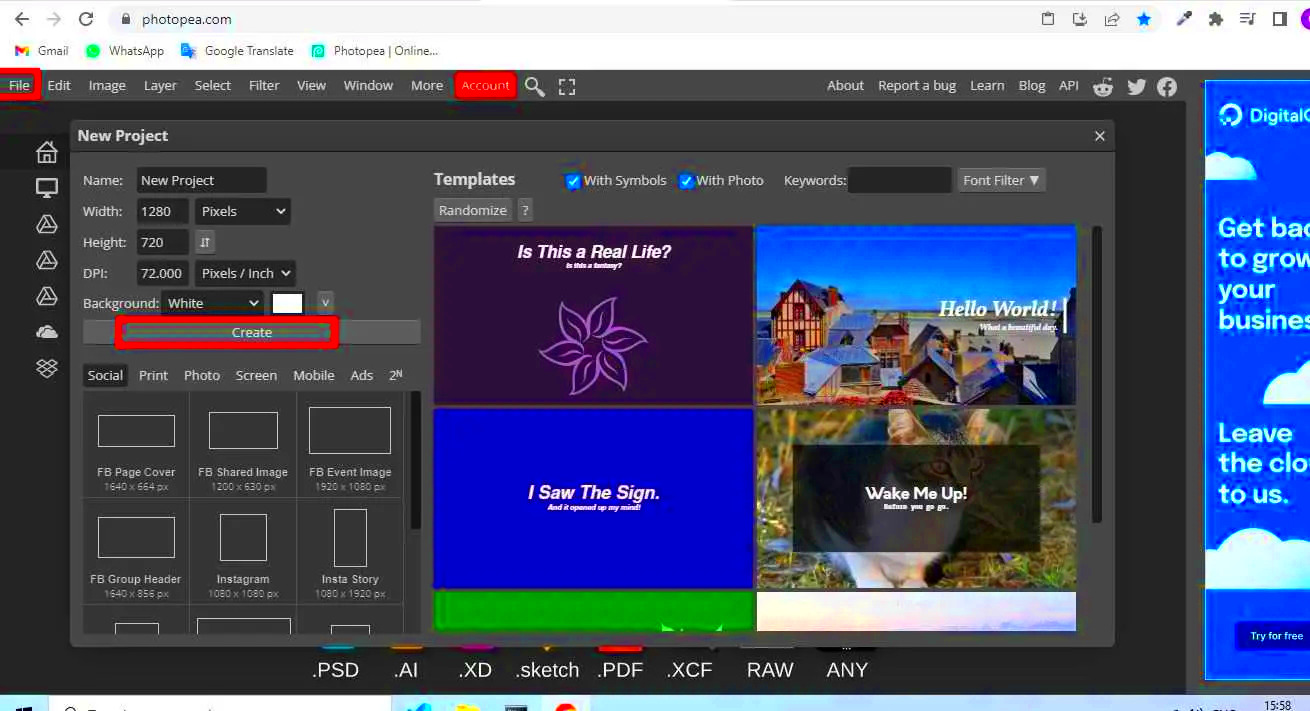
- Open Photopea: Go to the Photopea website and upload your image by selecting File > Open or dragging your file into the editor.
- Select the Crop Tool: In the toolbar on the left, click on the crop tool, which looks like two overlapping right angles.
- Adjust the Crop Box: Once you select the crop tool, a box appears around your image. Adjust it by dragging the edges or corners to frame your desired area.
- Confirm Your Crop: When you're satisfied with the crop area, press Enter or click the checkmark in the toolbar at the top to apply the crop.
- Save Your Image: Save your cropped image by going to File > Export As and choosing your preferred format, such as JPEG or PNG.
By following these steps, you can crop any image with ease in Photopea and make it ready for sharing or further editing.
Also Read This: Steps to Remove Color from an Image for a Clean Look
How to Use the Crop Tool for Quick Adjustments
The crop tool in Photopea is designed for quick and precise adjustments. Here’s how to make the most of it:
- Aspect Ratios: When you activate the crop tool, you’ll see options for different aspect ratios in the toolbar at the top. Common ratios include 1:1 for squares or 16:9 for widescreen formats. Selecting an aspect ratio can save time if you know the exact shape you need.
- Freeform Crop: If you prefer more flexibility, choose the Free option. This allows you to resize the crop box without being limited by specific dimensions.
- Alignment Guides: As you adjust the crop box, Photopea shows alignment guides to help you position your subject accurately. These guides can improve the balance and composition of your final image.
For quick adjustments, the crop tool’s features help streamline the process. Using preset ratios, freeform options, and alignment guides, you can crop images that are visually appealing and ready for any use.
Also Read This: Effortlessly Transfer Videos from Dailymotion to YouTube
Tips for Cropping Portraits and Landscapes
Cropping can dramatically change how a photo feels, especially with portraits and landscapes. Each type has unique considerations, and a few small adjustments can bring out the best in your images. Here are some practical tips to get the best results:
For Portraits:
- Focus on the Eyes: In portrait photography, the eyes are often the focal point. Positioning them along the upper third of the frame can create a more engaging photo.
- Avoid Cutting at Joints: When cropping close, avoid cropping directly at the subject's elbows, knees, or other joints. It can make the photo look unnatural; instead, crop slightly above or below.
- Use a 4:5 Aspect Ratio for Social Media: If you’re planning to post on social platforms like Instagram, a 4:5 aspect ratio is ideal. It fills the frame better and shows more detail on mobile devices.
For Landscapes:
- Consider the Rule of Thirds: Divide the frame into thirds both horizontally and vertically. Positioning key elements, like the horizon, along these lines adds balance and interest.
- Use a Wide Aspect Ratio: Landscapes often benefit from wider aspect ratios, such as 16:9 or 3:2, which capture the scene’s full width and enhance the immersive feel.
- Highlight Foreground Elements: If there's an object like a tree or rock in the foreground, position it along the lower third of the frame to give the image depth.
By following these tips, you can crop your portraits and landscapes to create visually stunning images that are ready for sharing or printing.
Also Read This: Optimal Timing for Posting YouTube Shorts to Maximize Engagement
Advanced Cropping Techniques in Photopea
Once you're comfortable with basic cropping, Photopea offers some advanced features that give you greater control and precision. Here’s how to use these tools effectively:
Using the Perspective Crop Tool
If your image has distortion, like tilted buildings, the Perspective Crop Tool is a great choice. This tool lets you adjust the corners of the crop box independently, fixing perspective issues without extra steps. It’s especially useful for architectural photography.
Rotating the Crop Box
To achieve unique angles, try rotating the crop box. With the crop tool selected, move your cursor near a corner of the crop box, then click and drag to rotate it. This can add a dynamic feel to otherwise simple images, giving them a fresh perspective.
Using Cropping with Layers
When working with layered images, cropping can affect multiple layers. By selecting Layer > Crop to Selection, you can apply the crop only to specific layers, leaving the background intact. This feature is handy for complex edits or creating composites.
These advanced techniques let you push the boundaries of cropping in Photopea, enhancing your creative options and control over your images.
Also Read This: Explore How to Optimize Pictures for Shutterstock
Saving and Exporting Cropped Images
Once you’re happy with your cropped image, saving and exporting are the final steps. Photopea makes it easy to save your work in the format and quality you need. Here’s a quick guide:
Saving Your Work
- Save as PSD for Edits: To keep all layers intact for future editing, save the file as a PSD. Go to File > Save as PSD for this option.
- Use “Save for Web” for Online Use: If you're preparing your image for online sharing, File > Export As > Save for Web is a good choice. It optimizes the file size while maintaining quality.
Exporting in Different Formats
| Format | Best Use |
|---|---|
| JPEG | Ideal for photos with rich colors; widely supported across platforms. |
| PNG | Best for images with transparency; maintains high quality. |
| SVG | Suitable for vector-based images like logos or icons; scales well without quality loss. |
With these options, you can export your images in the format that best suits your needs. Whether it’s for a website, social media, or printing, Photopea provides you with the flexibility to save your work in high quality.
Also Read This: How to Become a Shutterstock Model: Everything You Need to Know
Frequently Asked Questions
Is Photopea free to use?
Yes, Photopea is free to use with no installation required. However, it does have a premium version that offers an ad-free experience and some additional features for professional use. Most cropping and basic editing tools are available in the free version.
Can I crop images to a custom size in Photopea?
Absolutely! Photopea’s crop tool allows for custom dimensions. You can enter specific values in the toolbar for width and height or use the Free option to manually adjust the crop box. This is helpful if you need a precise crop size for printing or design purposes.
What formats are best for saving cropped images?
For most images, JPEG is ideal as it offers a good balance between quality and file size, making it suitable for online use. PNG works well if you need transparency or high quality, while SVG is perfect for vector graphics. Consider your end use when choosing a format:
| Format | When to Use |
|---|---|
| JPEG | Good for sharing photos on social media or websites. |
| PNG | Best for images needing transparent backgrounds. |
| SVG | Use for logos or vector images that need to scale well. |
How do I undo a crop in Photopea?
If you need to revert your crop, simply press Ctrl + Z (or Cmd + Z on a Mac) immediately after cropping to undo it. Alternatively, you can go to Edit > Undo to step back through your recent edits.
Can I crop multiple images at once?
Photopea currently does not support batch cropping. You will need to crop each image individually. However, if you’re using the same aspect ratio or size, you can repeat the process with each image quickly by setting the desired crop size in the toolbar.
Final Thoughts on Cropping in Photopea
Cropping images in Photopea is a simple yet powerful way to enhance your photos, whether for social media, design, or personal use. By mastering basic and advanced cropping techniques, you gain control over your images’ composition and focus. With Photopea’s flexible options, you can achieve professional-looking results without expensive software. Happy editing!

 admin
admin


