Curling your hair can completely transform your look, adding volume and flair that elevates your style. Whether you're preparing for a special occasion or simply want to change up your daily hairstyle, using a curling iron is one of the quickest and most effective methods. In this post, we'll dive into how to create gorgeous curls with a curling iron, starting from choosing the right tool to mastering the curling technique. Let's unravel the secrets behind those beautiful, bouncy curls!
Choosing the Right Curling Iron

The first step to achieving those stunning curls is selecting the right curling iron for your hair type and desired look. With numerous options available, it can feel overwhelming, but don’t worry! Here’s a handy guide to simplify your decision-making process:
- Barrel Size: The size of the barrel plays a significant role in the type of curls you can create.
- 1-inch Barrel: Great for tight curls and voluminous waves.
- 1.5-inch Barrel: Ideal for loose, beachy waves.
- 2-inch Barrel: Perfect for creating big, soft curls or waves.
- Material: The material of the barrel can impact heat distribution and how long the curls last.
- Ceramic: Even heat distribution, excellent for fine or damaged hair.
- Tourmaline: Reduces frizz and adds shine; great for thick or coarse hair.
- Metal: Heats up quickly but can cause hot spots and damage hair if not used carefully.
- Heat Settings: Look for a curling iron with adjustable heat settings.
- Fine or damaged hair: 250°F - 300°F
- Medium hair: 300°F - 350°F
- Thick or coarse hair: 350°F - 400°F
- Additional Features:
- Auto Shut-off: A safety feature that turns off the iron after a certain period.
- Swivel Cord: Prevents tangling and allows for smoother movement while styling.
- Clip vs. No-Clip: Clips can help hold hair in place but might create a crimp, while no-clip models, or wands, typically produce more natural curls.
By considering these factors, you can find a curling iron that best suits your hair type and helps you achieve those gorgeous curls you've been dreaming of!
Preparing Your Hair

Getting those gorgeous curls starts long before you pick up your curling iron. Preparation is key! Before diving into the curling process, it's essential to ensure your hair is in the best condition possible.
First, wash your hair with a moisturizing shampoo and conditioner. This helps add hydration and nourishment, making it more manageable. If your hair is prone to frizz, consider using a smoothing serum or anti-frizz product post-wash to help control any unruly strands.
Next, it's time to dry your hair. You have a couple of options here:
- Air Drying: If you've got the time, let your hair air dry. This method is gentler, reducing heat damage.
- Blow Drying: If you're in a hurry, use a blow dryer on a low heat setting. Always keep it moving to prevent hot spots that can lead to damage.
Before you apply heat, never skip the heat protectant spray. This product acts as a barrier between your hair and the heat, helping to prevent damage while keeping your curls looking luscious. Simply spritz it all over your hair, focusing on the ends, and comb through for even distribution.
Finally, consider the tools you'll be using. The right curling iron is crucial. Choose one with a barrel size that fits your desired curl type: smaller barrels create tighter curls, while larger barrels give you loose, beachy waves. Now you're all set to create those gorgeous curls!
Step-by-Step Curling Process

Now that your hair is prepped and ready, let’s dive into the actual curling process. It can seem a bit daunting at first, but with these steps, you’ll be curling like a pro in no time!
Here’s a straightforward guide to help you achieve those beautiful curls:
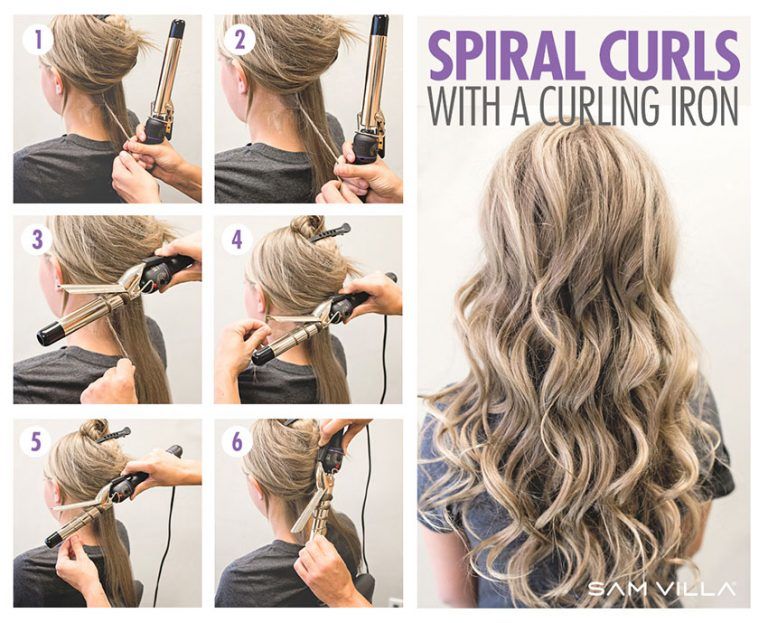
- Section Your Hair: Divide your hair into manageable sections. Use clips to hold the top half of your hair out of the way. Working with smaller sections (about 1 inch wide) will help you get more defined curls.
- Heat Up the Iron: Turn on your curling iron and set it to the appropriate temperature. For fine hair, aim for around 300°F, and for thicker hair, you might need a hotter setting, around 400°F. Wait for the iron to reach the desired temperature.
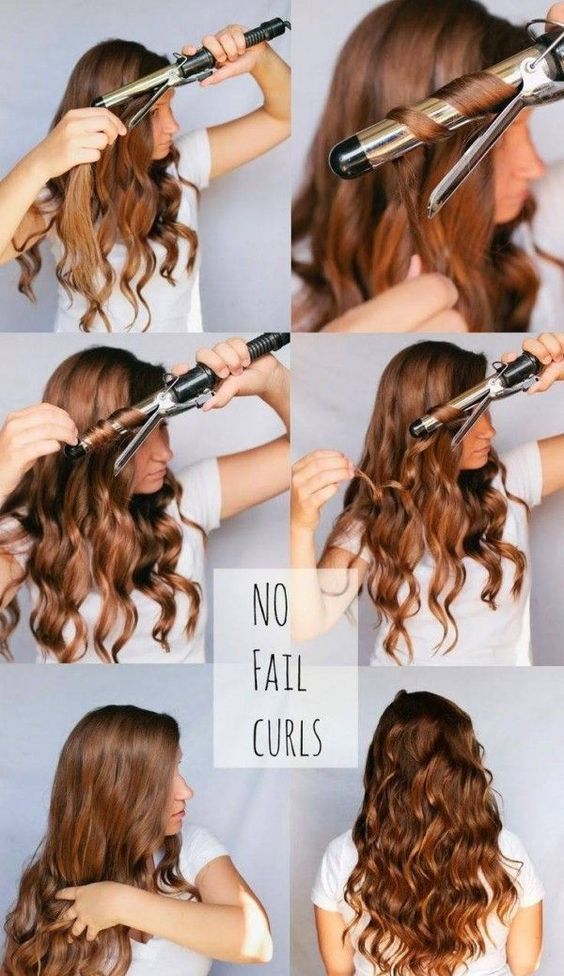
- Start Curling: Take one section of hair. Hold the curling iron vertically, and wrap the hair around the barrel, starting at the bottom. Make sure to wrap away from your face to create a flattering look. Hold it for about 10-15 seconds.
- Release the Curl: Carefully slide the barrel out while ensuring the curl holds its shape. You can pin it in place with a clip until it cools down for a longer-lasting hold.
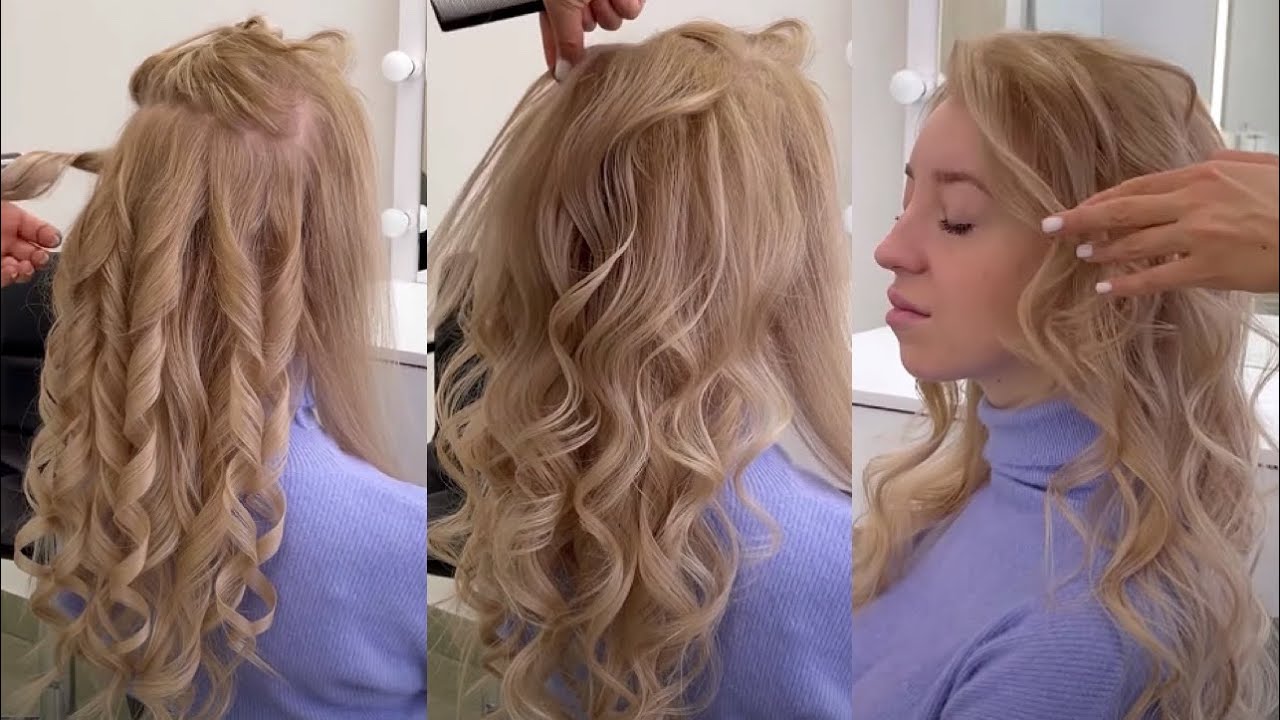
- Repeat: Continue this process around your entire head, alternating the direction of the curls as you go. This adds a natural look to your final hairstyle.
- Finish with Hairspray: Once all your curls are done, give your hair a light mist of hairspray. This locks in your beautiful curls and helps them last longer!
And there you have it! You’ve now mastered the art of curling your hair with a curling iron. With a little practice, you'll be able to create stunning curls that add volume and style to your look!
5. Techniques for Different Curl Styles
Creating gorgeous curls really hinges on the technique you use, and different styles can be achieved with just a few tweaks. Let’s go through some popular curl styles and how you can achieve each one using a curling iron.
- Beach Waves: For that effortless summer vibe, you want loose, soft curls. To get this look, wrap large sections of hair around the barrel, leaving the ends out. This helps achieve that relaxed, “just stepped off the beach” finish. A 1.5-inch barrel works wonders for this look.
- Tight Ringlets: If you’re after a more polished, bouncy curl, small sections are your best friend. Use a smaller barrel curling iron (about 1 inch or less) and you'll be able to create these tighter, more defined curls. Wrap the hair around the barrel and hold for a few seconds before releasing.
- Vintage Curls: Want to channel a classic pin-up girl vibe? Twist large sections of hair around a barrel (around 1.25 inches) for structured curls. Secure them with clips as you go, allowing them to set before combing through for a softer finish.
- Loose Soft Curls: If you like a more romantic, soft curl, take medium-sized sections and wrap them around the barrel, but alternate the direction for each curl. This creates an effortlessly chic look! Use a barrel size between 1-1.5 inches.
Experiment with these techniques to find the curl style that flatters your face shape and compliments your attire!
6. Tips for Long-Lasting Curls
Nothing is more frustrating than spending time curling your hair only to have them fall flat within a few hours. Fortunately, there are some great tips and tricks you can employ to keep those gorgeous curls intact all day long!
- Prep Your Hair: Before you even pick up that curling iron, make sure your hair is clean and dry. A bit of product like mousse or curl-enhancing cream can give your curls grip and longevity.
- Use a Heat Protectant: Don’t skimp on hair protection! Spraying a heat protectant will shield your strands from the heat damage and help your curls hold better.
- Don’t Skip Hairspray: Once you’ve curled your hair, lightly spritz a flexible hairspray on your curls. This adds an extra layer of hold without making your hair feel stiff or crunchy.
- Allow Curls to Cool: After you curl a section, let the curl cool in your hand or on your head. This sets the curl in place and helps it last longer.
- Adjust the Temperature: If your hair is fine, try using a slightly lower heat setting. Coarser hair can handle higher temperatures for better hold. Always adjust according to your hair type!
By following these tips, you’ll be well on your way to achieving curls that last from morning till night! Now, isn’t that worth the effort?
7. Styling and Finishing Touches
Now that you've mastered the art of curling, it's time to put the finishing touches on those gorgeous curls! Styling and finishing are where you can truly elevate your look. Here are some tips to help you lock in those curls and add some pizzazz.
1. Let Your Curls Cool
After curling each section, allow your curls to cool before touching them. This step is crucial because it helps set the curls in place. If you can, let them cool for about 10-15 minutes to optimize their hold.
2. Use a Lightweight Hair Spray
Once your curls have cooled, spritz on a lightweight hairspray for lasting hold without the crunch. Aim for a flexible hold formula that won’t make your hair look stiff or overly shiny.
3. Separate and Define Your Curls
For a touch of volume and a more natural look, gently separate your curls with your fingers. Here’s a simple method:
- Using your fingers, gently tug on the curls.
- Separate larger curls into smaller, softer curls.
- Be natural with your movements to avoid frizz.
4. Finish with Hair Oil or Serum
To add shine and tame any flyaways, apply a small amount of hair oil or serum. A little goes a long way, so just use enough to keep your curls looking polished.
Adjust the volume and style to match your vibe, whether it’s glamorous for a night out or soft and casual for everyday wear. Remember, you’ve put in the hard work—own it!
8. Conclusion
And there you have it! Creating gorgeous curls with a curling iron is not only achievable but also enjoyable! With the right technique and a bit of practice, you can style your hair like a pro. Remember these key points:
- Always start with clean, dry hair to achieve the best results.
- Use a heat protectant before styling to shield your locks.
- Choose the right barrel size based on your desired curl tightness.
- Allow curls to cool before styling them for longevity.
Ultimately, the journey to stunning curls is all about experimentation and finding what works for you. Don’t hesitate to try different products, adjust your technique, and even watch tutorials to refine your skills. Whether you're going for tight ringlets or soft beach waves, the world of curls is at your fingertips. Happy styling, and enjoy rocking those enviable curls!
 admin
admin


