Creating a project on Behance is a fantastic way to showcase your creative work to a global audience. Whether you're a graphic designer, photographer, or illustrator, Behance offers a platform where you can share your projects, connect with other creatives, and even attract potential clients. In this guide, we'll walk you through the steps to create an eye-catching project that highlights your unique skills and style. Let’s dive in!
Understanding Behance and Its Benefits
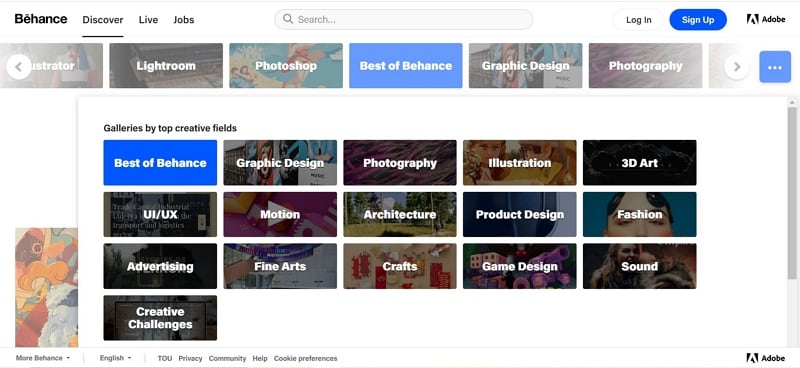
Behance is more than just a portfolio site; it’s a community of creatives from various fields, including design, photography, illustration, and more. Launched in 2005 and now owned by Adobe, it offers professionals an opportunity to display their work and engage with a vast audience. So, why should you consider using Behance for your creative projects? Here are some compelling reasons:
- Global Exposure: With millions of users, your work can be seen by people from all around the world, increasing your visibility in the creative industry.
- Networking Opportunities: Behance allows you to connect with other creatives, making it easier to collaborate on projects or find inspiration for your work.
- Feedback and Recognition: You can receive constructive feedback from fellow creatives, and your work can get appreciated through likes and comments, which can boost your confidence and portfolio.
- Showcase Your Versatility: Behance enables you to create multiple projects, allowing you to display various styles and skills, whether it's graphic design, photography, or motion graphics.
- Job Opportunities: Many companies hunt for talent on Behance, so having a strong portfolio can lead to potential job offers and freelance gigs.
In addition to these advantages, Behance's user-friendly interface makes it easy to upload and organize your projects. You can create visually stunning presentations that highlight your creativity in an engaging way!
Also Read This: How to Make Your Behance Portfolio Private: Steps for Securing Your Portfolio from Public View
Setting Up Your Behance Account

Getting started on Behance is a breeze! First things first, you'll need to create an account if you haven’t done so already. Here’s how you can set up your Behance account in just a few simple steps:
- Visit the Behance website: Go to behance.net.
- Sign up: You can sign up using your Adobe ID, Facebook, or even your email address. Choose whichever method suits you best!
- Complete your profile: Once you’ve signed up, take a moment to fill out your profile. Include a profile picture, a brief bio, and links to your other social media accounts or personal website. This helps potential viewers connect with you.
- Set your preferences: Navigate to the settings to customize your experience. Here, you can adjust your privacy settings, notification preferences, and even the visibility of your projects.
Remember, you’re not just creating an account; you’re building your brand. A polished profile can attract more viewers and potential collaborators, so take your time to make it shine!
Also Read This: Integrating Issuu into Your Behance Portfolio
Steps to Create a New Project
Now that your Behance account is set up, it’s time to showcase your creative work! Here’s a step-by-step guide to creating a new project:
- Log in to your account: Start by logging into your Behance account.
- Click on “Create a Project”: Locate the “Create a Project” button, usually found on your profile page or the homepage.
- Add your work: You can upload images, videos, or even audio files. Simply drag and drop your files, or click to browse your folders. Aim for high-quality visuals to capture attention.
- Organize your content: Use the project editor to arrange your files. You can add text descriptions, create sections, and even embed links. This is where your creativity shines!
- Utilize tags: Don’t forget to add relevant tags. This will help others find your project easily. Think about what keywords someone might use to search for work like yours.
- Publish your project: Once you’re satisfied with how everything looks, hit the “Publish” button. You can also choose to save it as a draft if you want to make further edits later.
And voilà! You've just created a stunning project on Behance. Make sure to share it with your network to gather feedback and engage with fellow creatives!
Also Read This: Upload Your Resume to Behance and Boost Your Creative Profile
5. Tips for Showcasing Your Work Effectively
Creating a stunning project on Behance is all about how you showcase your work. Here are some tips to make your project stand out:
- High-Quality Images: Always use high-resolution images. Blurry or pixelated photos can diminish the value of your work. Consider using Unsplash for high-quality free images.
- Compelling Descriptions: Describe your work in a way that tells a story. Share your inspiration, the process, and any challenges you overcame. People love to connect with the narrative behind the art.
- Use Mockups: Present your designs in real-world contexts using mockups. This gives potential clients a visual understanding of how your work can be applied.
- Organized Layout: Structure your project logically. Use a clean layout that guides viewers through your process, from concept to completion. A well-organized project keeps viewers engaged.
- Engage with Multimedia: Don’t limit yourself to just images. Incorporate videos or GIFs to demonstrate your work dynamically. This can really grab attention!
Remember, the goal is to create an immersive experience that resonates with your audience and showcases your creativity in the best possible light.
Also Read This: How to Pin Your Favorite Content from Behance to Keep it Accessible
6. Publishing and Sharing Your Project
Once your project is polished and ready, it’s time to publish and share it with the world! Here’s how you can do it effectively:
- Choose the Right Category: When publishing, select the category that best fits your project. This will help the right audience find your work more easily.
- Tag Your Work: Use relevant tags to improve visibility. Include keywords that relate to your project, such as “graphic design,” “illustration,” or “photography.”
- Share on Social Media: Create buzz around your project by sharing it on platforms like Instagram, Twitter, and Facebook. Tailor your message to each platform to maximize engagement.
- Engage with the Community: After publishing, interact with other creators on Behance. Comment on their projects and respond to any feedback on yours. Building relationships can enhance your visibility.
- Utilize Behance Features: Take advantage of Behance’s features like “Appreciate” and “Follow.” Encouraging others to appreciate your work can expand your reach.
By following these steps, you’re not just sharing a project; you’re creating a vibrant conversation around your creativity!
How to Create a Project in Behance to Showcase Your Creative Work
Behance is a powerful platform for creative professionals to showcase their portfolios and connect with other creatives. Here’s a step-by-step guide to creating a project on Behance that effectively highlights your work.
Step 1: Sign Up or Log In
- If you don't have an account, visit Behance.net and sign up for free.
- If you have an account, simply log in using your credentials.
Step 2: Start a New Project
- Click on the “Create a Project” button located in the top-right corner of your dashboard.
- You will be directed to a new project page where you can start adding your work.
Step 3: Add Your Work
- Upload high-quality images, videos, or other files related to your project. Aim for at least 3-10 images to create a comprehensive showcase.
- You can drag and drop files or use the upload button.
Step 4: Include Project Details
- Add a project title and a description that explains your work and creative process.
- Use relevant tags to help others discover your project more easily.
Step 5: Customize Your Layout
- Behance allows you to customize how your project appears. Experiment with different layouts until you find one that fits your style.
- Consider using a mix of text and visuals to keep viewers engaged.
Step 6: Publish and Share
- Once you’re satisfied with your project, click “Publish.”
- Share your project on social media platforms to reach a wider audience!
Conclusion: Creating a project on Behance is a straightforward process that can significantly enhance your visibility as a creative professional. By following these steps and presenting your work compellingly, you can effectively showcase your talent and connect with your audience.
 admin
admin


