Are you ready to take your Cricut projects to the next level? Creating mirror images is a fantastic technique that can elevate your designs, especially when working with heat transfer vinyl. Whether you're crafting unique garments or personalized decor, learning how to create a mirror image using your iPhone can streamline the process. Let’s dive into the details so you can get started on your next creative masterpiece!
Understanding the Concept of Mirror Images
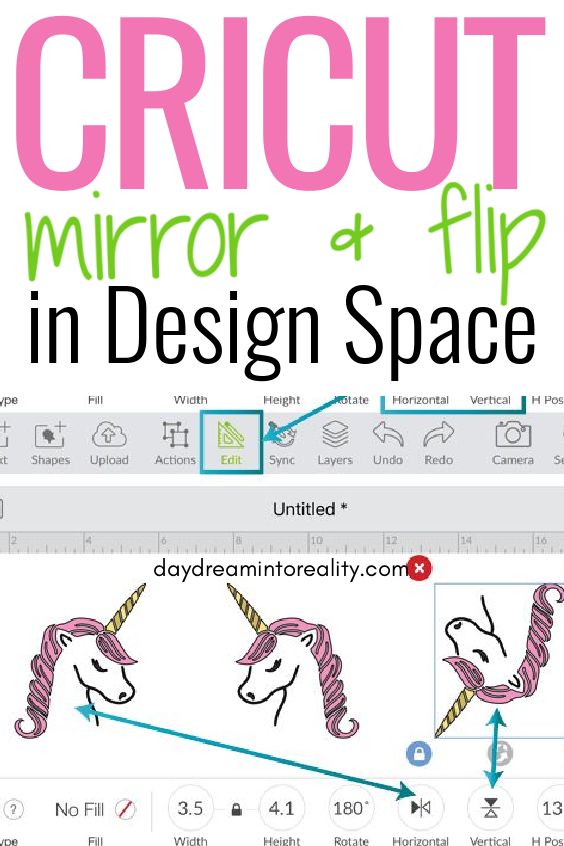
The concept of mirror images is simple but incredibly useful, particularly in the world of crafting with Cricut. When you create a mirror image, it flips the design horizontally, making it perfect for projects like heat transfer vinyl, which needs to be applied in reverse to show the correct design once it's transferred onto fabric.
Here are some key points to understand about mirror images:
- Visual Flip: A mirror image reflects the design as if it is being viewed in a mirror, resulting in a horizontally reversed version of the original design.
- Applications: This technique is crucial for applying designs to materials like t-shirts, tote bags, or any fabric where the design must face outward after application.
- Design Software: Most design applications, including Cricut Design Space on your iPhone, come with an easy option to create a mirror image.
- Importance in Crafting: Not only does this technique ensure your design looks just right, but it also prevents potential mistakes that could result in wasted materials.
By grasping the importance of mirror images, you unlock a whole new set of possibilities with your Cricut machine. This simple flip opens up creative avenues, allowing you to express your unique style in practical and eye-catching ways!
Also Read This: How to Edit Text in an Image While Matching the Same Font
Setting Up Your Cricut App on iPhone
Getting started with the Cricut app on your iPhone is a breeze! First and foremost, you'll want to ensure that you have the Cricut Design Space app installed. If you haven’t done this yet, simply head over to the App Store, search for "Cricut Design Space," and hit 'Download'. It's a free app that packs a punch with all the features you need for your projects!
Once you’ve got the app installed, follow these simple steps to set it up:
- Open the Cricut Design Space App: Find the app on your home screen and tap to open it.
- Log In or Create an Account: If you have an existing Cricut account, enter your credentials. If you’re new to Cricut, don’t worry! You can create an account in just a few minutes.
- Connect Your Cricut Machine: Make sure your Cricut machine is turned on and Bluetooth is enabled on your iPhone. The app will guide you through connecting your machine effortlessly.
- Familiarize Yourself with the Interface: Take a moment to explore the app. Browse the various templates, projects, and tools available for you!
Now that you’re set up, you’re ready to start creating some fantastic projects. Don’t hesitate to revisit the app frequently as it gets updates and new features!
Also Read This: Creating Vertical Videos for YouTube Shorts on Mobile
Steps to Create a Mirror Image in Cricut Design Space
Creating a mirror image in Cricut Design Space using your iPhone is straightforward and can add a unique touch to your projects. Here’s how you can do it in just a few steps:
- Open Your Project: Start by opening a new or existing project in the Cricut Design Space app.
- Add Your Design: You can either create your own design or choose one from the Cricut library. Tap on the '+' icon to add shapes or text.
- Select Your Design: Tap on your design to highlight it. This is important as you need to select the right layer to mirror.
- Mirroring Option: Look for the 'Actions' menu located at the bottom of the screen. Tap it, and then choose 'Flip'. You’ll see options to flip horizontally or vertically—select ‘Flip Horizontal’ to create a mirror image.
- Position Your Design: Once flipped, adjust the size and position of your design on the canvas. This is where creativity shines!
- Prepare to Cut: After positioning, tap ‘Make It’ to prepare for cutting. Ensure your design is still mirrored when you reach the preview screen.
- Start Cutting: Finally, send your design to your Cricut machine for cutting. And just like that, you’re ready to create a fabulous mirror image!
There you go! With these steps, you're well on your way to creating beautiful mirrored designs that are sure to impress!
Also Read This: How Do You Print a Mirror Image for Crafts, Shirts, or Photography Projects
Tips for Ensuring Successful Mirroring
Creating a mirror image on Cricut using your iPhone can feel a bit tricky at first, but with a few helpful tips, you can master this process in no time. Let’s dive into some strategies to ensure everything goes smoothly.
- Double-check Your Design: Before hitting that "make it" button, take a second to review your design. Make sure it’s exactly the way you want it to look once mirrored. This will save you from potential headaches later.
- Understand the Materials: Different materials may behave differently when mirrored. For example, heat transfer vinyl (HTV) will reflect well when mirrored, while standard vinyl might not need mirroring. So, know your materials!
- Use Good Lighting: Sometimes the simplest things help the most. Make sure you're in a well-lit area to observe your design clearly. This can help you catch any misalignments that could affect the final output.
- Practice Makes Perfect: Don’t hesitate to do a test cut. This allows you to see how your design will appear once mirrored without wasting too much material.
- Follow Manufacturer Guidelines: Always refer to the instructions provided with your specific Cricut machine and materials. This ensures you're following the recommended practices for optimal results.
By keeping these tips in mind, you'll enhance your chances of successfully creating that perfect mirror image.
Also Read This: How to Vectorize an Image in Procreate
Common Issues and Troubleshooting
Let's face it: no matter how much we prepare, issues can arise while creating mirror images on Cricut with your iPhone. Here are some common problems and how to tackle them.
| Issue | Possible Solution |
|---|---|
| Design Doesn't Appear Mirrored: | Make sure you've selected the “Mirror” option before proceeding to cut. It's a common oversights! |
| Vinyl Lifts During Cutting: | Ensure that your material is sticking well to the mat. If it’s lifting, consider using a stronger grip mat or reapplying your material. |
| Stray Cuts: | Check your blade. A dull blade can cause unwanted cuts. Replace or sharpen if necessary. |
| Poor Transfer Quality: | Make sure you're using the right transfer tape, and try applying pressure to ensure a secure bond between the vinyl and tape. |
| Design Doesn’t Cut Cleanly: | Examine your material settings in the Cricut app. Adjust the pressure settings for a cleaner cut. |
By understanding these common issues and their respective solutions, you'll be better equipped to tackle any hiccups that come your way!
How to Create a Mirror Image on Cricut Using Your iPhone
Creating a mirror image for your designs is an essential technique when working with the Cricut machine, especially when applying vinyl or heat transfer materials. This process ensures that your images appear correctly when transferred to your projects. Using your iPhone, you can easily create a mirror image for your Cricut project. Follow these simple steps:
- Download the Cricut Design Space App: If you haven't already, download and install the Cricut Design Space app from the App Store.
- Create a New Project: Open the app and click on “New Project” to start designing.
- Add Your Image: Tap on the “Upload” icon to import your desired image from your iPhone’s gallery.
- Resize and Position: Once your image is uploaded, resize it to fit your project requirements.
- Mirror the Image:
- Tap on the image to select it.
- Click on the “Actions” button located at the bottom toolbar.
- Select “Flip” and then choose “Flip Horizontal” to create a mirror effect.
- Finalize Your Design: Adjust as necessary, ensuring all elements are properly aligned.
- Send to Cricut: When satisfied, click on “Make It” to send your mirrored design to the Cricut for cutting.
Creating a mirror image is a straightforward process with the Cricut Design Space app on your iPhone. This feature allows you to ensure your vinyl or heat transfer materials adhere correctly, resulting in a beautifully finished product.
In conclusion, mastering the technique of creating a mirror image using your iPhone empowers you to utilize your Cricut machine more effectively, enhancing the quality and precision of your crafting projects.
 admin
admin


