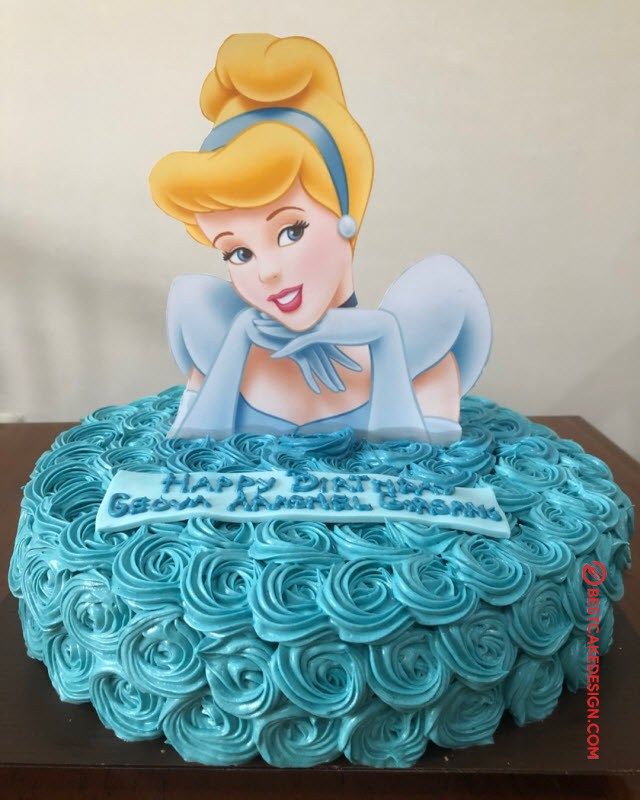
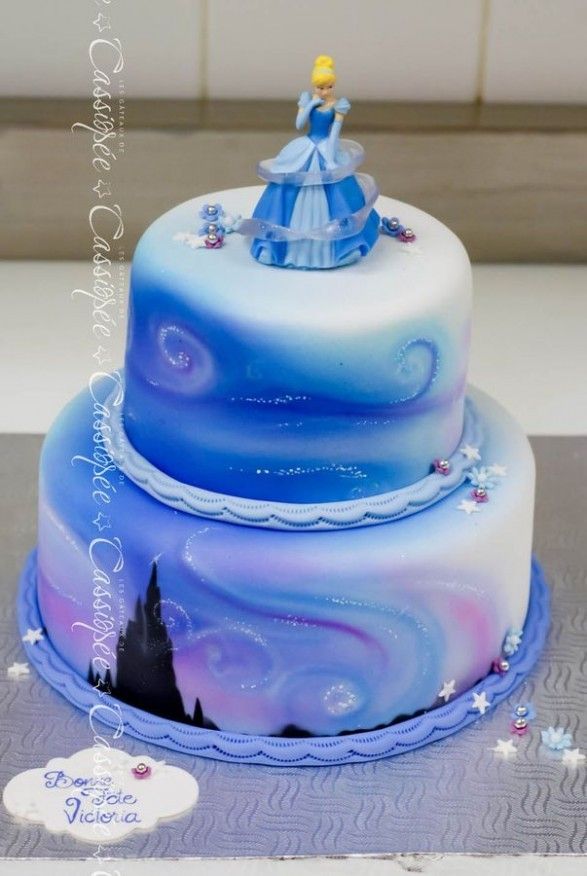
Have you ever dreamt of creating a cake that captures the magic of fairy tales? A Cinderella cake is not just a dessert; it’s a whimsical centerpiece that can make any celebration feel enchanting. Inspired by the classic Disney fairytale, this cake often embodies elements like elegant shades of blue, sparkling accents, and the iconic glass slipper. Whether you’re preparing for a birthday party, a bridal shower, or just want to impress your family during a special occasion, a Cinderella cake can add a touch of fantasy to your festivities. Ready to hop into the magical world of cake decorating? Let’s dive deeper!
Gathering the Ingredients and Tools
Before you begin your adventure in baking a Cinderella cake, it's essential to gather all the necessary ingredients and tools. This way, you’ll have everything within reach, making the process smoother and more enjoyable. Here’s a handy list to help you out!
Ingredients
- Cake Batter:
- 2 ½ cups of all-purpose flour
- 2 cups of sugar
- 1 cup of unsalted butter
- 1 cup of milk
- 4 large eggs
- 3 ½ teaspoons of baking powder
- 1 teaspoon of vanilla extract
- A pinch of salt
- Buttercream Icing:
- 1 cup of unsalted butter (softened)
- 4 cups of powdered sugar
- 2 tablespoons of heavy cream or milk
- 1 teaspoon of vanilla extract
- Blue gel food coloring
- Decorative Elements:
- Edible glitter
- Silver or gold edible pearls
- Candy or chocolate glass slippers (can be made with molds)
- Flowers or fondant for extra decoration
Tools
Having the right tools can make the decorating process so much more manageable. Here’s what you’ll need:
- Mixing Bowls: For combining your ingredients.
- Measuring Cups & Spoons: Precision is key when baking!
- Stand Mixer or Hand Mixer: To beat your batter and icing until fluffy.
- Spatula: Great for smoothing icing on your cake.
- Cake Pans: Ideally, round pans for stacking.
- Cooling Rack: To cool your cakes completely before decorating.
- Turntable: Makes decorating your cake a breeze!
- Piping Bags and Tips: For achieving intricate designs.
With this list in hand, you’re all set to bring your Cinderella cake to life! The only thing left is to channel your inner baker and let your creativity soar!
Also Read This: How to Make Apple ID in iPhone 4 for Dailymotion Account Setup
Baking the Cake Base
When it comes to creating a stunning Cinderella cake, the first step is baking a solid cake base. This is crucial because a well-baked cake not only provides the foundation for decorations but also tastes delightful!
Here’s a simple guide to help you through the process:
- Choosing Your Cake Flavor: Start with your favorite flavors. Classic choices include vanilla, chocolate, or a blend. Just remember, what you choose should pair well with fondant.
- Gather the Ingredients: You'll typically need:
| Ingredient | Amount |
|---|---|
| All-purpose flour | 2 ¾ cups |
| Granulated sugar | 2 cups |
| Baking powder | 1 tablespoon |
| Butter (softened) | 1 cup |
| Eggs | 4 large |
| Milk | 1 cup |
| Vanilla extract | 2 teaspoons |
Once you have all your ingredients ready, follow these steps:
- Preheat your oven to 350°F (175°C).
- In a large mixing bowl, cream together the butter and sugar until light and fluffy.
- Add eggs one at a time, mixing well after each addition.
- Combine the dry ingredients in another bowl, then gradually add them to the wet mixture, alternating with the milk.
- Add the vanilla and blend until the batter is smooth.
- Pour the batter into greased cake pans and bake for 25-30 minutes or until a toothpick comes out clean.
- Allow the cakes to cool completely before you start decorating. Trust me, patience is key here!
And voilà, you’ve baked your cake base! Now it’s time to prepare for the fun part—decorating!
Also Read This: How to Watch Videos Offline on Dailymotion Enjoy Videos Without Internet
Preparing the Fondant and Decorations
Once your cake base has cooled, it’s time to dive into the exciting world of fondant and decorations! Fondant is your gateway to creativity when it comes to cake decorating, providing a smooth canvas for all your designs.
Here’s how you can prepare the fondant and all those lovely decorations:
- Choosing the Right Fondant: You can either buy pre-made fondant or make your own. Store-bought options include brands like Satin Ice or Fondarific, which come in various colors. If you want to make your own, here’s a straightforward recipe:
- ½ cup water
- 2 tablespoons unflavored gelatin
- 1 tablespoon glycerin
- 2 tablespoons shortening
- 8 cups powdered sugar
- Making Your Fondant: Take that gelatin, mix it with water, and let it bloom for 10 minutes. Heat it gently, add glycerin and shortening, then stir in your powdered sugar until it forms a dough. Kneed until smooth, and you’re ready to roll!
- Coloring the Fondant: Use gel food colors to tint your fondant, adding colors that represent Cinderella’s magical style—think soft blues and sparkly whites! Start small; you can always add more color.
- Crafting Decorations: Use cookie cutters to create shapes like stars, hearts, or even tiny pumpkins. Consider using edible glitter or shimmering luster dust for that magical touch!
- Decorative Accents: Don’t forget to make elements like Cinderella’s slipper or her carriage. These can be fun and simple to create with fondant or even gingerbread for a quirky twist!
Once your decorations are ready, you can start adorning your cake with fondant, shaping it around and on top, and placing your delicate accents for the final touch. Remember, it’s all about creativity and having fun, so don’t stress!
Also Read This: Homemade Nail Polish Recipe to Watch on Dailymotion
Decorating the Cake Step-by-Step
Creating a stunning Cinderella cake is all about the details, and decorating it is where the magic truly happens! Follow these steps to take your cake from basic to beautiful:
- Layering the Cake: Start by stacking your cooled cake layers. If you've baked multiple layers, you may want to level them with a knife to ensure evenness. Apply a thin layer of frosting between each layer to lock in moisture and flavor.
- Caking the Crumb Coat: A crumb coat is a thin layer of frosting applied to seal in crumbs. Use a spatula to spread a thin layer over the entire cake. Once done, refrigerate the cake for about 30 minutes. This step ensures that when you apply the final layer of frosting, you won’t have pesky crumbs coming through!
- Final Frosting Layer: Once set, it’s time for the main frosting layer. You can use blue buttercream to match Cinderella's iconic gown. Spread it evenly using a spatula, and get creative with texture—try a smooth finish or swirling patterns for an elegant look.
- Creating Decorations: Use fondant or gum paste to create elements like Cinderella’s glass slipper, tiara, or pumpkin carriage. Roll out the fondant, cut shapes, and apply them strategically around the cake, giving it that fairy-tale charm.
- Adding Edible Glitter: To add a sparkly touch, sprinkle edible glitter on specific decorations, or even on the frosting to mimic the magical aspects of Cinderella’s story.
By following these steps, you’ll have a beautiful foundation upon which to build additional decorations and finalize your Cinderella cake!
Also Read This: How to Do Yoga at Home on Dailymotion – A Step-by-Step Beginner’s Guide
Finishing Touches for a Perfect Cinderella Cake
Now that your cake is decorated, it's time for those finishing touches that will elevate your creation from delightful to dazzling! Here are some ideas to consider:
- Gold Accents: Add small gold elements using gold luster dust or edible paint on decorations like the tiara or pumpkin carriage to give them an enchanting glow.
- Floral Arrangements: Incorporate some delicate edible flowers around the base or on top of the cake. You could use candy flowers or create your own from fondant for an added touch of elegance.
- Personalized Cake Topper: Consider customizing a cake topper with a message like “Happily Ever After” or a figurine of Cinderella herself. It adds a personalized touch that guests will love.
- Gems and Pearls: Place edible pearls or gems around the layers or on the cake board for extra bling, giving it that royal feel. They can be made from fondant or bought from cake supply stores.
- Final Dusting: Don't forget a gentle dusting of edible glitter all over the entire cake. It captures light beautifully, making your cake sparkle just like magic!
These finishing touches will ensure that your Cinderella cake not only looks professional but also captures the whimsy and charm of the beloved fairy tale. Happy baking!
Also Read This: Is Dailymotion a Good Platform for Hosting Videos? A Review
7. Sharing Your Creation on Dailymotion
So, you've baked and decorated the perfect Cinderella cake, and now it's time to show it off to the world! Dailymotion is a fantastic platform where you can share videos of your cake-decorating journey, and it’s pretty easy to get started. Let’s dive into how you can share your creative masterpiece with an enthusiastic audience.
First off, you'll want to capture the entire process. Here’s how you can do that:
- Plan Your Shots: Think about the different stages of making the cake - baking, icing, and decorating. Prepare your camera or smartphone to capture each step.
- Use Good Lighting: Natural light works wonders! Try to film near a window or in a well-lit kitchen to enhance your video quality.
- Explain as You Go: Adding voiceovers or commentary can make your video engaging. Describe what you’re doing, and share tips along the way.
- Keep It Snappy: Edit your video to reduce the length, focusing on the highlights of your process. Nobody wants a 30-minute video for a cake tutorial!
Now that your video is ready, it's time for uploading:
- Create a Dailymotion account if you haven’t already.
- Click on the upload button and select your edited video file.
- Add an engaging title and description. Think about keywords that viewers might look for, like “Cinderella cake decorating tutorial.”
- Share it across your social media platforms to reach a broader audience!
Interacting with viewers through comments can help you build a community, so don’t hesitate to respond to questions or feedback about your cake!
8. Conclusion and Tips for Future Cake Decorating
Congratulations! By now, you’ve not only learned how to create a stunning Cinderella cake but also explored some creative decorating techniques along the way. Remember, cake decorating is an art form, so let your creativity shine! Here are some final thoughts and tips to keep in mind for your future cake endeavors:
Stay Inspired: Don’t hesitate to draw inspiration from various sources like social media, baking shows, or even nature. Keeping your creative juices flowing can lead to exciting new designs!
Practice Makes Perfect: If your first cake doesn’t turn out as planned, that’s okay! Every baker has explored countless ventures before achieving perfection. Keep practicing and experimenting.
Invest in Quality Tools: High-quality tools can significantly enhance your decorating skills. Consider getting a set of piping bags, various tips, and fondant tools to make your decorating process smoother.
Don’t Rush: Take your time with each step. Enjoy the process of baking and decorating. The satisfaction you’ll feel once you see the final product will be all worth it!
Finally, remember that every cake is a journey, and it’s all about having fun while creating delicious art. Happy baking, and can't wait to see what you whip up next!
 admin
admin


