Copying images on a Mac is a simple task that many people do regularly. Whether you want to share an image, use it in a document, or save it for later, the process is quick and easy. Mac computers offer various ways to copy images, from using keyboard shortcuts to right-click options. Understanding the different methods will help you work more efficiently and get things done faster. In this guide, we'll walk you through the steps and provide tips to make copying images as smooth as possible on your Mac.
Understanding Different Methods to Copy Images

There are several ways to copy images on a Mac, each suited for different needs. Here are the most common methods:
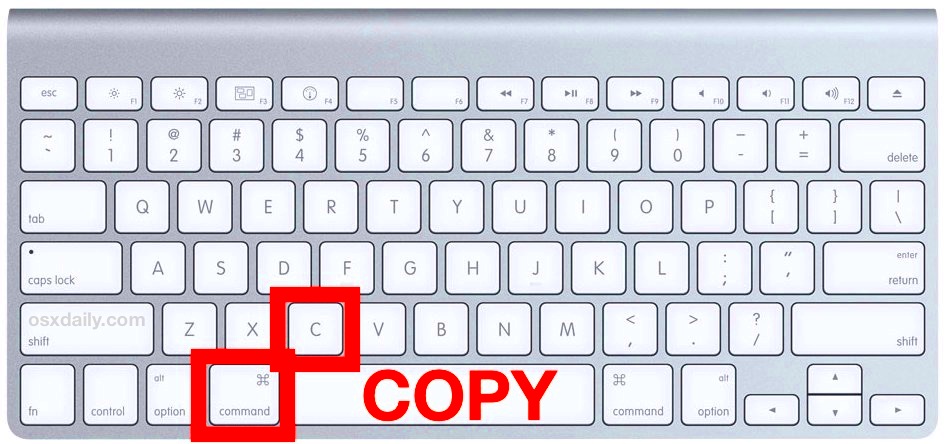
- Using Keyboard Shortcuts: The quickest way to copy an image is by using a combination of keyboard keys. This method is great for those who want to work efficiently without using a mouse.
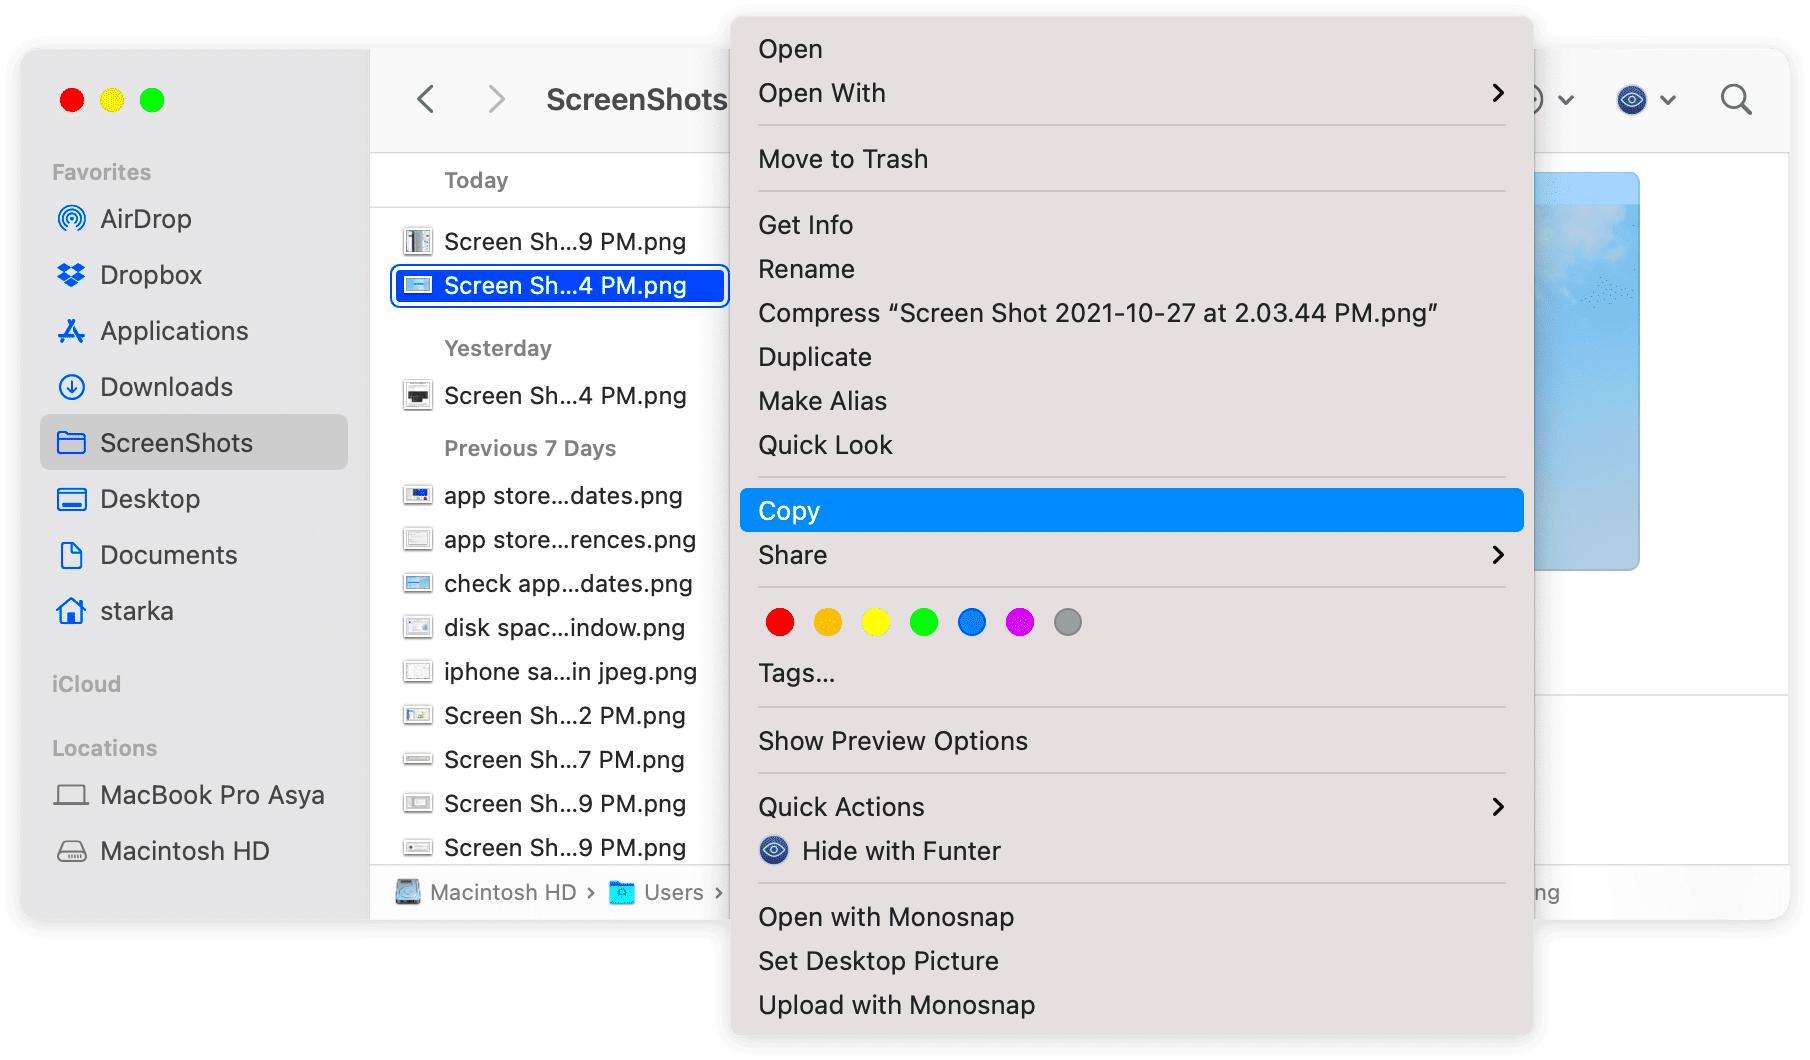
- Right-clicking on the Image: Most images on your Mac can be copied by right-clicking (or Control-clicking) on the image and selecting the "Copy" option. This method works well when using the Mac's built-in apps or browsers.
- Dragging the Image: For some applications, you can simply drag an image from one location to another. This is an effective method when you want to quickly copy an image to a folder or different app.
- Using the Preview App: You can also open an image in the Preview app, where you can select specific parts of the image to copy or even annotate before copying.
Knowing which method to use in different situations will save you time and effort when working with images on your Mac.
Also Read This: Tracing an Image on Procreate: A Step-by-Step Guide
Using Keyboard Shortcuts to Copy an Image
Keyboard shortcuts are a fast and efficient way to copy images on your Mac. They can save you time and keep you focused on your work without needing to use a mouse or trackpad. Here are the most common keyboard shortcuts for copying images:
- Command + C: This is the most common shortcut for copying. It works in most apps and browsers to copy an image.
- Command + Shift + 4: This shortcut allows you to take a screenshot of a selected area. Once you select the area, the image will be copied to your clipboard.
- Command + Option + Shift + 4: For more advanced users, this shortcut lets you take a screenshot and copy it directly to the clipboard without saving it to your desktop first.
These shortcuts make copying images quick and easy, especially when you need to do it repeatedly or want to avoid using the trackpad. Just remember to press the keys in the correct order for the shortcut to work!
Also Read This: Highest Followers On The Likee In USA 2023
Copying Images from Websites on a Mac
When browsing the web on your Mac, it's common to want to copy an image for personal use or to share with someone. Luckily, copying images from websites is easy. You can use a few simple steps to grab any image you find online. Here's how:
- Right-click or Control-click on the Image: On most websites, simply right-clicking on the image (or holding the Control key and clicking) will bring up a context menu. From there, you can select the "Copy Image" option. This copies the image to your clipboard.
- Drag and Drop: If you want to save an image directly from the website to your Mac, you can often drag it from your browser window and drop it into a folder or application like Notes or Messages. This will save a copy of the image without needing to copy and paste.
- Using Safari's "Save Image" Option: While this is not strictly "copying," if you want to save an image, you can right-click and select "Save Image As..." to store it on your computer for later use.
Remember, not all images on websites are free to use or copy. Always check the website's terms and conditions to ensure you're following proper usage rights when copying images from the web.
Also Read This: Removing Getty Images from Your Photos While Retaining Copyright
How to Copy Images from Apps on a Mac
Copying images from apps on a Mac is just as simple as copying from websites. Many applications allow you to select and copy images with ease. Here’s a quick breakdown of how you can copy images from different types of apps:
- Preview App: If you have an image open in the Preview app, you can use the selection tool to highlight the area you want to copy, then press Command + C to copy it. You can also copy the entire image.
- Photos App: In the Photos app, find the image you want to copy, select it, and press Command + C. You can then paste it into another app, like Pages or Word, using Command + V.
- Graphic Design Apps (e.g., Photoshop, Illustrator): In design apps, the process is similar. Select the image or part of the image you want, press Command + C to copy, and paste it where needed. Some apps may even allow you to copy images directly from layers.
- Messages and Mail Apps: When working in messaging apps like Messages or Mail, you can often drag and drop images directly from the app into other documents, or right-click to copy the image.
Each app may have slightly different options for copying images, but in general, the process is intuitive and user-friendly across the board on a Mac.
Also Read This: How Much Space Does a 1-Meter Image Occupy? Exploring Image Dimensions
Saving and Pasting Copied Images
After you've copied an image on your Mac, the next step is often to paste it somewhere or save it for future use. Whether you're pasting the image into a document, email, or app, here's how you can handle copied images:
- Pasting into Documents: If you're working in a document editor like Pages or Microsoft Word, simply use Command + V to paste the image into the document wherever your cursor is located. The image will appear exactly as it was copied.
- Pasting into Emails: In most email apps, you can easily paste copied images into the body of an email. Simply open a new email and press Command + V to paste the image where needed.
- Saving the Copied Image: Sometimes, instead of pasting, you may want to save the image for later. Open an app like Preview or Photos, then use Command + N to create a new file and paste the image inside. Alternatively, you can use the "Save As" function to store it in your preferred folder.
- Drag and Drop: For quick saving, you can also drag the copied image from the clipboard into a folder or onto your desktop, especially when you're working in Finder or apps that support this feature.
These methods ensure that you're able to keep, share, or manipulate images you've copied, no matter what application or platform you're using on your Mac. Just be mindful of where you paste the image and how you save it to avoid losing it later!
Also Read This: how to download image with transparent background
Common Issues While Copying Images and Their Solutions
While copying images on your Mac is typically easy, sometimes you may encounter a few common issues. Don't worry, though—most of these problems have simple solutions. Here’s a look at some of the issues you may face when copying images, along with ways to resolve them:
- Image Not Copying Properly: If you're unable to copy an image using the usual methods, ensure that the image isn't protected by copyright or restricted by the website. In some cases, websites disable right-click options. Try using the keyboard shortcut Command + C instead.
- Image Appears Distorted After Pasting: If the image looks strange or pixelated after you paste it, it may be due to the resolution of the original image or the app you're pasting it into. Try saving the image instead of copying it and then paste it to avoid quality loss.
- Clipboard Not Holding the Image: Sometimes, the image may not remain in your clipboard long enough to paste it. If this happens, try restarting your Mac or clearing your clipboard using a third-party app that helps manage clipboard contents.
- Unable to Copy from Certain Apps: Some apps, like those that deal with copyrighted images, might prevent copying. If you're working in a restricted environment, check the app's settings or look for alternative ways to save or share the image.
These are just a few common problems, but with these simple fixes, you can avoid most of them and copy images smoothly on your Mac.
Also Read This: Are iStock Video Previews Equal in Quality to Purchased Videos
Conclusion
Copying images on a Mac is a straightforward process, whether you're copying from a website, an app, or your local storage. With several methods available, including keyboard shortcuts, right-click options, and drag-and-drop features, you can easily transfer images for use in documents, emails, or other applications. It's important to remember that some images may be restricted or protected, so always check usage rights before copying them. By following the tips and solutions in this guide, you'll be able to copy and paste images quickly and without any hassle.
FAQ
- Can I copy an image from any website?
Not all websites allow you to copy images due to copyright protections. If the right-click option is disabled, you may need to use alternative methods like taking a screenshot.
- Why is the image I copied not showing up?
This could be due to a clipboard issue or an app restriction. Try restarting your Mac or using a clipboard management tool to clear the cache.
- How can I copy a portion of an image on my Mac?
If you're using Preview or another image editing app, you can use the selection tool to highlight the part of the image you want to copy and then press Command + C.
- Can I copy images from PDF files?
Yes, you can copy images from PDFs, especially if you open them with Preview. Just click on the image to select it and then copy it using Command + C.
- What do I do if the image quality is low after copying?
If the image quality degrades, try saving the image directly from the source or use a higher-quality version. Avoid using screenshots unless necessary, as they can reduce quality.

 admin
admin


