Copying images on a Dell computer is a straightforward task that can be done in several ways. Whether you're transferring photos for personal use or sharing files for work, understanding how to copy images efficiently can save you time. With the right knowledge, you can quickly move images between folders, external devices, or the internet. In this guide, we will cover various methods for copying images on a Dell computer, making it easier for you to handle your files and keep your system organized.
Understanding Image Copying Process on Dell Computers

On a Dell computer, copying images is part of the basic file management functions. When you copy an image, you create a duplicate of it, leaving the original in its current location. This is particularly helpful for moving images around within your computer or from your computer to external devices without changing the original content. The copying process doesn't affect the quality of the image either; you simply create a copy of the file to work with.
Here's how it typically works:
- Source Location: The image can be located in various locations on your computer—be it your desktop, a folder, or downloaded from the internet.
- Copying the Image: The action of copying the image doesn’t move it; it only creates a duplicate.
- Destination: You can paste the copied image into any location on your computer, external storage, or an online platform.
For Dell computers running on Windows, copying files follows the same process as other file types, so once you're familiar with this, you can apply it to any file—images included.
Steps to Copy an Image Using Keyboard Shortcuts

Keyboard shortcuts are a fast and efficient way to copy images on your Dell computer. If you prefer to avoid using the mouse or just want to speed up the process, keyboard shortcuts can make image copying quick and easy.
Here’s how to do it:
- Step 1: Locate the image you want to copy on your Dell computer.
- Step 2: Click once on the image to select it.
- Step 3: Press Ctrl + C to copy the image.
- Step 4: Navigate to the folder or destination where you want to paste the image.
- Step 5: Press Ctrl + V to paste the copied image in the new location.
That’s it! Using Ctrl + C and Ctrl + V is one of the quickest ways to copy and paste images without needing to use the right-click menu. This method is useful when you're working on tasks that require frequent image transfers, and it’s especially helpful when dealing with multiple images at once.
For an even faster workflow, you can also use the Ctrl + X command to cut an image (removing it from the original location) and paste it elsewhere using Ctrl + V.
How to Copy an Image by Right-Clicking on a Dell Computer
Copying an image by right-clicking is one of the most common and user-friendly methods to transfer files on a Dell computer. If you prefer using the mouse rather than keyboard shortcuts, the right-click option offers a simple, intuitive way to copy and move images between different locations.
Follow these easy steps to copy an image using the right-click method:
- Step 1: Find the image you want to copy on your Dell computer.
- Step 2: Right-click on the image. This will open a context menu with various options.
- Step 3: From the menu, select Copy. You can also press the Ctrl + C shortcut after selecting the image if you prefer.
- Step 4: Navigate to the folder or location where you want to paste the image.
- Step 5: Right-click again in the destination folder and select Paste from the context menu, or press Ctrl + V.
This method works across all versions of Windows and provides a straightforward way to duplicate images. It’s particularly useful when you're managing files in folders and prefer using visual cues. Right-clicking is also handy when you want to access additional options, such as moving files to a specific location or organizing images into folders.
Using File Explorer to Copy Images on Dell Computers
File Explorer is an essential tool on Dell computers for managing all your files, including images. Using File Explorer to copy images allows you to easily navigate through your computer's directories and quickly perform tasks like copying, moving, and pasting images.
Here's how to copy an image using File Explorer:
- Step 1: Open File Explorer by pressing Windows + E or by clicking on the File Explorer icon in the taskbar.
- Step 2: In File Explorer, locate the folder where the image is stored.
- Step 3: Select the image you want to copy by clicking on it.
- Step 4: Right-click the selected image and choose Copy, or simply press Ctrl + C on your keyboard.
- Step 5: Navigate to the destination folder where you want to paste the image.
- Step 6: In the destination folder, right-click and select Paste, or press Ctrl + V on your keyboard.
File Explorer also lets you drag and drop images between folders. This can be particularly useful when you want to organize your images in a more visual way. Additionally, File Explorer offers the option to view files in different layouts, making it easier to identify and select the images you want to copy.
For those who manage a large number of images, using File Explorer in conjunction with sorting options like "Date" or "Type" can help streamline the process and make finding files quicker.
How to Transfer Images from a Dell Computer to an External Device
Transferring images from your Dell computer to an external device, like a USB flash drive, external hard drive, or SD card, is an important task when you need to back up files or share them with others. The process is easy to follow and ensures that your images are safely stored outside of your computer.
Here’s how to transfer images from your Dell computer to an external device:
- Step 1: Insert the external device (USB, external hard drive, or SD card) into the appropriate port on your Dell computer.
- Step 2: Wait for Windows to recognize the external device. It should appear in File Explorer under "This PC" or "Devices and Drives."
- Step 3: Open the folder containing the images you want to transfer.
- Step 4: Select the images you want to transfer. You can select multiple images by holding down the Ctrl key while clicking on each image.
- Step 5: Right-click on the selected images and choose Copy, or press Ctrl + C.
- Step 6: Navigate to the external device in File Explorer.
- Step 7: Right-click in the external device’s window and select Paste, or press Ctrl + V.
If you want to move (not copy) the images from your Dell computer to the external device, simply select Cut instead of Copy in Step 5.
Transferring images is often necessary when you need more space on your computer or want to ensure your images are safely backed up. This process is the same whether you're transferring a few images or hundreds, and it's an excellent way to keep your files organized and secure.
Common Issues While Copying Images and How to Fix Them
While copying images on your Dell computer is usually a straightforward process, sometimes things can go wrong. Issues like slow transfer speeds, missing images, or unexpected errors can be frustrating. Understanding these common issues and knowing how to fix them can save you time and effort when managing your images.
Here are some common problems and solutions:
- Slow Copying Speeds: This can happen if you're copying large files or transferring to an external device with limited write speeds. To improve speed, make sure you're using a high-quality USB drive, and avoid running other heavy programs while copying.
- Image Not Showing Up After Pasting: If you’ve copied an image but can’t find it in the destination folder, try refreshing the folder or checking if the file was saved under a different name. Sometimes, Windows needs a quick refresh to display new files.
- Error Messages During Copy: Errors can happen due to corrupt files or system glitches. If an image won’t copy, try restarting your Dell computer, scanning the file for errors, or using a different external device.
- Insufficient Space on the Destination Device: If your external device doesn’t have enough space, the copy operation will fail. Make sure there’s enough free space, or delete unnecessary files from the destination device to make room.
By troubleshooting these issues, you can ensure a smooth image copying process on your Dell computer. Regularly updating your system and ensuring your devices are working properly will also help prevent most common errors.
Tips for Efficient Image Copying on Dell Computers
Copying images on your Dell computer doesn’t have to be a time-consuming process. With a few tips and tricks, you can improve efficiency and keep your workflow smooth. These methods will help you handle multiple images, reduce errors, and make transferring files faster.
Here are some tips for efficient image copying:
- Use Keyboard Shortcuts: Instead of relying on right-click menus, use keyboard shortcuts like Ctrl + C to copy and Ctrl + V to paste. This saves time, especially when you’re working with many files.
- Organize Files Before Copying: Organize your images into folders and subfolders before starting the copying process. This will make it easier to manage large numbers of files and avoid mistakes.
- Use Drag and Drop for Quick Transfers: If you're transferring files within File Explorer, simply drag and drop the image into its destination folder. This method can be quicker than using copy and paste for some users.
- Copy in Batches: If you're copying many images at once, select multiple files by holding down the Ctrl key (for individual images) or the Shift key (for a range of images). This way, you can copy all selected files at once.
- Check for Errors Regularly: After copying, double-check that the files have been transferred correctly. If you notice any issues like missing images or incomplete transfers, try again or use a different method.
By applying these tips, you’ll make your image copying process much faster and more efficient. This is especially helpful when dealing with large numbers of files or transferring between multiple locations.
FAQ
1. How do I copy an image from the internet to my Dell computer?
To copy an image from the internet, right-click on the image and select Copy Image or Save Image As to download it. You can then paste or save the image to your desired location on your Dell computer.
2. Can I copy images from my Dell computer to a Mac or other operating systems?
Yes, you can transfer images from a Dell computer (Windows) to other operating systems like macOS or Linux using external storage devices like USB drives, external hard drives, or cloud storage. Just copy the images on your Dell, and paste them onto the device that is accessible from the other operating system.
3. What should I do if I can’t copy images to my external hard drive?
If you're unable to copy images to your external hard drive, make sure it’s properly connected and formatted to support file transfers from your Dell. Check if the drive has enough space and that it isn’t write-protected. You might also want to try using a different USB port or cable.
4. Why are my copied images blurry or distorted after transferring?
If your images appear blurry or distorted, it could be due to file corruption during the copying process or incompatible file formats. Ensure the file is intact by opening it on your Dell before transferring. If the issue persists, try transferring the file in a different format (such as JPG instead of PNG).
5. How can I copy images from my phone to my Dell computer?
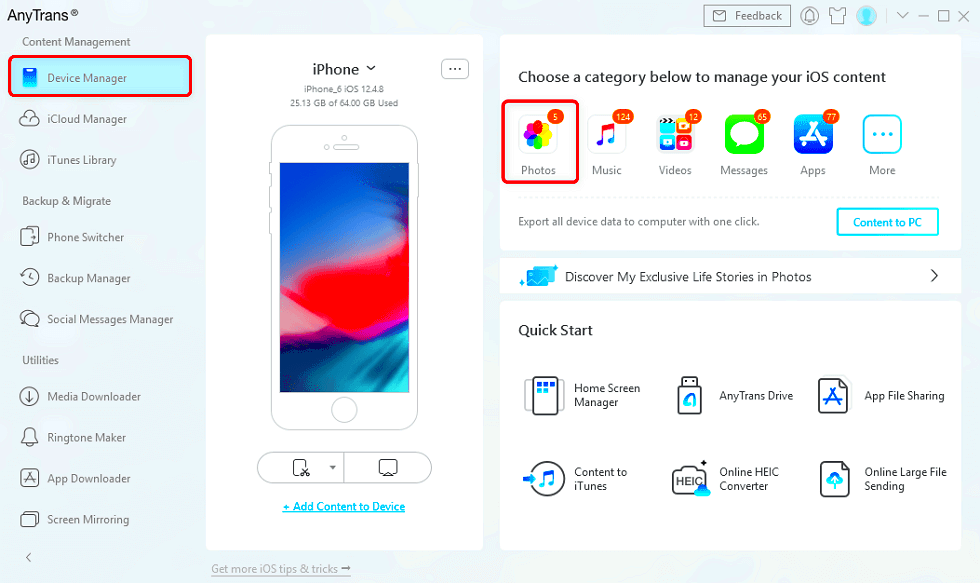
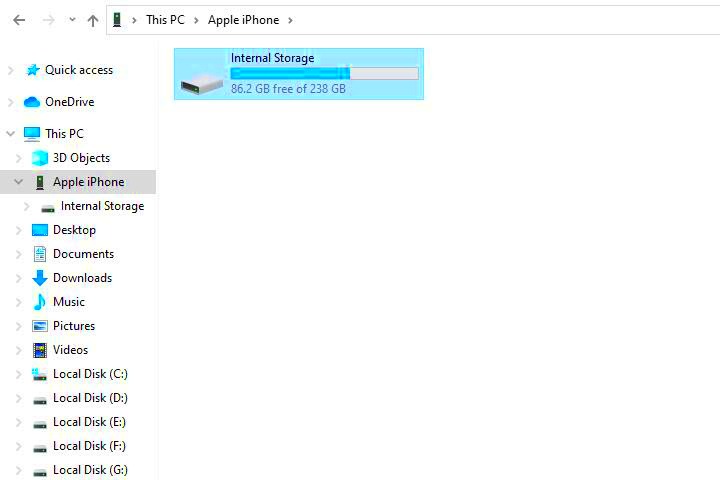
To copy images from your phone, connect it to your Dell computer via USB or use a wireless method like Bluetooth or cloud storage. Once connected, you can navigate to your phone’s storage in File Explorer and copy the images over.
Conclusion
Copying images on a Dell computer is a simple yet essential task for managing your files effectively. Whether you prefer using keyboard shortcuts, right-clicking, or File Explorer, there are multiple ways to copy and transfer your images quickly and efficiently. By understanding common issues like slow copying speeds or file errors and knowing how to troubleshoot them, you can avoid disruptions. Additionally, applying helpful tips such as organizing files in advance, using drag-and-drop, and working with batches will improve your workflow. With the right methods and a bit of practice, you'll be able to manage and transfer images on your Dell computer with ease.

 admin
admin


