MP4, or MPEG-4 Part 14, is one of the most popular digital multimedia formats used today. It supports various video and audio codecs, making it versatile and suitable for a wide range of devices. Whether you're watching videos on your smartphone, tablet, or computer, MP4 format ensures high-quality playback without taking up too much storage space. Its ability to handle videos, audio tracks, subtitles, and images in a single file makes it an ideal choice for media enthusiasts and casual viewers alike.
What's great about MP4 is its universal compatibility. Major platforms, including iOS and Android devices, support this format natively, meaning you won't encounter issues when playing videos across different devices. Furthermore, the MP4 format optimizes compression, allowing you to enjoy quality content without sacrificing file size. This characteristic makes it a perfect option for those who want to save their favorite YouTube videos for offline viewing.
Why Convert YouTube Videos to MP4?
So, why would anyone want to convert YouTube videos to MP4? The reasons are numerous, and they all boil down to convenience and accessibility. Let's take a closer look at some of the most compelling benefits:
- Offline Viewing: By converting YouTube videos to MP4, you can download and watch them anytime, anywhere, without the need for an internet connection. This is perfect for long trips or places with spotty internet service.
- Compatibility: MP4 is widely supported across devices and platforms, so you won’t have to worry about whether your video will play on your smartphone, laptop, or tablet.
- Storage Efficiency: MP4 formats use compression algorithms to keep file sizes manageable without drastically compromising quality. This is essential if you're limited on storage space but want to keep a library of videos.
- Editing Flexibility: Having an MP4 file allows you to easily edit the video using various software. Whether you want to trim, merge, or enhance your clips, MP4 files can be easily manipulated to fit your needs.
- Convenient Sharing: MP4 files are easier to share with friends or on other platforms. You'll find that most social media networks support MP4 uploads, making it a seamless experience to share your favorite clips.
While streaming is convenient, buffer times and disrupted connections can hamper your viewing experience. Converting your favorite YouTube videos to MP4 ensures you have direct access whenever you want. Plus, as internet speeds fluctuate, having videos offline guarantees smooth playback without interruptions.
Moreover, some YouTube content might not be available for streaming in your region, but having it converted to MP4 allows you to enjoy that content anyway. Whether it's a tutorial, music video, or documentary, converting opens doors to endless viewing possibilities.
In conclusion, converting YouTube videos to MP4 is not just a technical task; it’s about enhancing your viewing experience. It gives you the freedom to enjoy content on your own terms—what more could a media lover ask for?
Also Read This: How to Block YouTube on Safari on iPad to Control Internet Usage
3. Tools You Need for Conversion
Before diving into the conversion process, it's essential to have the right tools at your disposal. Thankfully, there are plenty of options available both online and offline. Here’s a quick rundown of the most popular tools you can use to convert YouTube videos to MP4 format.
- Online Video Converters: These are the most convenient tools as they require no downloads. Just paste the video URL, and you're good to go! Some popular options include:
- YTMP3 - Great for converting videos quickly.
- OnlineVideoConverter - Offers more format options and quality settings.
- Convert2MP3 - Another easy-to-use converter with extra features like audio extraction.
- Desktop Software: If you want more control over the conversion process, desktop software can be a better choice. These programs often offer additional features like batch downloading and editing capabilities:
- 4K Video Downloader - A powerful tool that allows for downloading and converting to different formats.
- FFmpeg - A bit more technical, but incredibly powerful for those who want maximum control over video processing.
- Any Video Converter - User-friendly with a bunch of format options and decent editing features.
- Browser Extensions: If you typically find yourself on YouTube, consider using a browser extension. It adds a download button directly to the video page:
- Video DownloadHelper - A popular choice for Firefox users, allowing for easy downloads from various websites.
- YouTube Video Downloader - Simple and straightforward, perfect for quick access while watching videos.
No matter what tool you choose, ensure it’s trustworthy and free from malware. Always do a bit of research or read reviews before downloading any software or using any online service. Now that you know what tools you'll need, you're ready to tackle the essential step of finding the video URL!
Also Read This: Watching the Super Bowl on YouTube TV What You Need to Know
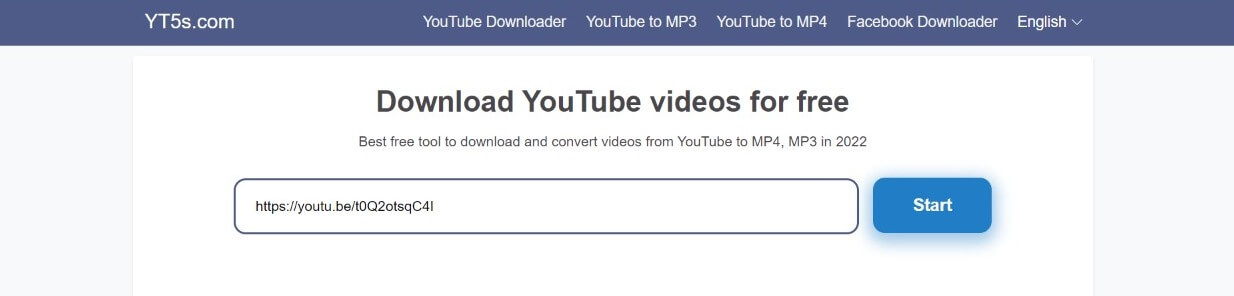
4. Step 1: Finding the YouTube Video URL
So, you've got your conversion tools ready. What’s next? The very first step in converting a YouTube video to MP4 format is finding the video URL. Sounds simple, right? Well, it is! But let’s ensure you do it correctly to avoid any headaches later. Here’s how to do it:
- Open YouTube: Start by going to the YouTube website or launching the app on your device. You can do this on your desktop or mobile, whichever you prefer.
- Search for the Video: Use the search bar to find the video you want to convert. Type in the keywords or title related to the video and hit enter. You can also browse through your subscriptions or suggested videos.
- Select the Video: Once you find the video, click on its thumbnail to start playing it. Take a moment to ensure it’s the right video - you’d hate to convert a video you didn’t intend to!
- Copy the URL:
- If you're using a desktop, just look at the address bar. The URL will appear there, starting with
https://. Simply click on the address to highlight it, right-click, and select Copy. - If you're using the YouTube app on mobile, tap the Share button below the video. From the list of options, choose Copy Link.
- If you're using a desktop, just look at the address bar. The URL will appear there, starting with
And voila! You now have the YouTube video URL on your clipboard, ready for pasting into your chosen conversion tool. Wasn’t that a breeze? Now you’re one step closer to having that video saved in the MP4 format!
Also Read This: How to Generate a YouTube Subscribe Link for Creators
5. Step 2: Choosing a Conversion Tool
Now that you’re ready to convert your favorite YouTube videos into MP4 format, it’s time to choose the right conversion tool. There are plenty of options out there, and each has its own set of features. But don’t worry; I’ll guide you through how to pick the one that suits your needs best!
Here are a few popular types of conversion tools:
- Online Converters: These are web-based tools that allow you to convert videos without downloading any software. Just paste the YouTube URL, choose your format, and hit convert!
- Desktop Software: If you prefer a more robust solution or need to convert videos regularly, desktop software might be the way to go. Programs like 4K Video Downloader or Freemake Video Converter provide powerful features.
- Browser Extensions: These add-ons let you download videos directly while browsing YouTube, making the process quick and convenient.
When choosing a conversion tool, keep this checklist in mind:
- Ease of Use: Is the interface user-friendly? You don’t want to spend hours figuring out how to get started.
- Output Quality: Check if the tool preserves video quality during conversion. Look for tools that support high-quality outputs.
- Speed: Some tools can take their sweet time. Read reviews or do a quick test to see how fast the conversion happens.
- Security: Make sure the tool doesn’t compromise your privacy or security. Check for HTTPS protocols and read user reviews regarding safety.
- Supported Formats: Ensure your conversion tool can output MP4 format and any other formats you may need in the future.
By considering these factors, you’ll find a conversion tool that meets your needs perfectly. Whether you go for an online converter for its convenience or a desktop program for its power, you’re one step closer to having those videos at your fingertips!
Also Read This: Does YouTube TV Include ESPN 3? What Sports Channels are Available on YouTube TV
6. Step 3: Initiating the Conversion Process
You’ve chosen your conversion tool—great! Now let’s get down to business and initiate the conversion process. While the exact steps can vary depending on the tool you selected, the general flow remains pretty consistent. Here’s a simplified guide to help you through!
1. *Copy the YouTube Video URL: Navigate to the YouTube video you want to convert. Highlight the URL in the browser’s address bar and copy it.
2. Open your Conversion Tool: Launch the conversion tool you decided on. If it's an online tool, head to the website. If it's software, double-click the application icon to open it.
3. Locate the Input Field: In most conversion tools, there will be a designated area to paste your video URL. Look for buttons or options that say "Paste URL," "Add Video,” or something similar.
4. Paste the URL: Click the input field and paste the YouTube URL you copied earlier. Most tools will automatically fetch the video details once you do this.
5. Select the Format (MP4): After the video is loaded, you’ll usually have the option to select your preferred output format. From the dropdown menu, choose MP4 if it’s not already selected.
6. Adjust Settings (Optional): Some tools allow you to tweak settings like resolution or audio quality. If you have specific preferences, dive into those settings to customize them to your liking.
7. Click on ‘Convert’ or ‘Download’: Once everything looks good, find the button that says ‘Convert,’ ‘Start,’ or ‘Download.’ Click on it to begin the conversion process. Depending on the length of the video and the speed of the tool, this might take a few moments.
8. Download the Converted Video:* After the conversion is complete, you’ll typically be prompted to download the MP4 file. Click on the download link, and voila! Your YouTube video is now saved in MP4 format, ready for you to watch anytime, anywhere.
And there you have it! Following these steps makes the conversion process a breeze. Enjoy your newly converted MP4 videos!
Also Read This: What Programs Do YouTubers Use for Recording? A List of Popular Software
7. Step 4: Downloading the MP4 Video
Now that you've found the perfect tool for converting your YouTube videos to MP4 format, it’s finally time to download your video! This step is where all your previous efforts pay off, and you get to enjoy your content offline. Here’s how to do it smoothly.
After pasting the YouTube link and selecting your desired quality settings in the converter tool, look for the Download button. Depending on the tool you’re using, it may be labeled slightly differently—like “Start Download” or “Convert & Download.” Click on that button, and the conversion process will begin.
While the conversion is in progress, a progress bar or spinner might indicate how much time is left until your file is ready. Depending on the length of the video and the speed of your internet connection, this could take anywhere from a few seconds to a few minutes.
Once the conversion is complete, you’ll be presented with a link to download your MP4 file. Here are a few things you should keep in mind:
- Save Location: Choose a convenient location on your device where you can easily find your video later, like your Downloads folder or a specific folder you create for video content.
- Rename the File: Consider renaming the file to something memorable. This can save you time later when you’re searching for that clip.
- Check Your Downloads: Once downloaded, it’s good practice to open the MP4 file immediately to ensure it converted correctly and plays without issues.
After going through these steps, your video is now ready for offline viewing, and you can enjoy it without worrying about streaming limits or interruptions. Whether you're planning to watch it on your laptop, tablet, or smartphone, you’re all set!
Also Read This: How Much Does 400000 Views Pay on YouTube
8. Tips for High-Quality Conversions
When converting YouTube videos to MP4 format, ensuring high quality can make a significant difference in your viewing experience. Here are some tips that can help you achieve better quality conversions.
- Choose the Right Resolution: Most conversion tools allow you to select the resolution of your video. Higher resolutions, like 1080p or even 4K, provide clearer and sharper images, but larger file sizes too. If you have sufficient storage and a compatible device, opt for a higher resolution.
- Check Bitrate Settings: The bitrate affects the quality of playback directly. A higher bitrate usually results in better quality; however, this also leads to larger file sizes. Many converters allow you to adjust this setting, so choose wisely based on your needs.
- Use Reputable Conversion Tools: Not all conversion tools are made equal! Stick with well-known ones that have a solid reputation for maintaining video quality during the conversion process. User reviews can provide valuable insights.
- Preview Before Finalizing: If your converter provides an option to preview the video, take a few moments to watch it before finalizing the download. This can save you from downloading a poorly converted video.
- Check Audio Quality: Often overlooked, audio quality is just as important as visual quality. Ensure the converter maintains high-quality audio settings to enhance your overall viewing experience.
By following these tips, you’ll ensure that the MP4 videos you convert are not only enjoyable to watch but also exceed your expectations in terms of quality. Now, sit back, relax, and enjoy your videos without a hitch!
Conclusion and Final Thoughts
In conclusion, converting YouTube videos to MP4 format is a straightforward process that can greatly enhance your viewing experience. By following the step-by-step methods outlined in this guide, you can easily access your favorite content offline, customize your media library, and enjoy more flexibility in how you consume videos. Remember to keep the following points in mind:
- Respect Copyright: Always ensure you have the rights to download and convert content to avoid copyright infringement.
- Choose Reliable Tools: Select trustworthy software or online services to ensure quality and security in your conversions.
- Mind Storage: Keep an eye on storage space, as video files can occupy significant amounts of memory.
- Check Formats: Although MP4 is widely supported, always verify playback compatibility with your devices.
By leveraging these tips and understanding the conversion process, you can seamlessly enhance your video library. Whether it's for offline viewing, editing, or creating a personal archive, converting videos to MP4 is a valuable skill that opens up new possibilities for media consumption. Enjoy your video experiences, and happy converting!
 admin
admin


