Changing your primary email on LinkedIn is simpler than you might think! Whether you’ve switched jobs, want to update your security settings, or just prefer a new email address, you can easily navigate this process. In this post, we'll guide you through the easy steps and discuss the reasons why updating your primary email is essential. Let’s dive in!
Why You Might Need to Change Your Primary Email
There are several reasons you might find yourself needing to change your primary email on LinkedIn. Let’s look at some of the most common scenarios:
- Job Changes: If you're switching careers or moving to a new company, it’s a great time to update your email. This ensures that your professional correspondence is current and aligns with your new role.
- Security Concerns: Using an email that’s been compromised or is no longer secure is risky. Changing your primary email can enhance your account's security, especially if you enable two-factor authentication.
- Personal Preferences: Maybe you’ve decided to consolidate your emails. Perhaps your old email is cluttered, or you simply want a fresh start with a new one that reflects your current identity.
- Changing Domains: If your email address is tied to a domain that you no longer use (like a university or a previous employer), updating to a personal email ensures you won’t lose access to your LinkedIn account.
Updating your primary email isn’t just about convenience; it’s also about ensuring that you receive important notifications and networking opportunities without a hitch. LinkedIn sends out messages regarding connection requests, job opportunities, and updates—all crucial elements for maintaining your professional presence. If these messages are going to an outdated or rarely checked email, you might miss out!
In summary, whether it’s due to job transitions, security enhancements, or personal choice, changing your primary email on LinkedIn is a proactive step towards maintaining a robust professional profile. Ready to make the change? Stick around for the next sections, where we’ll outline the steps to update your email seamlessly!
Also Read This: Mastering LinkedIn Sales Navigator for Effective Lead Generation
3. Step-by-Step Guide to Changing Your Primary Email on LinkedIn
Changing your primary email on LinkedIn is a straightforward process, and I promise it won’t take much of your time. Let’s dive right in!
Step 1: Log In to Your LinkedIn Account
First things first, head over to the LinkedIn website or open your LinkedIn app. Enter your credentials and log in to your profile.
Step 2: Access Your Settings
Once you’re logged in, look for the Me icon at the top right corner of your homepage. Click on it, and a dropdown menu will appear. Select Settings & Privacy from this menu.
Step 3: Navigate to Email Addresses
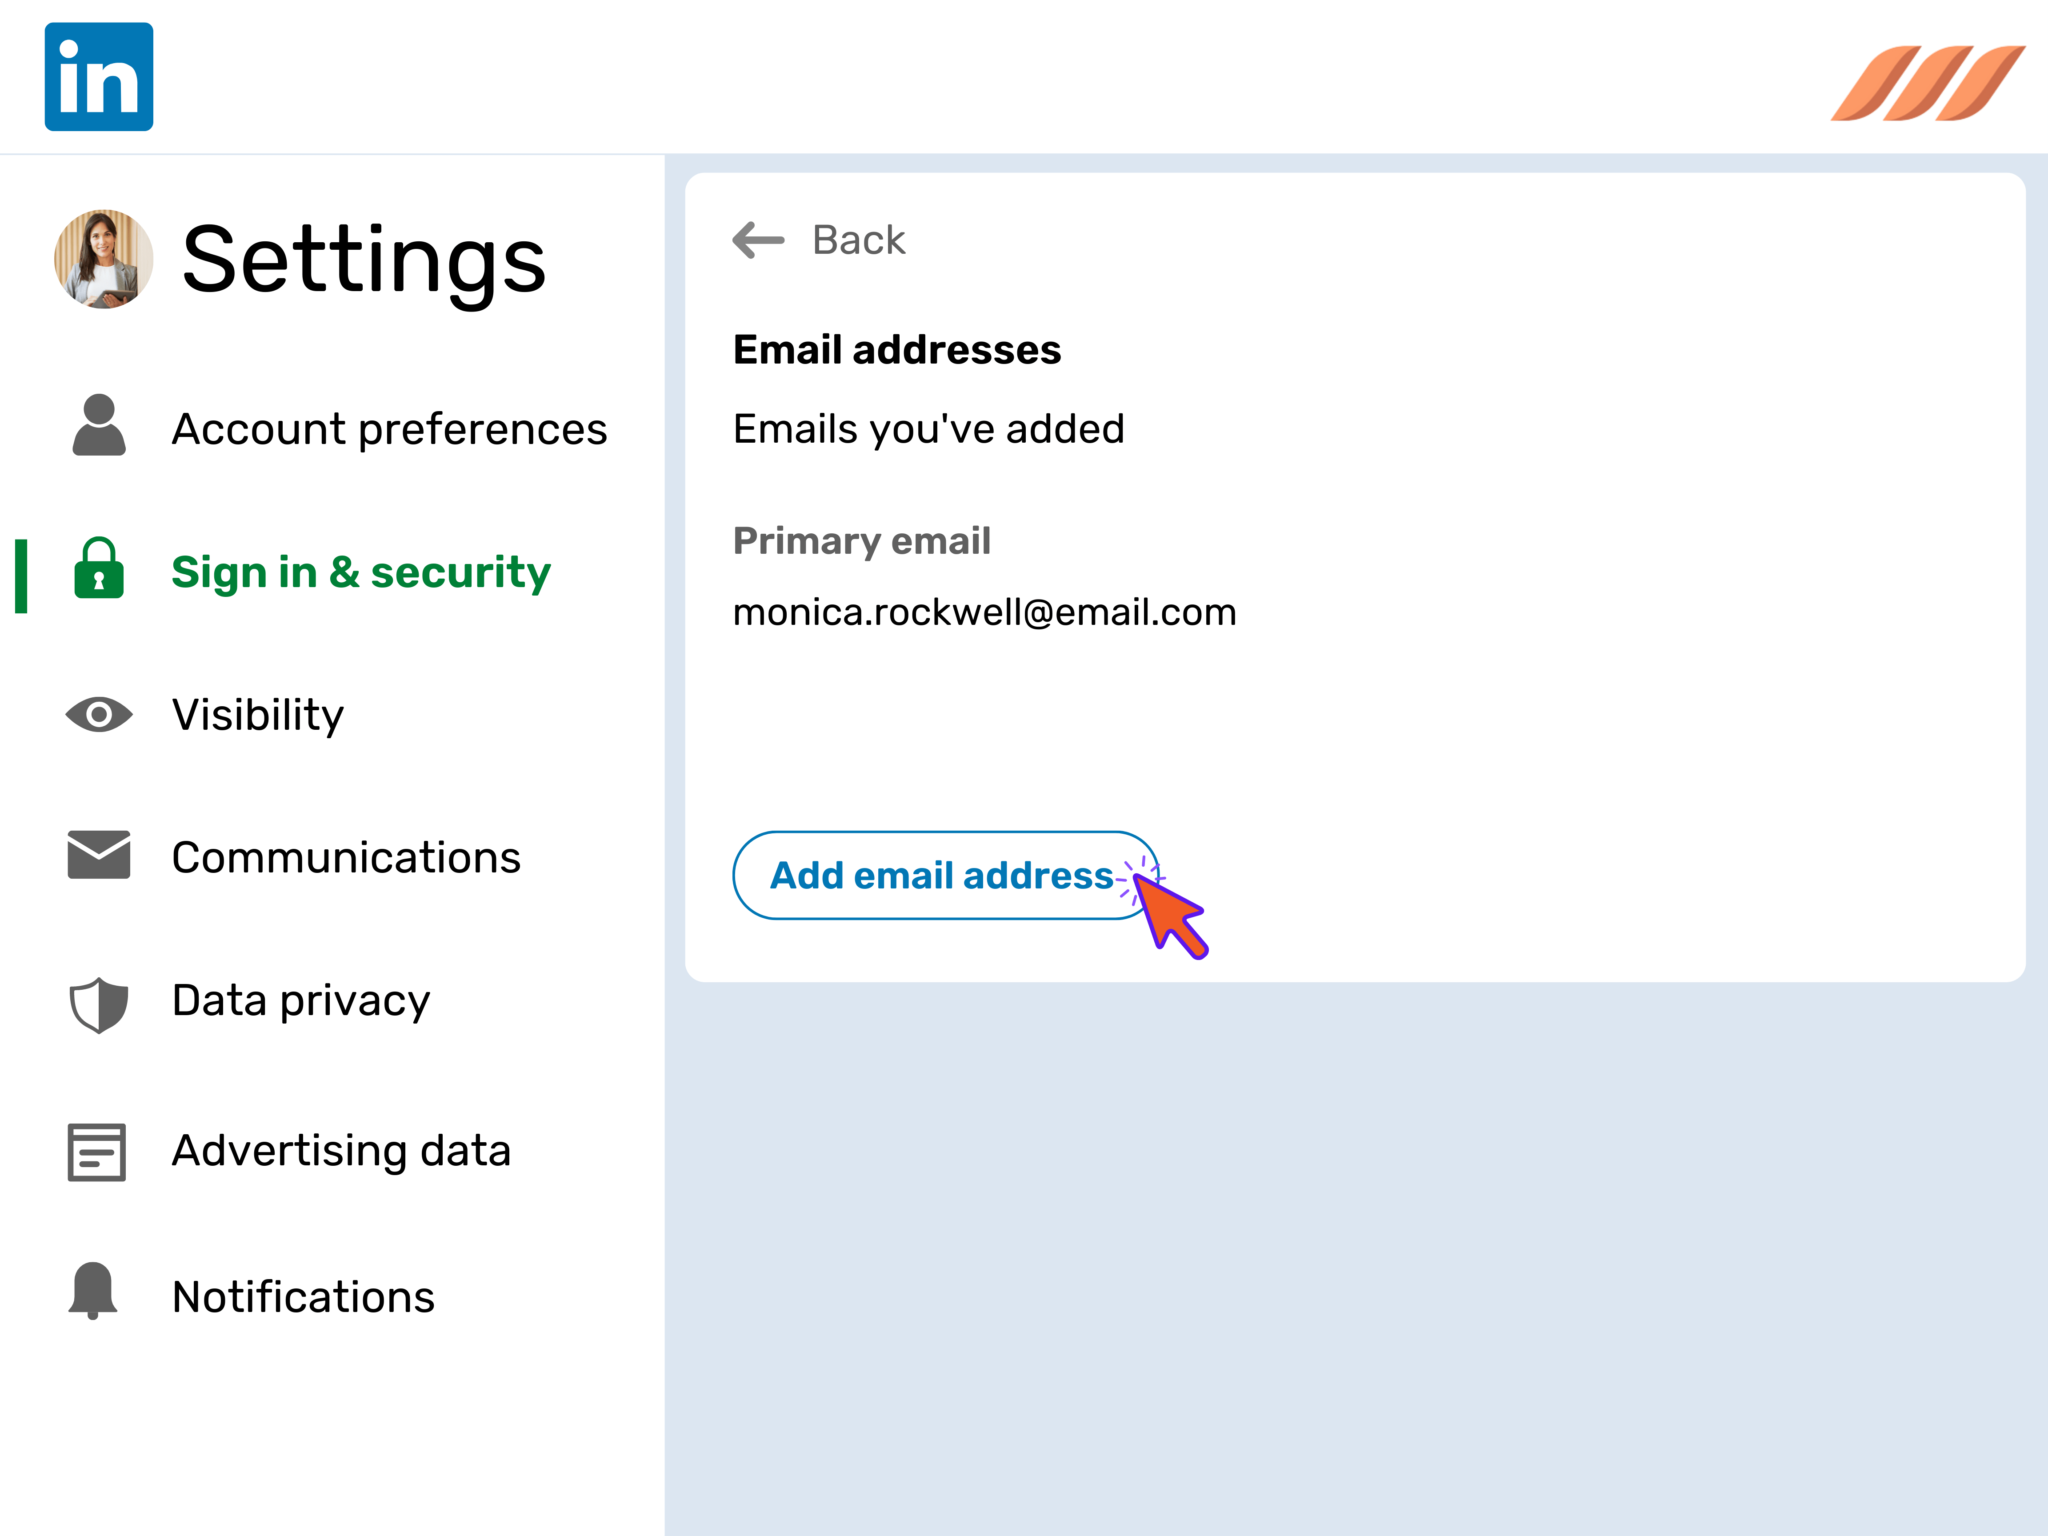
In the Settings menu, you’ll see various tabs on the left side. Click on Account preferences. From there, find the section labeled Email addresses. This is where you can view and manage all the email addresses associated with your LinkedIn account.
Step 4: Add a New Email Address
To add a new email address, click on Add email address. Enter your new email and click Send verification. LinkedIn will send a verification link to this new address, so keep an eye on your inbox!
Step 5: Verify Your New Email
Check your email for a message from LinkedIn. Click on the verification link within that email. This confirms that you indeed own the new email address.
Step 6: Set as Primary
Once your new email is verified, go back to the Email addresses section in your LinkedIn settings. You will now see your new email listed. Click Set as primary next to the new email address. This makes it your default email for LinkedIn notifications, messages, and logins.
Step 7: Remove Old Email (Optional)
If you want to remove your old email address, click on Remove next to the email you no longer wish to use. Just be sure that your new email is set as primary before doing this!
And voila! You’ve successfully changed your primary email on LinkedIn. It’s an easy process that takes just a few minutes, but it ensures that you stay connected with your professional network.
4. Common Issues and Troubleshooting Tips
As with any online platform, changing your email address on LinkedIn can sometimes come with a few hiccups. Here are some common issues you might encounter and tips to troubleshoot them:
- Didn’t Receive Verification Email? - Check your spam or junk folder. Sometimes, these emails can land there. If it’s not in either place, try resending the verification link.
- Link Expired? - Verification links can expire. If you’re trying to verify an email and the link doesn’t work, simply go back to the Email addresses section and resend the verification email.
- Cannot Set Email as Primary? - Make sure your new email is verified before attempting to set it as primary. LinkedIn won’t let you do this until verification is complete.
- Multiple Accounts? - If you have more than one LinkedIn account, ensure you’re logging into the correct one when making changes to your email.
- Other Account Issues? - Sometimes, account settings can get a bit tangled. If you’re experiencing difficulties, consider logging out and back in again or even clearing your browser cache.
If you follow these troubleshooting tips and still encounter issues, don’t hesitate to reach out to LinkedIn’s customer support. They’re usually pretty responsive and can help you get back on track.
Changing your primary email on LinkedIn shouldn’t be a headache, and with this guide, you’re well-equipped to handle it smoothly!
 admin
admin


