Changing your LinkedIn email address might seem like a daunting task, but it’s easier than you think! Whether you’ve switched to a new email provider or simply want to keep your professional connections organized, updating your email is crucial. In this guide, we’ll walk you through the steps to change your LinkedIn email address effortlessly, ensuring you stay connected with your network.
Why You Might Need to Change Your LinkedIn Email Address

There are several reasons why you might consider changing your LinkedIn email address. Let's explore some of the most common scenarios:
- Switching Email Providers: Perhaps you've moved from Gmail to Outlook or any other service. Keeping all your professional accounts in one place helps streamline your online presence.
- Personal Branding: You might want to use a more professional email address, especially if your current one is casual or linked to a service you no longer use. A custom domain can enhance your professional image. For example, switching from [email protected] to [email protected] makes a significant difference!
- Security Concerns: If you suspect your email has been compromised or you’re receiving too many spam messages, changing your email can help enhance your account security.
- Organizational Changes: If you’ve changed jobs or are no longer associated with a company, it’s a good idea to update your email to reflect your current professional status.
- Access Issues: In case you’re having trouble accessing your LinkedIn account due to an outdated email, changing it is essential for regaining access.
In sum, changing your LinkedIn email address can help you maintain professionalism, enhance security, and ensure you’re always connected to your network. Whether it’s a strategic move or a necessity, it’s important to keep your LinkedIn profile up to date. Ready to dive into the steps for making this change? Let’s get started!
Also Read This: How to Edit a Post on LinkedIn
3. Step 1: Log Into Your LinkedIn Account
Alright, let’s kick things off with the first step: logging into your LinkedIn account. This may seem like a no-brainer, but let’s make sure you’re on the right track!
First things first, head over to the LinkedIn website. If you’re using a mobile device, you can also open the LinkedIn app. Once you’re there, look for the login fields. You’ll need to enter your email address (the one currently linked to your account) and your password.
Pro Tip: If you’ve forgotten your password, don’t panic! There’s a handy “Forgot password?” link right below the login fields. Just click on that, follow the prompts, and you’ll be back in no time.
After you’ve entered your credentials, hit that login button! If you’ve enabled two-factor authentication, you might need to enter a code sent to your email or phone. This is a great security feature to keep your account safe!
And voilà! You’re now logged into your LinkedIn account. You should see your homepage, filled with updates from your connections and various industry articles. Now that you’re in, we can move on to the next step!
Also Read This: How to Know if Someone Has LinkedIn Premium Identifying Premium Profiles
4. Step 2: Access Your Settings
Now that you’re logged in, it’s time to access your settings. Don't worry; this part is just as easy as logging in!
Look for your profile picture in the top right corner of the screen. It’s a small circle that represents you. Go ahead and click on it, and a dropdown menu will appear. You’ll see several options here, but what you want is “Settings & Privacy.” Click on that option.
Once you’re in the “Settings & Privacy” section, you’ll be greeted by a clean interface with various tabs on the left side. Here’s what to do next:
- Account Preferences: This is where you’ll find options related to your LinkedIn account, including your email settings.
- Privacy: This section allows you to manage who can see your information and how your activity is shared.
- Communications: Here, you can adjust your notification settings to stay updated without being overwhelmed.
For changing your email, you’ll want to focus on the “Account Preferences” tab. Click on it, and look for the section labeled “Email addresses.” That’s where you’ll be able to view and edit your current email settings.
Quick Reminder: Make sure you have access to the email address you want to add or switch to. LinkedIn will send a verification link to that email to confirm the change.
Now that you’ve accessed your settings, you’re all set to move on to the actual email change process. Stay tuned for the next steps, where we’ll guide you through changing your LinkedIn email address in no time!
Also Read This: Fixing the ‘File is Corrupted’ Error When Uploading to LinkedIn
5. Step 3: Navigate to Email Addresses
Alright, let’s keep this moving! Now that you’re logged into your LinkedIn account, the next step is to locate the Email Addresses section. This is where the magic happens! Here’s how you get there:
- Click on your profile picture or the Me icon at the top of your LinkedIn homepage. This will take you to your profile settings.
- Once you’re on your profile settings page, look for the Settings & Privacy option, which is typically located on the left sidebar.
- In the Settings & Privacy section, scroll down to find the Account preferences tab.
- Here, you’ll see an option labeled Email addresses. Click on it!
Once you’re in the Email addresses section, you’ll be able to see all the email addresses currently linked to your account. This is super helpful because you can easily identify which email is set as your primary one. Remember, your primary email is the one that LinkedIn uses for notifications and important communications.
If you’re ready to add a new email address, hang tight! You’re just one step away. Making sure your email is updated is crucial for keeping your LinkedIn experience smooth and ensuring you don't miss anything important.
Also Read This: What the ‘People Also Viewed’ Section on LinkedIn Tells You
6. Step 4: Add a New Email Address
Now that you’ve navigated to the Email addresses section, it's time for the fun part—adding your new email address! Follow these easy steps:
- Look for a button that says Add email address. This button is usually located near the top of the email list, and it’s hard to miss!
- Once you click on that button, a new field will pop up prompting you to enter your new email address. Type it in carefully!
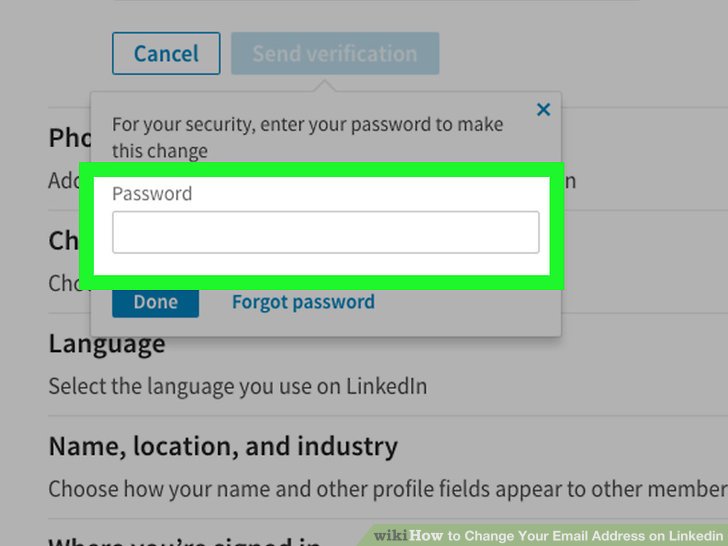
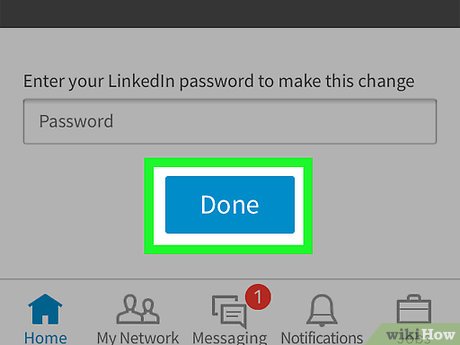
- After you’ve entered your email, hit the Send verification button. LinkedIn will then send a verification email to that address.
But wait—don’t rush off just yet! You need to check your inbox for that verification email. Sometimes it might land in your spam folder, so be sure to take a quick look there if you don’t see it right away. Once you find the email, click on the verification link inside. This step is super important because it confirms that you own this email address.
Once you've completed the verification, you can return to the Email addresses section on LinkedIn. You should see your new email address listed there! If you want to make this your primary email (the one LinkedIn uses to send notifications), just look for a button or option that says Make primary next to your new email address.
And voilà! You’ve successfully added a new email address. Make sure to keep your contact information updated, so you never miss any opportunities or important messages from your connections. Great job!
Also Read This: What’s My LinkedIn URL and How to Find It Quickly
7. Step 5: Verify Your New Email Address
Great job! You’re almost there. The next crucial step is to verify your new email address. This is essential because it ensures that you own the email and that it's connected to your LinkedIn account. Here’s how to do it:
- Check Your Inbox: After you’ve added your new email, head over to your email inbox. Look for an email from LinkedIn with the subject line “Verify your email address.” If you don’t see it right away, don’t forget to check your spam or junk folder.
- Open the Email: Once you find the verification email, open it. Inside, there will be a message confirming the change and a verification link.
- Click the Verification Link: Simply click on the link provided in the email. This action will redirect you to LinkedIn and confirm that you have access to that email.
- Confirmation Message: After clicking the link, LinkedIn will display a confirmation message indicating that your new email address has been successfully verified.
If you didn’t receive the verification email, you can return to your LinkedIn account settings and request a new verification link. Don’t worry; it’s a straightforward process. Just remember, verifying your email is crucial, as it helps keep your account secure.
8. Step 6: Remove the Old Email Address (Optional)
Now that your new email address is verified, you might be wondering if you should remove your old email address from your LinkedIn profile. While it’s not mandatory, doing so can help keep your account neat and secure. Here’s how you can remove your old email address:
- Return to Account Settings: Go back to the same Settings & Privacy section where you added your new email.
- Select Email Addresses: Click on the Emails tab. You’ll see a list of all email addresses linked to your account.
- Locate Your Old Email: Find the old email address you want to remove. Make sure you’re certain about this step, as removing it means you’ll no longer receive notifications sent to that email.
- Remove the Old Email: Next to the old email address, there will be an option to Remove. Click on it, and LinkedIn might ask you for confirmation.
Just a quick note: if your old email is the primary one (the one used for logins), you’ll need to set your new email as the primary before you can remove the old one. Simply click “Make Primary” next to your new email address before proceeding to remove the old one.
Remember, keeping your contact information up to date on LinkedIn not only helps you stay connected with others but also enhances your professional appearance. Happy networking!
 admin
admin


