Changing your email address on LinkedIn might seem like a small task, but it can significantly impact your networking and job-seeking efforts. Whether you've switched providers, want to enhance your privacy, or simply prefer a more professional email, this guide will walk you through the entire process. Let’s dive in and make sure your LinkedIn profile stays up-to-date!
Why You Might Need to Change Your Email Address on LinkedIn
There are several reasons you might consider changing your email address on LinkedIn. Here are just a few:
- Switching Providers: Life changes, and sometimes you need to move from one email provider to another. Perhaps you’ve switched from Yahoo to Gmail for better features.
- Professionalism: Using a personal or quirky email address might not convey the professional image you want to project. For instance, changing from [email protected] to [email protected] can enhance your professional presence.
- Security Concerns: If you’ve experienced issues with spam or security breaches, it might be time to update your email for better security and peace of mind.
- Career Changes: If you’ve moved to a new job or industry, it’s a good idea to use an email associated with your current role or company.
- Consolidation: Having multiple email addresses can be confusing. Streamlining to one email for all professional correspondence can simplify your life.
Each of these reasons highlights the importance of maintaining a current and relevant email address on LinkedIn. After all, LinkedIn is about making connections and showcasing your professional life. You want to ensure that potential employers, colleagues, and connections can reach you without any hiccups.
So, if any of these scenarios resonate with you, it's time to jump into the steps required to update your email address on LinkedIn. You'll not only feel more organized, but you'll also present a polished image to your network!
Also Read This: How to Insert a Link in LinkedIn: A Simple Guide to Adding Hyperlinks in Posts
3. Prerequisites for Changing Your Email Address
Before diving into the nitty-gritty of changing your email address on LinkedIn, it's essential to have a few things sorted out. Think of this as your checklist to ensure everything goes smoothly!
Here’s what you’ll need:
- Access to Your Current Email: You must be able to log into the email account currently linked to your LinkedIn profile. This step is crucial because LinkedIn often sends a verification link to this email when you make changes.
- Your New Email Address: Have the new email address ready. Make sure it’s one you frequently use and will easily remember. Also, avoid using temporary or disposable email addresses.
- LinkedIn Account Credentials: Have your LinkedIn username and password handy. If you've forgotten your password, it's a good idea to reset it before you start this process.
Once you have all these prerequisites in place, you're ready to move on to the next step. Remember, taking a moment to ensure everything is ready can save you time and prevent headaches later!
Also Read This: How to Calculate Engagement Rate on LinkedIn for Better Post Insights
4. Step 1: Logging into Your LinkedIn Account
Alright, now that you have everything you need, it's time to log into your LinkedIn account. This step might seem straightforward, but it’s essential to follow the process carefully to avoid any hiccups.
Follow these simple steps:
- Open Your Web Browser: Launch the web browser of your choice—be it Chrome, Firefox, or Safari. You can also use the LinkedIn mobile app if that's your preference!
- Go to LinkedIn's Website: Type www.linkedin.com in the address bar and hit Enter.
- Enter Your Credentials: On the LinkedIn homepage, you’ll see fields to enter your email address and password. Make sure you input the email address associated with your account.
- Click on the Sign In Button: After entering your credentials, click the Sign In button. If your details are correct, you’ll be redirected to your LinkedIn feed.
If you encounter any issues while logging in—like forgetting your password—don't worry! Just click on the Forgot password? link, and LinkedIn will guide you through the recovery process.
Once logged in, you'll have full access to your profile and settings, allowing you to make the necessary changes to your email address swiftly. You're one step closer to updating your LinkedIn presence!
Also Read This: Steps to View Your Own LinkedIn Profile as Someone Else Sees It
5. Step 2: Navigating to Account Settings
Now that you're ready to update your email address on LinkedIn, the first thing you need to do is navigate to your Account Settings. This part is straightforward, and I'm here to guide you through it!
To begin, log in to your LinkedIn account. Once you're on your home page, look for your profile picture or the "Me" icon located at the top right corner of the screen. Clicking on this will drop down a menu with several options.
Here’s what you should do next:
- Click on "Settings & Privacy": This is usually at the bottom of the dropdown menu. It will take you to a new page where you can manage various aspects of your LinkedIn account.
- Explore the Settings Menu: Once you're on the Settings & Privacy page, you’ll see several tabs on the left side. These include options like Account Preferences, Privacy, and Communications. We want the Account Preferences section for this update.
After clicking on Account Preferences, scroll down to find the Email addresses section. This is where the magic happens!
Don’t worry if this feels a bit overwhelming; everyone has been there! Just take it step by step, and you'll be updating your email address in no time.
Also Read This: How to Unblock People on LinkedIn and Reconnect Professionally
6. Step 3: Updating Your Email Address
Alright! You've made it to the point where you can actually update your email address. Exciting stuff! Let's dive right into how you can do this.
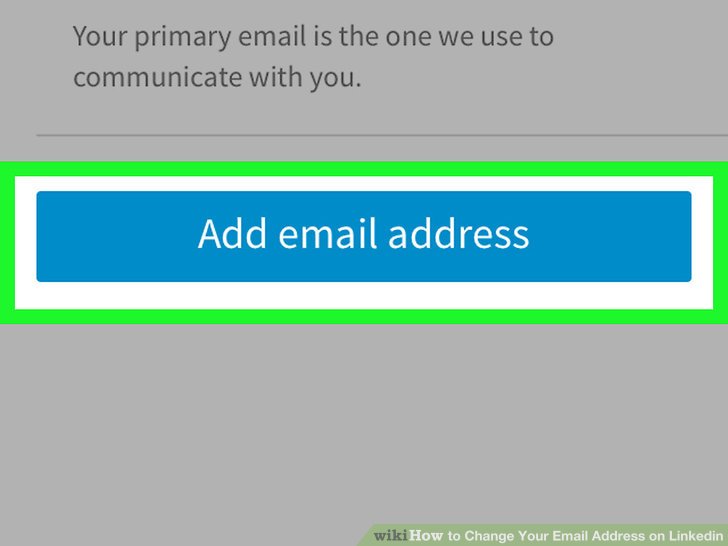
Once you're in the Email addresses section of your Account Preferences, you should see a list of your current email addresses associated with your LinkedIn account. If you want to add a new one, look for the Add email address button—it's typically pretty obvious!
Here’s how to proceed:
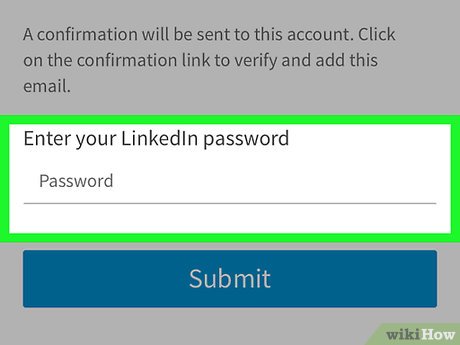
- Click "Add email address": A prompt will pop up asking for your new email. Enter it carefully—typos can lead to a world of confusion!
- Verify your Email: LinkedIn will send a verification link to the new email address you've entered. Check your inbox (and your spam folder, just in case) for this email. It’s essential to click on the verification link to ensure that you own the new email address.
- Set as Primary (if desired): After you've verified the new email, you’ll have the option to make it your primary address. If you want all LinkedIn communications to go to this new address, make sure to select this option. Just look for a checkbox or option that says Make primary.
And voila! You’ve just updated your email address on LinkedIn. It’s a small step, but it can make a big difference in how you manage your professional communications.
Remember, keeping your contact details up to date is crucial in today’s fast-paced world, especially on a platform like LinkedIn where networking is key. If you ever decide to switch email addresses again, just follow these steps, and you’ll be a pro in no time!
Also Read This: How to Turn Off LinkedIn Notifications: Managing LinkedIn Notifications to Reduce Distractions
7. Step 4: Verifying Your New Email Address
Congratulations on successfully adding your new email address! Now comes the important part: verifying it. This step is crucial because it ensures that you have full access to your LinkedIn account with your new email. Here's how to do it:
- Check Your Inbox: Head over to the inbox of your new email account. Look for an email from LinkedIn that contains a verification link. It might take a few minutes to arrive, so don’t worry if you don’t see it immediately.
- Open the Email: Once you find the email, open it. The subject line typically reads something like “Verify Your New Email Address.”
- Click the Link: Inside the email, you’ll find a button or a link that says “Verify Email” or something similar. Click that link!
- Confirmation Message: After clicking the link, you'll be redirected to LinkedIn, where you'll see a confirmation message that your email has been verified. It’s that simple!
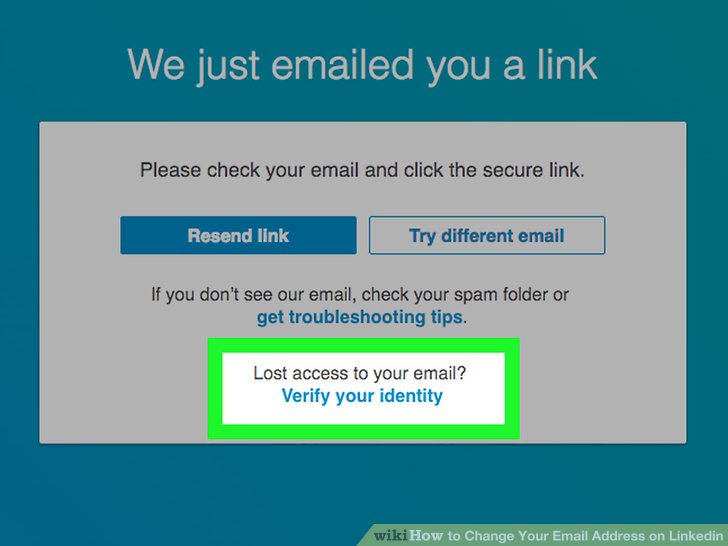
If you don’t receive the verification email, here are a few things to check:
- Spam/Junk Folder: Sometimes, verification emails end up in your spam or junk folder. Make sure to check there if you don’t see it in your inbox.
- Correct Email Address: Double-check that you entered the correct email address when you updated it. A small typo can prevent you from receiving the email.
- Resend Verification: If all else fails, return to your LinkedIn account settings and look for an option to resend the verification email.
Once your new email address is verified, you can start using it to log in. It’s also a good idea to let your connections know about your new email, especially if you often communicate through LinkedIn messages.
8. Common Issues and Troubleshooting Tips
Even though the process of changing your email on LinkedIn is generally straightforward, sometimes things don’t go as planned. Here are some common issues you might encounter and how to resolve them:
- Verification Email Not Received: As mentioned earlier, if you haven't received the verification email, check your spam folder first. If it's not there, ensure that you’ve entered the right email address. You can also click on the “Resend” option in your LinkedIn settings.
- Link Expired: If you clicked the verification link but it says the link has expired, don't panic! Just go back to your LinkedIn settings and request a new verification email.
- Login Issues: If you're having trouble logging in after changing your email, ensure you’re using the new email address. If you’re still facing issues, try resetting your password using the “Forgot Password?” link on the login page.
- Account Not Recognized: Rarely, users find that their account is not recognized after changing their email. If this happens, reach out to LinkedIn support for assistance. They can help you regain access.
Finally, remember that patience is key! LinkedIn updates might take a moment to propagate, so if something doesn’t seem right immediately, give it a little time and try again. With these troubleshooting tips in hand, you should be able to navigate any hiccups in the process smoothly.
 admin
admin


