Changing the shape of an image in Photoshop can open up a world of creative possibilities. Whether you're looking to create unique designs, enhance product images, or simply have fun with photos, understanding image shaping is fundamental. It allows you to manipulate images beyond their original boundaries, making them fit seamlessly into your projects.
Image shaping is all about altering the form of your visuals, giving them a distinct look or adapting them to specific layouts. With Photoshop’s powerful tools, you can easily transform shapes, create clipping masks, or apply vector paths that bring your artistic vision to life. By mastering these techniques, you can elevate your design skills and produce eye-catching imagery that stands out.
Tools and Features Used for Shaping Images
Photoshop boasts a plethora of tools designed for transforming the shape of an image. Here’s a rundown of essential tools and features that you’ll find handy:
- Marquee Tool: Perfect for selecting rectangular or elliptical areas of an image, allowing for straightforward cropping.
- Lasso Tool: This freehand selection tool enables you to outline the shape of an area, making it ideal for irregular shapes.
- Pen Tool: The ultimate tool for precision, the Pen Tool creates custom paths and shapes that can be filled with colors or patterns.
- Shape Tool: Use this to create geometric shapes or custom shapes that can be manipulated and resized.
- Transform Tool (Ctrl + T): This feature allows you to resize, rotate, and warp your image, changing its shape dynamically.
- Layer Masks: Masks enable you to hide or reveal parts of an image without permanently altering the original, perfect for blending shapes.
Each of these tools contributes to the overall process of shaping images. Experimenting with them can lead to innovative designs that are both functional and visually appealing. Remember, the key to mastering image shaping in Photoshop is practice and exploration!
Also Read This: Creating 3000×3000 Pixel Images Easily
3. Step-by-Step Guide to Changing Image Shapes
Changing the shape of an image in Photoshop can be a fun and creative process. Let’s break it down step-by-step so you can easily follow along.
- Open Your Image: Start by launching Photoshop and opening the image you want to modify. Go to File > Open, and select your desired image.
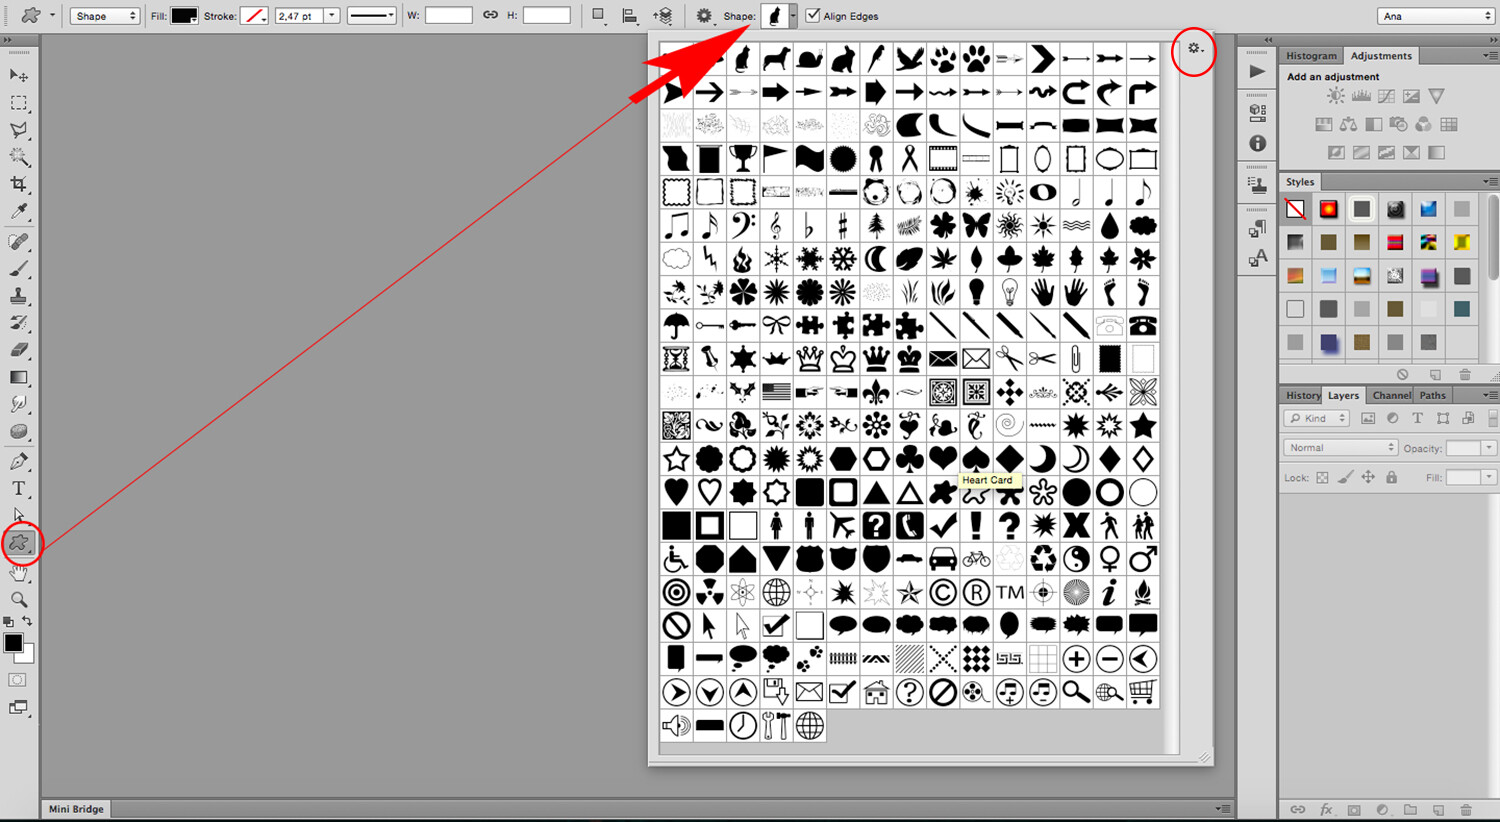
- Select the Shape Tool: Locate the Shape Tool in the toolbar on the left side of the screen. Choose the desired shape, like a rectangle, ellipse, or custom shape.
- Draw the Shape: Click and drag on your image to create the shape. You can adjust the size and position later, so don’t worry about getting it perfect on the first try!
- Convert the Shape Layer: Right-click on the shape layer in the Layers panel and select Rasterize Layer. This allows you to manipulate the pixels directly.
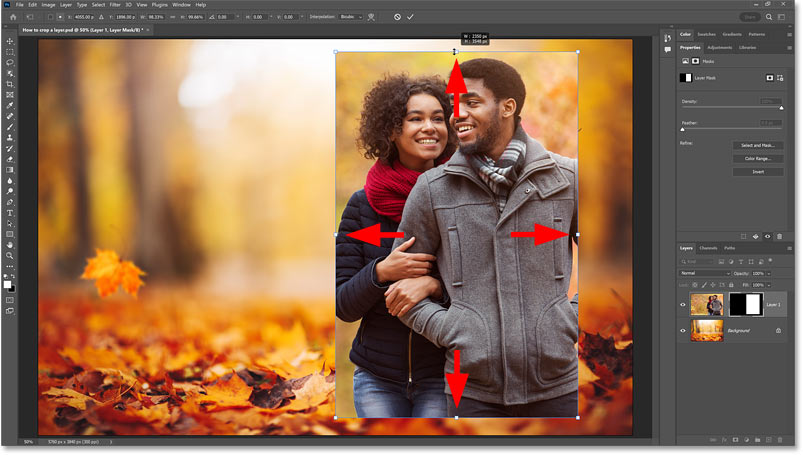
- Use the Transform Tool: Press Ctrl + T (or Cmd + T on Mac) to activate the Transform Tool. You can now resize, rotate, or skew the shape to achieve your desired look.
- Apply Filters or Adjustments: Once you’re satisfied with the shape, feel free to apply filters or adjustments. Go to Filter in the top menu and explore options like Blur or Distort.
- Save Your Work: Finally, save your newly shaped image by going to File > Save As. Choose the format you prefer, such as JPEG or PNG.
Also Read This: Is YouTube a Social Media App? Understanding YouTube’s Role in Social Media
4. Using Layer Masks for Complex Shapes

Layer masks are incredibly powerful when it comes to creating complex shapes in Photoshop. They allow you to hide parts of a layer while keeping the rest visible. Here’s how you can use them effectively:
- Open Your Image: As before, start by opening the image you want to work with.
- Add a Layer Mask: With your image layer selected, click on the Add Layer Mask icon at the bottom of the Layers panel. This will add a mask linked to your image layer.
- Select the Brush Tool: Choose the Brush Tool from the toolbar. Set the foreground color to black, which will hide parts of the image when you paint on the mask.
- Paint Over Areas: With the brush, start painting over the areas of your image you want to hide. If you make a mistake, switch to white paint to reveal those areas again.
- Adjust Opacity and Hardness: You can adjust the brush’s opacity and hardness in the options bar to create smooth transitions and soft edges in your shape.
- Refine the Mask: Use the Gaussian Blur filter on the mask itself for smoother edges, or utilize the Select and Mask feature for more advanced options.
- Final Touches: Once you’re pleased with your shape, consider adding effects or adjustments to enhance the overall look. Don’t forget to save your masterpiece!
Also Read This: How to Remove Experience from Your LinkedIn Profile
5. Applying Artistic Filters for Unique Effects
When you want to elevate the look of your shaped image in Photoshop, applying artistic filters can add a touch of creativity and flair. Filters can transform a standard image into a stunning work of art, making it stand out. Here’s how you can get started:
- Accessing Filters: Go to the top menu and click on Filter. Here, you’ll find a variety of options under Artistic. Each filter offers a different style, so it’s worth exploring each one.
- Choosing a Filter: Some popular choices include:
- Watercolor: Gives your image a soft, flowing appearance.
- Oil Paint: Adds brush strokes that mimic traditional painting.
- Poster Edges: Creates a bold, graphic look with defined edges.
- Adjusting Settings: Once you choose a filter, a dialog box will appear. Here, you can adjust parameters like brush size and texture. Play around until you find the perfect balance!
- Layering Effects: Don’t be afraid to combine multiple filters for a unique outcome. You can apply one filter, duplicate the layer, and add another filter to create depth.
Remember, the key is to experiment! Artistic filters can dramatically change the vibe of your image, making it personal and engaging.
Also Read This: A Step-by-step Guide to Making an AI Painting
6. Saving and Exporting Your Shaped Image
After you’ve put in all the hard work shaping and enhancing your image, saving it properly is crucial. You want to ensure that your artistic creation retains its quality and is easy to share or use later. Here’s how to do it:
- Choosing the Right Format: Depending on your needs, you might want to save your image in different formats:
- Saving Your Work: To save, navigate to File > Save As. Choose your desired format from the dropdown menu and name your file. Don’t forget to select the right destination folder!
- Exporting for Web: If your goal is to share online, use File > Export > Save for Web (Legacy). This optimizes your image for web use, ensuring it loads quickly without sacrificing quality.
| Format | Best For |
|---|---|
| JPEG | Photography and web use |
| PNG | Images with transparency |
| PSD | Preserving layers for future edits |
By saving and exporting your image thoughtfully, you’ll ensure that your creative efforts shine through, whether you’re sharing it on social media or using it in a project.
Also Read This: Here’s How to Download Dailymotion Videos with Subtitles in Any Language
7. Common Mistakes to Avoid
Changing the shape of an image in Photoshop can be a fun and creative process, but it’s easy to make mistakes along the way. Here are some common pitfalls to avoid:
- Not Using Layers: Always work on a new layer. This allows you to make changes without affecting the original image. If you forget, it can lead to irreversible changes that you might regret.
- Ignoring Image Resolution: When stretching or squishing an image, keep an eye on the resolution. Too much distortion can lead to a pixelated or blurry image. Aim for a resolution of at least 300 DPI for print and 72 DPI for web.
- Forgetting to Save Progress: It’s crucial to save your work frequently. Use “Save As” to create different versions, so you can revisit earlier stages if needed.
- Overusing Transform Tools: While tools like Warp and Scale are powerful, using them excessively can lead to unnatural results. Experiment, but don’t go overboard!
- Not Utilizing Smart Objects: Convert your layers to Smart Objects before manipulating them. This preserves your original image quality, allowing for non-destructive editing.
By avoiding these common mistakes, you'll set yourself up for success as you explore the creative possibilities in Photoshop!
8. Conclusion and Additional Resources
Changing the shape of an image in Photoshop opens up a world of creative potential. Whether you're trying to create a stunning graphic for social media or adjust an image for a project, mastering this skill can greatly enhance your design toolbox.
Remember, practice is key! The more you experiment with the various tools and techniques we've discussed, the more comfortable you'll become. If you're looking for further learning opportunities, here are some resources to check out:
| Resource | Description |
|---|---|
| Adobe Photoshop Tutorials | Official tutorials from Adobe that cover a wide range of topics, including image manipulation. |
| Lynda.com Photoshop Courses | Comprehensive video courses for all skill levels, focusing on various Photoshop techniques. |
| YouTube Tutorials | A treasure trove of free video content, where you can find specific tutorials on changing image shapes. |
By leveraging these resources, you’ll be well on your way to becoming a Photoshop pro in no time!
 admin
admin


