Image perspective plays a crucial role in making your presentations look professional and visually appealing. In PowerPoint, adjusting the perspective of an
image can help create the illusion of depth, direction, or a different angle. This feature is particularly useful when you're trying to integrate images seamlessly into your slides or emphasize certain elements within a design.While PowerPoint isn't as advanced as dedicated graphic design software, it provides several tools that allow you to adjust the perspective of an
image with ease. Whether you're working with photos, illustrations, or diagrams, understanding how to manipulate perspective can elevate your presentation from average to visually stunning.
Steps to Change the Perspective of an Image
Changing the perspective of an
image in PowerPoint is fairly simple, though it requires a bit of attention to detail. Follow these steps to transform your
image and adjust its appearance:
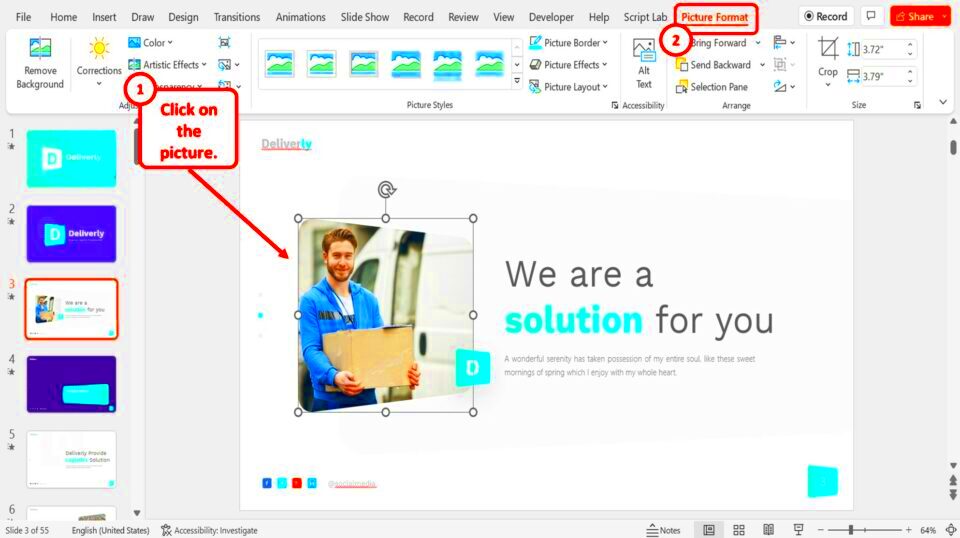
- Insert the Image: Start by opening your PowerPoint presentation and inserting the image you want to modify. You can do this by navigating to the Insert tab and selecting Pictures.
- Select the Image: Once the image is inserted, click on it to select it. This will activate the Picture Tools tab at the top of the screen.
- Open the Format Options: In the Picture Tools tab, select Format, then look for the Crop tool dropdown.
- Apply the Crop to Shape: Use the Crop to Shape option to change the basic shape of the image. Choose a shape that resembles the angle or perspective you want to achieve.
- Adjust the 3D Rotation: In the Format Picture pane, find the 3D Rotation option. Adjust the X, Y, and Z axis to tilt the image and change its perspective.
- Refine the Image: After adjusting the perspective, use the Soft Edges or Shadow features to enhance the effect and make the image blend naturally with the slide.
Following these steps will help you achieve a more dynamic and visually appealing
image perspective within PowerPoint.
Using PowerPoint's Built-in Tools for Image Adjustments
PowerPoint offers several built-in tools that make it easier to tweak your images and adjust their perspective. While it may not have the same capabilities as Photoshop or other professional software, the tools provided are more than adequate for most presentation needs.Here’s a look at the most useful tools you can use:
- 3D Rotation: This tool allows you to rotate your image along three different axes (X, Y, and Z). It’s one of the key features for changing perspective.
- Crop to Shape: This option lets you crop an image into a variety of preset shapes. By choosing shapes like trapezoids or parallelograms, you can give the impression of a changed perspective.
- Soft Edges and Bevel: These effects can smooth out the harsh edges of an image, making the perspective shift look more natural.
- Shadow and Reflection: Adding shadows or reflections can enhance the illusion of depth, helping to emphasize the perspective change.
- Picture Corrections: Under Format Picture, you can adjust brightness, contrast, and sharpness, helping to fine-tune the visual impact after changing the perspective.
By combining these built-in tools, you can create professional-quality images directly within PowerPoint without the need for additional software.
Advanced Tips for Perfecting the Perspective
Once you’ve mastered the basics of changing an
image’s perspective in PowerPoint, you might want to fine-tune your skills. These advanced tips will help you perfect the perspective and make your images truly stand out. It’s all about paying attention to the details and using PowerPoint’s features creatively to achieve the best results.Here are some advanced techniques to try:
- Use Gridlines and Guides: Align your image with PowerPoint’s gridlines or guides. This will ensure the perspective is consistent with other elements on your slide, giving a cohesive look.
- Fine-tune the 3D Rotation: Instead of sticking to the basic rotation angles, experiment with subtle adjustments to the X, Y, and Z axes. Even small changes can make a big difference in how the image looks.
- Apply Gradient Fills: Using gradient fills can help simulate lighting effects, making the perspective adjustment more realistic. By adjusting the gradient, you can control where the light falls on the image, enhancing the 3D effect.
- Combine with Animation: Pair your perspective changes with animations to create a dynamic effect. For example, you can use the Fly In or Zoom animations to bring in images that have been adjusted for perspective, adding extra depth to your presentation.
- Experiment with Layering: Stack images on top of one another after adjusting their perspectives. By overlapping elements, you can create a visually compelling scene that draws the viewer’s attention.
With these advanced tips, your PowerPoint presentations will look more polished, and you’ll have greater control over how images appear on the slide.
Common Mistakes to Avoid When Adjusting Perspective
Adjusting the perspective of images can greatly enhance your presentation, but it’s also easy to make mistakes if you’re not careful. Being aware of common pitfalls can save you time and ensure your final product looks as professional as possible.Here are some common mistakes to watch out for:
- Over-rotating the Image: It’s tempting to go overboard with the 3D rotation feature, but too much rotation can distort the image and make it hard to recognize. Stick to subtle adjustments for a more natural look.
- Ignoring Image Quality: When you stretch or rotate an image too much, you risk losing clarity. Always make sure the image resolution is high enough to handle perspective changes without looking pixelated.
- Forgetting to Maintain Aspect Ratio: When resizing the image, avoid disproportionate scaling. Always hold down the Shift key while resizing to maintain the aspect ratio and avoid warping the image.
- Not Considering the Slide Layout:
Saving and Exporting Your Edited Image
Once you’ve adjusted the perspective of your image in PowerPoint, it’s important to know how to save and export it properly. Whether you want to use the edited image in another project or simply preserve your work, PowerPoint offers a few options to export high-quality images with ease. Let’s walk through how you can save and export your edited image to maintain its quality and adjustments.Follow these steps to save and export your edited image:- Right-Click the Image: Once you’ve finished editing your image, right-click on the image to bring up a context menu.
- Choose "Save as Picture": Select Save as Picture from the menu. This will allow you to save the image file directly to your computer.
- Select the File Format: You’ll be prompted to choose a file format for the image. Common formats include PNG (which supports transparency) and JPEG (for high-quality, compressed images).
- Name and Save: Enter a file name and select the location on your computer where you want to save the image. Click Save to export the image.
- Export Entire Slide (Optional): If you want to export the entire slide, including the image and text, go to File > Export and choose Change File Type. Select PNG or JPEG for high-quality exports of the entire slide.
By following these steps, you can save your edited image for future use, ensuring that the adjustments you’ve made to its perspective are preserved and ready to be included in other documents or presentations.Frequently Asked Questions (FAQs)
Here are some common questions people have about changing image perspective in PowerPoint, along with helpful answers:| Question | Answer |
|---|
| Can I undo perspective changes in PowerPoint? | Yes, you can easily undo any changes by clicking Undo (Ctrl + Z) or by using the Reset Picture option under the Picture Tools > Format tab. |
| What if the image becomes blurry after adjusting the perspective? | If your image becomes blurry, it might be due to low resolution. Try using a higher-resolution image to avoid losing quality when making adjustments. |
| Is there a way to lock perspective settings for an image? | No, PowerPoint doesn’t have a feature to lock perspective settings, but you can save the image as a picture file to preserve the adjustments you made. |
| Can I adjust the perspective of multiple images at once? | Unfortunately, PowerPoint doesn’t allow you to apply perspective changes to multiple images simultaneously. You’ll need to adjust each image individually. |
Conclusion: Enhancing Presentations with Perspective Adjustments
Adjusting the perspective of images in PowerPoint is a simple yet powerful way to make your presentations more dynamic and engaging. Whether you’re using subtle changes to create depth or going for a dramatic angle, understanding how to work with perspective can transform the overall feel of your slides. By following the steps and tips outlined in this guide, you can enhance your presentations and ensure that your visuals support your message in the best way possible.Remember to avoid common mistakes, experiment with advanced techniques, and always save your work properly for future use. The key to great presentations lies in finding the perfect balance between content and visuals, and mastering image perspective can help you achieve that balance.
 admin
admin


