Changing image colors in Figma is a powerful way to customize your designs and make them stand out. Whether you’re working on a brand logo, a social media graphic, or a presentation slide, Figma’s tools make color adjustments straightforward and creative. It’s a versatile platform that works seamlessly for beginners and professionals alike.
When you change the color of an image, you’re not just altering its appearance but also ensuring it fits your project’s overall theme. Figma offers several built-in tools to make this process smooth. From using overlays to advanced plugins, you have multiple options to experiment with. Understanding these tools will help you achieve the desired look for your designs efficiently.
Remember, color adjustments in Figma are non-destructive, meaning your original image remains intact. This feature allows you to experiment freely without worrying about losing your work.
Steps to Upload and Place an Image in Figma

Before making any color changes, you need to upload and position your image correctly in Figma. Here’s how you can do it:
- Step 1: Open your Figma project or create a new one.
- Step 2: Drag and drop your image directly onto the canvas or use the File menu to import it.
- Step 3: Adjust the size and position of the image using the selection tool. You can resize it by dragging the corners while holding the Shift key to maintain proportions.
Positioning the image correctly ensures it aligns well with other elements in your design. Once it’s in place, you’re ready to move on to color adjustments.
Also Read This: How to Create Stunning Dough Flowers Step by Step
How to Use Figma’s Built-In Tools for Color Adjustment

Figma comes equipped with built-in tools that simplify the process of changing image colors. Here’s a quick guide to using them:
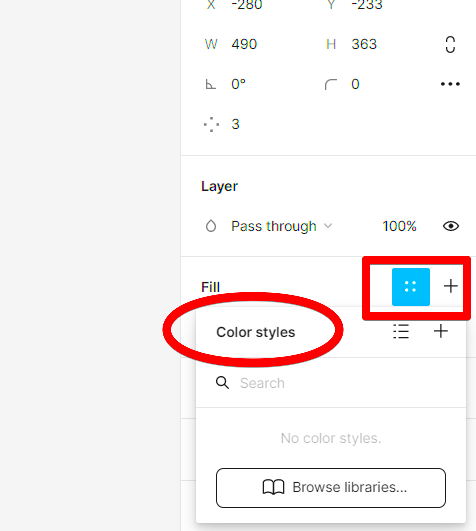
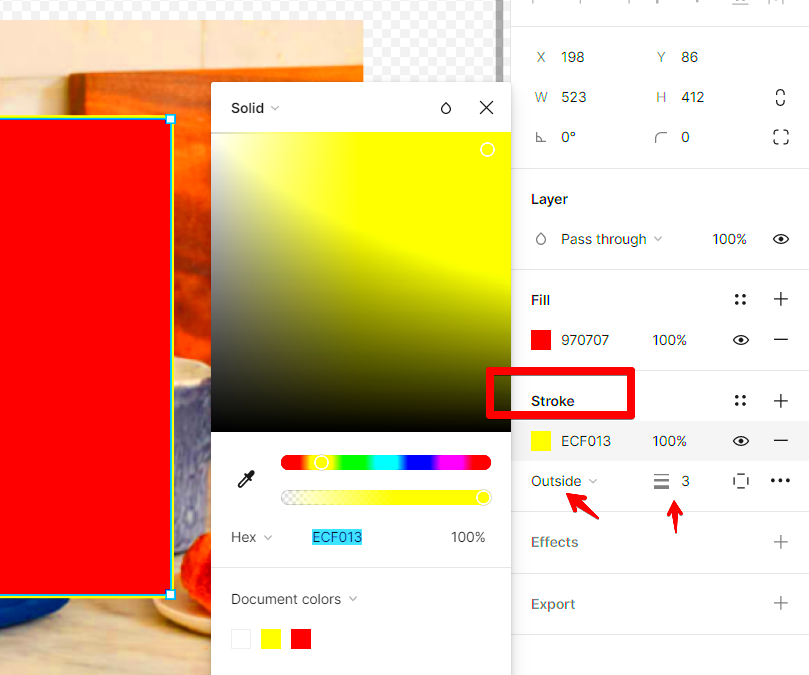
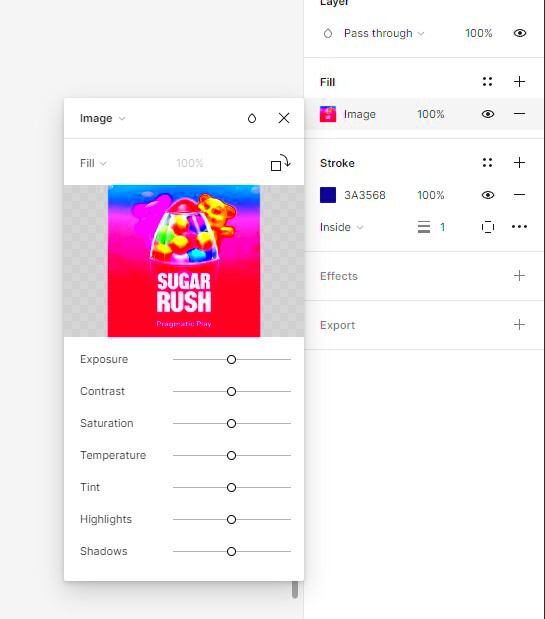
- Adjustment Layers: Use the Fill option in the right-hand panel to add a solid color layer over your image. You can control the opacity to blend it with the original image.
- Blend Modes: Experiment with blend modes like Multiply, Overlay, or Soft Light. These modes create unique color effects without losing image details.
- Filters: Apply filters such as brightness, contrast, and saturation adjustments by selecting your image and using the Effect panel.
These tools are intuitive and offer a lot of creative freedom. For example, you can add a blue overlay to give your image a calming tone or adjust the contrast for a more dynamic appearance. The best part? You can preview all changes in real time, ensuring you’re satisfied before finalizing.
Also Read This: Tips for Capturing Photos That Sell on Getty Images
Tips for Using Overlays to Change Image Colors

Overlays are one of the simplest and most effective ways to modify image colors in Figma. They work by adding a layer of color over your image, blending the two to create the desired effect. This technique is especially useful for creating unified color schemes or adding emphasis to specific design elements.
Here are some practical tips to get the best results:
- Choose the Right Color: Pick a color that aligns with your project’s theme or brand guidelines. Use Figma’s color picker to find shades that complement your design.
- Adjust Opacity: Experiment with the opacity slider to control how much of the overlay color shows. Lower opacity levels allow the original image details to shine through.
- Use Blend Modes: Combine overlays with blend modes like Multiply, Screen, or Overlay to achieve different effects. For example, the Screen mode can brighten your image, while Multiply can darken it.
- Layer Strategically: If you’re working with multiple images or text elements, ensure your overlays don’t overpower the rest of the design.
Overlays are versatile and easy to use, making them an excellent tool for beginners and pros alike. They allow you to create custom looks without altering the original image.
Also Read This: Exploring the Creative World of Design Possibilities with VectorStock
When to Use Third-Party Plugins for Image Color Customization
While Figma’s built-in tools are powerful, there are times when third-party plugins can make your work easier and more advanced. These plugins often provide additional features, like batch color adjustments or pre-set effects, that can save time and effort.
Here are some scenarios where plugins are helpful:
- Advanced Filters: If you need specific color effects, like duotone or gradients, some plugins offer more control than Figma’s default tools.
- Time-Saving Automation: For projects with multiple images, plugins can automate repetitive tasks like applying the same color adjustments to all images.
- Custom Color Libraries: Plugins like Image Palette can extract colors directly from an image, allowing you to create consistent designs.
To install a plugin, simply go to the Figma Community tab, search for the desired plugin, and click Install. Once installed, you can access it from the Plugins menu within your project. Plugins are perfect for tasks that go beyond Figma’s built-in capabilities, but always ensure they’re from trusted sources to maintain your project’s integrity.
Also Read This: How to Fix BIOS Image Errors: A Guide for Beginners
Common Mistakes to Avoid When Changing Image Colors
Adjusting image colors in Figma is straightforward, but mistakes can easily happen if you’re not careful. These errors can lead to inconsistent designs or poor visual quality. Here are some common mistakes and tips to avoid them:
| Mistake | Why It’s a Problem | How to Avoid |
|---|---|---|
| Overusing Saturation | Leads to unnatural and overly bright images. | Keep saturation adjustments subtle for a professional look. |
| Ignoring Blend Modes | Can make colors look flat and unappealing. | Experiment with blend modes for dynamic effects. |
| Skipping Layer Organization | Creates confusion in complex projects. | Label and group layers for easy navigation. |
| Not Previewing Changes | May result in poor alignment with the overall design. | Use Figma’s preview feature to see how changes affect the design. |
By staying mindful of these pitfalls, you can ensure your color adjustments enhance your designs instead of detracting from them.
Also Read This: How to Edit Adobe Stock Images: A Beginner’s Guide
FAQ About Changing Image Colors in Figma
When working on image color customization in Figma, many users encounter common questions. Below, we’ve answered some of the most frequently asked ones to help you master this feature:
-
Can I change the colors of a raster image directly in Figma?
No, Figma does not allow direct editing of raster images like PNGs or JPEGs. However, you can use overlays, blend modes, and filters to achieve similar effects. For detailed editing, consider using plugins or external tools like Photoshop before importing your image into Figma.
-
What are the best blend modes for color adjustments?
It depends on the effect you want to create. For darker tones, Multiply works well, while Screen is ideal for lighter effects. Experiment with Overlay or Soft Light for subtle changes.
-
How can I ensure color consistency across multiple images?
Use Figma’s color styles feature to save and reuse specific colors. You can also utilize plugins to batch apply adjustments to maintain uniformity.
-
Are there limitations to using Figma for image color changes?
Yes, Figma is not as advanced as dedicated photo editing software for detailed edits. However, it’s excellent for quick adjustments and creating design-ready visuals.
-
Can I undo my changes after adjusting colors?
Yes, Figma allows you to undo any changes using the Undo function (Ctrl+Z or Cmd+Z). Additionally, adjustments are non-destructive, so your original image remains untouched.
Conclusion
Changing image colors in Figma is a versatile skill that can elevate your design projects. By understanding the tools, avoiding common mistakes, and utilizing overlays or plugins when needed, you can create visually stunning designs efficiently. With these tips in hand, you’re well on your way to mastering Figma’s color adjustment features.


