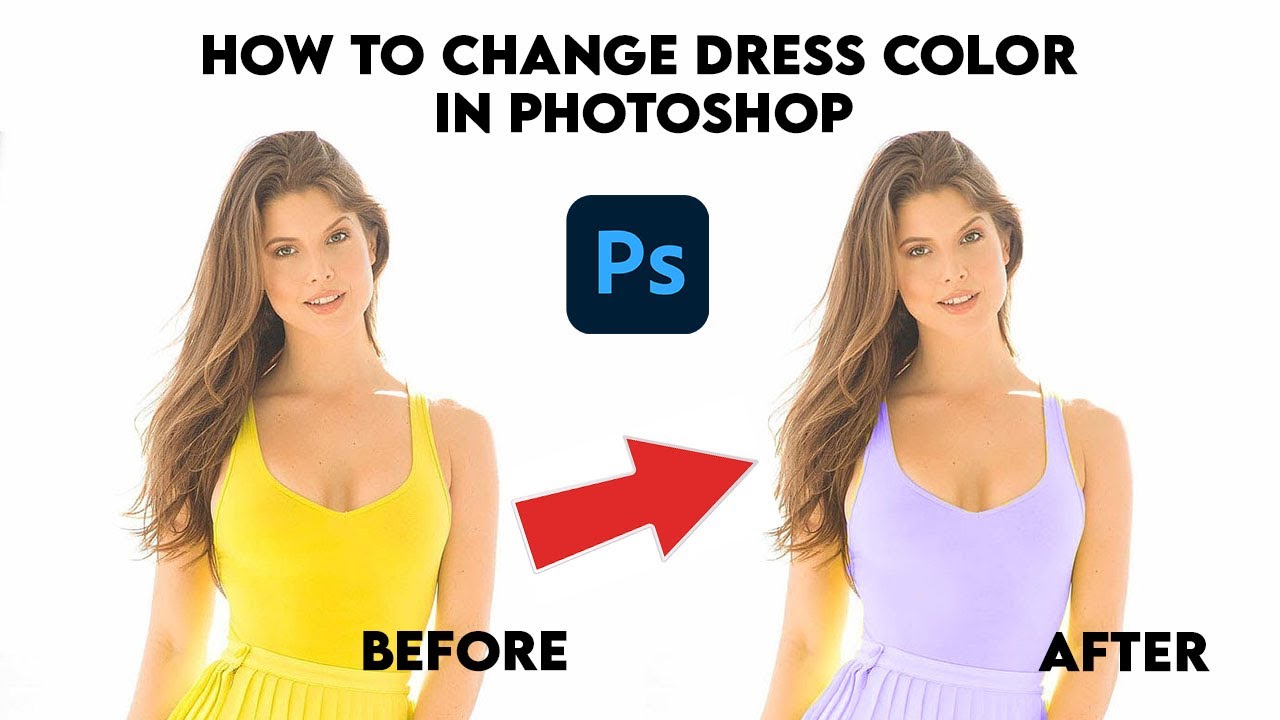
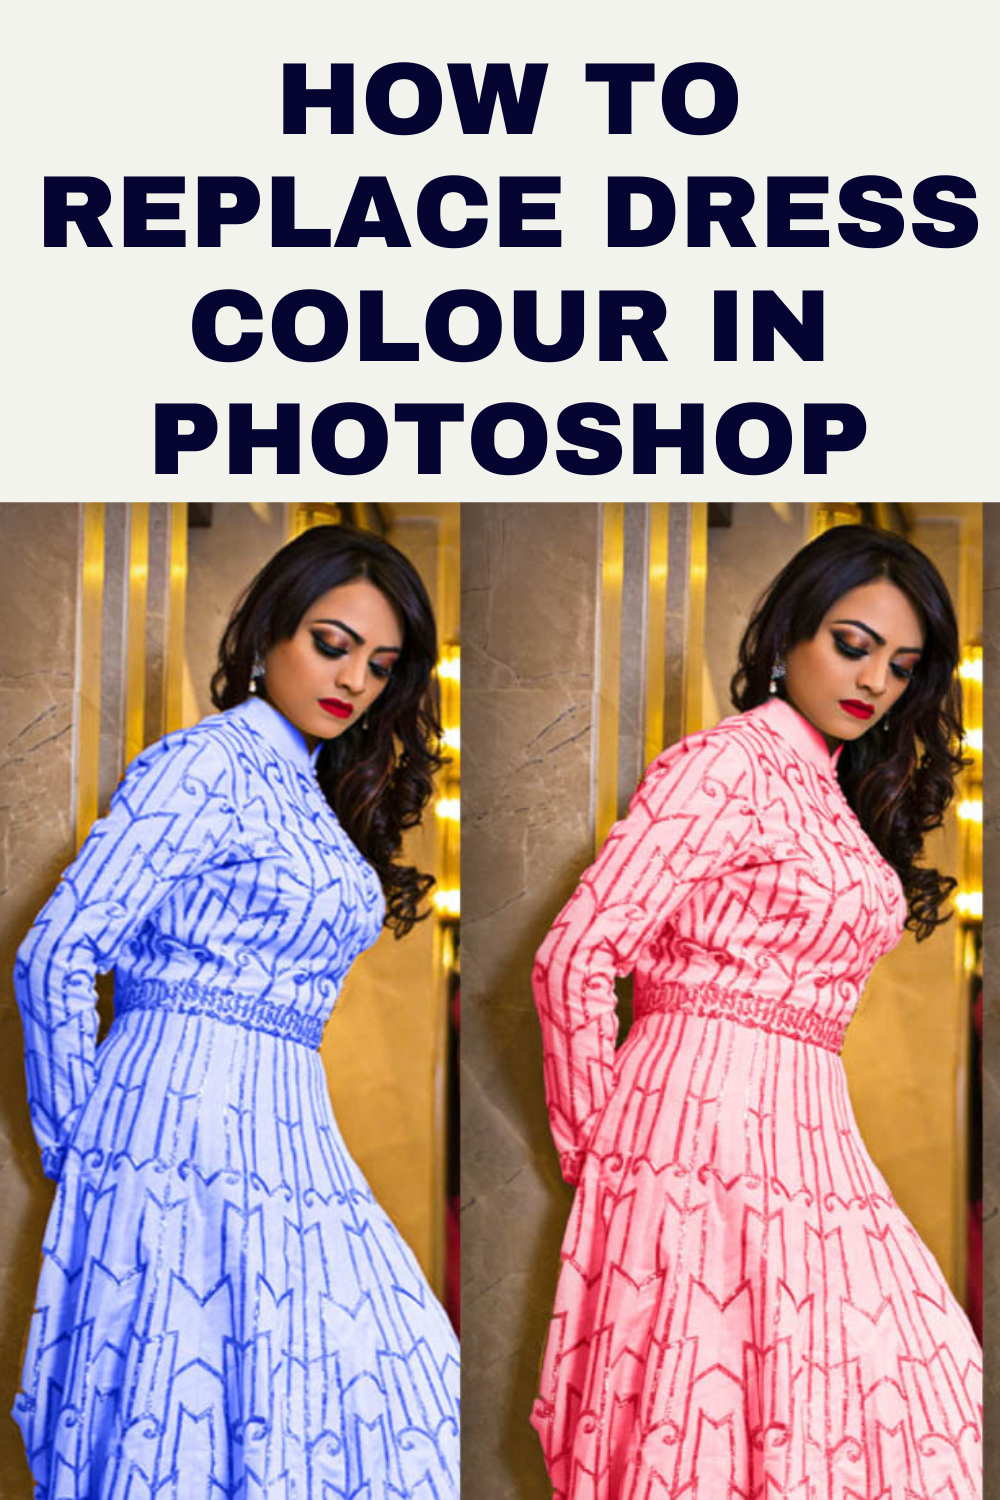
Introduction to Color Changing in Photoshop CS6
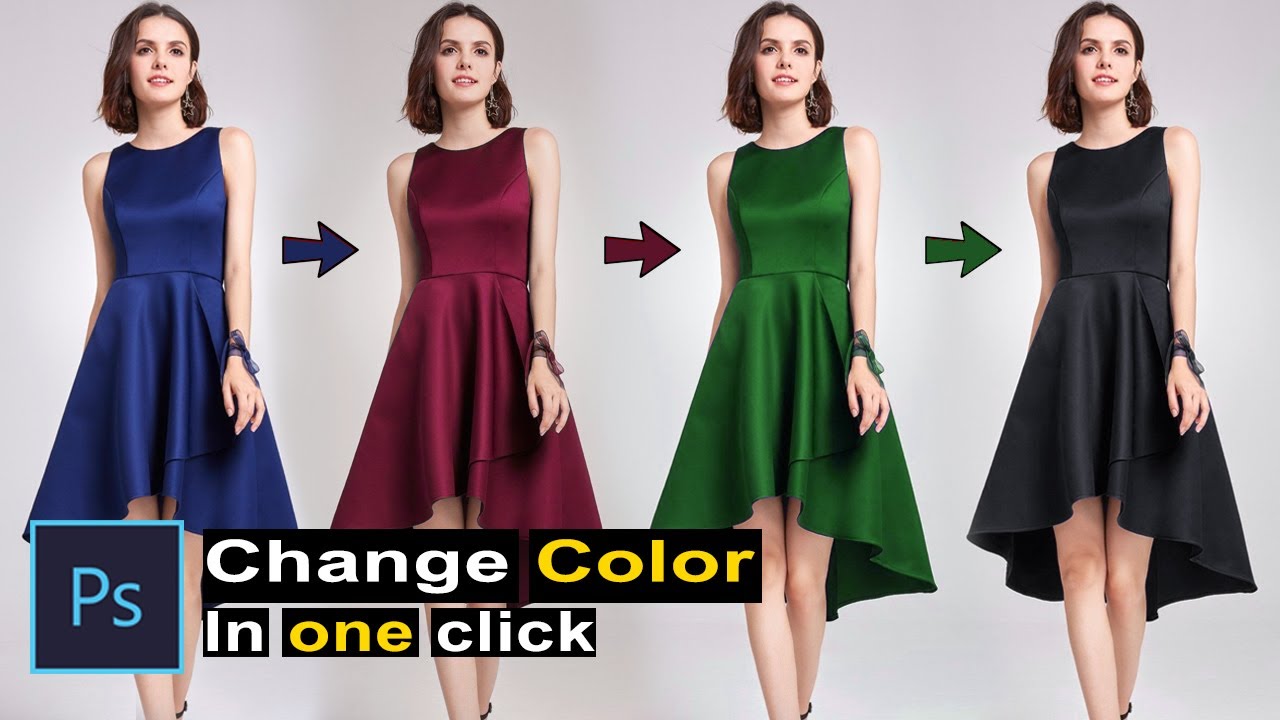
Changing the color of a dress in Photoshop CS6 is a fantastic way to unleash your creativity and enhance your photo editing skills. Whether you want to experiment with fashion designs or simply modify a picture for fun, understanding how to change colors effectively can transform your images. This guide will walk you through the process step-by-step, making it easy for even beginners to follow along. Let’s dive into the colorful world of Photoshop!
Also Read This: When Bob Became a Builder: Educational Clips Available on Dailymotion
Understanding the Tools Needed for Color Change
Before you start changing colors, it's essential to familiarize yourself with the tools and features in Photoshop CS6 that will make your task easier. Here’s a breakdown of the key tools you’ll be using:
- Magic Wand Tool: This tool selects areas based on color similarity. It’s especially useful for isolating the dress or any other object you want to change.
- Lasso Tool: For more precise selections, the Lasso Tool allows you to draw around the area you wish to color change. This is great for intricate designs or complex patterns.
- Hue/Saturation Adjustment Layer: This layer is crucial for changing the color of the selected area. It lets you manipulate the hue, saturation, and lightness to achieve the desired color.
- Brush Tool: Sometimes, you may need to refine your selection or touch up the edges. The Brush Tool is perfect for adding color to specific areas or correcting any mistakes.
- Layer Masks: Using masks helps you apply changes non-destructively. You can hide or reveal parts of your adjustment layer without permanently altering the original image.
Now, let’s look at these tools in more detail:
| Tool | Function | Tip |
|---|---|---|
| Magic Wand Tool | Selects areas by color | Adjust the tolerance for more accurate selections. |
| Lasso Tool | Draws around any area | Use the polygonal lasso for straight edges. |
| Hue/Saturation Adjustment Layer | Changes color properties | Experiment with sliders for best results. |
| Brush Tool | Applies color and refines edges | Use a soft brush for smoother transitions. |
| Layer Masks | Modifies visibility of layers | Paint with black to hide, white to reveal. |
With these tools in your arsenal, you’re equipped to start changing dress colors with confidence. The key is to practice and get comfortable with each tool’s functionality. As you become familiar with them, you’ll be amazed at how easy it is to give your photos a fresh new look!
Also Read This: How Does Dailymotion’s Video Recommendation System Work?
3. Step-by-Step Guide to Change Dress Color
Changing the color of a dress in Photoshop CS6 might sound daunting, but it’s actually quite straightforward! Let’s break it down into simple steps so you can follow along easily.
Step 1: Open Your Image
Launch Photoshop CS6 and open the image you want to edit. You can do this by going to File > Open and selecting your image file. Once it’s loaded, you’re ready to start!
Step 2: Select the Dress
The next step is selecting the dress. Use the Quick Selection Tool (W) from the toolbox. Carefully click and drag over the dress to select it. If you accidentally select other parts of the image, hold down the Alt key (Option key on Mac) to subtract from your selection. Make sure you have a clean selection for the best results.
Step 3: Refine Your Selection
Once you have the dress selected, it’s time to refine the edges. Go to Select > Refine Edge. Here, you can adjust the Radius slider to soften the edges. Zoom in to make sure the edges look smooth and natural. When you’re satisfied, click OK.
Step 4: Create a New Adjustment Layer
Now comes the fun part! With the dress still selected, go to Layer > New Adjustment Layer > Hue/Saturation. A new panel will pop up where you can adjust the color. Check the Colorize box to apply a uniform color to the dress.
Step 5: Adjust the Color
Use the sliders to change the Hue, Saturation, and Lightness. Try out different colors until you find one that you love. Don’t be afraid to experiment!
Step 6: Fine-tune Your Image
Once you’re happy with the color, you might want to dodge and burn certain areas to enhance shadows and highlights. Use the Brush Tool (B) set to a low opacity to carefully paint in shadows or highlights. This adds depth and realism to your edited dress.
Step 7: Save Your Work
Don’t forget to save your masterpiece! Go to File > Save As and choose a format that suits your needs (JPEG, PNG, or PSD if you want to keep the layers).
Also Read This: What Makes Dailymotion Distinct from Other Popular Video Platforms
4. Tips for Achieving Realistic Color Changes
Now that you know the steps to change dress color, let’s dive into some helpful tips to ensure those color changes look as natural as possible!
- Match the Lighting: Observe the lighting in your original image. Ensure that the new color you choose matches the light and shadow in the image. Colors can look drastically different in varying light conditions.
- Use Layer Masks: Layer masks are your best friend! They allow you to make adjustments without permanently altering the original image. This means you can easily go back and tweak your selection or color.
- Consider Fabric Texture: Different fabrics reflect light differently. For instance, a silk dress will have a different sheen compared to cotton. Adjust the Opacity or use different layers to simulate this effect.
- Experiment with Blending Modes: Try changing the blending mode of your adjustment layer. For instance, using Multiply or Overlay can create more complex and realistic color effects.
- Check for Color Clipping: Sometimes, colors can become overly saturated or clipped. Keep an eye on the Histogram to ensure your colors have a good range and aren’t washed out or too dark.
Remember, practice makes perfect! With these tips and the step-by-step guide, you'll be able to change dress colors in Photoshop CS6 like a pro in no time. Happy editing!
Also Read This: Understanding Dailymotion’s Strictness in Platform Rules and Guidelines
5. Common Mistakes to Avoid When Changing Colors
Changing dress colors in Photoshop CS6 can be a fun and creative process, but it's also filled with potential pitfalls. Here are some common mistakes to watch out for:
- Not Using Layers: One of the biggest blunders is modifying the original image directly. Always use layers! This allows you to experiment without damaging your original photo.
- Ignoring Feathering: When selecting the dress, many beginners forget to feather the selection edges. This can lead to harsh lines that make the change look unnatural. A feather of about 1-3 pixels can help smooth out those edges.
- Over-Saturation: It’s easy to get carried away with vibrant colors, but sometimes less is more. Over-saturated colors can make the dress look unrealistic. Keep an eye on how the new color complements the overall image.
- Forgetting Shadows and Highlights: Color isn’t the only thing that matters. Shadows and highlights play a crucial role in how the dress appears. If you change the color but neglect to adjust the shadows and highlights accordingly, the dress might not look three-dimensional.
- Not Checking Color Compatibility: Before you finalize a color, ensure it fits with the rest of the image. Test different shades to see how they interact with background colors and other elements.
By being aware of these mistakes, you can save time and frustration, making your editing process smoother and more enjoyable. Remember, practice makes perfect!
6. Enhancing Your Skills with Practice Projects
Now that you have a handle on changing dress colors, it’s time to enhance your skills with some fun practice projects. Here are a few ideas to get you started:
- Color Challenge: Choose a series of images with dresses in different colors. Try changing each dress to a completely different hue. This will help you understand how different colors interact with light and fabric.
- Fashion Collage: Create a collage of dresses from various sources. Change the colors of each dress to match a specific theme, like “Pastels” or “Neon Nights.” This will challenge your ability to maintain harmony in your color choices.
- Realistic Rendering: Find a photo of a dress that you love but wish was a different color. Change it and focus on blending the color into the shadows and highlights realistically. Pay attention to fabric textures as you apply the new color.
- Before and After Series: Document your progress by creating a “before and after” series. Change the dress colors in a selection of images and showcase how your skills have evolved over time.
- Join Online Challenges: Participate in Photoshop challenges on platforms like Reddit or Instagram. These often have specific themes or prompts that can inspire you to try new techniques.
Consistently engaging in these projects will not only improve your technical skills but also spark your creativity. So, grab your favorite images and start experimenting!
 admin
admin


