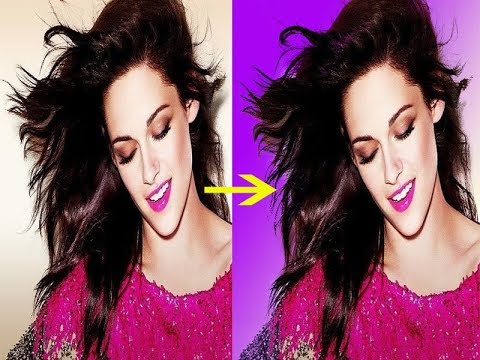
Changing backgrounds in Adobe Photoshop CS6 can transform your images from ordinary to extraordinary. Whether you’re looking to create a stunning visual for your social media, enhance a product photo, or simply have fun with your snapshots, understanding how to manipulate backgrounds opens a world of creative possibilities. This guide will provide you with clear and easy steps to change backgrounds, ensuring you can achieve the look you desire with confidence.
Step-by-Step Guide to Changing the Background
Let’s dive into the detailed steps for changing the background in Photoshop CS6. Follow these simple instructions, and you’ll be a pro in no time!
- Open Your Image: Launch Photoshop CS6 and open the image whose background you want to change. You can do this by clicking on File > Open and selecting your image file.
- Select the Subject: Use the Quick Selection Tool or the Pen Tool to carefully select the subject of your photo. Make sure to zoom in for precision. You can also use the Select > Inverse option if you’ve selected the background instead.
- Refine Your Selection: Once you have the initial selection, go to Select > Refine Edge. This tool allows you to smooth and feather your selection edges. Adjust the sliders until you’re satisfied with the selection.
- Remove the Background: With the subject selected, hit Delete on your keyboard to remove the background. You’ll see a transparent checkerboard pattern, indicating that the background is removed.
- Add a New Background: Now, open the desired background image by going to File > Place and selecting your new background. Adjust its size to fit the canvas using the Transform Tool (Ctrl + T).
- Position Your Layers: Make sure your new background layer is below your subject layer in the layers panel. This will ensure your subject stands out against the new background.
- Final Touches: Use adjustment layers to tweak the colors, brightness, and contrast. This step helps in blending the subject with the new background seamlessly.
By following these easy steps, you can create stunning images that captivate your audience and showcase your creativity! Happy editing!
Also Read This: Here is How to Download Dailymotion Videos Online with No Software
Using the Magic Wand Tool for Selection
The Magic Wand Tool is a lifesaver when it comes to quick background changes in Adobe Photoshop CS6. It's simple to use and perfect for selecting areas of similar color, making it ideal for backgrounds.
To get started, follow these easy steps:
- Select the Magic Wand Tool: You can find it in the toolbox on the left side of your workspace. It looks like a magic wand!
- Adjust the Tolerance: In the options bar at the top, set the tolerance level. A lower value (around 20) selects colors very similar to the pixel you click, while a higher value (up to 100) broadens the selection range.
- Click on the Background: Simply click on the area you want to change. The Magic Wand Tool will select all adjacent pixels of similar color.
- Add to Selection: Hold down the Shift key and click on other areas if the initial selection doesn’t cover everything.
It’s that easy! Just make sure your selection encompasses the entire background you wish to change. If you find that the edges are a bit rough, don’t worry—we've got a solution for that!
Also Read This: How to Make Embroidery Designs on Clothes: DIY Fashion Tutorial on Dailymotion
Refining the Edges of Your Selection
Once you’ve selected the background using the Magic Wand Tool, it’s time to refine those edges for a more professional look. Here’s how you can do it:
- Access the Refine Edge Tool: With your selection active, go to the top menu and select Select > Refine Edge. This opens up a new dialog box.
- Adjust the Radius: Use the Radius slider to create a smoother edge. A small radius (around 1-3 pixels) often works best for sharp edges.
- Use the Smart Radius: Check the Smart Radius box to automatically adjust the edge based on the details in your selection.
- Modify Edge Detection: Experiment with the Contrast and Fade Radius to enhance the edges further. This helps to blend the selection seamlessly with the new background.
- Output Options: Choose how you want to output the selection—either to a new layer with a mask or a new layer entirely. This keeps your original image intact while allowing you to work with the new background.
Refining edges gives you the flexibility to make your subject pop against the new background, ensuring a polished final result. Remember, practice makes perfect when it comes to selecting and refining in Photoshop!
Also Read This: How to Make a Facebook ID on Dailymotion
5. Inserting a New Background
So, you've got your subject all set, and now it’s time to jazz things up with a new background! This step is crucial because the right background can make your subject pop and enhance the overall look of your image. Here’s how to do it in a few simple steps:
- Open Your New Background: Start by selecting the background image you want to use. Go to File > Open and choose your desired background image. It’s best to use a high-resolution image for a professional finish.
- Copy the Background: With the new background open, use the Rectangular Marquee Tool (or Ctrl+A for all) to select the entire image. Then, copy it by pressing Ctrl+C.
- Paste into Your Main Image: Switch back to your main image where you’ve isolated your subject. Paste the new background by pressing Ctrl+V. This creates a new layer for your background.
- Adjust Layer Position: Make sure your new background layer is below your subject layer in the layers panel. You can drag the layers to rearrange them.
And voilà! You now have a new background behind your subject. But don’t rush just yet; let’s make some final adjustments to ensure everything looks perfect.
Also Read This: How to Master Football Skills Like Cristiano Ronaldo on Dailymotion
6. Final Adjustments and Saving Your Work
Now that you’ve inserted your new background, it’s time to make those final tweaks to ensure your image looks cohesive. Here’s how to finalize your masterpiece:
- Resize and Position: Use the Transform Tool (Ctrl+T) on your background layer to resize it and fit it perfectly behind your subject. Hold down Shift while dragging to maintain proportions.
- Adjust Colors: Sometimes, the colors between your subject and background might not match. Go to Image > Adjustments > Color Balance or Hue/Saturation to tweak the tones until they blend seamlessly.
- Add Filters: If needed, apply filters to your background for effects like blur (to create depth) or sharpening. This can help draw attention to your subject.
- Save Your Work: Once you’re satisfied, it’s time to save! Go to File > Save As and choose a format. For web use, save as JPEG; for future edits, save as a Photoshop (PSD) file.
And there you have it! Your image is ready to shine. With these easy steps, you’ve transformed your photo with a new background, and now it’s a piece of art worth sharing!
Also Read This: How to Eliminate the YouTube Ad Blocker Pop-Up
How to Change Background in Adobe Photoshop CS6: Easy Steps to Follow
Changing the background in Adobe Photoshop CS6 can enhance your images and create stunning visual effects. Whether you want to replace a boring background with a vibrant one or remove an unwanted backdrop, the process is straightforward when you follow these easy steps.
Here’s a step-by-step guide:
- Open Your Image: Launch Photoshop CS6 and open the image you want to edit by selecting File > Open.
- Select the Background: Use the Quick Selection Tool or Magic Wand Tool from the toolbar to select the background you wish to change. Adjust the tool size for better accuracy.
- Refine Your Selection: Go to Select > Refine Edge to fine-tune your selection edges. Utilize the Radius and Contrast sliders for smoother edges.
- Remove the Background: After refining, click OK. Then, press the Delete key to remove the selected background.
- Add a New Background: You can now add a new background. Open the new background image and drag it into your original document. Place it below your main image layer in the Layers panel.
- Adjust and Save: Finally, adjust the positioning and scaling of your layers as needed. Save your work by selecting File > Save As to preserve your original image.
By following these steps, you can easily change the background of your images in Photoshop CS6, giving them a fresh new look and feel.
Conclusion and Tips for Future Projects
Changing backgrounds in Photoshop CS6 is a skill that can greatly enhance your photo editing capabilities. Remember to experiment with different backgrounds and selections to discover unique styles that suit your vision. Practice makes perfect!
 admin
admin