Are you looking to preserve your favorite YouTube videos offline? Burning them to a CD can be a great solution! Not only does it allow you to watch your favorite content anytime, but it also gives you a tangible copy to share. In this guide, we’ll walk you through the process step-by-step while keeping it fun and straightforward. So grab your CDs and let’s dive in!
Understanding the Legal Aspects of Downloading YouTube Videos

Before you hit that download button, it’s crucial to understand the legal landscape surrounding downloading YouTube videos. While it might seem harmless, there are several factors to consider to avoid potential legal issues:
- YouTube's Terms of Service: According to YouTube's Terms of Service, downloading videos without permission is against their rules. They specify that content creators retain copyright over their work, and unauthorized downloading can infringe on these rights.
- Copyright Law: In many countries, copyright laws protect the content created by individuals. Downloading videos for personal use may seem trivial, but sharing them or using them for commercial purposes without permission could lead to serious penalties.
- Public Domain Content: Not all content on YouTube is copyrighted. Some videos are released under Creative Commons licenses or are in the public domain. These can be legally downloaded and used, but it’s essential to check the licensing before proceeding.
Here’s a quick breakdown of what you can legally do:
| Use Case | Legal? | Notes |
|---|---|---|
| Personal Use | Gray Area | Some argue it’s okay, but it’s technically against YouTube’s terms. |
| Sharing with Friends | No | Sharing copyrighted content can lead to legal issues. |
| Commercial Use | No | Using videos for profit without permission is illegal. |
| Creative Commons Videos | Yes | Always check the license for specific terms. |
In summary, while downloading YouTube videos to burn onto a CD may seem like a harmless endeavor, it’s essential to do so within the bounds of the law. Always respect copyright and the wishes of the content creators. If you're unsure, it’s best to err on the side of caution and seek permission or choose content that’s explicitly allowed for download.
Also Read This: Where Can I Download Videos from YouTube? Legal and Safe Ways to Download YouTube Content
3. Necessary Tools and Software for Burning Videos
Before you dive into burning YouTube videos to a CD, it's essential to gather the right tools and software. Having the right setup can make the entire process smooth and hassle-free. Here’s what you’ll need:
- Computer: A PC or Mac with a CD/DVD drive is a must. If your laptop doesn’t have one, an external CD/DVD burner will work just fine.
- Internet Connection: Since you're downloading videos from YouTube, a stable internet connection is crucial for faster download speeds.
- Video Download Software: Look for reliable software to grab those YouTube videos. Some popular choices include:
- 4K Video Downloader: Simple interface and supports various formats.
- YTD Video Downloader: Great for batch downloads and converting formats.
- Freemake Video Downloader: Offers multiple format options and is user-friendly.
- CD Burning Software: After downloading, you'll need software to burn the videos onto a CD. Some effective options are:
- Nero Burning ROM: A classic choice, known for its reliability and features.
- CDBurnerXP: Free and easy to use, perfect for Windows users.
- ImgBurn: Lightweight and offers various advanced features for burning discs.
- Blank CDs: Lastly, don’t forget to grab some blank CDs! Make sure they are compatible with your burner (CD-R or CD-RW).
Once you have everything set up, you're ready to move on to the next step. With the right tools at your disposal, you’ll find that downloading and burning videos is not only easy but also quite enjoyable!
Also Read This: Is NoteBurner YouTube Music Converter Safe to Use? A Comprehensive Review
4. Step 1: Downloading YouTube Videos
Now that you have all your tools ready, it’s time to download those YouTube videos! Follow these simple steps to make sure you get your videos without any hassle:
- Choose Your Video: First, head over to YouTube and find the video you want to download. Copy the URL from the address bar.
- Open Your Video Downloader: Launch the video download software you decided on earlier. Each software has a slightly different interface, but the basic steps are generally similar.
- Paste the URL: In your chosen downloader, look for an option that says “Paste URL” or “Download.” Click on it and paste the YouTube link you copied. Most software will automatically analyze the video.
- Select the Format: After the analysis, you’ll usually see options for different formats and resolutions. Choose the format that suits your needs best. For CDs, MP4 is a popular choice due to its compatibility.
- Start the Download: Hit the “Download” button and wait for the software to fetch your video. The time it takes will depend on your internet speed and the video's length.
- Check Your Download: Once the download is complete, navigate to your downloads folder to ensure the video file is there. Play it to confirm the quality before moving on.
And voilà! You’ve successfully downloaded your YouTube video. With this first step complete, you’re now prepared to move on to the exciting part—burning that video onto a CD!
Also Read This: Does YouTube TV Offer Bally Sports? Regional Sports Access
5. Step 2: Converting Videos to CD-Compatible Format
Now that you've got your YouTube video downloaded, it's time to convert it into a format that your CD burner can understand. Most CD players require specific formats, so let’s get this right!
First, *choose a conversion tool*. There are many options out there, both free and paid. Some popular choices include:
- HandBrake: An open-source tool that handles a variety of formats.
- Freemake Video Converter: User-friendly and supports multiple formats.
- Any Video Converter: Great for batch conversions if you have multiple videos.
Once you’ve selected your converter, follow these steps:
- Open Your Conversion Software: Launch the application and look for an option to import the video file you downloaded.
- Select the Output Format: For CD compatibility, you’ll typically want to choose formats like MPEG, VCD, or AVI. Check the settings to see what your CD burner supports.
- Adjust Settings: Many programs allow you to adjust video and audio settings. For CDs, a resolution of 640x480 is generally sufficient.
- Start the Conversion: Hit the convert button and wait for the process to complete. This may take some time depending on the size of your video.
Once the conversion is complete, you’ll have a file that’s ready to be burned onto a CD! Make sure to check the newly created file to ensure the quality is up to your standards. You wouldn't want to burn a CD with glitchy video, right?
Also Read This: How to Make a Roblox YouTube Thumbnail for Your Gaming Videos
6. Step 3: Preparing Your CD Burner
With your video now in CD-compatible format, it’s time to prepare your CD burner. This step is crucial to ensure that your video will play smoothly on CD players. Here’s how to get it all set up.
First, ensure that you have the appropriate blank CDs. You'll typically want to use:
- CD-Rs: These are perfect for burning videos, as they can only be written to once.
- CD-RWs: If you want the option to erase and re-burn your CD, go for CD-RWs.
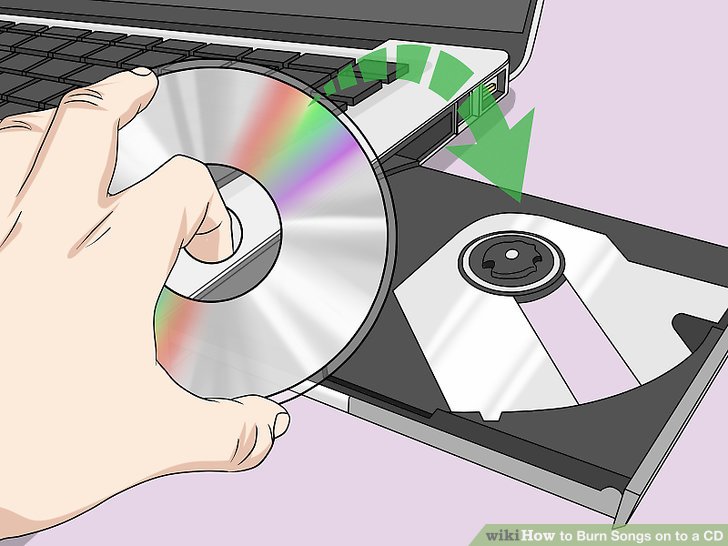
Next, follow these simple steps to prepare your burner:
- Insert the Blank CD: Place it into your CD drive. Wait for your computer to recognize it.
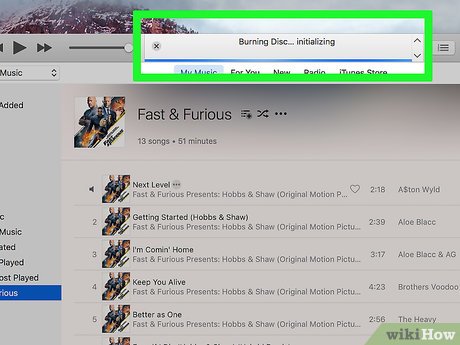
- Open Your CD Burning Software: Popular options include Nero, Roxio, or even Windows Media Player. Choose one that you are comfortable with.
- Select the Option to Create a Video CD: This option may be labeled differently depending on the software. Look for something like “Create Video CD” or “Burn Video Disc.”
- Add Your Video File: Import the video file you previously converted. Most software allows you to drag and drop the file easily.
- Check the Burn Settings: Make sure everything looks good. You might want to check the burn speed; slower speeds can lead to better quality.
After you've set everything up, you're ready to burn your CD! Click the burn button and wait patiently as the software does its magic. Once complete, take a moment to label your CD so you know what's on it for future reference.
And there you have it! You now have a CD with your favorite YouTube video, ready to be played anywhere. Enjoy your viewing experience!
Also Read This: What Happened to Georgie's Face on Young Sheldon YouTube? Uncovering the Story
7. Step 4: Burning the Video to CD
Alright! Now that you’ve downloaded your YouTube video and ready to take the next step, it’s time to burn that video onto a CD. This part can be quite satisfying, but let’s make sure we do it right!
First, you’ll need to gather a few supplies:
- A blank CD-R or CD-RW (CD-R is preferable for compatibility)
- A CD/DVD burning software (like ImgBurn, CDBurnerXP, or Nero)
- Your downloaded YouTube video file
Let’s jump into the steps:
- Open your CD burning software: Launch the application you’ve chosen. Most software will have a straightforward interface, so it shouldn't be too complicated to navigate.
- Select the option to create a data disc: Look for an option that says “Create Data Disc” or something similar. You want your video to be treated as a file rather than a music CD.
- Add your video file: Click the “Add” or “Browse” button and navigate to where your downloaded video is stored. Select the video and confirm that it’s added to the burning queue.
- Adjust settings if necessary: Check if there are any specific settings you want to adjust. For instance, you can sometimes choose the write speed. Lower speeds can offer better results.
- Insert your blank CD: Make sure your CD drive is empty and insert your blank CD. The software should recognize it.
- Start burning: Once everything looks good, click “Burn” or “Start.” Sit back and relax while the software does its magic. This process may take a few minutes, depending on the video size.
Once the burning process is complete, the software will usually notify you. Don’t forget to safely eject the CD and give it a quick test on a DVD player or computer to ensure it plays correctly. And just like that, you now have your YouTube video on CD!
8. Troubleshooting Common Issues
Sometimes, things don’t go as smoothly as we hope. But don’t worry! Here are some common issues you might encounter while burning a YouTube video to a CD, along with solutions.
- Issue: The CD is not recognized by the burner.
- Issue: The burning process fails.
- Issue: The video doesn’t play after burning.
- Issue: The burned CD skips or has glitches.
Make sure you’re using a compatible blank CD. If your software requires a specific type, like CD-R, using a CD-RW might cause issues. Also, try cleaning the CD drive.
This could be due to a variety of reasons. Ensure that your download isn’t corrupted and that there’s enough space on your hard drive. Sometimes, a restart can resolve lingering software issues.
Check if the format of the video file is compatible with your CD player. If you used a different format (like .MKV), it may not play on standard players. Converting it to a more compatible format like .MP4 might solve this issue.
Try lowering the burn speed in your software settings. Burning at a slower speed can often yield better playback performance.
Finally, if all else fails, consider researching the specific error messages your software displays. Forums or the help section of your burning software can often provide additional insights. Don't get discouraged; with a little trial and error, you’ll become a CD-burning pro in no time!
 admin
admin


