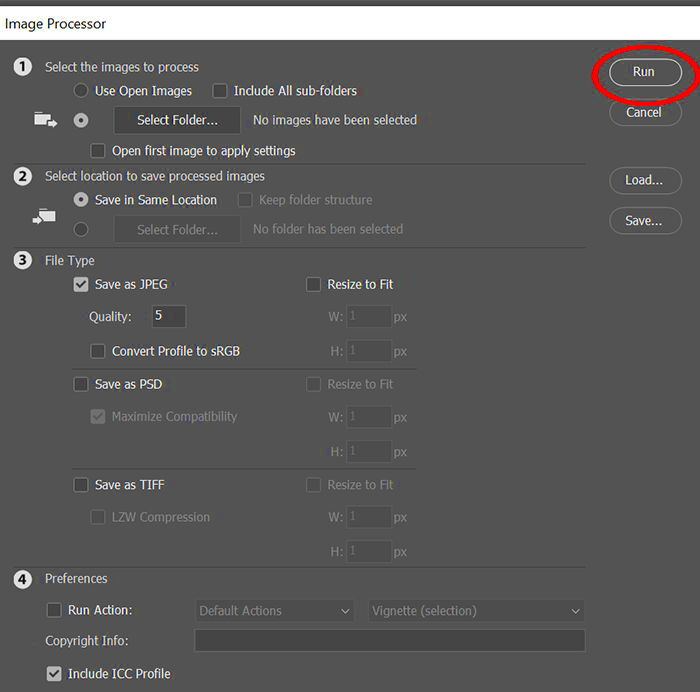
Batch resizing images is a technique that allows you to resize multiple images at once, rather than one by one. This method saves you time and effort, especially when dealing with large image collections. Whether you're preparing images for a website, social media, or a presentation, batch resizing can simplify the process significantly. It’s an efficient way to maintain consistency across your visuals, while also optimizing file sizes for faster loading times and better performance.
Why Batch Resize Images?
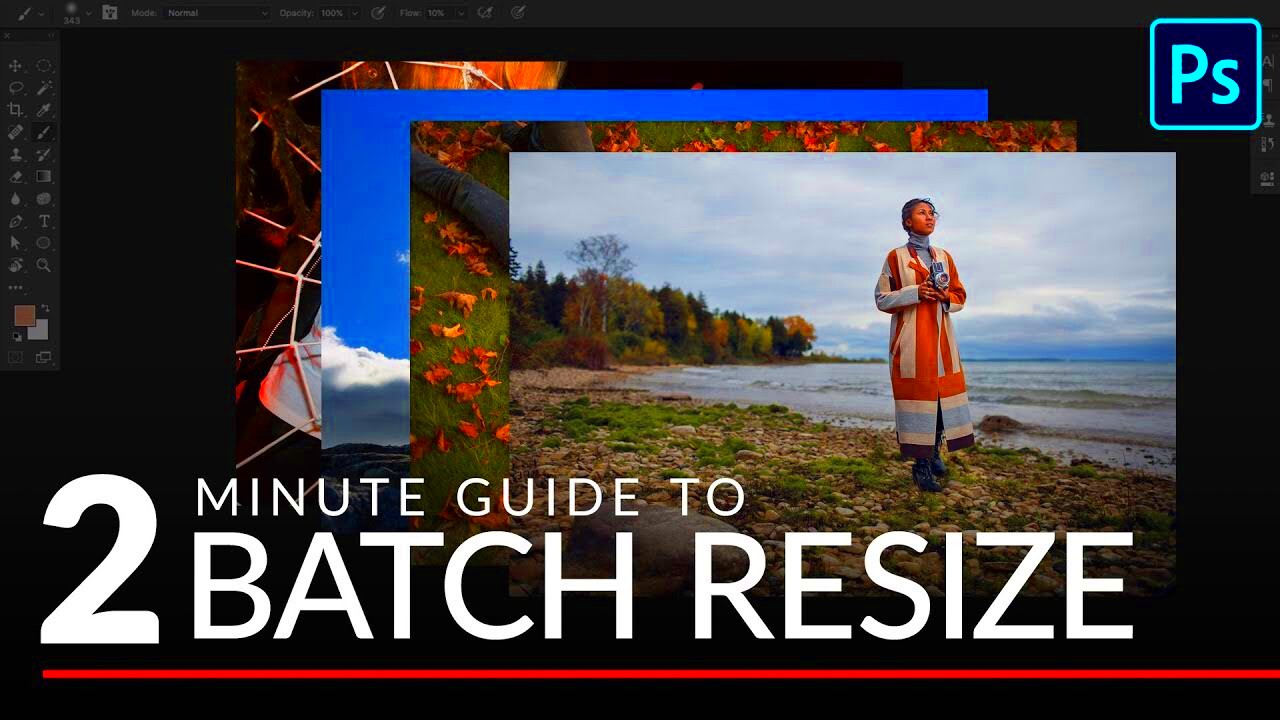
Batch resizing images can make a big difference in several areas, particularly when managing large numbers of photos or graphics. Here’s why you should consider it:
- Time-saving: Resizing images one by one can take up a lot of time. By using batch resizing, you can resize hundreds or even thousands of images in a fraction of the time.
- Consistency: When resizing images in bulk, you ensure all your visuals have the same dimensions, helping create a consistent look across your website, portfolio, or social media accounts.
- Storage Efficiency: Resized images tend to be smaller in file size, which means they occupy less storage space, making it easier to manage and back up your files.
- Improved Website Performance: Smaller image sizes help websites load faster, providing a better experience for visitors. Batch resizing ensures that your website images are optimized without sacrificing quality.
Whether you’re working on an online portfolio, blog, or an e-commerce store, batch resizing will streamline your workflow and help you meet the requirements of various platforms more effectively.
Also Read This: How to Add Subtitles to YouTube Shorts and Make Your Videos Accessible
Choosing the Right Tool for Batch Resizing
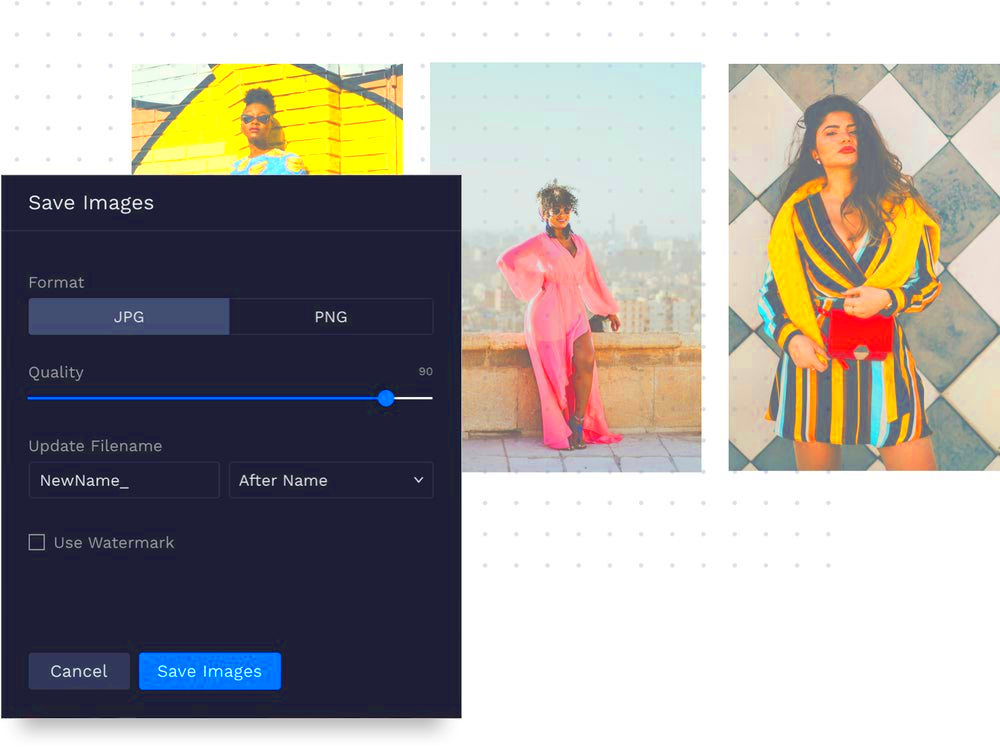
There are many tools available for batch resizing images, but picking the right one is crucial for saving time and ensuring quality results. When choosing a batch resizing tool, consider the following factors:
- Ease of Use: Choose a tool with a user-friendly interface, so you don’t have to waste time figuring out how to use it. A good tool should be intuitive and simple to navigate.
- Customization Options: Look for a tool that offers a variety of settings, such as resizing by percentage or specific dimensions. Some tools even allow you to adjust the aspect ratio and resolution for the best results.
- Batch Processing Speed: The main advantage of batch resizing is speed. Pick a tool that can handle a large number of images quickly without compromising quality.
- File Format Support: Ensure the tool supports all the image formats you need (JPEG, PNG, GIF, etc.). Some tools also allow you to convert file formats during the resizing process, which can be helpful.
- Cost: While many batch resizing tools are free, others offer additional features at a price. Evaluate the tool’s features and decide if it’s worth investing in a premium version for added benefits.
Popular tools like Photoshop, IrfanView, and GIMP are great for advanced users, while simpler tools like Image Resizer or TinyPNG might suit beginners. Test a few options to see which one works best for your needs.
Also Read This: How to Upload to Behance Understanding the Upload Process for Creative Projects
How to Batch Resize Images with Simple Steps
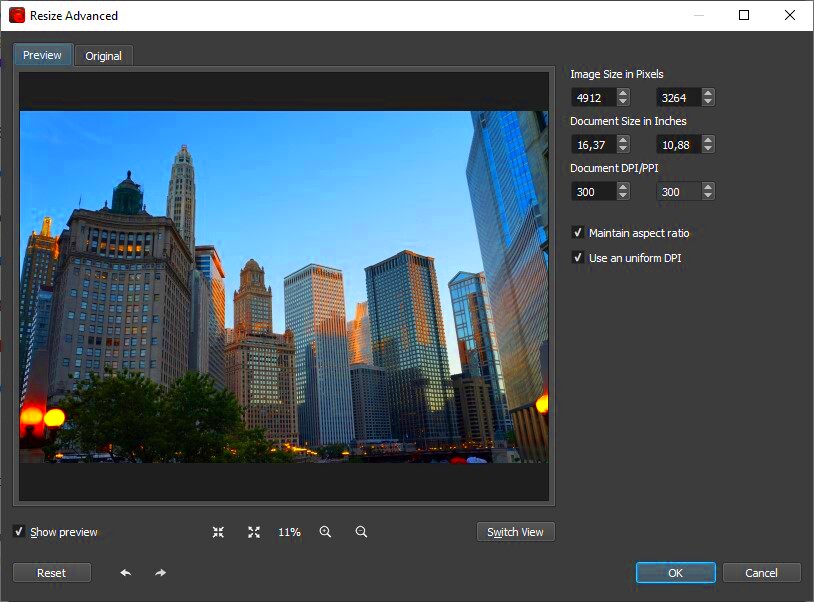
Batch resizing images doesn’t have to be complicated. By following a few easy steps, you can resize multiple images in no time. Whether you're using a software application or an online tool, the process is similar. Here's how you can do it:
- Select Your Images: Start by selecting the images you want to resize. Most tools allow you to choose multiple files at once. Simply click to highlight the images, or select an entire folder if needed.
- Choose Your Resize Option: Next, decide on how you want to resize the images. You can typically resize by dimensions (height and width), percentage, or file size. Select the method that works best for your project.
- Set Your Desired Size: After selecting your resize option, input the new size. For example, you can specify the width or height in pixels or set a percentage for scaling. Many tools will maintain the aspect ratio by default, ensuring your images don’t stretch or distort.
- Preview the Changes: Some tools allow you to preview the resized images before finalizing. This step helps you make sure everything looks correct and avoids any mistakes.
- Batch Process the Images: Once you’re satisfied with your settings, simply click the “Resize” button to process all the selected images at once. The tool will automatically apply the changes to each image in your batch.
That’s it! With these simple steps, you can efficiently resize a batch of images and get them ready for whatever project you’re working on.
Also Read This: Monthly Costs for Adobe Stock Photography
Key Settings to Adjust When Resizing Images
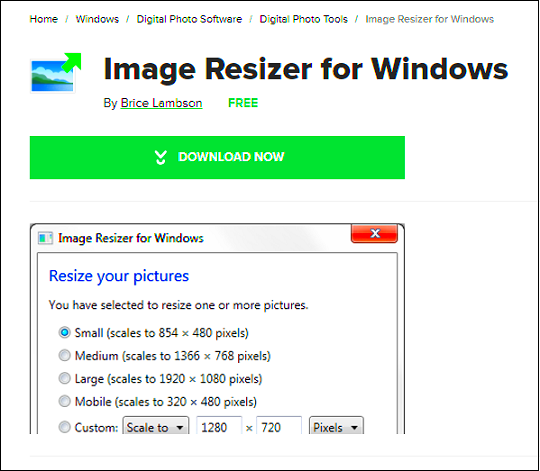
When resizing images, several key settings can affect the outcome. Understanding these settings ensures you get the best results without losing image quality. Here are the main settings to consider:
- Dimensions: This setting refers to the width and height of your image. If you're resizing for a specific platform, make sure to input the correct dimensions. For example, social media platforms often have preferred sizes for profile pictures or posts.
- Aspect Ratio: The aspect ratio maintains the proportion between the width and height of an image. Keep this locked to avoid stretching your image. This is particularly important if you want your images to retain their original proportions.
- Resolution: Resolution is the level of detail in an image. Higher resolutions result in sharper, clearer images, but they also increase file size. If you’re resizing for the web, aim for a resolution around 72 DPI (dots per inch), which is standard for screen displays.
- File Format: Depending on your needs, choose the best file format for your resized image. JPEG is great for photos, PNG is ideal for transparent images, and GIF is commonly used for animated images.
- Quality: Many tools offer a quality setting when resizing. Lowering the quality reduces the file size but may also reduce the visual sharpness. Find a balance between file size and quality that works for you.
Adjusting these settings carefully can help you optimize your images for different uses, ensuring they look great and load quickly on websites or social media platforms.
Also Read This: Enhance Your YouTube Shorts with Creative Effects
Common Mistakes to Avoid When Batch Resizing Images
While batch resizing images is a great time-saver, there are a few common mistakes that can negatively affect the quality of your images or cause other issues. Here are the most common pitfalls to avoid:
- Not Keeping the Aspect Ratio: Forgetting to maintain the aspect ratio is a frequent mistake. When you change the width or height without keeping the ratio locked, your images may become stretched or squished, leading to an unnatural appearance.
- Resizing to Too Small a Size: Reducing image sizes too much can cause a loss of detail. Avoid resizing images to very small dimensions if you need them for print or high-quality display. Always make sure the final size meets your needs.
- Forgetting to Adjust Resolution: Resizing without considering resolution can lead to poor image quality, especially if the image is too small or low-res for its intended use. If you’re using images for print, aim for a higher resolution (300 DPI); for web use, 72 DPI is usually sufficient.
- Not Previewing Changes: Skipping the preview step can result in unwanted surprises. Always take a moment to preview your resized images to ensure they look correct before finalizing the changes.
- Using the Wrong File Format: Choosing an inappropriate file format for your resized image can affect its quality and file size. For example, using JPEG for images that require transparency won’t work. Always select the correct format based on your needs.
By being mindful of these common mistakes, you can ensure your batch resizing process runs smoothly and results in high-quality images that meet your requirements.
Also Read This: How to Edit a YouTube Video That Is Not Yours
How to Automate the Batch Resizing Process
Automating the batch resizing process can save you even more time, especially when you frequently work with large numbers of images. By using the right tools, you can set up a system where images are resized automatically, without manual intervention. Here’s how you can automate this process:
- Use Automated Software: Some software applications, like Photoshop or GIMP, allow you to create scripts or actions that automatically resize images based on your set parameters. You can apply these actions to multiple images in one go, so you don’t have to resize each image manually.
- Online Tools with Automation: Many online tools also offer batch processing features. Some of them allow you to upload a batch of images, set the desired output size, and let the tool process everything automatically. Look for tools that allow you to save your settings for future use.
- Create Batch Resize Workflows: If you use software like Adobe Lightroom or ImageMagick, you can set up workflows to handle batch resizing. These workflows can include tasks such as resizing, renaming, and even converting file formats in one go, all with a simple click.
- Set Time-Based Resizing Tasks: If you regularly need to resize images at specific times (e.g., daily or weekly), consider scheduling these tasks. Tools like Automator (for Mac) or Windows Task Scheduler can run resizing scripts at scheduled intervals.
- Use Cloud-Based Solutions: Cloud-based tools like Google Drive or Dropbox, when combined with automation apps (like Zapier), can be set up to automatically resize images as they’re uploaded to your cloud storage.
Automating batch resizing can save you hours of work, improve workflow consistency, and ensure your images are always resized according to your preferred settings.
Also Read This: How to Share Your Portfolio on Behance
Best Practices for Resized Images in Web and Social Media Use
When resizing images for web or social media use, it’s essential to optimize them not just for size, but also for visual quality and performance. Here are some best practices to keep in mind:
- Optimize File Size for Faster Loading: Large images can slow down website load times, which can negatively impact user experience and SEO rankings. Aim to reduce image file sizes without compromising quality. Tools like TinyPNG or JPEGmini can help with this.
- Use Correct Image Dimensions for Each Platform: Different platforms require different image sizes. For example, Instagram prefers square or vertical images, while Facebook has specific dimensions for cover photos and ads. Check the recommended sizes for each platform and resize your images accordingly to avoid pixelation or stretching.
- Choose the Right File Format: For web use, JPEGs are often the best choice for photos, as they provide a good balance between quality and file size. PNGs are better for images that require transparency, like logos. GIFs are perfect for simple animations, while WebP is a modern format that offers excellent compression without sacrificing quality.
- Ensure Proper Resolution: For web use, a resolution of 72 DPI (dots per inch) is typically sufficient, as it provides a good balance between quality and file size. For print, however, 300 DPI is the standard. Always adjust the resolution according to the intended medium.
- Check Image Quality After Resizing: Always preview resized images before publishing them online. Sometimes, resizing can cause a loss of sharpness or detail, especially if the image was reduced too much. Aim for clear, crisp images that look great on all devices.
Following these best practices ensures your images will perform well on websites and social media, making your content more visually appealing and improving user engagement.
Also Read This: Understanding the Age Requirements to Use Behance
FAQ
1. What is batch resizing?
Batch resizing is the process of resizing multiple images at once instead of one by one. It saves time and ensures consistency in image dimensions across a collection.
2. Can I resize images online?
Yes, many online tools allow you to resize images in bulk. Some popular options include TinyPNG, BatchPhoto, and Adobe Express, all of which offer simple interfaces for resizing multiple images simultaneously.
3. How can I resize images for social media?
To resize images for social media, you need to follow the recommended image sizes for each platform. For instance, Instagram posts typically use square images (1080x1080 pixels), while Facebook cover photos are best at 820x312 pixels. Use an online tool or software to adjust the size to fit each platform’s requirements.
4. Does resizing images affect quality?
Yes, resizing images can affect their quality, especially if they’re resized too much or too small. Always ensure you keep a good balance between file size and resolution for the intended purpose, and check the quality after resizing.
5. How do I automate the resizing process?
Automation can be achieved using batch resizing tools that allow you to set preset dimensions, resolution, and other settings. Software like Photoshop allows you to create actions, and online tools often have batch processing options that handle resizing automatically.
6. What’s the best image format for the web?
JPEG is commonly used for web images as it offers good quality with smaller file sizes. For images that need transparency, PNG is ideal, while GIF is used for simple animations. WebP is a newer format that combines the benefits of both JPEG and PNG, offering high-quality images with smaller file sizes.
Conclusion
Batch resizing images is a highly effective way to save time and maintain consistency, whether you're working on personal projects, managing a business, or handling social media. By following the right steps and choosing the appropriate tools, you can streamline the process and ensure your images are optimized for the web, social media, or print. Don’t forget to adjust key settings like dimensions, resolution, and file format to get the best results. Avoid common mistakes like losing aspect ratios or resizing to too small a size. By automating the process where possible, you can further improve efficiency. With these strategies, you can confidently manage large volumes of images and keep your workflow smooth and efficient, all while ensuring high-quality results across all platforms.
