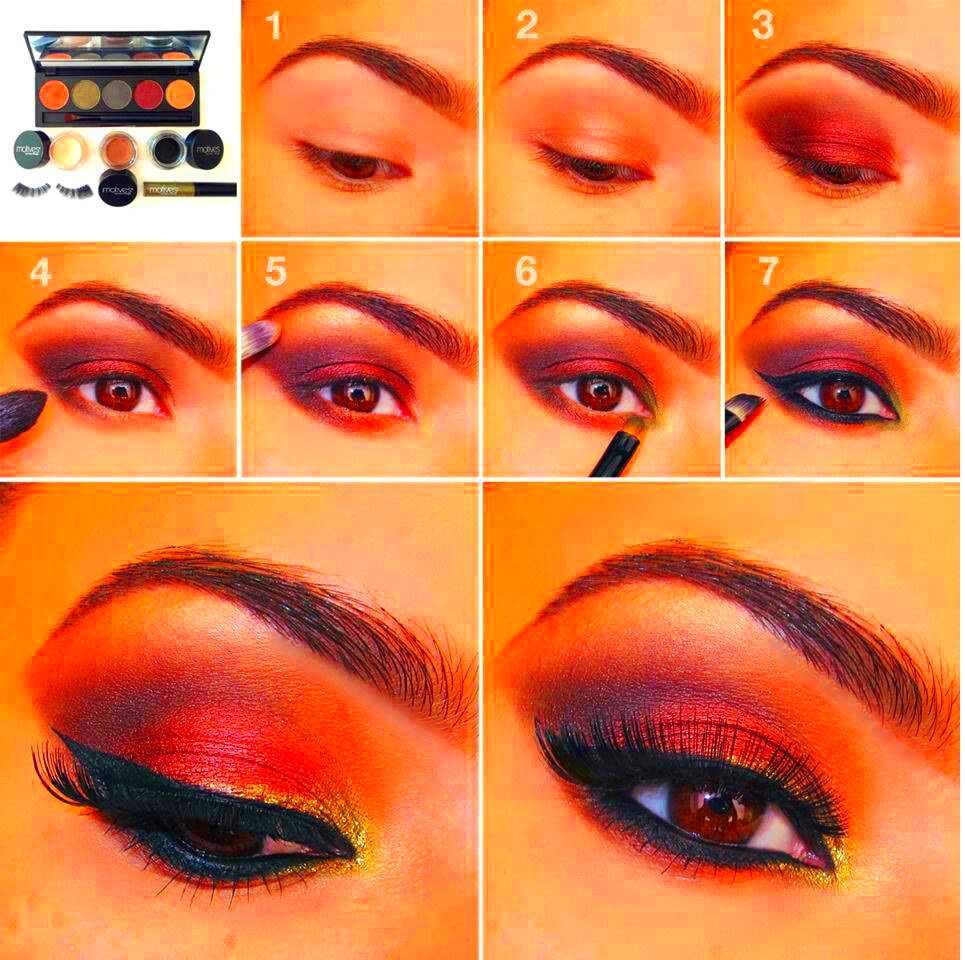
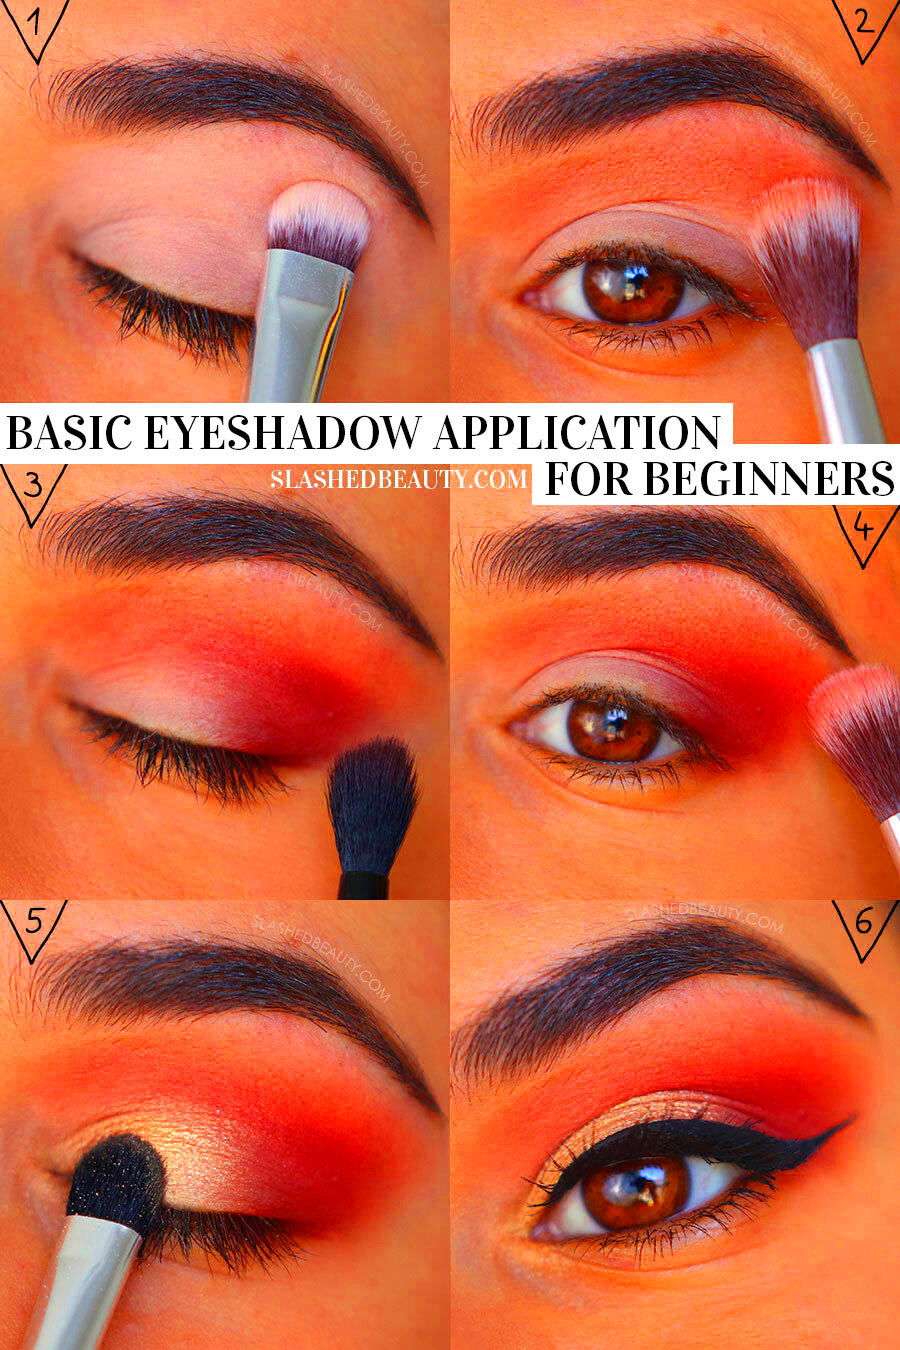
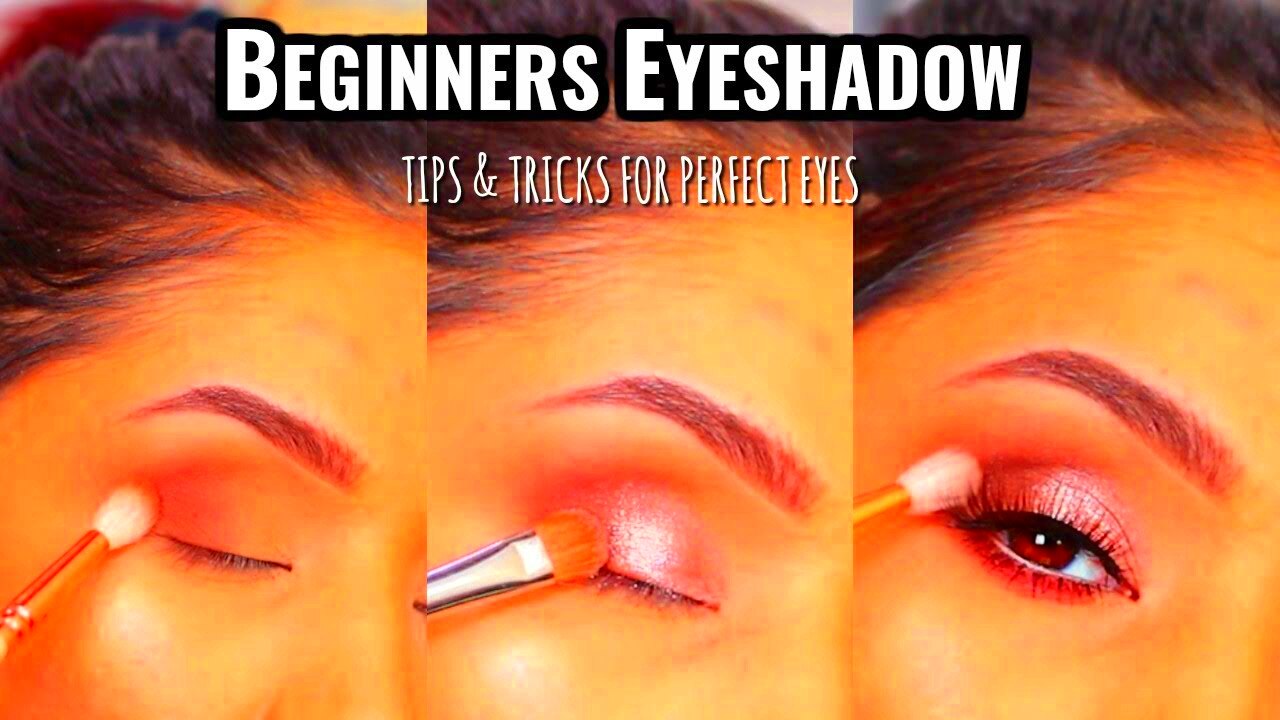
Eyeshadow can completely transform your look, whether you’re aiming for a subtle, natural appearance or a bold, dramatic statement. With a little practice and the right tools, you can master the art of applying eyeshadow. It’s all about experimenting with colors, textures, and techniques to enhance the natural beauty of your eyes.
The key to achieving a flawless eyeshadow look lies in the technique and understanding what works best for your eye shape and personal style. Once you get the hang of applying eyeshadow, it becomes a fun and creative way to express yourself.
Choosing the Right Eyeshadow Shades for Your Look

When it comes to selecting eyeshadow shades, it's important to choose colors that complement your eye color, skin tone, and the look you want to achieve. Here’s how you can get started:
- Consider your eye color: Certain shades bring out the vibrancy of your eyes. For example, copper and gold tones make blue eyes pop, while purples and greens can enhance brown eyes.
- Match to your skin tone: Light skin tones tend to look great with softer pastels and neutral tones, while deeper skin tones can pull off bolder, vibrant shades like gold, purple, and deep browns.
- Choose based on the occasion: For a day look, neutral tones like beige, soft browns, and peaches work well. For evening looks, try adding darker shades like charcoal or deep purple to create depth.
Don't be afraid to experiment with different colors, but start with shades that you feel most comfortable with. Over time, you’ll develop a better sense of what works best for you.
Also Read This: how to extract text from image samsung
Preparing Your Eyelids for Eyeshadow

Properly prepping your eyelids is crucial to ensure that your eyeshadow stays in place and lasts throughout the day. Without preparation, your eyeshadow may crease or fade. Here’s a simple guide to get your eyelids ready:
- Cleanse your eyelids: Make sure your eyelids are clean and free from any oils or residue. Use a gentle makeup remover or cleanser for this step.
- Apply an eyeshadow primer: Primer is essential for creating a smooth surface and helping your eyeshadow last longer. Apply a thin layer of primer to your eyelids and blend it out evenly.
- Set the primer with powder: After applying primer, lightly dust your eyelids with translucent powder to set the base and prevent creasing.
These simple steps will create the perfect canvas for your eyeshadow and help you achieve a smoother application. With a well-prepped eyelid, your eyeshadow will glide on effortlessly and stay in place all day.
Also Read This: What Interests People About Working with Platforms Like Dailymotion
How to Apply the Base Eyeshadow Shade
Applying the base eyeshadow shade is the first step in creating a beautiful eyeshadow look. This step sets the foundation for the rest of your eye makeup and creates a smooth surface for blending other shades. Here’s how to apply the base eyeshadow properly:
- Choose a neutral shade: For your base color, opt for a neutral shade that matches or is slightly lighter than your skin tone. This will help even out your eyelids and provide a good foundation for the other colors.
- Use a flat eyeshadow brush: A flat brush helps distribute the base color evenly across your eyelid. Pick up some product on the brush and tap off any excess before applying.
- Apply evenly across the lid: Starting from your lash line, apply the base color across your entire eyelid, blending it up to the crease. This creates a smooth, uniform base for the rest of your eyeshadow.
- Blend well: After applying, gently blend the color with a fluffy brush to avoid harsh lines and create a seamless finish.
When done right, the base shade will not only provide an even canvas for other colors but also help your eyeshadow last longer. Remember to keep it light and subtle, as this shade is meant to enhance, not overpower, the look.
Also Read This: How to Project an Image on a Wall Without Using a Projector
Adding Depth with Transition and Crease Colors
To give your eyeshadow look dimension and depth, you’ll need to add transition and crease colors. These shades help create a more structured and flattering eye shape. Here’s how you can use them effectively:
- Pick a transition shade: The transition color is a mid-tone shade that helps blend the light base color with darker crease colors. A soft brown, taupe, or peach works well as a transition color. Apply it just above your crease using a fluffy brush.
- Apply crease color: Choose a darker shade for your crease to add depth to your eyes. This could be a deeper brown, burgundy, or even a dark plum. Use a smaller, angled brush to apply the crease color in the natural fold of your eyelid, blending it well into the transition color.
- Blend, blend, blend: Blending is key when working with transition and crease colors. Make sure there are no harsh lines by gently blending the shades into one another. A good rule of thumb is to start from the outer corner of the eye and work your way in.
By applying these colors, you’ll create the illusion of depth and make your eyes appear more defined. Transition and crease colors are essential for a professional-looking eyeshadow application that adds complexity to your eye makeup.
Also Read This: How to Turn an Image into a Coloring Page for Fun Projects
Highlighting Your Eyes with Lighter Shades
Highlighting your eyes with lighter shades is an important step to make your eyes appear brighter and more awake. Lighter shades bring light to the eye area and can highlight specific features like the inner corner or brow bone. Here’s how to apply these shades effectively:
- Choose a light, shimmery shade: For highlighting, choose a light, shimmery shade such as champagne, pearl, or soft gold. These shades reflect light and make your eyes pop.
- Apply to the inner corner: Use a small brush or your fingertip to apply the light shade to the inner corner of your eyes. This opens up the eyes and makes them look brighter.
- Highlight the brow bone: Apply the same light shade just under your brow bone to lift and highlight this area. It creates a subtle lift and adds to the overall brightness of your eyes.
- Blend gently: Be sure to blend the lighter shades into your transition and base colors. The goal is to add brightness without creating sharp lines.
Highlighting with lighter shades can completely transform your look by adding radiance and drawing attention to your eyes. It’s the perfect finishing touch for a fresh, bright-eyed appearance.
Also Read This: how to make an image background transparent in google slides
Perfecting the Eyeliner and Finishing Touches
Once you’ve applied your eyeshadow, it’s time to perfect your eyeliner and add the finishing touches to complete your look. Eyeliner helps define your eyes, and when done correctly, it can make your eyes appear larger, more defined, and dramatic. Here's how to apply eyeliner and wrap up your eye makeup:
- Choose the right eyeliner: Eyeliner comes in various formulas—pencil, liquid, gel, and felt-tip. Choose one that suits your desired look. Liquid eyeliner is great for precision and bold lines, while pencil gives a softer, smudged effect.
- Apply eyeliner close to the lash line: Start by lining your upper lash line as close to the lashes as possible. This will make your lashes appear thicker and add definition to the eyes.
- Consider a winged eyeliner: For a more dramatic look, you can create a winged eyeliner. Simply extend the liner upwards from the outer corner of the eye, following the natural curve of your lower lash line.
- Finish with mascara: Apply a coat or two of mascara to your upper and lower lashes. This helps open up the eyes and adds volume. Make sure to coat every lash for an even look.
- Set with setting spray: To ensure your eye makeup lasts all day, spritz a setting spray over your face to lock everything in place.
With these final touches, your eyeshadow will be beautifully defined, giving you a polished and flawless finish. Eyeliner and mascara make a big difference in framing your eyes and completing your makeup look.
Also Read This: How to Create a Mirror Image on Cricut Using Your iPhone
Common Mistakes to Avoid When Applying Eyeshadow
Eyeshadow can be tricky, and even the most experienced makeup artists can make mistakes. Avoiding common errors ensures your eyeshadow will look flawless every time. Here are a few mistakes to steer clear of:
- Not priming your eyelids: Skipping primer can cause your eyeshadow to crease and fade throughout the day. Always apply an eyeshadow primer to create a smooth, long-lasting base.
- Using the wrong tools: Using the wrong brushes can make blending and application difficult. Invest in quality brushes that are suited for different tasks, like blending, applying base colors, and adding detail to the crease.
- Over-applying eyeshadow: Less is more when it comes to eyeshadow. Overloading your eyelids with too much product can lead to a cakey, messy look. Start with a light hand and build the color slowly.
- Ignoring your eye shape: Different eye shapes require different techniques. For example, hooded eyes may benefit from a slightly higher crease color application, while round eyes may need liner to elongate the shape.
- Not blending properly: Blending is key to a smooth eyeshadow look. Leaving harsh lines between colors can make your eyeshadow look unfinished. Make sure to blend every layer thoroughly.
By avoiding these common mistakes, you’ll achieve a polished and professional eyeshadow look that lasts all day. Practice makes perfect, so don’t be discouraged if it takes a few tries to get it right!
Also Read This: How to Wrap Text Around an Image in Canva
FAQ
1. How do I prevent eyeshadow from creasing?
To prevent eyeshadow from creasing, always apply an eyeshadow primer first. Setting the primer with translucent powder also helps. Choose eyeshadows that are long-lasting and designed to resist creasing for better results.
2. What type of eyeshadow is best for beginners?
Powder eyeshadows are a great choice for beginners because they’re easy to apply and blend. Look for neutral shades that are versatile and simple to work with, such as soft browns, taupes, and beiges.
3. Can I use eyeshadow without eyeliner?
Yes, you can definitely wear eyeshadow without eyeliner. If you prefer a more subtle look, simply apply eyeshadow to your eyelids and finish with mascara for a more natural appearance. However, eyeliner helps add definition to the eyes and can enhance the overall makeup look.
4. How do I make my eyeshadow last longer?
To make your eyeshadow last all day, start by applying an eyeshadow primer. Set the primer with a light dusting of translucent powder. Additionally, use long-lasting eyeshadows or eyeshadow formulas designed to resist fading and creasing.
5. Should I use matte or shimmery eyeshadow?
Both matte and shimmery eyeshadows have their place in a makeup look. Matte eyeshadows are great for creating depth and definition, while shimmery shades add brightness and dimension. You can use both together—apply matte shades in the crease and shimmery shades on the lids to create a balanced, dimensional look.
Conclusion
Mastering the art of applying eyeshadow can take a little time, but with the right techniques, tools, and practice, you can achieve a flawless look every time. Whether you're going for a natural day look or a bold, dramatic evening style, the steps outlined in this guide can help you achieve the perfect eyeshadow application. Start with a good base, add depth with transition and crease colors, highlight with lighter shades, and finish off with eyeliner and mascara to define your eyes. Remember to avoid common mistakes like over-applying products or skipping primer, and always blend for a seamless finish. With these tips and a bit of experimentation, you’ll feel more confident and creative with your eyeshadow application, allowing you to enjoy a polished and beautiful look that lasts throughout the day.

 admin
admin


