When working on documents in Microsoft Word, you might find yourself needing to add space between images. This can improve the visual appeal of your document and make it easier for readers to understand the content. Whether you are creating a report, a presentation, or any other type of document, knowing how to adjust the space between images is essential. In this guide, we will explore different methods to create space between images, ensuring your document looks polished and professional.
Understanding the Need for Space Between Images
Adding space between images in Word is not just about aesthetics; it also serves several practical purposes:
- Improved Readability: Adequate spacing helps guide the reader's eye, making it easier to follow the content.
- Visual Balance: Space can create a more balanced layout, preventing the document from looking cluttered.
- Emphasis on Content: When images are spaced out, each one can stand out on its own, allowing for better emphasis on important visuals.
- Professional Appearance: Properly spaced images give your document a polished and professional look.
By understanding these benefits, you can see why it's important to know how to manage image spacing effectively in Word.
Also Read This: Visual Vibes: Downloading Videos from AliExpress
Using the Layout Options for Image Spacing
Microsoft Word offers several layout options that make it easy to add space between images. Here’s how you can use these options:
- Select the Image: Click on the image you want to adjust.
- Access the Layout Options: Click on the small layout icon that appears next to the image or go to the "Format" tab in the ribbon.
- Choose Text Wrapping: Select a text wrapping option, such as "In Line with Text" or "Square." This affects how the image interacts with surrounding text.
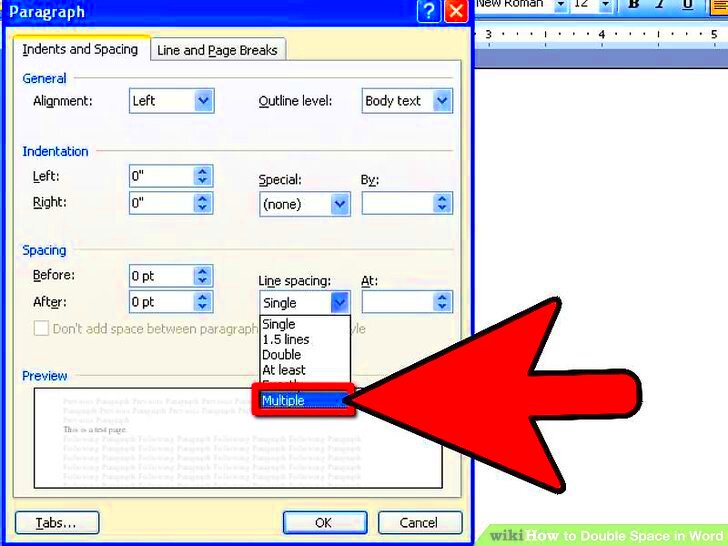
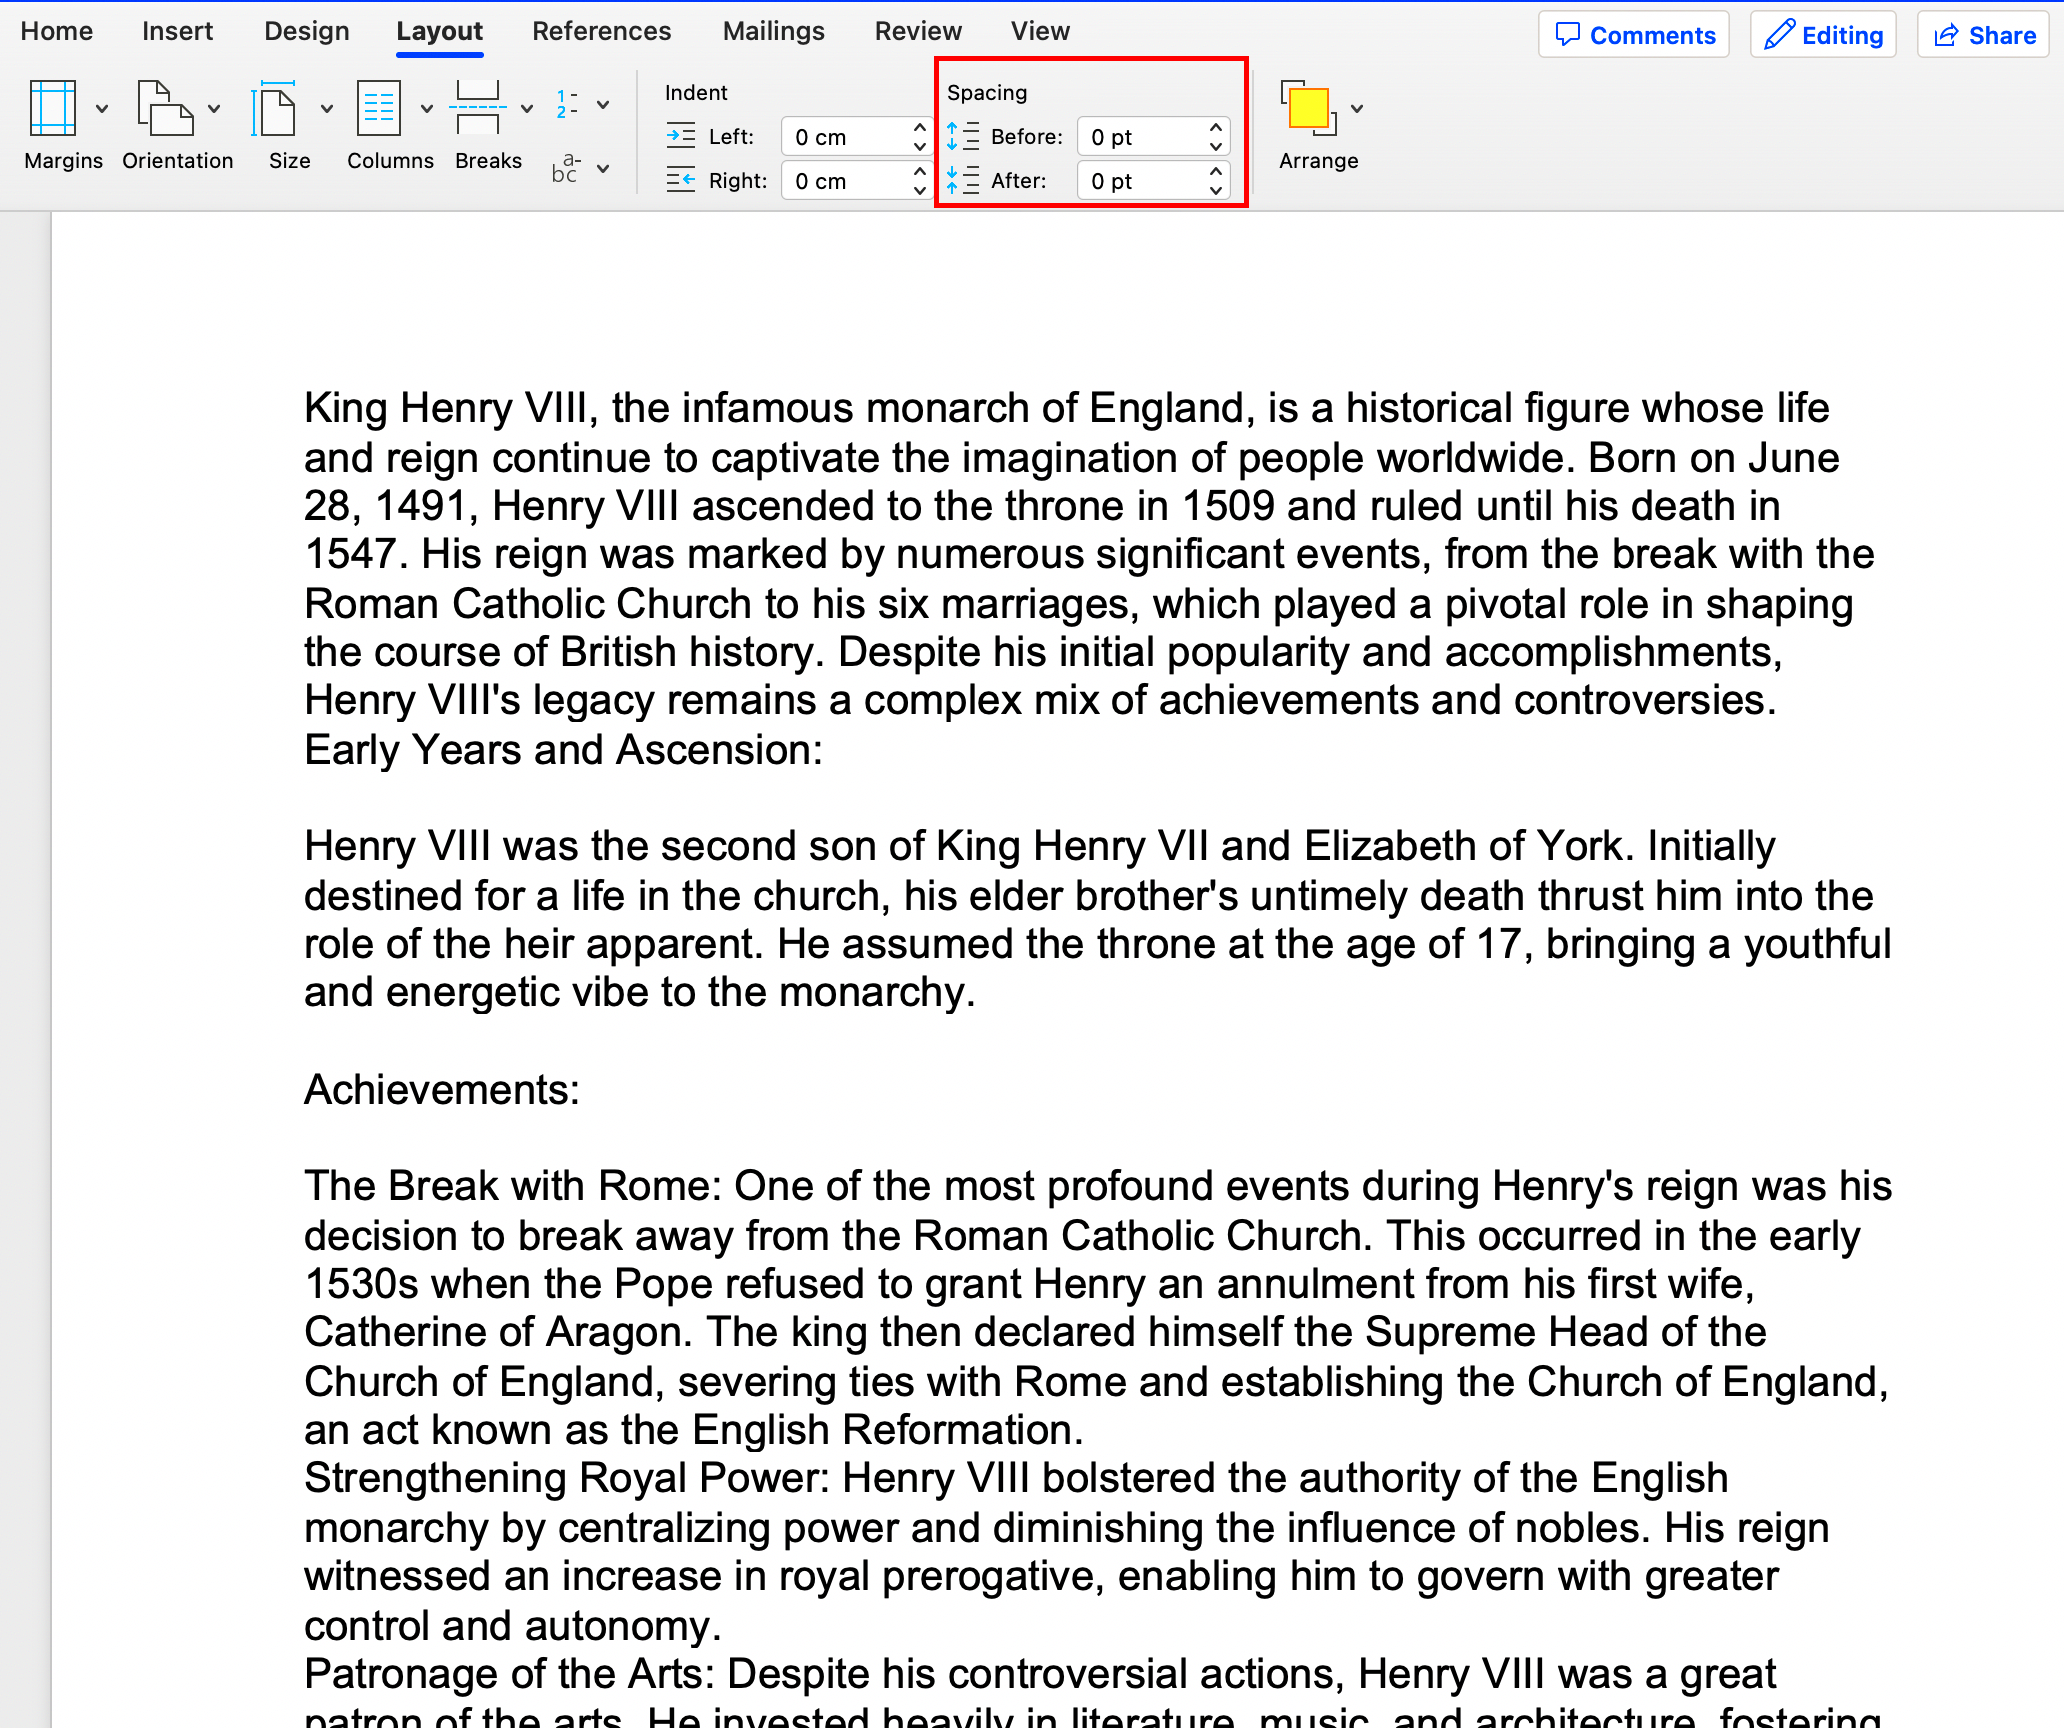
- Adjust Margins: Once you’ve selected a wrapping option, click on "More Layout Options." Here, you can set specific margins around your image.
- Preview Changes: Check how the image looks with the new spacing. Adjust the margins as needed to achieve the desired effect.
This method is straightforward and allows you to fine-tune the space between your images and surrounding text for a cleaner layout.
Also Read This: Capturing Snow Across the USA in Beautiful Photos
Adjusting Image Positioning to Create Space
Another effective way to add space between images in Word is by adjusting their positioning. This approach gives you more control over how images interact with one another and the surrounding text. Here’s how to do it:
- Select the Image: Click on the image you want to adjust to make sure it is active.
- Use the Picture Format Tab: Go to the "Picture Format" tab in the ribbon. This tab appears when an image is selected.
- Adjust Position: Click on the "Position" option. You can choose from various preset positions or manually drag the image to your desired location.
- Set Text Wrapping: Experiment with different text wrapping options like "Tight" or "Through" to see how they affect the spacing.
As you adjust the positioning, keep in mind the following tips:
- Consistent Alignment: Align images to the left, right, or center for a cleaner look.
- Check Overlapping: Ensure that images do not overlap unless it’s part of your design.
- Use Guides: Enable gridlines to help position images evenly.
By thoughtfully adjusting image positioning, you can create a more organized and visually appealing document.
Also Read This: Removing Storyblocks Logo or Watermark From Downloaded Content
Using Text Boxes for Custom Image Spacing
Text boxes are a versatile tool in Word that can help you achieve custom spacing between images. They allow you to place images in a way that fits your layout perfectly. Here’s how you can use text boxes:
- Insert a Text Box: Go to the "Insert" tab and select "Text Box." Choose a simple text box option.
- Position the Text Box: Click and drag the text box to where you want your image to go. You can also resize it to fit your image.
- Insert the Image: Click inside the text box, then go to "Insert" and select "Pictures" to add your image.
- Adjust the Text Box Size: Resize the text box to create space around the image. This adds padding around your picture.
Here are some benefits of using text boxes for image spacing:
- Flexibility: You can easily move the text box and image together, maintaining the layout.
- Custom Margins: Adjust the text box margins for more control over spacing.
- Layering Options: You can layer multiple images within different text boxes for creative designs.
Using text boxes provides a lot of freedom in designing your document layout, making your images stand out just the way you want them to.
Also Read This: Shutterstock Free Download Without Watermark – Your Ultimate Solution to High-quality Images!
Utilizing Tables to Control Image Arrangement
Using tables is another great way to control the arrangement and spacing of images in Word. Tables provide a structured layout that can help you align images neatly. Here’s how to do it:
- Insert a Table: Go to the "Insert" tab and click on "Table." Choose the number of rows and columns you need based on your images.
- Insert Images into Cells: Click on a cell in the table and go to "Insert," then select "Pictures" to add your image.
- Adjust Cell Size: Resize the table cells to control the space around each image. You can drag the cell borders to adjust width and height.
- Remove Borders: If you want a cleaner look, select the table, go to "Table Design," and choose "No Border."
Here are some advantages of using tables:
- Consistent Spacing: Tables ensure even spacing between images, making your layout neat.
- Easy Alignment: You can easily align images within table cells, ensuring a tidy appearance.
- Row and Column Control: You can adjust rows and columns independently for customized layouts.
By utilizing tables, you can create an organized and visually appealing document that showcases your images effectively.
Also Read This: Recording Tools and Software Used by Popular YouTubers
Tips for Maintaining Consistent Image Spacing
Consistency in image spacing is key to a professional-looking document. When your images are uniformly spaced, your content appears more organized and easier to read. Here are some helpful tips to maintain consistent spacing:
- Use Gridlines: Turn on gridlines in Word to help align your images. Go to the "View" tab and check "Gridlines." This will help you place images more accurately.
- Set Standard Margins: Decide on a standard margin size for your images and stick to it throughout the document. This can help create a uniform appearance.
- Utilize Format Painter: If you’ve set the spacing for one image, use the Format Painter to copy those settings to other images. Simply click the image, select Format Painter, and click on the other images.
- Group Images: If you have multiple images that need to be spaced the same way, group them together. Select all the images, right-click, and choose "Group." This allows you to move them as a single unit.
By following these tips, you can ensure that your images are consistently spaced, enhancing the overall look of your document.
Also Read This: How to Edit Text in a JPEG Image Online with Free Tools
Common Issues When Adding Space Between Images
While adding space between images in Word is generally straightforward, you might encounter a few common issues. Understanding these can help you troubleshoot and create a better layout:
- Overlapping Images: Sometimes, images can overlap if they’re not properly spaced. This usually happens when text wrapping settings are not adjusted correctly.
- Inconsistent Margins: If you adjust the margin for one image, make sure to apply the same settings to others. Inconsistent margins can create an unbalanced look.
- Text Flow Issues: When images are positioned too close to text, it can disrupt the flow of your document. Always check how text interacts with your images.
- Difficulty in Moving Images: If images are grouped with text or other objects, they might be hard to move independently. Unlink them if necessary to gain control over positioning.
By being aware of these common issues, you can address them quickly and ensure a smoother experience when adding space between images.
Also Read This: How to Copy a Transcript from YouTube Videos Easily
FAQs About Image Spacing in Word
Have questions about adding space between images in Word? You’re not alone! Here are some frequently asked questions that can help you find answers:
- How do I add space between images? You can adjust margins, use layout options, or insert text boxes to create space between your images.
- Why do my images overlap? Images might overlap due to incorrect text wrapping settings. Make sure to select an appropriate wrapping option to prevent this.
- Can I use tables to arrange images? Yes, tables are a great way to control image spacing and alignment, ensuring everything looks neat.
- What’s the best way to keep my image spacing consistent? Using gridlines, setting standard margins, and utilizing the Format Painter can help maintain consistent spacing.
If you have more questions, feel free to explore Microsoft Word’s help resources or reach out to user forums for additional support!
Conclusion on Adding Space Between Images
Adding space between images in Microsoft Word is an essential skill for anyone looking to create polished and professional documents. By understanding various techniques such as adjusting image positioning, using text boxes, and utilizing tables, you can effectively enhance the visual appeal of your work. Remember to maintain consistent spacing for a cohesive look and be mindful of common issues that may arise during the process. With these tips and techniques at your disposal, you can ensure that your images are not only well-placed but also complement the overall design of your document. Happy editing!
 admin
admin


