Twine is an exciting tool that lets you create interactive, nonlinear stories. Whether you're writing a game, an educational piece, or just a fun narrative, Twine provides a straightforward way to bring your ideas to life. One key aspect of enhancing your Twine project is the use of images. By adding visuals, you can create a richer experience for your readers, making your story more engaging and memorable. Let’s explore how you can effectively add images to your Twine projects.
Understanding Image Formats for Twine
Before you start adding images, it’s essential to know the different image formats that Twine supports. Each format has its strengths and weaknesses, so choosing the right one can make a difference in your project’s quality. Here’s a quick overview:
- JPEG (or JPG): Great for photographs and images with many colors. It compresses well, making it ideal for web use, but can lose some quality when edited.
- PNG: Best for images that need transparency, like logos or graphics with sharp edges. It maintains quality but results in larger file sizes.
- GIF: Useful for simple animations and low-color images. It’s limited to 256 colors but can create fun, animated visuals.
- SVG: A vector format that scales beautifully without losing quality. Perfect for logos and illustrations, but may require more technical knowledge to use.
Understanding these formats will help you choose the right images for your Twine stories.
Also Read This: Tried and Tested Shutterstock Image Downloader Without Watermark
Steps to Add Images in Twine
Adding images to your Twine project is a simple process. Just follow these steps:
- Select Your Image: First, choose an image in one of the supported formats. Make sure it’s relevant to your story.
- Upload the Image: Go to the "Assets" section in Twine. Click the "Add" button and upload your selected image.
- Copy the Image Link: Once uploaded, right-click on the image and copy the link provided. This link will be used in your story.
- Insert the Image in Your Passage: In the passage where you want the image, use the following HTML code:
<img src="your_image_link_here" alt="description of image"> - Preview Your Work: Always preview your project to ensure the image appears as intended. Adjust the size or positioning if needed.
By following these steps, you can easily incorporate images into your Twine projects, enhancing the overall experience for your audience.
Also Read This: Account Closure: How Do I Close My Photobucket Account
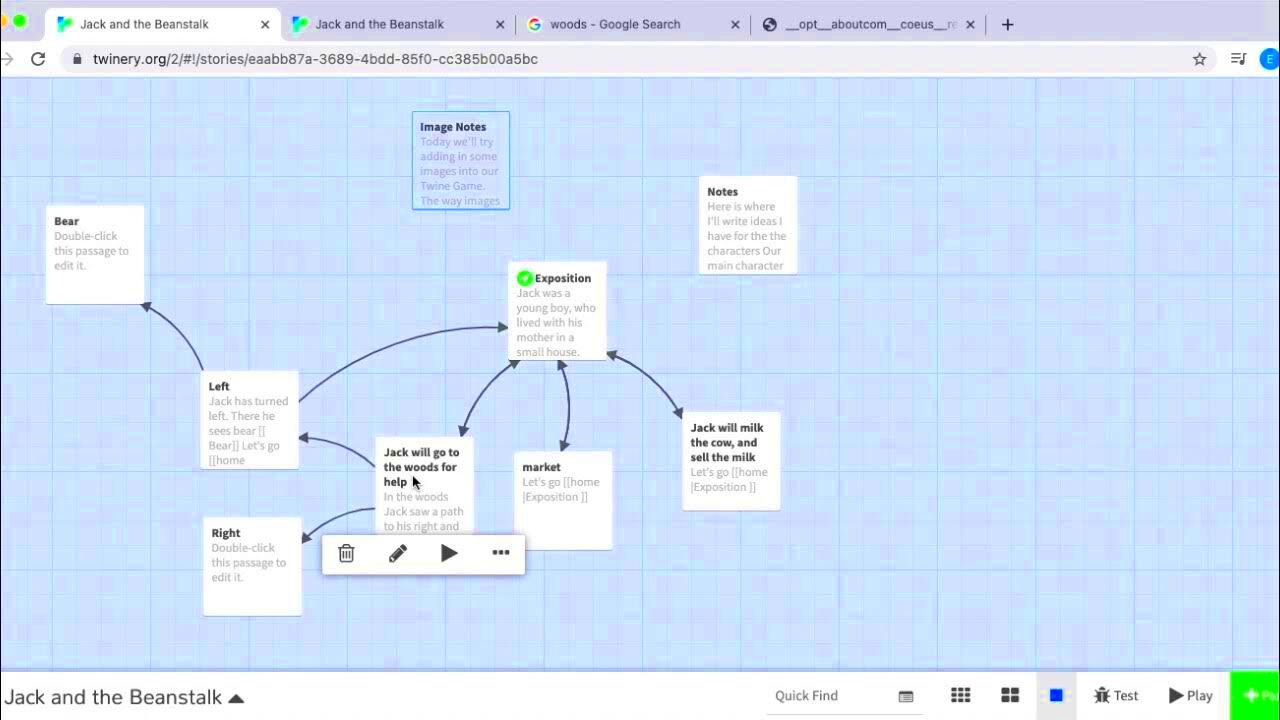
Using the Twine Interface for Image Insertion
Using the Twine interface to add images is quite user-friendly. The design allows for seamless integration of images into your storytelling, making it easy to enhance your project visually. Here’s a quick guide on how to navigate the interface for image insertion:
- Access the Passages: First, open your Twine project and navigate to the passage where you want to insert an image.
- Locate the Editing Toolbar: At the top of the editing window, you will see a toolbar. This is where most of your formatting options are available.
- Add Your Image Code: You can manually type the image tag using the format mentioned earlier, or you can use Twine’s built-in editor to insert images more visually. Click on the "Insert" option and select "Image." Then, paste the link to your uploaded image.
- Adjust Image Settings: You may want to set attributes such as width or height directly in the image tag, like this:
<img src="your_image_link" width="500" alt="description">. This keeps your layout tidy and responsive.
Using the Twine interface simplifies the process, allowing you to focus on creating your story while enhancing it with captivating visuals.
Also Read This: Proper Ways to Credit Images Online
Common Issues When Adding Images
Even though adding images in Twine is straightforward, you might encounter a few common issues. Here’s a list of problems and tips on how to solve them:
- Image Not Displaying: If your image isn’t showing up, double-check the URL you pasted. Make sure it’s correct and leads directly to the image file.
- Broken Links: If you move or delete the image file from its original location, the link will break. Always keep your images organized and avoid changing their locations after uploading.
- Loading Times: Large images can slow down loading times. Ensure your images are optimized for web use to maintain a smooth user experience.
- Incorrect Dimensions: Sometimes images appear too large or too small. Use the width and height attributes in the image tag to adjust dimensions as needed.
By being aware of these common issues, you can troubleshoot effectively and keep your Twine project looking great!
Also Read This: how to put images in shapes in canva
Best Practices for Image Sizing and Quality
When adding images to your Twine projects, keeping an eye on sizing and quality is crucial. Here are some best practices to ensure your visuals enhance rather than detract from your storytelling:
- Optimize Your Images: Use tools like TinyPNG or JPEGmini to compress your images without losing quality. This helps reduce loading times.
- Choose the Right Dimensions: Images should be sized appropriately for your layout. Aim for a width that fits well within your passage without overwhelming the text.
- Maintain Consistent Quality: Ensure that all images in your project have a similar quality level. Mixing high-resolution images with lower-quality ones can disrupt the visual flow.
- Test Across Devices: Check how your images appear on different devices. What looks good on a desktop may not display well on mobile. Adjust sizes accordingly.
- Use Alt Text: Always include descriptive alt text for your images. This not only improves accessibility but also provides context in case the image doesn’t load.
By following these best practices, you can create visually appealing and effective Twine projects that captivate your audience and enhance their reading experience.
Also Read This: Step-by-step Guide: How to Make a Streamable
How to Optimize Images for Web Use
Optimizing images for the web is essential to ensure your Twine projects load quickly and look great. When images are optimized, they can improve your project's performance and user experience. Here are some practical tips to help you optimize your images effectively:
- Choose the Right Format: Use JPEG for photos, PNG for graphics and images with transparency, and GIF for animations. Each format has its strengths, so pick wisely based on your needs.
- Resize Images: Before uploading, resize your images to the dimensions you’ll use in Twine. Large images can slow down loading times, so aim for a balance between size and quality.
- Compress Your Images: Utilize online tools like TinyPNG or ImageOptim to reduce file sizes without sacrificing quality. These tools make your images smaller, helping your pages load faster.
- Avoid Text in Images: If possible, don’t include text in your images. Use CSS for styling text instead, which keeps your project more flexible and accessible.
- Implement Lazy Loading: If you have many images, consider lazy loading techniques. This means images load only when they come into view, speeding up initial loading times.
By following these tips, you can ensure your images enhance your Twine projects without causing slow loading times or quality issues. A well-optimized image can make all the difference!
Also Read This: Know How to Download Good Night Video from Sharechat with This Practical Tool
Frequently Asked Questions
Adding images to your Twine projects can raise a few questions. Here are some frequently asked questions that can help clarify common concerns:
- Can I use any image from the internet?
No, always ensure that you have permission to use images or use royalty-free image sources to avoid copyright issues. - What should I do if my image doesn’t load?
Check the URL for accuracy. Ensure the image is still hosted at the specified link, and try refreshing the page. - How do I ensure my images are accessible?
Include alt text for each image. This helps screen readers describe the images to visually impaired users. - What is the best size for images in Twine?
It depends on your layout, but a width of 600-800 pixels is often a good starting point for most passages. - Is there a limit to the number of images I can add?
While there’s no strict limit, too many images can slow down your project. Focus on quality over quantity.
If you have any more questions, don't hesitate to seek help from the Twine community or consult the documentation for additional guidance.
Conclusion on Adding Images to Twine Projects
Adding images to your Twine projects can significantly enhance the storytelling experience. By understanding how to insert images, troubleshooting common issues, and following best practices for optimization, you can create visually appealing narratives that engage your audience. Remember, the right image can evoke emotions and provide context, making your story more immersive.
As you continue to work with Twine, experiment with different types of images and layouts to see what resonates best with your readers. Keep in mind the importance of image quality and loading speed, as these factors can affect user experience. With practice and creativity, you’ll be able to make your Twine projects shine with stunning visuals that complement your writing.
So go ahead, unleash your creativity, and start adding images that will captivate your audience and bring your stories to life!
 admin
admin


