Are you looking to spice up your Google Slides presentation with some engaging audio from YouTube? You’re in the right place! In this blog post, we’ll guide you through the simple steps to add captivating audio from YouTube to your slides. Adding audio can enhance your storytelling and keep your audience engaged. So, let’s dive in and harness the power of
Step 1: Find the YouTube Video With the Desired Audio
The first step in adding YouTube audio to your Google Slides presentation is to find the perfect video that contains the audio you wish to use. This process is quite straightforward but can be a bit tricky if you don’t know where to look. Here’s how to get started:
1. Open YouTube:
Head over to YouTube and use the search bar at the top of the page. Try to think of keywords related to the type of audio you need. For example, if you’re looking for calming background music, type “calming music” or “background music for presentations.”
2. Browse Through the Results:
Once you hit search, you’ll see a variety of videos. Take your time to browse through them. Look for:
- Titles: Focus on videos that clearly state their purpose in the title.
- Thumbnails: Engaging thumbnails can sometimes give you a hint at the video’s content.
- Creators: If you have favorite channels that usually produce the kind of audio you like, start there!
3. Preview the Videos:
Click on a few videos and listen to the audio. Most people make the mistake of picking the first video without sampling it. Make sure the quality aligns with your presentation’s theme. Also, pay attention to:
- The audio length: Ensure it's sufficient for your needs.
- The type of audio: Check that it matches the mood you're trying to create.
- Volume levels: Ensure the audio is clear and not too loud or soft.
4. Check Usage Rights:
Before you get too attached to a specific video, it’s crucial to check the usage rights. Not all YouTube videos can be used freely. Look for:
- Copyright Information: Many creators will specify if their audio is available for use. Check the description for licensing details.
- Creative Commons License: If the video is under a Creative Commons license, you may be able to use it with proper attribution.
Once you’ve found the right video, you’re ready for the next step! Remember to keep your options open and explore various videos to find the audio that truly enhances your presentation.
Also Read This: How to Embed a YouTube Playlist on Websites and Blogs
3. Step 2: Get the Audio Link from the YouTube Video

Alright, you've chosen the perfect YouTube video for your presentation, and now it’s time to get that audio link. Don’t worry, this part is super easy! Here’s how to do it:
- Find the YouTube Video: Start by going to YouTube and locating the video you want to use. Make sure it’s the one that has the audio you need!
- Copy the Video URL: You can do this by clicking on the address bar of your web browser and highlighting the full URL. Once selected, right-click and choose Copy or simply press Ctrl + C (or Command + C on a Mac).
- Get the Direct Audio Link: You can use some online tools to extract just the audio link from the video. You’d paste the URL of the YouTube video into these tools, and voila! They’ll provide you with a direct audio link.
It’s worth noting that when you’re copying and sharing links, be sure to comply with any copyright regulations. If the audio is protected, make sure you have the right to use it in your presentation!
Once you have the audio link, you’re one step closer to enriching your Google Slides presentation. Keep moving forward; the next step is equally as important!
Also Read This: Is YouTube a Social Media Platform
4. Step 3: Convert YouTube Audio to MP3 (if necessary)

Now that you have the audio link, you might find that you need it in the MP3 format for your Google Slides presentation. Fear not, converting YouTube audio to MP3 is easier than it sounds! Here’s how to do just that:
- Use a Conversion Website: There are numerous websites that can convert the audio for you. Some popular options include ytmp3.cc and Online Video Converter. Just make sure to choose a reliable one!
- Paste the Audio Link: Once you’re on the conversion website, look for a text box where you can paste the YouTube audio link you copied earlier. Paste it there!
- Select MP3 Format: Most converters will give you the option to choose the format. Make sure to select MP3 as your desired output format.
- Start the Conversion: Click on the Convert button (or whatever option is provided) and wait for a moment. The website will process the audio, and then provide you with a link to download the MP3 file!
- Download the Audio File: Once the conversion is complete, click on the download link. Your audio file will save to your computer, usually in the Downloads folder.
And there you have it! Converting YouTube audio to MP3 is a breeze, and now you can easily incorporate that audio into your Google Slides presentation. Just keep in mind that some conversion websites might have limitations on file sizes or duration, so make sure you choose one that fits your needs.
With your audio ready, you’re all set to add some great auditory elements to your slides and engage your audience even more. Keep going, you're making great progress!
Also Read This: Exploring the Earning Potential for 100000 Views on YouTube in 2024
5. Step 4: Upload Audio to Google Drive
Alright, friends! Now that you have your audio file ready, it’s time to get it uploaded to Google Drive. This step might seem a bit tedious, but don’t worry; it's pretty straightforward! Here’s how to do it:
- Open Google Drive: First, head over to Google Drive in your web browser. Make sure you're signed in to your Google account. If you're not signed in, go ahead and do that now.
- Create a Folder (Optional): For easy organization, you might want to create a new folder for your presentation audio. Click on the “+ New” button in the top-left corner, then select “Folder.” Name it something like "Presentation Audio" and click “Create.”
- Upload Your Audio: Now, inside the folder (or right in your Drive), click on the “+ New” button again and select “File upload.” A file dialog will open up. Navigate to where you stored your YouTube audio file on your computer, select it, and click “Open.”
- Wait for Upload: Once you’ve uploaded the audio file, give it a moment to finish uploading. You’ll see a little progress bar, and when it’s done, your file should appear in your Google Drive folder!
And there you go! You’ve successfully uploaded your audio to Google Drive. A quick tip: make sure your audio file is in a compatible format like MP3 or WAV, as those usually work best with Google Slides.
Also Read This: Is Peacock on YouTube: A Simple Answer
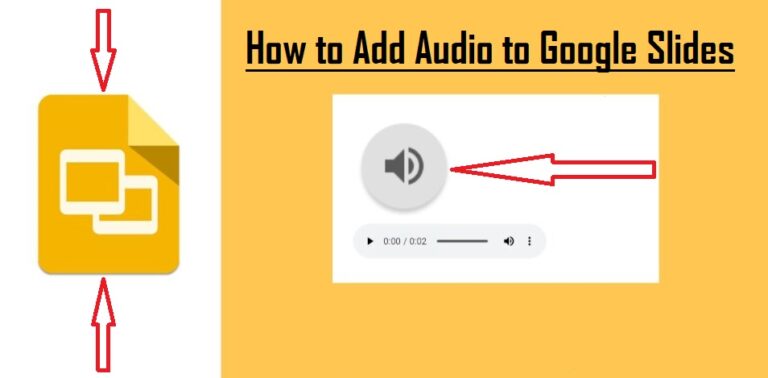
6. Step 5: Insert Audio into Google Slides
Now that your audio is safely stored in Google Drive, we can finally insert it into your Google Slides presentation! This part is like adding the cherry on top of a sundae — your presentation is about to get much more engaging!
- Open Google Slides: Navigate to your Google Slides presentation where you want to add the audio. Make sure you’ve selected the slide that will feature the audio.
- Insert Audio: Click on the “Insert” menu at the top of the screen. From the dropdown, find “Audio.” This should open a new dialog box showing your Google Drive files.
- Select Your Audio File: In the dialog box, browse through your Drive to find the audio file you uploaded earlier. Click on it to select, and then hit the “Select” button at the bottom right.
- Adjust the Audio Settings: After inserting the audio, you’ll see an audio icon on your slide. You can click on this icon to open the “Format options.” Here, you can choose settings like “Start playing” (on click or automatically), and whether you want it to stop when you get to the next slide.
Finally, don't forget to preview your slide to make sure everything works as expected! Click on the “Present” button in the top right corner. When the slide loads, click on the audio icon, and voilà! Your YouTube audio plays right alongside your presentation!
And that’s it, folks! You’ve successfully added YouTube audio to your Google Slides presentation. Go ahead and dazzle your audience with your captivating slides and engaging audio. With just a few simple steps, you've turned an ordinary presentation into an extraordinary experience!
Also Read This: Capturing Gameplay for YouTube on Xbox One
7. Step 6: Adjust Audio Settings in Google Slides
Now that you’ve successfully added your YouTube audio to your Google Slides presentation, it’s time to fine-tune the audio settings to ensure everything runs smoothly. Adjusting the audio settings can make a significant difference in how your audience experiences your presentation. Here are some key adjustments you can consider:
- Set Audio to Play Automatically: By default, audio might not start playing until you click it. To change this, select the audio icon, then go to the options in the toolbar. Look for the “Format Options” pane on the right side, where you can choose “Start playing: Automatically.” This setting allows your audio to begin as soon as the slide is presented.
- Loop Audio: If your presentation requires background music or a continuous audio track, looping the audio can be very effective. In the “Format Options” pane, check the box labeled “Loop until stopped.” This feature ensures that your music continues to play as long as the slide is displayed, making the presentation feel seamless.
- Adjust Volume Levels: Sometimes, the audio from your YouTube video might overpower other sounds (or the voice of a presenter). To adjust this, use the volume control that may appear in the audio settings. Ensure that your audio levels are balanced for optimal listening.
- Hide the Audio Icon: If you don’t want the audio icon to distract from your slides, you can hide it during your presentation. Simply select the audio icon and then right-click to choose “Hide icon when presenting.” This way, viewers won’t see the audio button, keeping the focus on your content.
Once you’ve fine-tuned these settings, it’s a good idea to preview your slides to make sure everything sounds just right. Simply hit “Present” and navigate through your slides while listening carefully to the audio quality, transitions, and how well the audio integrates with your presentation flow.
Also Read This: Watching Are You Being Served Full Episodes on YouTube: Availability and Options
8. Conclusion
Adding YouTube audio to your Google Slides presentation can truly elevate the overall impact of your content. Whether it’s background music, sound effects, or voiceovers, the right audio can enhance engagement and help convey your message more effectively.
In this blog, we’ve walked through the steps necessary to include audio from YouTube, from finding the right video to fine-tuning audio settings. Remember, the key is to choose audio that complements your slides without overwhelming them. Take your time in selecting the right tracks and ensure they align with your presentation's tone and subject matter.
As you continue to experiment with audio in your Google Slides presentations, don’t hesitate to get creative! Combine different types of audio, sync them with transitions, or even create a storytelling experience that captures your audience's attention.
Ultimately, the goal is to convey your message effectively while keeping your audience engaged.
So go ahead—add that audio, adjust those settings, and get ready to present like a pro. Your audience is sure to appreciate the extra effort and enjoy your presentation even more!
Frequently Asked Questions
When it comes to adding audio from YouTube to your Google Slides presentation, there are a number of questions that frequently arise. Here are some of the most common queries:
1. Can I directly embed YouTube audio in Google Slides?
No, Google Slides does not allow you to directly embed audio from YouTube. However, you can link to a YouTube video or use third-party tools to download the audio and then upload it to Slides.
2. How do I add a link to a YouTube audio/video?
- Go to the YouTube video.
- Click the "Share" button and copy the link.
- In Google Slides, select the text or object you want to hyperlink.
- Right-click and choose "Link," then paste the YouTube URL.
3. Is it legal to use YouTube audio in my presentation?
It depends on copyright. Ensure you have permission to use specific audio, or utilize audio with a Creative Commons license.
4. Can I record audio from YouTube for personal use?
Recording audio for personal use may fall into legal gray areas depending on copyright laws in your jurisdiction. Always check the terms of use.
5. Are there any alternatives to YouTube audio for my presentations?
Yes! Consider using:
- Free Music Archive: Offers public domain and Creative Commons music.
- Bensound: Features royalty-free music for presentations.
- Incompetech: Provides a range of options under Creative Commons licenses.
For any further inquiries, feel free to reach out in the comments section. Happy presenting!
 admin
admin


