Images are essential for making your Squarespace website visually appealing and engaging. Whether you’re creating a personal blog, a portfolio, or a business site, the right images can help tell your story and connect with your audience. Squarespace offers an easy-to-use platform to add, edit, and manage images, allowing you to create a professional-looking website in no time. In this guide, we’ll walk you through the steps of adding images to your Squarespace site, ensuring they are optimized for both desktop and mobile viewing.
Choosing the Right Image for Your Squarespace Website

Choosing the right image is crucial to maintaining your website’s aesthetic and message. The images you use should align with the overall tone and theme of your website. Here are some key things to consider when selecting images:
- Quality: Choose high-resolution images that are crisp and clear. Avoid pixelated or blurry images as they can make your website appear unprofessional.
- Relevance: Ensure that the images are relevant to your content. Images should complement your text and help communicate your message.
- Size: Images should be large enough to maintain quality but not so large that they slow down your website’s load time. Aim for images that are optimized for web use.
- Consistency: Maintain a consistent style across all images. Whether you prefer vibrant colors or muted tones, keeping a unified look is essential for a cohesive design.
By considering these factors, you can choose images that will enhance your website's visual appeal and ensure a smooth user experience for your visitors.
Also Read This: how to tell if the image water mark
Step-by-Step Guide to Adding Images to Squarespace

Now that you understand the importance of selecting the right images, let’s dive into the process of adding them to your Squarespace website. Here’s a simple, step-by-step guide:
- Log into Your Squarespace Account: Open your Squarespace dashboard and log into your website.
- Choose the Page or Post to Edit: Navigate to the page or blog post where you want to add an image. You can either add a new page or edit an existing one.
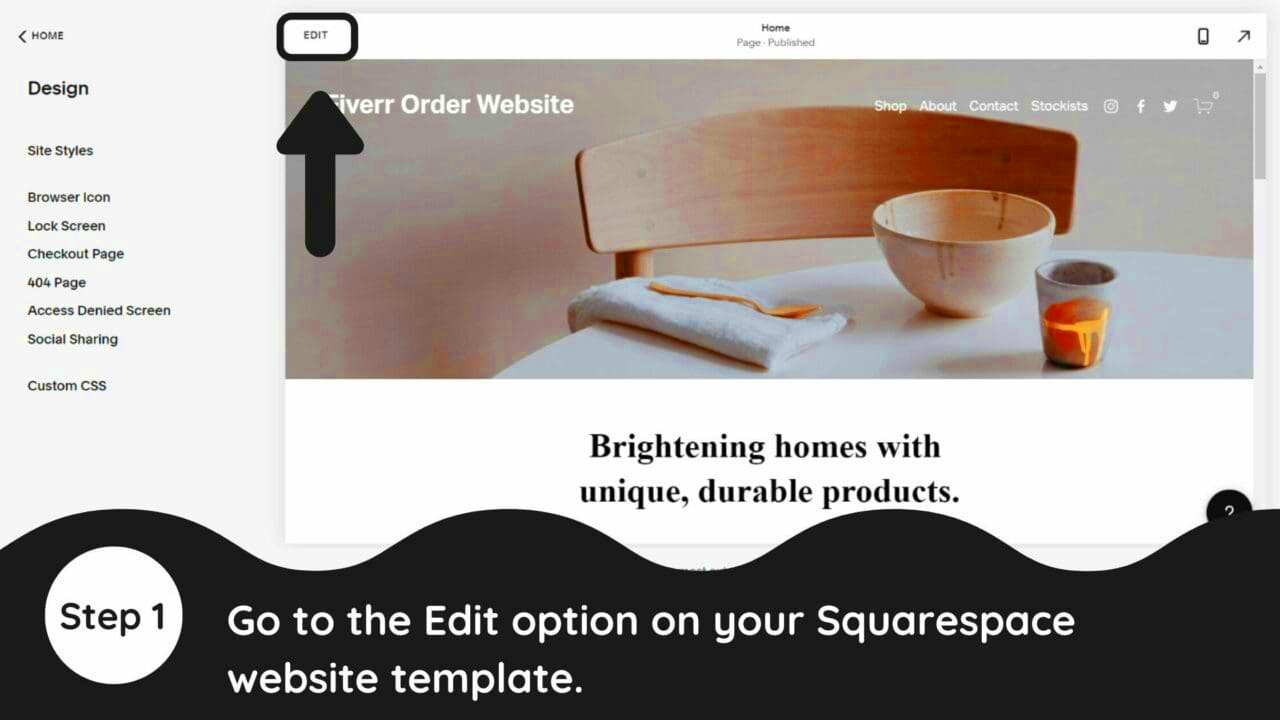
- Click on the Edit Button: Once you’ve chosen the page or post, click the “Edit” button to enter the content editor.
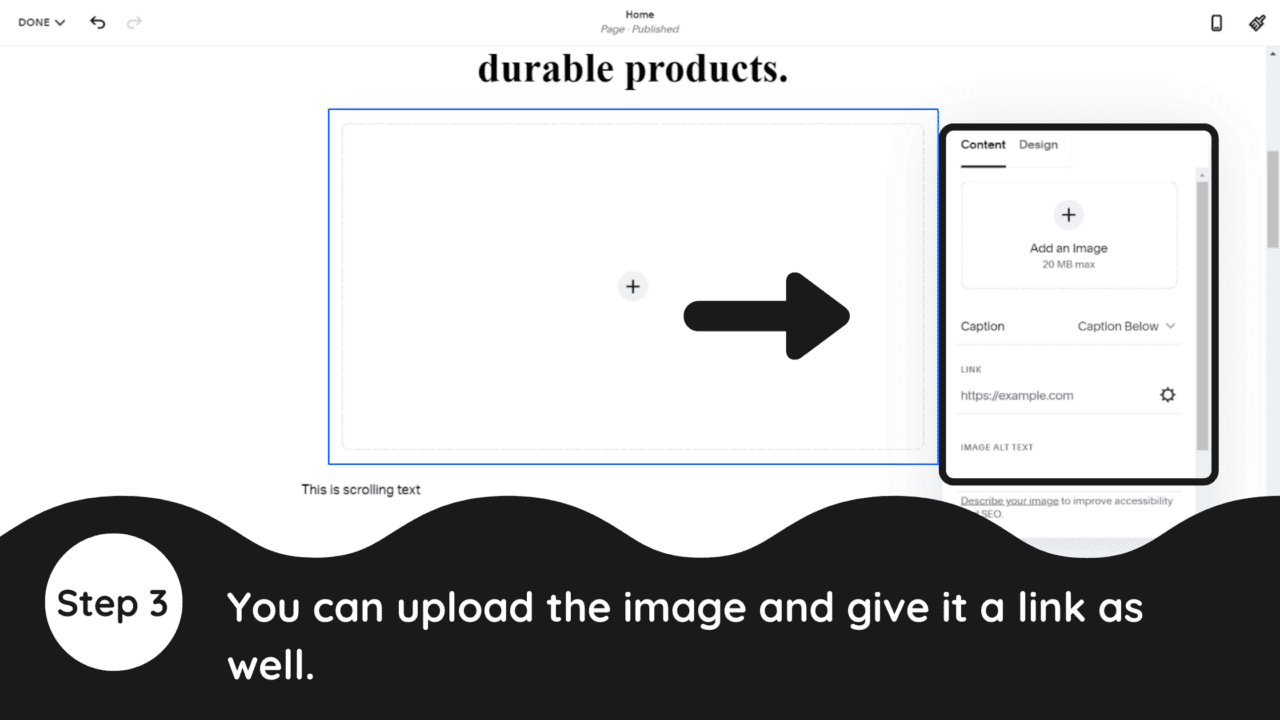
- Add an Image Block: In the editor, click the “+” button to add a new content block. Select the “Image” block from the options provided.
- Upload Your Image: Click the “Upload Image” button to browse and select the image you want to add. You can upload from your computer or choose from Squarespace’s built-in image library.
- Adjust Image Settings: Once your image is uploaded, you can adjust its size, alignment, and spacing. Squarespace allows you to resize and crop images as needed.
- Save Your Changes: After adjusting your image, make sure to click the “Save” button to keep your changes.
That’s it! You’ve successfully added an image to your Squarespace page. This process is simple, and Squarespace’s user-friendly tools make it easy to manage your images as your site grows.
Also Read This: Understanding YouTube Editor Salaries
Uploading Images from Your Computer
Uploading images directly from your computer to Squarespace is a quick and easy way to get your visuals onto your website. Whether you're adding photos, illustrations, or graphics, the process is straightforward. Let’s walk through the steps:
- Open the Content Editor: Go to the page or post where you want to add your image and click on the “Edit” button to open the content editor.
- Select the Image Block: Click the “+” icon to add a new block, and select the “Image” block from the list of options.
- Click Upload Image: When the image block is added, click the “Upload Image” button. This will open a file dialog window where you can browse your computer for the image you want to upload.
- Select Your Image: Find the image file on your computer, click on it, and hit the “Open” button to upload it to Squarespace.
- Adjust Image Settings: After uploading, you can adjust the image’s alignment, size, and margins to fit your design needs.
- Save Your Changes: Once you’re happy with the image’s placement, click “Save” to finalize the upload.
Uploading images from your computer is one of the fastest ways to get visuals on your site. This method works well when you have a specific image in mind stored locally. However, be mindful of the image’s file size to ensure that your website remains fast and responsive.
Also Read This: How to Use Mixcloud? Tips and Tricks for You
Using Image Blocks to Display Your Images
Squarespace’s image blocks allow you to display images in a variety of ways, giving you flexibility in how you present your visuals. Image blocks can be used to create galleries, sliders, or simple single images. Here's how to use
- Simple Image Block: This is the most common block. You can use it to add one image at a time, perfect for featured images or blog posts.
- Gallery Block: Ideal for displaying multiple images at once. You can create a grid or a carousel to showcase a collection of images in a visually appealing layout.
- Slideshow Block: Great for showcasing a series of images in a rotating slideshow format. This block works well for portfolios, product showcases, or visual storytelling.
- Image Overlay Block: Use this for adding text or buttons on top of images. This is perfect for call-to-action sections or adding captions.
To add an image block, follow these steps:
- Click the “+” icon in the editor and choose your desired image block (Gallery, Slideshow, or Image).
- Upload the image(s) to the block.
- Customize the block settings (size, layout, captions, etc.) to suit your needs.
- Click “Save” to finalize the changes.
Using image blocks helps you organize and display your visuals in an engaging way, making it easier to manage your images while keeping your website looking clean and professional.
Also Read This: Explore How to Become a Shutterstock Model
Optimizing Image Sizes for Faster Loading
Optimizing your images is one of the most important steps in ensuring your website loads quickly. Large image files can slow down your site, negatively impacting user experience and SEO rankings. Here are some tips to optimize your images before uploading them to Squarespace:
- Resize Your Images: Before uploading, make sure your images aren’t larger than necessary. Squarespace automatically resizes images for display, but uploading overly large images can still affect loading times. Aim for a resolution of 72 DPI for web images.
- Compress Image Files: Use tools like TinyPNG or ImageOptim to compress your images without sacrificing quality. This reduces the file size, helping pages load faster.
- Use Appropriate File Formats: JPEGs are great for photographs, while PNGs are better for images with transparency. WebP is a newer format that offers high quality at a smaller file size and is supported by Squarespace.
- Use Lazy Loading: Squarespace supports lazy loading, which means images load only when they’re about to appear on the screen, improving initial page load time.
To check if your images are optimized, you can use online tools like Google PageSpeed Insights or GTmetrix to test your website's speed. Keep an eye on your website’s performance and make adjustments to image sizes as needed.
By optimizing your images, you not only improve your site’s load time but also provide a better experience for visitors, which can lead to higher engagement and better search engine rankings.
Also Read This: Why Are AI-Generated Celebrity Images So Popular?
Managing Images with the Squarespace Image Editor
The Squarespace Image Editor gives you the power to make quick adjustments to your images without needing third-party software. You can crop, rotate, adjust brightness, and apply filters to your images, all within the platform. This built-in tool is a huge time-saver, allowing you to enhance your visuals directly on your website. Here’s how to use the image editor:
- Open the Image Block: Click on the image you want to edit. A toolbar will appear at the top of the block with several options.
- Click Edit: Once the toolbar appears, click the "Edit" button to open the Image Editor.
- Adjust Image Size: You can resize your image using the drag handles or enter specific dimensions.
- Crop and Rotate: Use the crop tool to remove unwanted areas or adjust the image’s orientation. You can also rotate your image by 90-degree increments.
- Apply Filters: The editor offers filters that can help enhance the colors and mood of your image, from subtle adjustments to dramatic changes.
- Save Changes: After editing, click “Save” to apply the changes to your image.
By using the Squarespace Image Editor, you can enhance your images without leaving the platform. Whether you're making a quick fix or adding artistic effects, this tool streamlines the process and keeps your workflow efficient. Keep in mind that while the editor is powerful, it’s still a good idea to upload images that are already optimized for the web to avoid compromising on quality.
Also Read This: How to Combine Images in Inkscape for Layered and Complex Designs
Ensuring Mobile Compatibility for Your Images
More users are browsing websites on mobile devices than ever before, so ensuring your images look great on mobile is essential for a smooth user experience. Squarespace automatically adjusts images for mobile viewing, but there are still some steps you can take to ensure your images display well across all screen sizes.
- Responsive Images: Squarespace automatically creates responsive images that adjust in size depending on the screen width. However, you can manually adjust image settings for different devices.
- Image Aspect Ratio: Consider using a consistent aspect ratio across your images to maintain a neat, cohesive look on mobile devices. Large or oddly shaped images may not display properly on smaller screens.
- Avoid Large Images: On mobile, larger image files can slow down load times. Ensure that your images are compressed and optimized for faster loading speeds.
- Test Mobile View: Always preview how your images look on mobile devices. Squarespace’s mobile preview tool allows you to see how your site will appear on different screen sizes.
- Use Fewer Images for Faster Loading: If your site uses many large images, it could impact mobile performance. Be strategic about which images are essential and consider using minimalist design choices.
To test and improve mobile compatibility, regularly check how your images appear on various devices, from smartphones to tablets. By keeping mobile users in mind, you ensure a better browsing experience for everyone.
Also Read This: How to Contribute to Shutterstock: A Complete Guide
FAQ
Here are some common questions about working with images on Squarespace:
- How do I resize my images on Squarespace? You can resize images directly in the Squarespace Image Editor. Simply click on the image and use the resizing tools or crop it to fit your layout.
- Can I use custom image sizes? Yes, Squarespace allows you to upload custom image sizes. However, it's important to optimize them for the web to avoid slow load times.
- What file formats does Squarespace support? Squarespace supports JPEG, PNG, GIF, and WebP image formats. JPEG is ideal for photographs, while PNG works best for images with transparency.
- How can I add captions to images? When adding an image block, you can enable captions for your images. This option allows you to display text underneath your image, giving context to your visuals.
- Why does my image look blurry after uploading? If your image appears blurry, it might be due to a low resolution or oversized file. Ensure your images are high-quality and optimized before uploading.
- Can I use images from stock photo websites? Yes, you can upload images from stock photo websites like HD Stock Images, as long as you have the necessary rights to use them on your site.
These FAQs address common concerns when working with images on Squarespace. For additional help, you can always reach out to Squarespace’s customer support team or check their help documentation.
Conclusion
Adding images to your Squarespace website is a straightforward process, but ensuring they are optimized and well-managed can take your site’s design and user experience to the next level. By choosing the right images, resizing them for faster loading times, and ensuring mobile compatibility, you can create a visually appealing and functional website. Don’t forget to leverage Squarespace’s built-in image editing tools to make quick adjustments and keep your content fresh. Remember, images are one of the first things visitors notice, so take the time to make them look great and fit seamlessly into your website’s design. With these tips, you’re well on your way to building a more dynamic, engaging, and professional-looking site. Happy designing!


