Adobe Illustrator is a powerful tool for graphic design, and one of the fun features it offers is adding images. Whether you're looking to incorporate photos into your projects or create stunning visuals with integrated graphics, knowing how to add an image to Illustrator can elevate your design game. In this guide, we'll walk you through the process, ensuring that by the end, you'll feel confident using images to enhance your creative work!
Preparing Your Image for Import

Before you dive into Adobe Illustrator, it's essential to prepare your image properly. Taking a few steps beforehand can save you time and ensure that the imported photo looks just as you envision it. Here’s how to get ready:
- Choose the Right Image Format: Illustrator supports various formats like JPG, PNG, and TIFF. For photos, JPG is a common choice, while PNG is better for images with transparency.
- Check the Resolution: A high-resolution image (at least 300 DPI) is ideal for print projects. If your resolution is too low, the image may appear pixelated when scaled up.
- Color Mode: Make sure your image is in RGB color mode for digital uses and CMYK for print. You can change this in editing software like Adobe Photoshop if needed.
- Clean Up the Image: Before importing, use image editing software to crop any unnecessary parts, adjust brightness and contrast, or remove blemishes. This way, your artwork will start off with a polished look.
- Organize Your Files: Keep all your images in one folder related to your project. This makes it easier to import everything later without scrambling to find what you need.
Taking these preparation steps ensures a smoother workflow once you get into Illustrator. You'll be ready to focus on creativity rather than troubleshooting image issues!
Also Read This: Album Artistry: A Step-by-Step Guide on How to Create an Album on SoundCloud
Opening Adobe Illustrator

Alright, so you’ve decided to dive into the world of design, and your first step is to open Adobe Illustrator. Don’t worry; it’s easier than you might think! Here’s a simple guide to get you started:
- Locate Your Illustrator Icon: Look for the Illustrator icon on your desktop, in your applications folder, or in your taskbar if you’ve pinned it there.
- Double-Click: Go ahead and double-click that shiny icon. It’ll take just a moment for the program to load, so be patient!
- Explore the Start Workspace: Once Illustrator is open, you may see a start workspace where you can create new documents or open existing ones. This is your design hub!
- Create a New Document: Click on “Create New” to start a fresh project. Here, you can select dimensions and settings based on what you’re creating. If you have specific measurements in mind, don’t hesitate to customize!”
And there you go! With just a few clicks, you’re ready to unleash your creativity in Illustrator. Once your document is open, you’re all set for the next step: importing your image to bring your designs to life. Exciting, right?
Also Read This: How to Record a Program on YouTube TV
Importing the Image into Illustrator

Now that you’ve got your workspace ready, it’s time to add that image you want to work with. Importing images into Illustrator is straightforward, so let’s take it step by step!
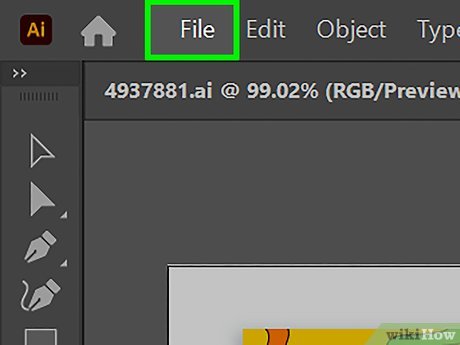
- Go to the File Menu: In the top left corner of Illustrator, click on “File.” This will open up a drop-down menu with several options.
- Select Place: From that menu, choose “Place...” This action will prompt you to browse your computer for the image you want to import.
- Find Your Image: Navigate through your files until you find the desired image. Once you find it, click on it to highlight it.
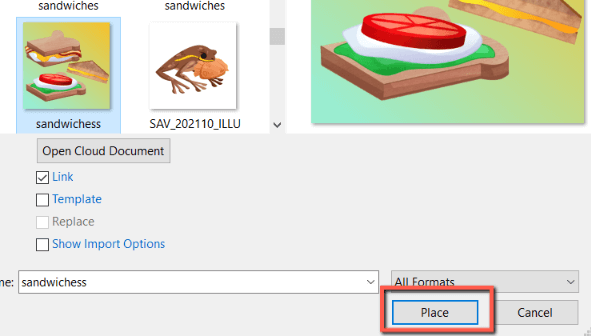
- Click Place: After selecting your image, click the “Place” button in the bottom right corner of the dialog box.
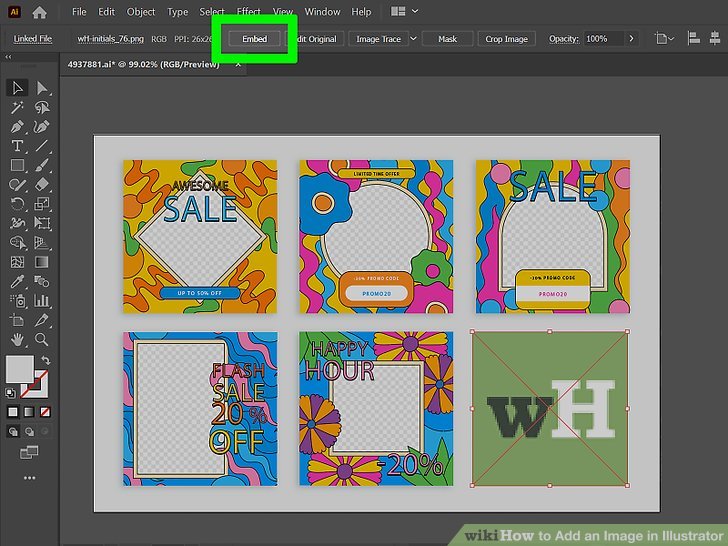
Once your image is placed in Illustrator, you can click and drag to position it wherever you want on your canvas. If you need to resize the image, hold down the Shift key while dragging the corners to maintain proportions. Voilà! Your image is officially part of your project, and you’re one step closer to your design masterpiece.
Also Read This: Making a PDF From Multiple Images Quickly
5. Positioning and Resizing Your Image
Once you’ve successfully imported your image into Adobe Illustrator, the next crucial step is positioning and resizing it to fit your project needs. It’s like arranging furniture in a room; you want everything to look just right!
Start by selecting your image with the Selection Tool (the black arrow). This tool is your best friend for moving and adjusting your image. When you click on the image, you’ll notice a bounding box appears around it. This box has handles on the corners and sides, which are perfect for resizing.
Here’s how you can resize your image:
- Maintain Proportions: Click and drag one of the corner handles. This will resize your image while keeping its original aspect ratio. It’s a great way to ensure that your image doesn’t become distorted.
- Free Transform: If you want to stretch or squash the image, you can use the side handles. Just remember, this may alter the quality of the image.
After resizing, you might want to adjust the image's position. Simply click and drag to move it around the artboard. You can also use the arrow keys on your keyboard for finer control. And if you need to align it relative to other elements, Illustrator provides various alignment options in the Align panel.
In essence, take your time to experiment with positioning and resizing. Every small adjustment can significantly impact the overall look of your project!
Also Read This: Inserting Images in Onshape
6. Using the Image in Your Project
Integrating your image into a project is more than just dropping it onto the artboard; it's about how the image complements your design. With Adobe Illustrator's powerful functionality, you can make your image an integral part of your artwork.
First, think about how you want to use the image. Are you incorporating it into a logo, creating a poster, or adding details to an illustration? Here are some ways to utilize your image effectively:
- Layering: You can place your image behind text or other design elements to create a dynamic feel. Play with the layer order in the Layers panel to achieve the desired effect.
- Masking: Create interesting shapes or cutouts by using Clipping Masks. This allows you to show only parts of the image in specific shapes, adding creativity to your project.
- Effects: Don’t shy away from using various effects available in Illustrator. From drop shadows to blurs, these can add depth and interest to your image.
When you’re finished integrating your image, take a step back and analyze how it fits within your design. Is it supporting your overall vision? Is it clear and engaging? This step is crucial because it helps you assess whether the image strengthens the narrative or aesthetic of your project.
So, go ahead and unleash your creativity! The possibilities are endless, and with practice, you’ll find the perfect balance between images and illustration.
Also Read This: How to Extract a Signature from an Image for Professional Use
7. Saving Your Work
Alright, you've put in the effort, created some amazing designs, and now it’s time to save your masterpiece in Adobe Illustrator. Saving your work correctly is crucial to ensure that your creative project is not lost and that you can always come back to it for modifications or just to admire your skills!
Generally, you have a couple of options when it comes to saving your files in Illustrator:
- Saving in AI Format: This is the native file format for Adobe Illustrator. To save your work in AI format, simply go to File > Save As.... Make sure to choose Adobe Illustrator (AI) from the format dropdown. This allows you to preserve all layers, effects, and other features that you might want to edit later.
- Exporting in Other Formats: If you need to use your design outside of Illustrator, export your work in formats like JPEG, PNG, or PDF. Go to File > Export > Export As..., and choose your desired format. Be mindful of quality settings, especially for print-ready files!
- Using the Save for Web Option: If you’re preparing graphics for the web, use File > Export > Save for Web (Legacy). This option optimizes images so they load faster online without sacrificing too much quality.
Don’t forget to save often while you work! It’s a great habit to avoid losing your progress. A quick Ctrl + S (or Cmd + S on Mac) will do the trick!
8. Conclusion
And there you have it! Adding images to Adobe Illustrator and managing them effectively is a fantastic way to enrich your design projects. You’ve learned how to import images, adjust their position, and save your work like a pro. Isn't it great how a few simple steps can elevate your artwork to new levels?
Whether you’re designing for print, web, or any other medium, understanding how to incorporate and manipulate images in Illustrator will definitely enhance your creative process. So go ahead, play around with different images, blend them seamlessly into your projects, and let your creativity shine!
If you have any questions or need further tips about using Illustrator, don’t hesitate to drop a comment. Happy designing, and remember to save your work often!
 admin
admin


