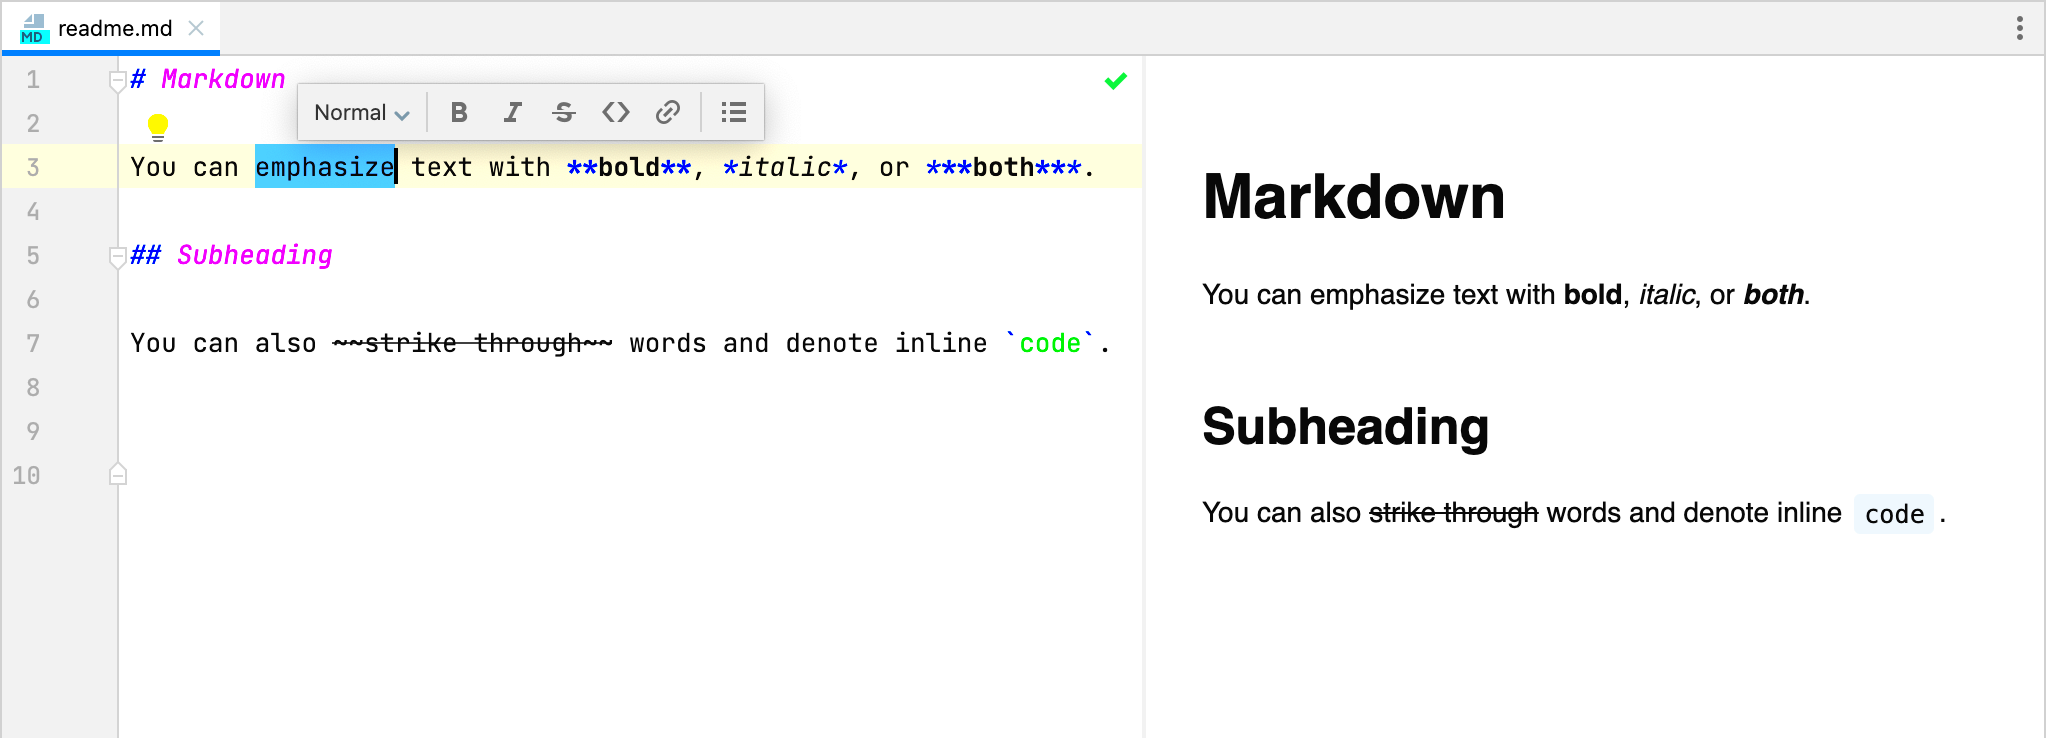
Markdown is a lightweight markup language that allows you to format text quickly and efficiently. One of the great things about Markdown is its simplicity, and adding images is no exception. Whether you're creating documentation, a blog post, or a readme file, images can make your content more engaging and informative. But how do you add images in Markdown? The process is straightforward, and once you understand the syntax, you’ll be able to enhance your documents with visual content in no time.
In this section, we’ll walk you through the basics of adding images to your Markdown files. By the end, you'll be able to include visuals that complement your written content effectively.
Understanding Markdown Syntax for Images

Markdown’s syntax for images is quite simple and intuitive. The general structure for embedding an image is similar to creating a link, but with an added exclamation mark at the beginning.
Here’s the basic format:

Let’s break this down:
- ![Alt text]: The exclamation mark tells Markdown you want to display an image. The "Alt text" is a description of the image, which is displayed if the image can’t be loaded or for accessibility purposes.
- (URL or path to image): This is where you provide the URL of an online image or the path to a local image file stored on your computer or project directory.
For example:

This would display the image from the provided URL. The alt text ("Sample Image") will appear if the
It’s that simple! Now you can add images to your Markdown documents with ease.
Also Read This: The Best Free Image Sharing Sites in the USA for 2024
Why Use Images in Documentation

Images can play a crucial role in documentation. They’re not just for decoration—they help explain concepts, break up long chunks of text, and keep readers engaged. In technical documentation, for instance, a screenshot or diagram might be far more effective than a paragraph of text in explaining a process or step.
Here are some reasons why adding images to your documentation is beneficial:
- Clarity: Sometimes, words alone aren’t enough to explain a complex concept. Images, such as screenshots, diagrams, or charts, can help clarify your message.
- Engagement: Documentation can become dry, especially for more technical topics. Images make the content visually appealing, which helps keep readers engaged and interested.
- Better Understanding: Visual learners often benefit from images more than text alone. Including images ensures that you cater to different learning styles.
- Step-by-Step Instructions: Images are particularly helpful when illustrating a process or tutorial. They allow readers to see exactly what they should expect at each stage.
To summarize, images are an excellent way to improve the readability, effectiveness, and accessibility of your documentation. They offer a visual complement to your written content, making it more enjoyable and easier to understand for your audience.
Also Read This: Free Tool to Download Image from Shutterstock
How to Add an Image from a URL in Markdown
Adding an image from a URL in Markdown is one of the easiest ways to include visuals in your document. Instead of uploading an image file to your project, you can simply link to an
The syntax is simple, and it works just like adding a link in Markdown—except with an exclamation mark at the beginning.
Here’s the structure:

Here’s what each part does:
- Alt text: This is a description of the image, which will be displayed if the image fails to load or for accessibility purposes. Think of it as a placeholder text that helps with SEO too.
- URL: This is the direct link to the image. It can be from any website or image hosting platform, such as an image on Flickr, Imgur, or your own hosted domain.
For example:

This would display an image of a cute puppy from the given URL. Make sure that the image URL is correct and publicly accessible, or it won’t show up in your Markdown file.
Using a URL is a quick and efficient way to add images, especially when you don’t need to store the image locally in your project files.
Also Read This: How to Get Getty Images for Free: A Comprehensive Guide
How to Add Local Images in Markdown
Sometimes, you may want to add an image that’s saved locally on your computer or within your project files. This is common when you’re working on a personal project or using images that are specific to your documentation.
To add a local image, the syntax is very similar to linking to a URL, but instead of a URL, you’ll provide the relative or absolute path to the image file.
Here’s how to do it:

Let’s break it down:
- Alt text: Just like with images from URLs, the alt text describes the image, and it's important for accessibility and SEO.
- Path to image: This can be a relative path (if the image is within your project directory) or an absolute path. For example, if the image is in the same folder as your Markdown file, you can just use the image filename.
Here’s an example using a relative path:

In this case, the image is located in a subfolder named "images" within the same directory as the Markdown file. The relative path makes it easier to organize your project and move it around without breaking the links.
If you’re using an absolute path, make sure the path is accurate and points to the exact location of the image file on your computer or server.
Adding local images in Markdown is simple and helps keep everything self-contained within your project.
Also Read This: How to Download Getty Images for Free Without Watermarks
Best Practices for Adding Images to Markdown
While adding images to your Markdown files is relatively straightforward, following some best practices can make your documents more polished, professional, and easy to navigate. Here are some tips to keep in mind:
- Use Clear and Descriptive Alt Text: The alt text serves as both a description of the image and a backup when the image can’t load. Make sure it’s relevant and descriptive so that it enhances the content.
- Optimize Image File Size: Large images can slow down loading times, especially for users with slower internet connections. Before adding an image, optimize it by reducing its file size without sacrificing too much quality.
- Organize Your Images: If you’re adding multiple images, it’s a good idea to organize them into folders within your project. This helps you maintain a clean structure and makes it easier to manage your files.
- Use Relative Paths: When linking to local images, use relative paths instead of absolute paths. This makes it easier to move your project around without breaking the links to your images.
- Ensure Accessibility: Accessibility is crucial, especially when it comes to alt text. Make sure your images are accessible to everyone, including those with visual impairments. Use descriptive alt text and make sure all images add value to the document.
- Maintain Consistent Image Size and Style: Try to maintain a consistent size and style for your images throughout the document. This creates a cohesive and professional look, preventing your document from feeling cluttered or chaotic.
By following these best practices, you can create more polished, accessible, and user-friendly documentation. Images are a powerful tool, but using them correctly ensures they enhance your content rather than distract from it.
Also Read This: How to Obtain High-Quality Getty Images Without Watermarks
Common Issues When Adding Images in Markdown
While adding images to Markdown documents is generally straightforward, there are a few common issues that can arise. These problems can prevent your images from displaying correctly and can be frustrating if you’re not sure what went wrong. In this section, we’ll cover some of the most frequent problems users face when adding images in Markdown and how to solve them.
- Image Not Displaying: One of the most common issues is that the image doesn’t show up in the final document. This can happen for several reasons, such as:
- The file path or URL is incorrect.
- The image is missing or the link is broken.
- The file extension is incorrect (e.g., using .png instead of .jpg).
- Incorrect Image Size: Sometimes, images may appear too large or too small. This can happen if the image is either too high resolution or not scaled properly. To manage this:
- Use a tool to resize your image before uploading it.
- Consider specifying the image size in Markdown (though this is limited compared to HTML).

- Alt Text Not Appearing: If you’ve added alt text, but it’s not showing up, it could be due to the image being too large or the Markdown processor not supporting alt text for images. Make sure the syntax is correct and try viewing your document in different environments (such as GitHub, VS Code, or another Markdown editor).
- Broken Links to Local Images: If you're using local images, a common issue is broken links caused by incorrect file paths. Double-check that the image’s file path is relative to the Markdown document's location. If the image is moved or deleted, it won’t show up anymore.
By understanding these common issues, you can troubleshoot and resolve any problems that may arise when adding images to your Markdown files.
Also Read This: how to put an image on a cd
FAQ
In this section, we’ll answer some of the most frequently asked questions about adding images in Markdown. These answers should help clarify any doubts you might have about the process.
- Can I resize images in Markdown?
Markdown itself doesn’t provide a built-in way to resize images. However, you can use HTML tags for more control over the image size, such as the<img>tag withwidthandheightattributes. - Can I add GIFs or videos in Markdown?
Yes, you can add GIFs using the same syntax as images. For videos, you’ll need to rely on HTML tags (e.g.,<video>or<iframe>) as Markdown does not natively support video embedding. - What is the best format for images in Markdown?
JPEG (.jpg), PNG, and GIF are the most common image formats used in Markdown. Choose the format based on the type of image and the quality-to-file-size ratio. PNG is great for images with transparency, while JPEG is ideal for photographs. - Why are my images not showing on GitHub?
If your images aren’t displaying on GitHub, make sure you’re using the correct relative file paths and that the image files are committed to the repository. GitHub renders Markdown differently than other platforms, so it’s good to test your document on GitHub itself. - Can I add images from a local path when viewing a Markdown file in a browser?
Local images may not display when viewing Markdown in a browser unless they’re hosted on a server. For local projects, ensure that the image files are included in your project directory and use relative paths for reference.
Conclusion
Adding images to Markdown is a simple and effective way to enhance your documentation, tutorials, or blog posts. By understanding the basic syntax and best practices, you can make your content more engaging and informative. Whether you’re linking to external images or adding locally stored visuals, following the correct structure and addressing common issues ensures your images display properly and help convey your message clearly.
In conclusion, Markdown makes it easy to add visuals to your text with minimal effort, and by following the steps outlined in this guide, you’ll be able to create clean, professional-looking documents that are enhanced with relevant images. If you encounter any issues, simply troubleshoot the common problems mentioned, and your Markdown files will be image-ready in no time!

 admin
admin


