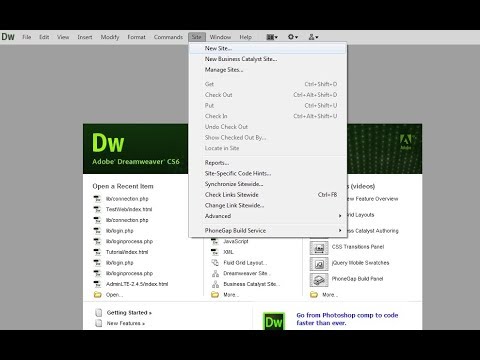
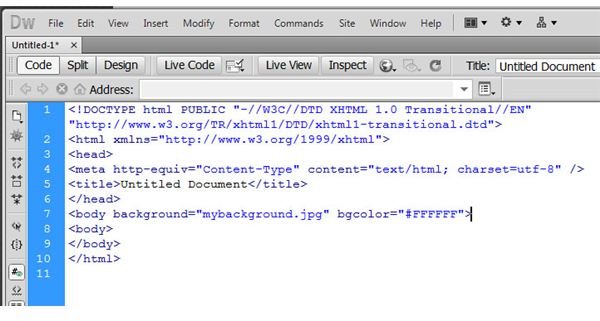
If you're diving into web design, Dreamweaver is a powerful tool that can help you create stunning websites. One of the most essential skills you’ll need is the ability to add and manage images effectively. Images play a crucial role in web design by enhancing aesthetics and communication. In Dreamweaver, working with images is straightforward but requires some understanding of the application’s features. This guide will introduce you to image editing in Dreamweaver and provide a step-by-step on how to insert images seamlessly.
Step-by-Step Guide to Inserting Images

Adding images in Dreamweaver might sound complicated, but trust me, it's easier than you think! Here’s a simple step-by-step guide to get you started:
- Open Your Project: First, launch Dreamweaver and open your existing project or create a new one. This is where you’ll be inserting your images.
- Prepare Your Image: Make sure you have the image saved on your computer. Ideally, your images should be optimized for web use to reduce loading times.
- Select the Insert Tab: Look for the “Insert” panel on the top left of the application. This is your main hub for adding various elements to your web page.
- Choose the Image Option: Click on the “Image” icon within the Insert panel. A dialog window will pop up to allow you to find your desired image.
- Browse for Your Image: In the dialogue, click “Browse,” navigate to where your image is stored, and select it. Click “OK.”
- Add Alt Text: After selecting your image, a field to enter 'Alt Text' will appear. This is important for accessibility and SEO, so make it descriptive!
- Resize and Position: Once inserted, you can click on the image to resize or reposition it as needed. Use the corner handles to maintain the aspect ratio.
- Save Your Work: Finally, don't forget to save your changes. Choose “File” and select “Save” or simply hit Ctrl+S on your keyboard.
And voila! You’re on your way to creating a visually appealing web page with images in Dreamweaver. Happy designing!
Also Read This: how to put a border around an image in word
Choosing the Right Image Format

When it comes to adding images in Dreamweaver, choosing the right format is crucial for both visual appeal and website performance. Different image formats serve different purposes, and understanding when to use each one can make a significant difference.
Here are some common image formats you'll encounter:
- JPEG (Joint Photographic Experts Group): Ideal for photographs and images with gradients. JPEGs support a wide range of colors and can compress image size very effectively without significant loss in quality.
- PNG (Portable Network Graphics): This format works wonders for images that require transparency, like logos or icons. It offers lossless compression, so image quality stays intact, though file sizes can be larger compared to JPEGs.
- GIF (Graphics Interchange Format): Always a favorite for simple animations and graphics. The colors are limited to 256, which makes it less suitable for detailed images, but it's fantastic for small animations.
- SVG (Scalable Vector Graphics): Perfect for logos, icons, and illustrations. SVGs are resolution-independent, so they look great on any device. Plus, they’re lightweight, making them quick to load.
Choosing the right image format not only enhances the look of your website but also optimizes loading speed, which is essential for user experience and SEO. So, think carefully about what type of image you’re working with before hitting that upload button!
Also Read This: How to Get an Image for Your ESPN Fantasy Team Profile
Adjusting Image Properties

After you’ve selected the perfect image for your website in Dreamweaver, the next step is to fine-tune its properties. Adjusting image properties allows you to customize how the
To adjust image properties, follow these steps:
- Select the image in Dreamweaver. This will activate the Properties panel, usually located at the bottom of the screen.
- In the Properties panel, you’ll see various options. Here are some key properties you can modify:
| Property | Description |
|---|---|
| Source (SRC) | Specify the location of the image file. |
| Alt Text | Provide a description of the image for accessibility and SEO. |
| Width/Height | Set dimensions to fit the layout. Always maintain the aspect ratio! |
| Border | Add borders to your image if needed or keep it set to zero. |
| Alignment | Control how the image aligns with surrounding text or other elements. |
Once you make these adjustments, preview your design to see how everything looks. Don’t hesitate to tweak the properties further until the image fits perfectly within your overall design. Properly adjusted images can elevate your website's aesthetic significantly!
Also Read This: How to Delete an Uploaded File in Adobe Stock
5. Using CSS for Image Styling
Styling images in Dreamweaver can really enhance the look and feel of your web design. CSS (Cascading Style Sheets) is a powerful way to control the presentation of your HTML elements, and images are no exception! Here’s how you can get started:
First, let’s add some CSS styles to our images. You can choose to style images in several ways, including setting their size, adding borders, or even applying effects like shadows. Here are some common styles you might consider:
- Width and Height: Control the size of your images easily.
- Border: Add a border to make your images stand out.
- Margin: Set space around your image to improve layout.
- Box-shadow: Create depth with shadows.
- Opacity: Make your images partially transparent.
Here’s a quick CSS example to show you the styling in action:
img { width: 100%; / Makes image responsive / height: auto; / Maintains aspect ratio / border: 2px solid #ccc; / Adds a light grey border / box-shadow: 5px 5px 10px rgba(0, 0, 0, 0.5); / Adds a shadow / } By applying these styles in the CSS section of Dreamweaver, just save and preview your changes in a web browser. You’ll see how much of a difference simple styling can make!
Also Read This: How to Share YouTube Videos on Instagram with Ease
6. Troubleshooting Common Issues
Working with images in Dreamweaver can sometimes lead to a few hiccups. Whether your image isn't showing up or it appears distorted, it’s crucial to know how to troubleshoot these common issues effectively. Here’s a handy guide:
- Image Not Displaying:
- Check the file path: Ensure the path to the image is correct.
- File format: Verify that the image is in a web-friendly format (like .jpg, .png, or .gif).
- Distorted Images:
- Aspect ratio: Make sure not to force images into specific dimensions that distort them.
- CSS styles: Review your CSS for any conflicting styles that might alter the image appearance.
- Slow Loading Times:
- File size: Opt for optimized images to improve load times.
- Image format: Use appropriate formats for your specific needs (e.g., .jpg for photos, .png for graphics).
By keeping these tips in mind, you’ll be able to fix most issues that come your way while working with images in Dreamweaver. And remember, every problem has a solution, so don’t hesitate to investigate until you find what works!
Also Read This: Understanding Rumblecom – A Comprehensive Guide to the Popular Video Platform
7. Best Practices for Image Optimization
When it comes to adding images to your website using Dreamweaver, image optimization is key. Optimizing your images means reducing their file size while maintaining acceptable quality, which enhances loading speed and overall user experience. Here are some best practices to optimize your images:
- Choose the Right Format: Use JPEG for photographs, PNG for images requiring transparency, and GIF for simple graphics or animations. Each format has its strengths, so choose wisely based on your needs.
- Resize Images: Before uploading, make sure your images are the right dimensions. Avoid using large images that are scaled down in the browser, as they still take longer to load.
- Compress Images: Use tools like TinyPNG or ImageOptim to compress your images without sacrificing much quality. This cuts down file size considerably.
- Use Descriptive Filenames: When naming your image files, use relevant keywords. This not only helps with SEO but also makes it easier for you to keep track of your files.
- Add Alt Text: Always include alt text for your images. This improves accessibility for visually impaired users and helps search engines understand what the image is about.
- Leverage CSS Sprites: If your site uses multiple small icons or images, consider combining them into a single image file. This reduces HTTP requests and speeds up loading times.
By following these practices, you can ensure that your website remains visually appealing while being efficient and fast-loading. A well-optimized image not only enhances user experience but also positively impacts your site's SEO.
8. Conclusion
Adding images in Dreamweaver is a straightforward process that can significantly enhance the visual appeal of your website. However, it’s essential to strike a balance between aesthetics and performance. As we've discussed, following best practices for image optimization is crucial to ensure that your website loads quickly and efficiently.
Remember, the goal is to create a delightful experience for your users. Whether you're a novice or an experienced designer, understanding how to properly incorporate images will set your website apart.
In summary:
- Choose the right image formats for your needs.
- Resize and compress images before uploading them to Dreamweaver.
- Utilize descriptive filenames and alt attributes for better SEO and accessibility.
With these tips in mind, you're now equipped to elevate your web design game. Don't forget to review and test your images on various devices to ensure they look great everywhere. Happy designing!
 admin
admin


