Have you ever thought about showcasing your creative work to a broader audience? Behance is a fantastic platform for artists, designers, and creators of all types to share their projects and gain visibility in the creative community. Whether you're an illustrator, a photographer, or a graphic designer, adding a new project to Behance can be a game-changer. In this guide, we’ll walk you through the steps to create a stunning project on
Creating a New Project on Behance

Creating a new project on Behance is straightforward, but knowing the right steps can make a world of difference in how your work is perceived. Here’s how to do it step by step:
- Log in to Your Behance Account: First things first, you need to log into your Behance account. If you're new, you can easily sign up for free!
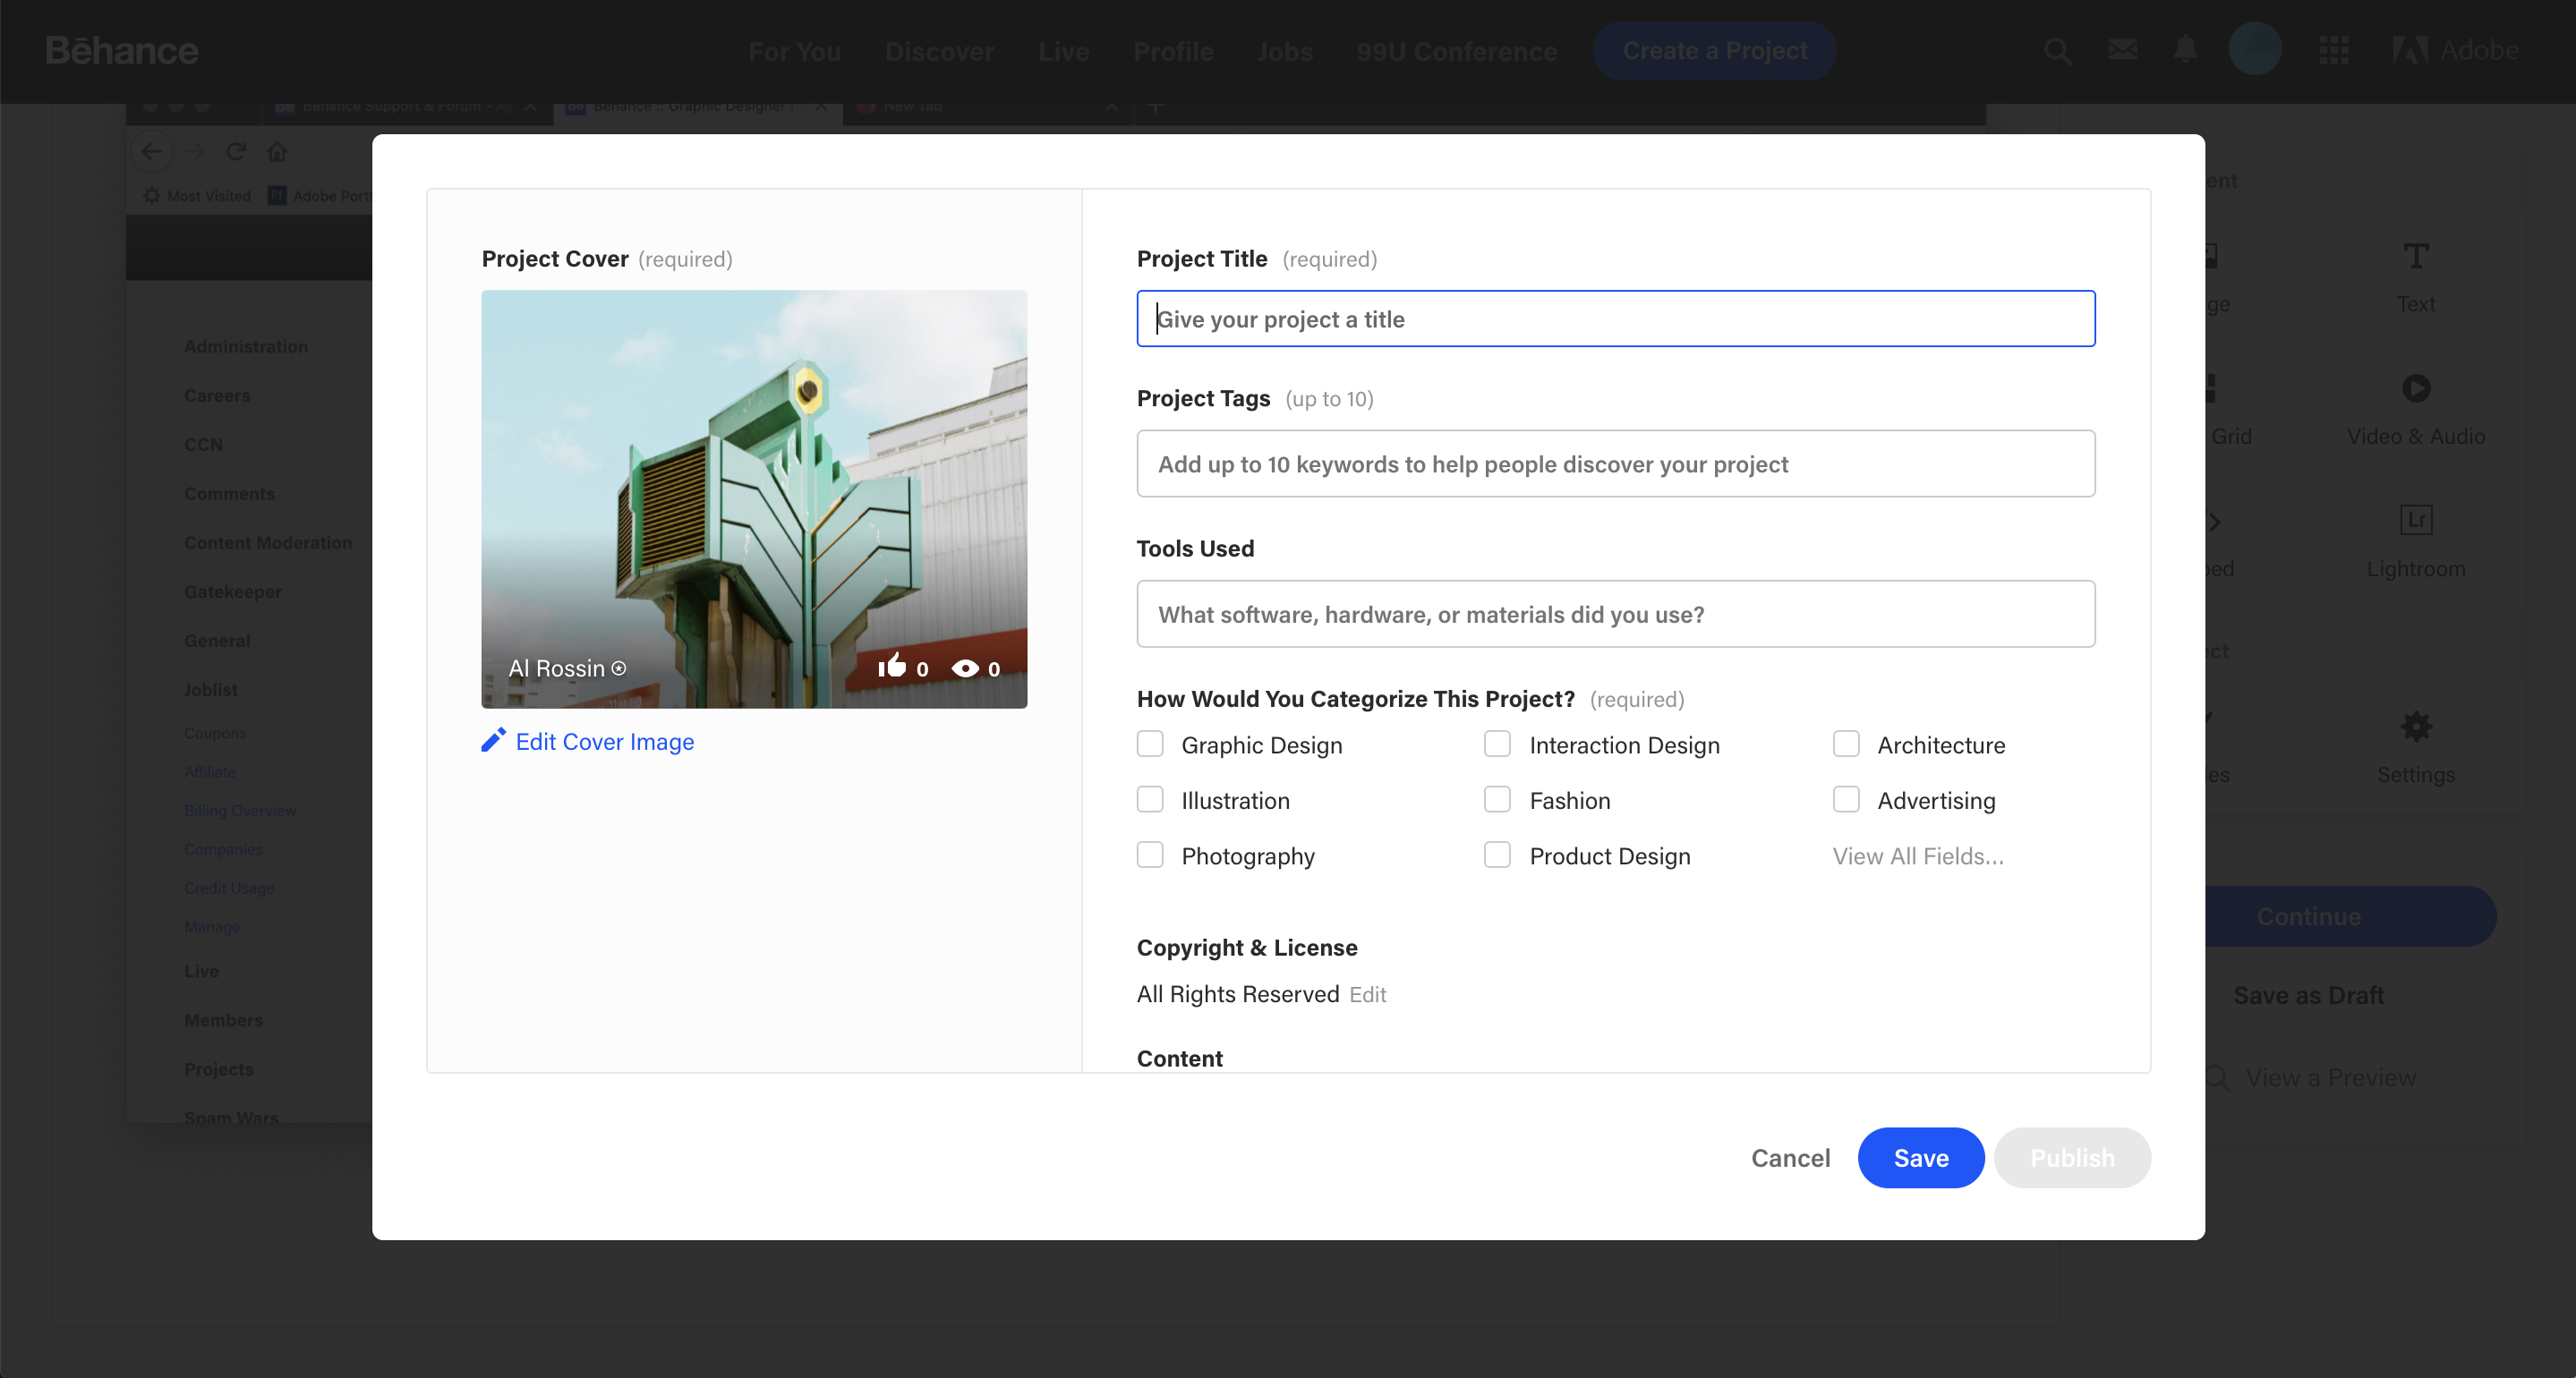
- Navigate to the “Create a Project” Option: Once you're logged in, look for the “Create a Project” button found at the top right corner of your dashboard. Click on it to start.
- Upload Your Work: Now comes the fun part. You can upload images, videos, or even embed links from other platforms. Just click the “Upload” button and choose your files. Make sure to select high-quality files that represent your work well.
- Add Content: You can add text descriptions, captions, and even tags. This is where you can tell the story behind your project. Use bullet points or numbered lists to break down your content for better readability. For example:
- Project Title: Provide a catchy name.
- Description: Explain your creative process and inspiration.
- Tags: Use relevant tags to help people find your work.
Pro Tip: Keep your descriptions engaging but concise. Readers might lose interest if it's too long!
- Choose a Cover Image: Your cover image will be the first thing viewers see. Choose something striking that encapsulates your project.
- Set Your Privacy Settings: Decide if you want your project to be public or private. Keep in mind that a public project will gain more visibility.
- Hit Publish: Once you’re satisfied with everything, click on “Publish.” Congratulations, your project is now live!
After you publish, don't forget to share your project on social media to attract even more viewers! Organizing your projects in portfolios can also help present your work cohesively and allow others to see your full range of creativity. Enjoy sharing your creative journey on Behance!
Also Read This: How to Effectively Publish and Share Your Work on Behance
Step-by-Step Guide to Uploading Your Work

Uploading your work to Behance is a straightforward process, but knowing the right steps can make it even smoother. Here’s a quick guide to help you navigate your way through:
- Sign In to Your Behance Account: Start by logging into your Behance account. If you don’t have one yet, creating an account is free and easy!
- Click on the "Create a Project" Button: Once you’re on your dashboard, look for the big “Create a Project” button at the top right. Give that a click!
- Add Your Work: You can upload images, videos, or even a PDF. Simply drag and drop your files or click to upload. Behance supports various file formats, so check that you’re using compatible ones.
- Arrange Your Files: After uploading, you can reorder images or videos using the simple drag-and-drop feature. Arrange them in a way that tells a story about your project.
- Write a Compelling Project Title: Your title is your first impression. Make it catchy and relevant to draw viewers in!
- Add Descriptions and Tags: Briefly describe your project and include keywords and tags that reflect your work’s content. This helps others discover your creations more easily.
- Choose a Project Cover: Select an eye-catching cover image that represents your project well; it could be one of the uploaded images or something new!
- Publish! Finally, hit that publish button and share your work with the world. Remember, you can always edit your project later if needed.
And there you have it! Easy peasy, right? Now, let's look at how you can organize your project effectively.
Also Read This: How to Create a Profile on Behance for Your Personal Creative Portfolio
Tips for Organizing Your Project Effectively

Once you've uploaded your work, organizing it effectively on Behance can make a big difference in how viewers perceive your project. Here are some handy tips to keep your designs tidy and engaging:
- Use Sections: Break your project into sections. You can categorize different elements of your work, like sketches, final renders, or mood boards. This helps viewers grasp your workflow.
- Maintain a Consistent Style: Whether it’s format, color scheme, or font choice, keep it consistent. This creates an aesthetically pleasing experience for the viewer.
- Use Descriptive Headers: Clear and descriptive headers can guide your audience through the project. They act like a roadmap and keep the viewer engaged.
- Incorporate Context: Providing context for your projects—like the challenge, your process, or the outcomes—helps connect with your audience. Don't just show the work; explain it!
- Optimize Image Quality: Ensure your images are high quality and not pixelated. Use resolution settings that will make your work stand out without slowing down load times.
- Engage with Your Audience: Encourage feedback by asking questions in your project description or responding to comments. Engaging your audience can foster a community around your work.
By following these tips, you not only showcase your creativity but also organize your project in a way that tells a compelling story. Now go ahead and wow your viewers!
Also Read This: A Complete Guide to Naming Your Projects on Behance
5. Enhancing Your Project with Description and Tags

Once you’ve uploaded your project to Behance, you want it to shine! The description and tags are crucial in making your project more discoverable and appealing to viewers. Let’s talk about how you can enhance your project in these areas.
Descriptions are your chance to tell the story behind your project. Use this space to:
- Detail your creative process: Explain how you came up with the idea and the steps you took to execute it.
- Highlight challenges: Share any obstacles you faced and how you overcame them—this adds a human touch.
- Include inspirations: Mention other artists or projects that inspired your work.
- Explain techniques used: Discuss tools, software, or methods you applied to create your project.
When writing your description, try to keep your tone conversational and relatable. You want people to connect with you through your words. Aim for around 200-300 words to provide enough detail without overwhelming the reader.
Tags are equally important as they help in categorizing your project. Here’s how to choose them wisely:
- Use relevant keywords: Think about terms your target audience might search for.
- Consider broad and specific tags: For example, “graphic design” (broad) versus “minimalist poster” (specific).
- Research similar projects: See what tags other creators in your field are using.
By thoughtfully crafting your description and selecting the right tags, you not only enhance your project but also increase its chances of being seen by potential admirers or clients.
Also Read This: How to Download Projects from Behance and Save Your Favorite Designs Easily
6. Publishing and Sharing Your Project
So you’ve polished your project with a captivating description and perfect tags—now it’s time to publish it! This is the moment you’ve been waiting for, and there’s a lot to consider about how to get the most out of your launch.
When you're ready to go live, follow these steps:
- Double-check everything: Go through your project one last time. Check images, text, descriptions, and tags to ensure everything is in tip-top shape.
- Choose privacy settings: Decide if you want your project to be public or private. Public projects are visible to everyone, while private ones can be shared selectively.
- Hit the publish button: When you’re satisfied, it’s time to share your hard work with the world!
But wait! Publishing is just the beginning. To maximize exposure, consider
- Sharing on social media: Post your project on platforms like Instagram, Twitter, and LinkedIn. Use relevant hashtags to reach a larger audience.
- Engaging with the Behance community: Comment on and appreciate other users’ projects to encourage them to check out yours in return.
- Invite feedback: Ask friends and colleagues for their thoughts, making them feel involved also helps you get different perspectives.
With thoughtful publishing and effective sharing, your project can reach new heights. Remember, it’s all about building connections and showcasing your unique creative voice!
How to Add a New Project to Behance and Organize Your Creative Work
Behance is a popular online platform that allows creative professionals to showcase their work, connect with others, and explore various projects. Adding a new project to Behance is a straightforward process, but organizing it effectively is equally important to gain visibility and engage your audience. Below are the steps to add a new project and tips on organization.
Steps to Add a New Project
- Sign In/Create an Account:
If you don’t have an account yet, create one by registering on Behance.net. If you already have an account, simply log in.
- Navigate to ‘Create a Project’:
Click on the “Create a Project” button found at the top right of your dashboard.
- Add Your Assets:
Upload images, videos, or files showcasing your project. You can then rearrange them by dragging and dropping.
- Write a Project Description:
Provide context and details about your project. Use formatting options for better readability.
- Select Tags:
Add relevant tags that mirror your project’s themes to help others discover your work.
- Set Privacy Settings:
Choose whether to keep your project public or private.
- Publish Your Project:
Click “Publish” to make your project live for others to view.
Organizing Your Creative Work
Once your projects are added, effective organization can make your profile more appealing. Consider these tips:
- Group Similar Projects: Create collections for projects that share a theme or style.
- Regularly Update: Keep your projects fresh by adding new work and refining existing ones.
- Engage with Others: Comment on and appreciate other artists' work, fostering a sense of community.
Table of Useful Tips
| Tip | Description |
|---|---|
| Use High-Quality Images | Ensure that all visuals are of high quality for a professional appearance. |
| Consistent Branding | Keep a consistent style, color scheme, and branding across all projects. |
| Monitor Analytics | Utilize Behance's analytics to track how your projects are performing. |
In conclusion, adding and organizing your projects on Behance not only enhances your portfolio but also helps you build connections in the creative community. By following the outlined steps and tips, you can effectively showcase your work and gain greater visibility.
 admin
admin


