Adding a class to an image in HTML is an essential skill for web developers. It allows you to manage and style images more effectively. By assigning a class, you can apply custom styles, animations, or behavior to specific images on your website without affecting others. It's like giving each image its unique identity that you can control with CSS or JavaScript.
In this guide, we'll walk you through the basics of adding a class to an image, why it's important, and how to do it. Whether you're creating a portfolio, blog, or e-commerce site, knowing how to add and manipulate classes for images is crucial for achieving the desired look and functionality.
Why Use a Class for Images in HTML?

Using a class for images provides several advantages, particularly in terms of design and functionality. Here’s why it’s important:
- Consistent Styling: With a class, you can apply the same CSS styles to multiple images across your website. This ensures a consistent look and feel, without needing to add styles to each image individually.
- Improved Accessibility: By adding descriptive class names, you can make your images more accessible for users and search engines.
- Advanced Interaction: A class can be used to trigger specific actions with JavaScript. For example, you could change an image when clicked or add a hover effect.
- Targeted Customization: With classes, you can customize the behavior of specific images. This means no need to alter every image on your page—just target the ones with a particular class.
Overall, using classes gives you more flexibility and control over how your images are displayed and interacted with on your website.
Steps to Add a Class to an Image in HTML

Adding a class to an image in HTML is straightforward. Here’s a simple step-by-step process:
- Step 1: Start with the
<img>tag. This is the HTML element used to display images. - Step 2: Inside the
<img>tag, use theclassattribute to define the class name. - Step 3: Choose a descriptive class name that represents the purpose of the image, like
class="product-image"orclass="featured-img". - Step 4: Close the
<img>tag.
Here’s an example of what the HTML might look like:
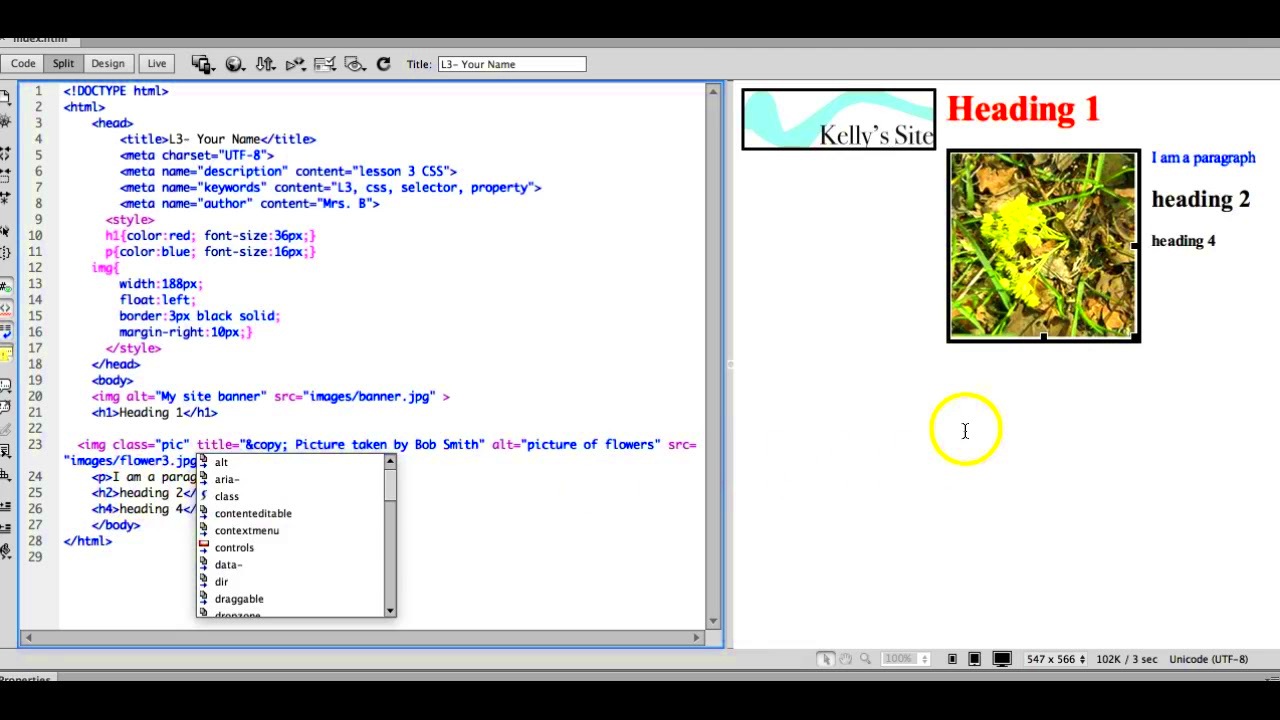
<img src="image.jpg" alt="Description of the image" class="product-image">Once the class is added, you can apply CSS styles to the image using that class. For example:
.product-image { width: 300px; height: auto; border-radius: 10px; }This CSS will style all images with the class "product-image," setting their width, height, and rounding the corners.
Understanding the Syntax for Image Class in HTML
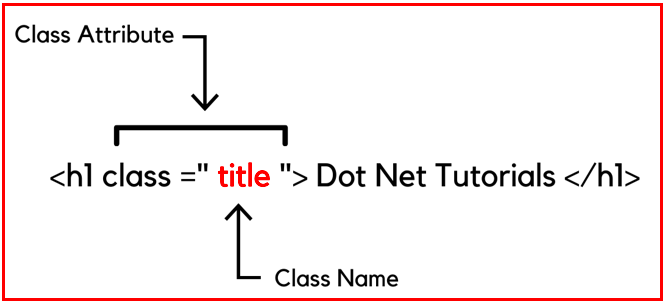
Understanding the syntax for adding a class to an image in HTML is essential for creating effective web pages. The syntax is simple, and once you get the hang of it, it becomes second nature. The key is knowing how to correctly place the class attribute within the <img> tag.
Here's a breakdown of the syntax:
<img src="image.jpg" alt="Image description" class="your-class-name">- <img>: This is the HTML tag used to insert an image into your web page.
- src="image.jpg": The source attribute points to the image file you want to display. This could be a local file or a URL.
- alt="Image description": The alt attribute is used for accessibility, providing a text description of the image for screen readers or when the image cannot be displayed.
- class="your-class-name": The class attribute assigns a specific class name to the image. This allows you to target the image with CSS or JavaScript.
Once you’ve added the class to your image, you can easily style it with CSS or add specific functionality using JavaScript. It’s important to choose a descriptive class name that will help you remember what the class is for, making your code easier to manage as your project grows.
Common Use Cases for Adding Classes to Images
Adding classes to images is not just about styling; it’s about improving functionality and organization. Here are some common scenarios where using image classes comes in handy:
- Responsive Design: You can apply a class to images that need to resize according to the screen size. For example, images within a grid layout or a carousel might require specific styling for different devices.
- Hover Effects: If you want to apply hover effects, such as changing the opacity or zooming in, you can target images with a particular class to add these effects when the user hovers over the image.
- Lazy Loading: Using classes can help implement lazy loading, which defers the loading of images until they are visible on the screen, improving page load times.
- Gallery or Grid Layout: In a gallery or grid of images, assigning a class to each image allows you to style them uniformly and apply specific grid or flexbox settings for alignment.
- Interactive Features: For websites with interactive elements, such as a clickable product image or an image that triggers a lightbox, adding a class makes it easy to target and manage these actions via JavaScript.
These are just a few examples of how adding classes can improve your website’s design and functionality, helping create a more dynamic and interactive user experience.
How to Style Images Using CSS Classes
Styling images using CSS classes is one of the most common ways to modify the appearance of images on a webpage. By applying CSS rules to an image class, you can control its size, position, borders, shadows, and much more.
Here’s how to style images with CSS classes:
- Step 1: Add a class to the image tag in HTML.
- Step 2: Write CSS rules targeting that class.
- Step 3: Apply the styles as needed.
Let’s go through an example:
<img src="image.jpg" alt="Description" class="styled-image">Now, in your CSS file or within a <style> tag, you can style the image with the "styled-image" class:
.styled-image {
  width: 100%;
  height: auto;
  border: 5px solid #ccc;
  border-radius: 8px;
  box-shadow: 0 4px 8px rgba(0,0,0,0.2);
  transition: transform 0.3s ease-in-out;
}
This CSS rule will:
- Set the image width: The width is set to 100%, making the image responsive and adjusting its size according to the parent container.
- Maintain aspect ratio: The height is set to auto to maintain the aspect ratio of the image.
- Apply a border: A light gray border is applied around the image.
- Round the corners: The border-radius property gives the image rounded corners.
- Add a shadow: A box-shadow adds depth to the image.
- Enable hover effects: The transition property creates a smooth effect when the image is hovered over, such as zooming in.
By using CSS, you can easily style all images with the same class name, giving your website a polished, consistent look. With a bit of creativity, you can apply more advanced styles like filters, animations, or custom shapes to your images.
Testing and Troubleshooting Image Classes in HTML
Once you’ve added a class to an image and applied styles or functionality, it’s important to test and troubleshoot to ensure everything works as expected. Sometimes, issues can arise with image classes due to incorrect syntax, conflicting styles, or JavaScript errors. Here’s how to test and fix common problems:
- Check Syntax: Ensure the class name is correctly written in both the HTML and CSS files. Remember that class names are case-sensitive, so
product-imageis different fromProduct-Image. - Inspect the Image: Use browser developer tools to inspect the image element and check if the class is being applied correctly. Right-click on the image, select "Inspect," and look for the
class="your-class-name"in the HTML structure. - Look for Conflicts: If other styles are overriding your image class styles, check for conflicts in your CSS. This can happen if multiple CSS rules are targeting the same image with different properties. You can use more specific selectors or
!importantto resolve these conflicts. - Test JavaScript Behavior: If you’re using JavaScript to manipulate the image (e.g., hover effects, image switching), ensure that the JavaScript code targets the class correctly and that there are no errors in the console.
- Check Image Path: If the image is not showing up, confirm the
srcattribute is correctly pointing to the image file, and the image file exists in the right location.
By following these steps, you can quickly identify and fix any issues with your image classes, ensuring your images display as intended across different browsers and devices.
Conclusion: Benefits of Using Classes for Images in HTML
Adding classes to images in HTML offers a wide range of benefits that improve the design and functionality of your website. Whether you’re working on a small personal project or a large-scale commercial site, using image classes provides several advantages:
- Consistency: Classes allow you to apply uniform styles to multiple images, ensuring consistency in your design without needing to repeat CSS for each image individually.
- Flexibility: You can easily target specific images for custom styling or behavior, making it simple to control which images are styled differently on your site.
- Enhanced User Experience: Image classes enable features like hover effects, lazy loading, and responsive design, which enhance the interactivity and usability of your website.
- Better Organization: By assigning classes to images, you can keep your HTML clean and organized. It makes your code easier to manage, especially as your project grows.
- SEO and Accessibility: Properly named classes, along with alt text, contribute to improved accessibility and SEO, helping search engines understand the content of your images.
In conclusion, using classes for images is a powerful technique that simplifies the process of styling and interacting with images on your website. It enhances your site's performance, aesthetics, and user engagement, making it an essential practice for any web developer.
FAQ
1. What is the purpose of adding a class to an image in HTML?
Adding a class to an image allows you to apply specific styles, animations, or behaviors using CSS or JavaScript. It helps to target specific images without affecting others on the page.
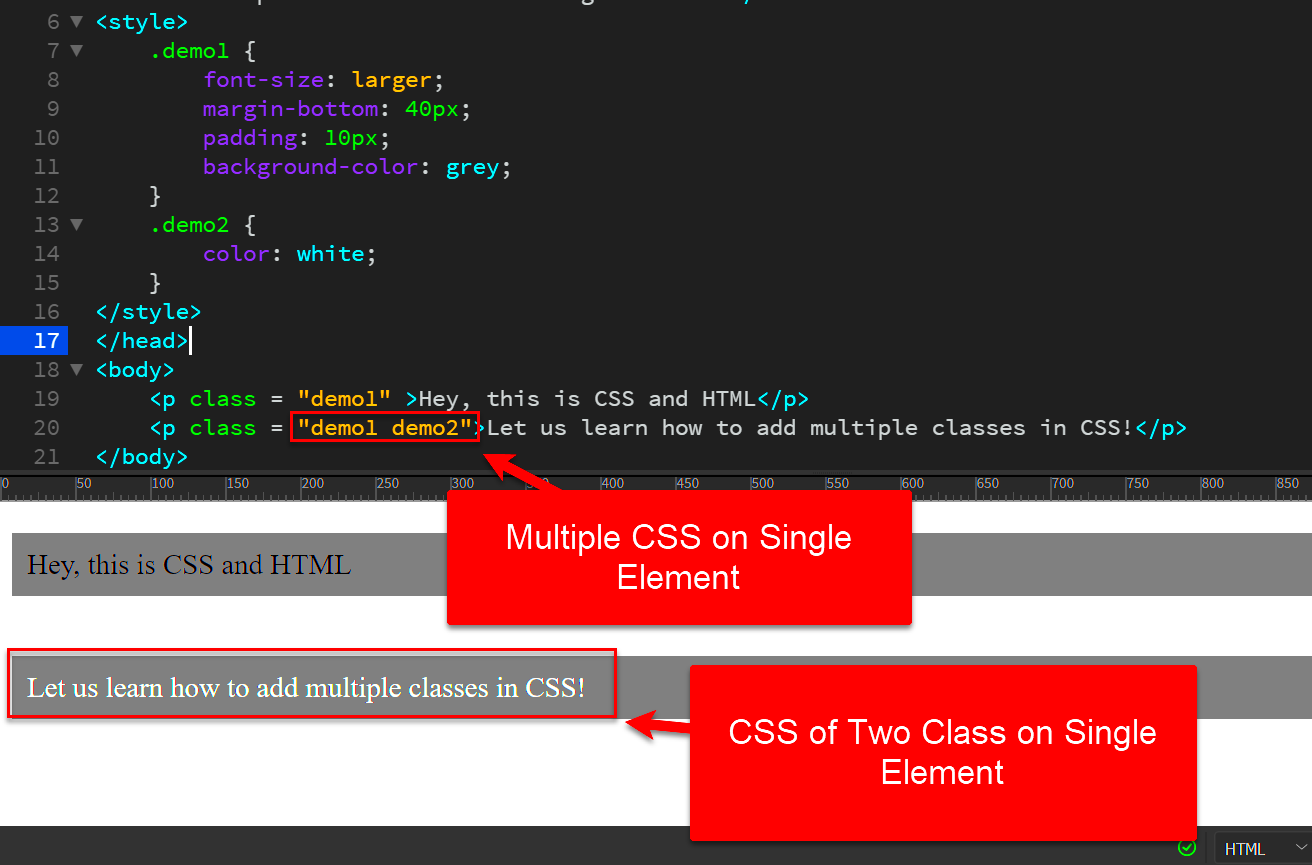
2. Can I add multiple classes to an image?
Yes, you can assign multiple classes to an image by separating them with a space. For example: <img src="image.jpg" class="class-one class-two">. Each class can have different styles or functionalities.
3. Can I style images differently on mobile devices?
Yes! You can use CSS media queries to apply different styles based on the screen size, making images responsive. For example, you can have one style for desktop screens and another for mobile devices.
4. Why isn't my image showing after adding a class?
There could be a few reasons. Make sure the image file path in the src attribute is correct. Also, check if the class is applied properly and that there are no CSS issues preventing the image from displaying.
5. Can I add interactive effects to images using classes?
Absolutely! Classes allow you to use CSS hover effects, animations, or even trigger actions with JavaScript. For example, you can enlarge an image when the user hovers over it or open a lightbox when clicked.


