Getty Images is a leading global provider of visual content. With millions of high-quality images and videos, it’s a go-to resource for publishers, marketers, and creatives alike. If you're a photographer or an artist looking to showcase your work, Getty offers a fantastic platform for exposure and potential earnings. Not only do they cater to big-name brands, but they also give emerging talent a chance to shine. So, if you’re ready to dive into the world of stock photography, let’s explore how you can successfully submit your photos to Getty Images!
Understanding the Submission Process
Submitting your photos to Getty Images may seem daunting at first, but breaking it down into manageable steps can simplify the process. Here’s a comprehensive guide to help you navigate through it smoothly.
1. Create an Account: Before you can submit any images, you need to create an account on the Getty Images Contributor platform. This is your gateway to showcasing your work. The sign-up process is straightforward—just provide your email, create a password, and follow the prompts to set up your profile.
2. Know the Requirements: Getty has specific requirements for photo submissions. Here are some key points to keep in mind:
- Image Quality: Your photos should be high-resolution and well-composed.
- Technical Specs: Ensure images are at least 4 megapixels and saved in JPEG format.
- Exclusivity: If your images are already sold on other stock sites, they may not be accepted.
3. Prepare Your Images: Once you have your photos ready, it’s time to prepare them for upload. This includes:
- Editing: Make sure your images are edited for color balance, exposure, and cropping.
- Keywording: Add relevant keywords to help potential buyers find your images. Think like a buyer—what terms would you search for?
- Model Releases: If your image features recognizable people, you’ll need a signed model release form. This legal document grants permission for Getty to use the images commercially.
4. Uploading Your Photos: Once everything is ready, log into your Getty Images Contributor account and navigate to the upload section. Here’s how to do it:
- Click on the “Upload” button and select your images from your computer.
- Fill in all the required details, including titles, descriptions, and keywords.
- Submit your images for review.
5. Review Process: After submission, your images will go through a review process. Getty’s editorial team evaluates the quality, relevance, and compliance with their guidelines. This can take a few days, so be patient!
6. Stay Engaged: Once your images are accepted, don’t just sit back! Keep promoting your portfolio on social media, and engage with the community. Regularly uploading fresh content can improve your visibility and sales.
In summary, submitting your photos to Getty Images involves understanding their requirements, preparing your work meticulously, and navigating the upload process with care. By following these steps, you'll be well on your way to seeing your photography published on a global stage!
Also Read This: Shutterstock Contributor Earnings: Understanding How Much You Can Make
3. Preparing Your Photos for Submission

Before you hit that submit button to Getty Images, it’s crucial to ensure your photos are in tip-top shape. After all, it’s not just about snapping a picture; it’s about telling a story and making it visually appealing. Here’s how to prepare your photos for a successful submission:
- Resolution Matters: Getty Images typically prefers high-resolution images. Aim for at least 300 DPI (dots per inch) to ensure your photos look sharp and professional. Think about it: a blurry image won’t catch anyone’s eye!
- Edit Thoughtfully: Use editing software like Adobe Lightroom or Photoshop to enhance your photos. Adjust brightness, contrast, and saturation, but avoid overdoing it. Authenticity is key!
- File Type: Save your images in formats that Getty accepts, primarily JPEG or TIFF. Keep in mind that TIFF files are larger, so use them sparingly for your best shots.
- Color Profile: Use the RGB color profile. Most digital cameras capture images in RGB, making it easier for Getty to process your photos.
- Keyword Your Images: Getty allows you to add keywords when you submit your photos. Think like a buyer—what words would they use to find your image? Use descriptive and relevant keywords to improve visibility.
Finally, don’t forget to double-check your images against Getty’s submission guidelines. Each submission platform has its own rules, so make sure you’re compliant to avoid rejections.
Also Read This: Understanding Adobe Stock’s Payment for Your Images
4. Creating a Getty Images Contributor Account
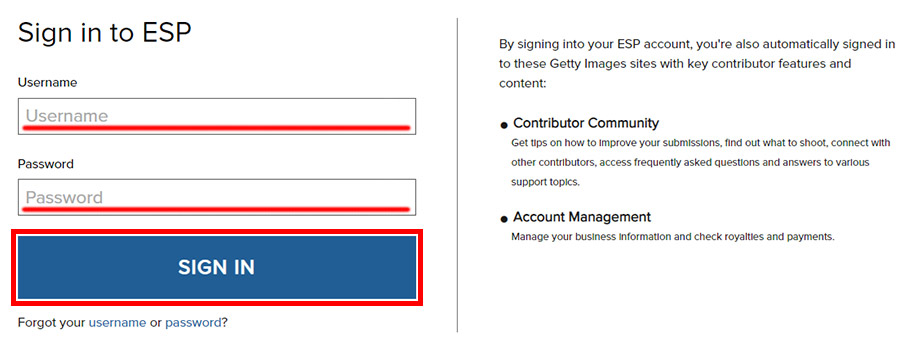
Now that your photos are prepped and ready to shine, it's time to create your Getty Images Contributor account. This process is straightforward, but let’s break it down step-by-step:
- Visit the Getty Images Contributor Page: Start by navigating to the Getty Images contributor website. You’ll find a “Join” button prominently displayed.
- Fill Out Your Information: You’ll need to provide some basic information, including your name, email address, and a password. Make sure your email is valid; you want to receive notifications about your submissions!
- Choose Your Contributor Type: Getty offers different types of contributor accounts (like photo, video, or illustration). Select the one that fits your work best.
- Agree to the Terms: Read through Getty’s terms and conditions carefully. It’s crucial to understand your rights and responsibilities as a contributor. If you’re okay with the terms, check the box to agree.
- Email Verification: After submitting your information, check your inbox for a verification email from Getty. Click the link in the email to confirm your account.
Once your account is set up, you can upload your images directly through the platform. Make sure to familiarize yourself with the dashboard and explore the resources Getty offers for contributors.
And there you have it! You’re now on your way to sharing your photographic talent with the world through Getty Images. Ready to capture and submit your stunning shots? Let’s go!
Also Read This: How Much Do I Make from My Picture Through Getty Images: Understanding Earnings from Photo Licensing
5. Steps to Submit Your Photos
Submitting your photos to Getty Images might feel like a daunting task, but breaking it down into manageable steps makes it much easier! Here’s a straightforward guide to help you navigate the submission process smoothly.
- Create an Account: Before you can submit your photos, you need to create an account on Getty Images. Visit their website and sign up. You’ll need to provide some basic information, like your name, email, and a password.
- Understand the Requirements: Each photo must meet specific criteria. Familiarize yourself with their submission guidelines, including image resolution, file formats (JPEG is standard), and technical specifications. For instance, images should generally be at least 4 megapixels in size.
- Choose Your Best Work: Only submit your best photos. Quality over quantity is key! Assess your portfolio and select images that are not only technically sound but also have compelling subject matter. Consider the type of content that Getty Images often publishes.
- Keywording: Once you’ve selected your images, it’s time to add keywords. This step is crucial as it helps potential buyers find your work. Think about terms that describe the subject, mood, colors, and any relevant emotions the image conveys. Use a mix of general and specific keywords!
- Fill Out the Submission Form: Navigate to the submission section and fill in the required details. This form typically includes information about the model releases if applicable and a brief description of each image.
- Upload Your Photos: After filling out the form, you can start uploading your selected images. Ensure that each file is properly named and that you've double-checked everything for accuracy.
- Review and Submit: Before hitting that submit button, take a moment to review your submission. Make sure everything looks good and complies with Getty's guidelines. Once you're satisfied, go ahead and submit!
And just like that, you’ve submitted your photos! The waiting game begins, but it’s all part of the process.
Also Read This: How to Sell Images on Getty Postcards for Unique Marketing Opportunities
6. Tips for Increasing Your Chances of Acceptance
Getting your photos accepted by Getty Images can be competitive, but you can enhance your chances significantly with a few strategic tips. Here’s how to increase your odds and get your work noticed!
- Stay Trend-Aware: Keep an eye on current trends in photography and stock images. Browse Getty’s collection to see what types of images are popular. For instance, if you notice a trend in lifestyle images featuring sustainability, create and submit content that aligns with that theme.
- Focus on Composition: A well-composed photo stands out. Use the rule of thirds, leading lines, and interesting angles to make your images more visually appealing. Remember, light plays a crucial role, so aim for natural lighting whenever possible!
- Feature Diverse Subjects: Getty Images values diversity. Including a range of subjects—different ages, ethnicities, and lifestyles—can make your portfolio more appealing to buyers looking for inclusive imagery.
- Utilize Model Releases: If your photos feature identifiable people, ensure you have the necessary model releases. This legal document allows Getty to use the images without issues. Having these releases ready can make your submissions much more appealing.
- Be Patient and Persistent: Not every submission will be accepted, and that’s okay! If your photos are rejected, consider the feedback (if provided) and keep submitting. Persistence is key in the world of stock photography.
By following these tips, you’ll be well on your way to increasing your chances of acceptance at Getty Images. Happy shooting!
Also Read This: Inside Look at Alamy Platform
7. Common Mistakes to Avoid When Submitting
Submitting your photos to Getty Images can be an exciting journey, but it’s essential to steer clear of some common pitfalls that can derail your chances of getting published. Here’s a list of mistakes you don’t want to make:
- Ignoring Submission Guidelines: Each agency has specific guidelines regarding image size, format, and content. Failing to adhere to these can lead to immediate rejection. Always read the requirements thoroughly!
- Submitting Low-Quality Images: Quality matters more than quantity. Make sure your photos are sharp, well-lit, and free from distractions. Blurry or poorly composed images can tarnish your reputation.
- Over-Editing Your Photos: It might be tempting to apply heavy filters or excessive retouching, but Getty Images prefers natural-looking photos. Keep edits subtle to maintain authenticity.
- Neglecting Metadata: Properly filling out your metadata (titles, descriptions, and keywords) is crucial. Incomplete or misleading metadata can prevent your images from being found by potential buyers.
- Not Researching Trends: Stay updated on current trends and popular subjects in the stock photo industry. Submitting outdated or cliché images may not resonate with buyers.
- Submitting Too Many Similar Images: Getty Images appreciates a diverse portfolio. If you send in several photos that are too similar, it may dilute your submission. Focus on showcasing your best and most varied work.
Avoiding these common mistakes can significantly enhance your chances of getting your photos published. Always take a moment to review your submission before hitting that send button!
8. What Happens After Submission?
Once you've submitted your photos to Getty Images, you might find yourself filled with anticipation. But what exactly happens next? Here’s a quick rundown of the process:
- Initial Review: Your submission will first go through an initial review stage. Getty's editorial team will check for technical quality and adherence to guidelines. This can take anywhere from a few days to several weeks.
- Evaluation: If your images pass the initial review, they’re evaluated for market potential. The team assesses if your photos align with current trends and buyer needs.
- Approval or Rejection: You’ll receive a notification about the status of your submission. If approved, your photos will be added to the Getty Images library. If rejected, you’ll often receive feedback on why they didn’t make the cut.
- Licensing: Once published, your images are made available for licensing. They can be purchased by individuals or businesses, and you'll earn royalties based on the agreements in place.
- Promotion: Getty Images may also promote your work through various channels, which can significantly increase visibility and sales potential.
Understanding this process can help manage your expectations and prepare you for the next steps. Keep your fingers crossed, and hopefully, your stunning images will soon be seen by a global audience!
 admin
admin


