Welcome to the world of Lightroom! If you've ever found yourself with an image that's just a bit off-kilter, don't worry—rotating images is a breeze. Whether you're correcting the orientation after a photo shoot or simply want to experiment with different angles, Lightroom offers intuitive tools to help you achieve the perfect rotation. In this guide, we'll walk you through the steps to rotate your images like a pro!
Step-by-Step Guide to Rotate Images
Rotating an image in Lightroom is straightforward, and with a few clicks, you can have your photos looking just the way you want them. Let’s dive into the process!
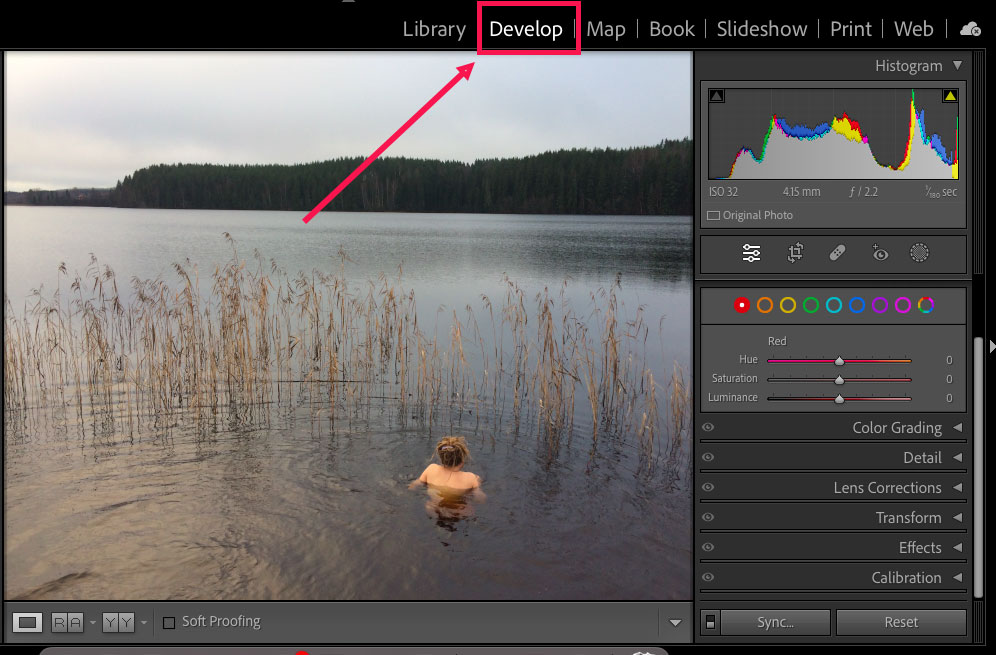
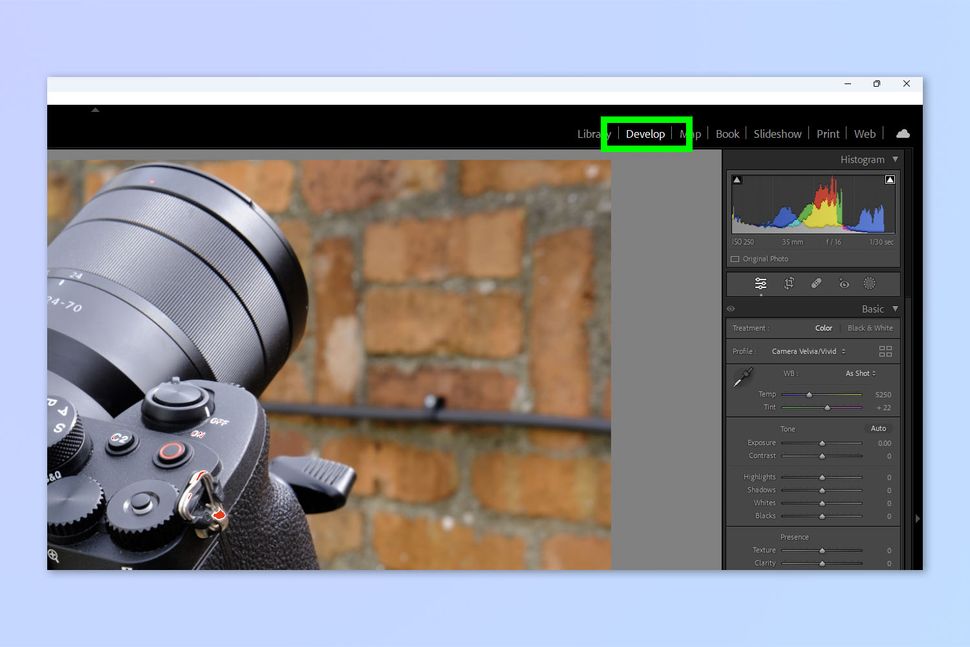
Step 1: Open Your Image
First things first! Launch Lightroom and navigate to the Library module. From there, find the image you want to rotate. You can do this by either importing your photos or selecting one from your existing catalog. Once you find it, double-click to open it in the Develop module.
Step 2: Locate the Rotation Tools
Now that your image is open, look for the rotation tools. You'll find options in the right-side panel under the Transform section. Here are a couple of handy tools:
- Rotate Left (Counterclockwise): Click the button to rotate your image 90 degrees to the left.
- Rotate Right (Clockwise): Click the button to rotate your image 90 degrees to the right.
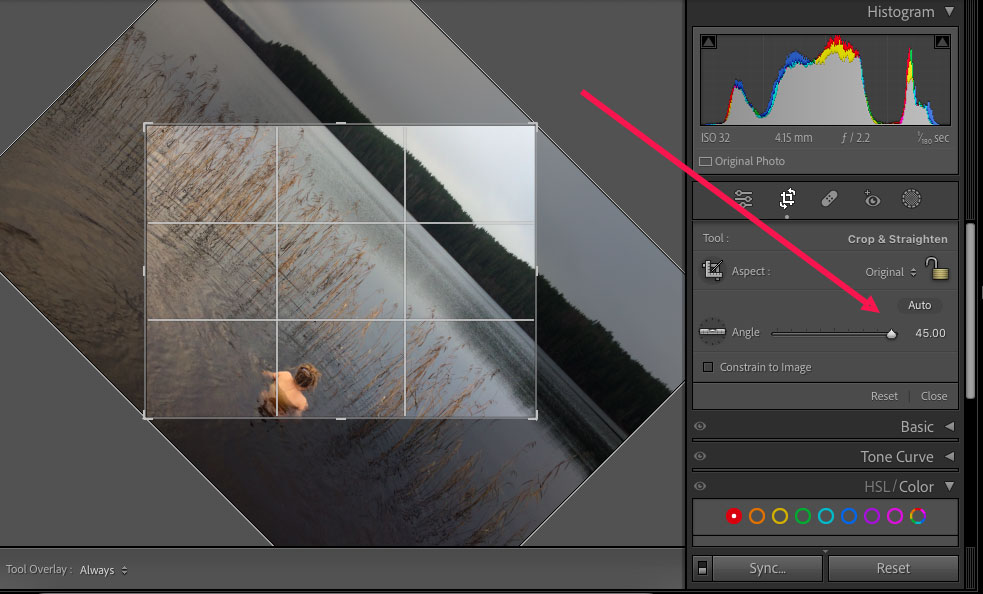
Step 3: Fine-Tune Your Rotation
If you want to adjust the angle more precisely, you can use the Angle slider located just below the buttons. Drag the slider left or right to get the exact angle you desire. This is especially useful for correcting images that need just a slight tweak rather than a full 90-degree rotation.
Step 4: Crop and Adjust (Optional)
After rotating your image, you might notice some empty spaces around the edges. This is a great opportunity to crop your photo! Click on the Crop Overlay tool (shortcut: R) and adjust the cropping handles to eliminate any unwanted areas. Don’t forget to maintain the aspect ratio if you prefer a specific format!
Step 5: Save Your Changes
Once you're satisfied with the rotation and cropping, it’s time to save your work. Press Ctrl + S (or Cmd + S on Mac) to save your changes. If you plan to export the image, go to the File menu and select Export to choose your desired file format and quality settings.
And voilà! You've successfully rotated and adjusted your image in Lightroom. With these simple steps, you can enhance your photography skills and ensure your images are always at their best!
Also Read This: How to Extract Audio from YouTube Videos on Mac
3. Using Keyboard Shortcuts for Quick Rotation
Did you know that Lightroom offers some handy keyboard shortcuts to rotate your images quickly? If you’re like most photographers, speed is of the essence when you're working on a project. Instead of fumbling through menus, using keyboard shortcuts can save you precious time. Here’s how to do it:
Rotating Images
- Rotate Left: Press
Ctrl + Shift + [(Windows) orCmd + Shift + [(Mac) to rotate your image counterclockwise. - Rotate Right: Press
Ctrl + Shift + ](Windows) orCmd + Shift + ](Mac) to rotate it clockwise.
These shortcuts are incredibly useful, especially when you’re reviewing multiple images. You can quickly flip through your photos, adjusting their orientation without losing focus on the creative process.
Flipping Images
Beyond just rotation, you might want to flip an image. While Lightroom doesn't have a direct shortcut for flipping, you can quickly access this feature:
- Right-click on the image.
- Select Flip Horizontal or Flip Vertical from the menu.
Flipping can create interesting effects and perspectives, so don't hesitate to experiment! Just remember that these shortcuts and quick actions can streamline your workflow, allowing you to focus on the artistic elements of your editing.
Also Read This: how to cut out an image in illustrator
4. Adjusting Image Orientation for Different Formats
When it comes to presenting your images, orientation can play a crucial role, especially if you're working with various platforms like social media, websites, or print. Each format has its preferences: portrait, landscape, or square. Let’s dive into how you can adjust your image orientation in Lightroom for different formats.
Understanding Formats
- Portrait: Ideal for profiles, magazines, and vertical display spaces.
- Landscape: Perfect for landscapes, banners, and most social media platforms.
- Square: Great for Instagram posts and thumbnails.
So, how do you adjust the orientation? Here are a few steps to guide you:
- Open the photo you want to edit in the Develop module.
- Use the rotation shortcuts mentioned earlier to set your preferred orientation.
- If you need a specific crop for a certain format, use the Crop Tool (shortcut
R).
Once you're in the Crop Tool, you can choose from aspect ratios like 4x5, 1x1 (square), or even custom sizes based on your requirement. Just remember to keep your composition in mind; cropping can dramatically change the focal point of your image.
Final Tips
Always keep in mind the final destination of your images. For instance, if you're preparing a photo for Instagram, a square crop might be more appealing. Alternatively, if you're creating prints, you might want to stick with a portrait or landscape orientation, depending on the print size. Experimenting with these options will help you find the best fit for your vision!
With these tips and shortcuts at your disposal, adjusting image orientation in Lightroom becomes a breeze, letting you focus on what really matters: creating stunning photography.
Also Read This: Learn to Make Money with Dailymotion Videos
5. Common Issues and Troubleshooting Tips
Even seasoned photographers can run into a few hiccups when rotating images in Lightroom. Here are some common issues you might encounter and how to resolve them:
- Image Not Rotating: If you find that the rotation tool isn’t responding, double-check that you’re in the correct module. The Develop module is where you’ll adjust your image settings, including rotation. If it still doesn’t work, try restarting Lightroom.
- Incorrect Aspect Ratio After Rotation: Sometimes, rotating an image can alter how it fits within the frame. If you notice this, check the crop settings. To maintain the aspect ratio, make sure to lock the aspect ratio while cropping the image after rotation.
- Changes Not Saved: If your rotations seem to disappear after closing Lightroom, ensure you’re saving your work. Use the “Save Metadata to File” option or simply export your images to retain all changes.
- Performance Issues: If Lightroom becomes sluggish while you're trying to rotate images, your system might be running low on resources. Closing other applications can help free up memory. Also, consider optimizing your catalog regularly.
Lightroom’s community forums and support pages can also be invaluable resources. If you encounter a problem that you can’t solve on your own, chances are someone else has faced it too.
6. Conclusion and Additional Resources
Rotating an image in Lightroom is a simple yet essential skill for any photographer looking to enhance their workflow. By mastering the rotation tools, you can ensure your images are perfectly aligned and ready for presentation or printing.
Remember, whether you're rotating to create a more dynamic composition or just to straighten a horizon line, these small adjustments can make a significant difference in your final product.
For further exploration, consider diving into these additional resources:
- Adobe Lightroom Tutorials: Official tutorials from Adobe that cover everything from basic edits to advanced techniques.
- Lightroom Queen: A treasure trove of tips, tricks, and troubleshooting advice curated by a Lightroom expert.
- YouTube - Lightroom Channel: Visual learners can find a wealth of video tutorials that walk you through various features and updates in Lightroom.
As you continue to refine your editing skills, remember that practice makes perfect. Don’t hesitate to experiment with different rotation techniques and settings. Happy editing!
 admin
admin


