When it comes to protecting your data, creating backups is one of the most important steps you can take. But there's more than one way to back up your files. One of the most effective methods is by imaging your hard drive. Hard drive imaging creates an exact copy of your entire system, including the operating system, applications, settings, and all your files. This method offers more than just file backup—it's like making a snapshot of your entire system. If something goes wrong, you can restore everything in a fraction of the time it would take to reinstall and set up your system from scratch.
What Is Hard Drive Imaging?

Hard drive imaging is the process of creating an exact replica of your hard drive onto another storage device. Unlike traditional file backups, which only copy files, imaging copies the entire disk, including the system files, settings, and applications. This ensures that if your system crashes, you can restore not just your files but the entire environment, just as it was before the failure.
Here’s a breakdown of how hard drive imaging works:
- Disk Copying: The software creates an identical copy of every sector of the hard drive, including hidden files and boot records.
- Compression: The image is usually compressed to save space, but it still maintains an exact copy of the original data.
- Restoration: In case of a failure, the system image can be restored to the same or a new drive, bringing your system back to its previous state.
In essence, hard drive imaging gives you a complete backup that can be used to recover your whole system, rather than just restoring individual files or folders.
Why You Should Image Your Hard Drive

Hard drive imaging offers several advantages over traditional backups. While regular file backups are great for protecting important documents and photos, they don’t offer the same level of protection when it comes to your operating system or installed applications. Imaging your hard drive, on the other hand, ensures that your entire system can be restored if something goes wrong.
Here are some key reasons why you should consider imaging your hard drive:
- Full System Backup: Imaging creates a backup of your entire system, not just files, so you’re protected from all sorts of failures—from software crashes to hardware issues.
- Faster Recovery: If your system fails, restoring an image takes much less time than reinstalling the operating system and applications from scratch.
- System Replication: If you need to set up a new computer or transfer your system to a larger drive, you can use the image to replicate your current setup without having to manually reinstall everything.
- Peace of Mind: Knowing that your system is completely backed up, including all settings, drivers, and applications, gives you confidence in the event of a failure.
Whether you're a casual user who just wants to avoid the hassle of system reinstallation or a business professional looking to protect critical data, hard drive imaging is a smart and reliable method for securing your system.
How to Choose the Right Imaging Software

Choosing the right hard drive imaging software is crucial for ensuring that your backup process is smooth and your data is safe. With so many options available, it can be a bit overwhelming to decide which one to use. The right software can make the entire imaging process faster and more reliable, so it’s important to consider a few key factors before making your choice.
Here are some things to keep in mind when selecting your imaging software:
- Ease of Use: Look for software with an intuitive interface. You don’t want to spend hours trying to figure out how to create an image. Many good programs come with step-by-step wizards that guide you through the process.
- Compatibility: Make sure the software is compatible with your operating system. Some imaging tools work only on specific OS platforms like Windows, Mac, or Linux.
- Backup Options: Does the software allow for incremental backups? This feature only backs up changes since the last image, which can save time and storage space.
- Restoration Features: Check that the software provides reliable restoration options. You want to be sure that you can restore your system quickly and without errors if needed.
- Customer Support: Good customer support can make a huge difference, especially if something goes wrong. Opt for a program that offers help via email, chat, or phone.
Examples of popular imaging software include Clonezilla, Macrium Reflect, and Acronis True Image. Try out a few different programs to see which one fits your needs and feels most comfortable to use.
Step-by-Step Guide to Imaging Your Hard Drive
Now that you've chosen your imaging software, it’s time to start creating your system image. Imaging your hard drive is usually a straightforward process, but it’s important to follow the right steps to ensure a successful backup.
Here’s a simple, step-by-step guide to imaging your hard drive:
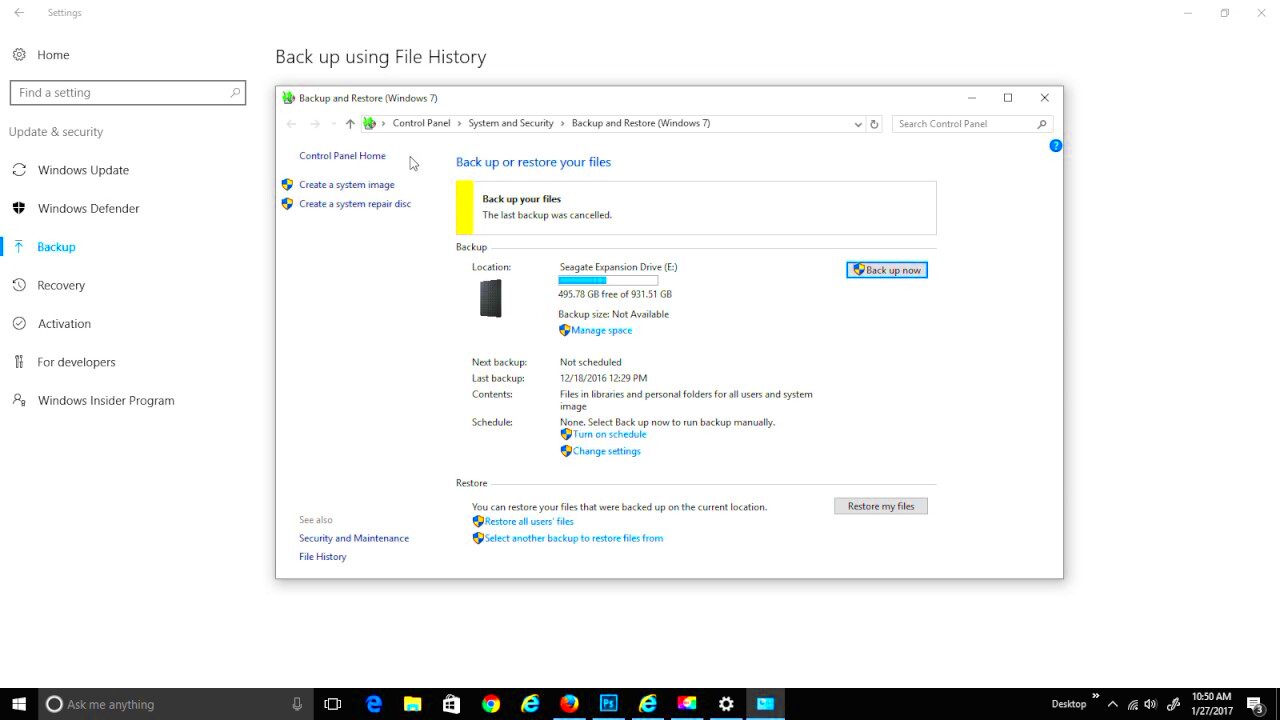
- Install the Imaging Software: Download and install your chosen imaging software on your computer. Follow the setup instructions to get it up and running.
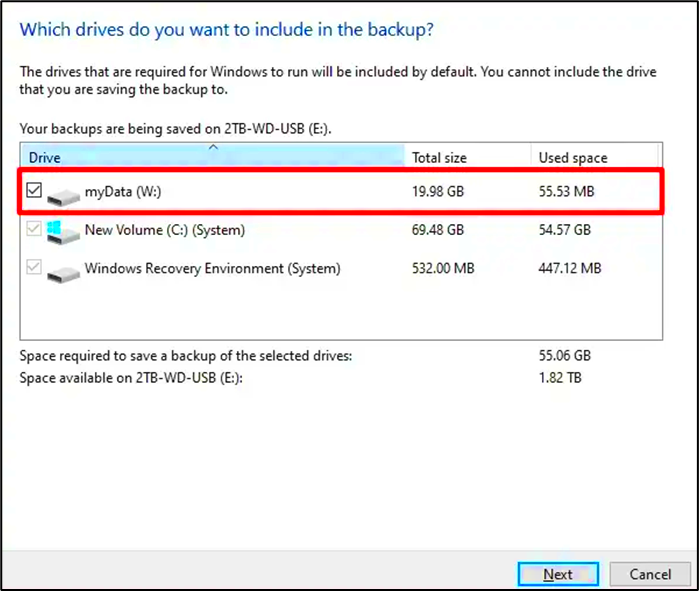
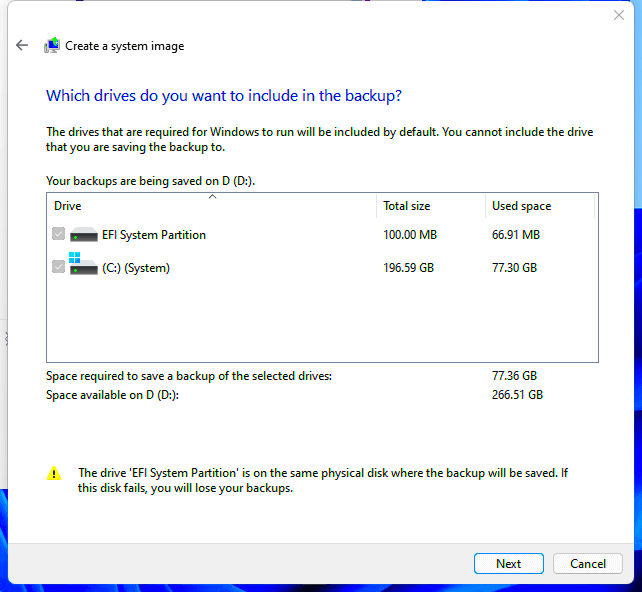
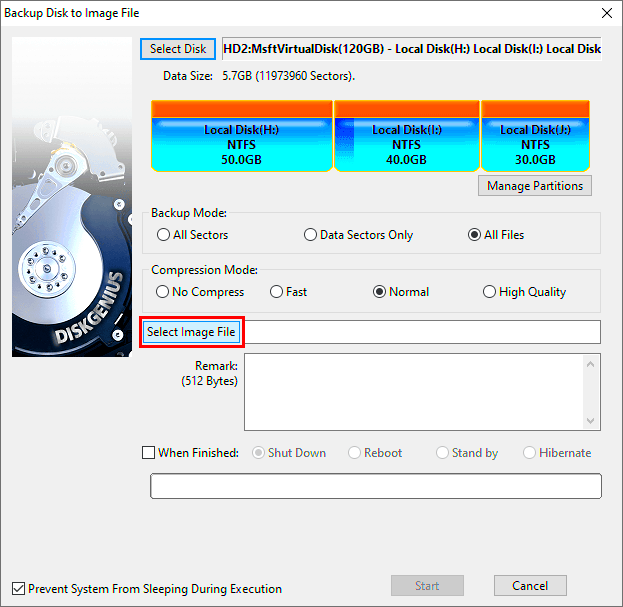
- Choose the Source Drive: Open the imaging software and select the hard drive you want to create an image of. This is usually your main system drive (C: drive).
- Select the Destination: Choose where you want to store the image. This could be an external hard drive, a network location, or even cloud storage, depending on the software and your storage capacity.
- Start the Imaging Process: Begin the imaging process by clicking the appropriate option in your software. Some programs let you choose between a full or incremental image. A full image captures everything, while an incremental one only captures changes since the last backup.
- Wait for the Process to Complete: Depending on the size of your drive and the speed of your system, imaging can take some time. Be patient and let the process run to completion.
- Verify the Image: After the image is created, verify that the file is intact and can be restored. Many programs offer a verification step to ensure the image is properly created.
Once you’ve created your system image, store it in a safe location, and keep it updated regularly to ensure you’re always protected in case of a system failure.
Common Mistakes to Avoid When Imaging a Hard Drive
While imaging your hard drive is a great way to protect your data, there are some common mistakes that can make the process less effective or lead to issues when restoring your system. Avoiding these pitfalls will help ensure your backups are reliable and that you can restore your system without problems if the need arises.
Here are some common mistakes to watch out for:
- Not Verifying the Image: After creating a backup, it’s crucial to verify the image to ensure it was created correctly. Some software offers an automatic verification process, but if not, you should check the image manually.
- Choosing the Wrong Destination: Don’t store your backup on the same drive you’re imaging. If your primary drive fails, you won’t be able to recover the image. Always use an external drive, network storage, or cloud backup for your image files.
- Forgetting to Update the Image: A one-time image is not enough. You should regularly update your system image to capture changes made to your system over time. Otherwise, you might lose recent work or settings in case of a recovery.
- Skipping Disk Cleanup: Before imaging, run disk cleanup tools to remove unnecessary files and free up space. Imaging a cluttered or full drive can take up more space and slow down the process.
- Overlooking Software Compatibility: Make sure the imaging software you’re using is compatible with your system. Some programs may not work well with certain hardware or operating system versions, leading to errors or incomplete images.
By avoiding these mistakes, you can ensure that your hard drive imaging is smooth, your backups are reliable, and your system can be easily restored when needed.
Restoring a System Image to a New Drive
If your system fails, or if you're upgrading to a larger or faster drive, restoring a system image to a new drive is the best way to get your system back up and running without losing any data. The process is relatively straightforward but requires some care to ensure that the restoration is successful. By restoring the system image, you can quickly bring your operating system, software, settings, and files back to their previous state.
Follow these steps to restore a system image to a new drive:
- Prepare Your New Drive: Install the new hard drive into your computer. If it's an external drive, connect it to your computer.
- Boot from Recovery Media: You’ll need to boot your computer using a recovery disk or USB drive that contains your imaging software. Some software comes with a built-in recovery tool.
- Select the System Image: Open your imaging software and locate the system image you want to restore. It should be stored on an external drive or network location.
- Begin the Restoration Process: Follow the software’s prompts to restore the image. The process will overwrite the contents of the new drive, so make sure it’s empty or that you’ve backed up any important data first.
- Wait for the Restoration to Complete: Depending on the size of the image and the speed of your drives, this could take anywhere from a few minutes to several hours. Be patient and avoid interrupting the process.
- Reboot Your System: Once the restoration is complete, reboot your system and make sure everything is working as expected. Your new drive should now contain an exact replica of your old drive.
Restoring a system image can save you a lot of time and effort, especially when moving to a new hard drive or recovering from a system crash. Just remember to always verify the image before starting the restoration process to avoid any issues later.
Best Practices for Maintaining Your Hard Drive Images
Here are some best practices to follow when maintaining your hard drive images:
- Store Backups in Multiple Locations: Don’t rely on a single storage location for your system images. Keep copies on external hard drives, network storage, or cloud services to ensure redundancy.
- Update Images Regularly: As you make changes to your system, such as installing software or updating files, make sure to create new images regularly. You don’t want to restore an outdated image that lacks your most recent work.
- Keep Images Organized: Label and organize your images by date and version. This will help you find the right backup quickly in case you need to restore it.
- Verify Your Images: Periodically, check your system images for integrity. Many imaging software programs have a built-in feature that verifies the image to ensure it hasn’t been corrupted.
- Use Compression: While you want to store as many images as possible, consider using compression options to save space. Most imaging tools allow you to compress images without losing any data.
- Test Your Backup: Occasionally, test your backup by restoring it to a test machine or a partition. This ensures that the image is viable and you can restore your system when needed.
By following these best practices, you can ensure that your hard drive images remain reliable and secure. Regularly maintaining your backups will provide peace of mind knowing that you're prepared for any unforeseen system issues.
FAQ
Here are some frequently asked questions about hard drive imaging and how it works:
- How often should I create a system image? It's recommended to create a system image after significant changes, such as software installations, operating system updates, or major file changes. A good rule of thumb is to create an image once a month if you're not making frequent changes.
- Can I restore a system image to a different sized drive? Yes, you can restore a system image to a different sized drive, but the image must be restored to a drive that’s at least as large as the original one. Some imaging software allows you to resize partitions during the restoration process.
- Is it possible to restore a system image if the hard drive is physically damaged? If the drive is physically damaged and you can’t access it, you might not be able to restore the image. However, if you have the image saved to an external drive or cloud storage, you can restore it to a new drive without issue.
- How do I choose between full or incremental backups? Full backups create an exact copy of your system every time, while incremental backups only capture changes since the last backup. Full backups are more time-consuming, but they are a complete snapshot. Incremental backups are faster and save space but require the full image for restoration.
- Can I automate the process of creating system images? Yes, many imaging software programs allow you to schedule automatic backups. This way, you can set the software to create a new system image at regular intervals without having to do it manually.
Conclusion
In conclusion, imaging your hard drive is a powerful and essential method for ensuring the safety of your data. By creating a full backup of your system, you not only protect your files but also preserve your entire operating environment, applications, and settings. This can save you significant time and effort in the event of system failures or hardware issues. By following best practices such as regular updates, using reliable software, and maintaining multiple storage locations, you can ensure that your hard drive images remain secure and accessible whenever needed. Remember, creating a system image is just one part of the process—proper maintenance and testing are crucial to making sure your backup is effective when disaster strikes. Whether you’re a home user or managing a business, system imaging offers peace of mind and a reliable solution for data recovery.


