When your iPhone starts to run out of space, one of the main culprits is often the large size of your photos. While high-quality images are great for capturing memories, they can take up a significant amount of storage over time. This is where image compression comes in. By reducing the file size of your photos, you can free up valuable storage on your iPhone without compromising the overall quality too much. In this post, we’ll walk you through the basics of compressing images on your iPhone and why it’s so important to do so.
Why You Might Need to Compress Images on iPhone

There are several reasons why you might want to compress your images on iPhone:
- Storage space: Over time, your iPhone can accumulate thousands of photos, which can quickly take up most of your available storage. Compressing images can help free up space for other apps, files, or updates.
- Sharing with others: Large image files can be difficult to share, especially if you’re sending them over text or email. Smaller file sizes make it easier and faster to send photos to friends or family.
- Uploading to cloud services: If you’re uploading images to cloud storage or social media, compression can reduce upload times and ensure that you don’t run out of cloud storage space too quickly.
- Backup management: When backing up your photos, especially if you’re using an online service, smaller files help ensure that your backups don’t take up excessive amounts of storage.
In short, compressing images helps with storage management, sharing, and backup without losing much in terms of quality.
How iPhone Handles Image Storage by Default

By default, iPhones save images in the HEIF (High-Efficiency Image Format) for photos and HEVC (High-Efficiency Video Coding) for videos. These formats are designed to offer good quality images and videos while keeping file sizes relatively small compared to older formats like JPEG. However, even with these efficient formats, your storage can fill up fast as you take more photos and videos.
When you take a photo on your iPhone, the image is typically saved in its original resolution and size. The high resolution means that you can zoom in on details without losing sharpness, but it also leads to larger file sizes. For example, a single high-resolution photo can range anywhere from 2MB to 10MB, depending on the content.
To help manage storage, iPhones also use a feature called “Optimize iPhone Storage”. When this option is turned on, your iPhone will store full-resolution photos and videos in iCloud and only keep smaller, optimized versions on your device. This allows you to have more photos stored on your phone without using up too much storage. However, if you need to access the full resolution photo, it will download from iCloud as needed, which requires an internet connection.
Despite these features, it’s still important to be proactive about managing your photo storage, especially if you don’t use iCloud or if you’re running out of space quickly. This is where image compression can make a big difference.
Steps to Compress an Image on iPhone Without Third-Party Apps

If you want to compress an image on your iPhone without using any third-party apps, there are a few built-in options you can try. While iPhones don’t have a direct "compress" button, there are workarounds that help you reduce image size effectively.
One of the easiest methods is to use the Mail app for compression:
- Open the Photos app and select the image you want to compress.
- Tap the Share icon (the square with an upward arrow).
- Select the Mail app from the share options.
- In the recipient field, type your own email address (you won’t actually send the email). This action triggers the compression process.
- Tap Send (don’t worry, it won’t be sent).
- When prompted to choose the image size, select Small or Medium.
- Once you’ve selected the size, your iPhone will compress the image before sending it. You can save the compressed version by opening the email and downloading the image back to your device.
Though this is a simple method, it doesn’t provide as much control over the compression level as third-party apps. But it works well for reducing image size quickly without installing extra software.
Using Third-Party Apps to Compress Images on iPhone
If you need more control over the image compression process, third-party apps can provide a more powerful solution. These apps typically allow you to compress multiple images at once, adjust the level of compression, and even convert file formats. Some popular apps for image compression on iPhone include:
- Compress Photos & Pictures: This app allows you to compress images without sacrificing too much quality. It also lets you resize images and batch compress them for efficiency.
- Image Size: A straightforward app that helps you resize and compress images to the exact dimensions you need. It's easy to use and suitable for both beginners and advanced users.
- JPEG / PNG Image File Converter: This app specializes in compressing and converting images to different formats, such as JPEG, PNG, and more. It’s handy if you need to convert images into more manageable sizes for uploading or sharing.
Using these apps is simple, and the compression quality is often higher compared to the built-in options. Most of these apps provide a slider or options to adjust the degree of compression, so you can choose the best balance between image quality and file size. Many apps also allow you to preview the compressed image before saving it, so you can ensure that it looks good.
How to Compress Multiple Images on iPhone at Once
Compressing a single image on your iPhone is easy, but what if you need to compress multiple images at once? Thankfully, third-party apps can help with this as well, saving you time and effort. Here’s how you can compress multiple images at once on iPhone:
- Choose a compression app: Start by downloading one of the apps mentioned earlier, like "Compress Photos & Pictures" or "Image Size."
- Select multiple photos: Open the app, and look for an option to select multiple photos at once. In most apps, there will be a “Select All” button or the ability to choose images from your photo library in a batch.
- Adjust compression settings: Once you've selected the images, adjust the compression settings according to your needs. Many apps will allow you to choose the level of compression for all images in the batch.
- Start the compression process: After adjusting the settings, tap on the button to start the compression. The app will process all the selected images and reduce their file sizes.
- Save the compressed images: Once the compression is complete, you can save the smaller, compressed images back to your photo library or share them as needed.
Batch compressing images is incredibly helpful if you have a lot of photos to manage. Not only does it save time, but it also allows you to control the quality and file size for all your images at once. This method is particularly useful when you need to free up space or upload multiple images to a website or cloud service.
Things to Consider Before Compressing Images on iPhone
Before you start compressing images on your iPhone, there are a few important things to consider. Compression helps reduce file sizes and free up storage, but it can also affect image quality. Depending on how much compression you apply, the image could lose some detail or become blurry. Here are a few things to keep in mind before you start:
- Quality vs. File Size: The more you compress an image, the smaller the file size will be, but the quality might degrade. You’ll need to find the right balance between reducing file size and maintaining acceptable quality.
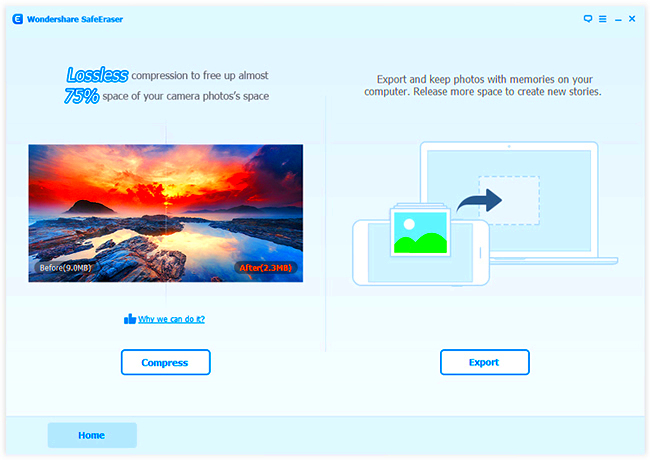
- Lossless vs. Lossy Compression: There are two types of compression: lossless and lossy. Lossless compression retains the original quality but doesn’t reduce the file size as much. Lossy compression sacrifices some image quality in exchange for smaller file sizes. Depending on your needs, you may want to choose one over the other.
- Purpose of the Image: Think about what you plan to do with the image. If it’s for printing or professional use, you’ll want to preserve the highest quality possible. However, for casual sharing or uploading to social media, some loss in quality may be acceptable.
- Backup Your Originals: Before compressing images, it’s always a good idea to make sure you have backups of the original high-quality images. This way, if you ever need the full-resolution versions, you’ll have them safely stored away.
Taking these factors into account will help you make the right decision for compressing your images while keeping them looking their best.
Tips to Keep iPhone Storage Optimized
Managing storage on your iPhone can be challenging, especially when you take lots of photos, download apps, and store media. But with a few simple habits, you can optimize your storage and keep your device running smoothly. Here are some helpful tips to keep your iPhone storage in check:
- Enable iCloud Photo Library: By turning on iCloud Photo Library, your photos and videos will be stored in iCloud, allowing you to free up space on your device. It also automatically syncs your photos across all your Apple devices.
- Use "Optimize iPhone Storage": This feature keeps full-resolution photos and videos in iCloud and stores smaller versions on your device. This helps save space while still giving you access to your media when needed.
- Clear Safari Cache: Over time, Safari can accumulate a lot of cache and website data. Go to Settings > Safari > Clear History and Website Data to remove unnecessary files.
- Delete Unused Apps: Take a look through your apps and delete any that you don’t use anymore. This will free up a significant amount of space. You can always download them again later if needed.
- Offload Unused Apps: iOS has an option to "offload" apps, which means removing them from your device but keeping their data intact. This option is useful if you want to temporarily free up space but don’t want to lose app data.
- Review Large Files: Go to Settings > General > iPhone Storage to see which apps and files are taking up the most space. You can then decide whether to delete or transfer files to another device.
- Use Cloud Storage for Documents: Storing documents and files in cloud services like iCloud, Google Drive, or Dropbox can save a lot of space on your iPhone.
By following these tips, you’ll ensure that your iPhone remains optimized for both performance and storage, giving you more space for what matters most.
FAQ
Here are answers to some of the most common questions about compressing images on iPhone:
- Does compressing images affect their quality? Yes, compressing images can reduce their quality, especially if you use lossy compression. However, many apps and methods offer a balance that keeps the quality acceptable while reducing file size.
- Can I compress multiple images at once on my iPhone? Yes, there are third-party apps available that allow you to compress multiple images at once. This can save you time, especially if you need to compress large batches of photos.
- Is there a way to compress images without losing quality? Lossless compression can help you reduce file size without losing any quality. However, it may not compress images as much as lossy compression.
- What is the best app for compressing images on iPhone? Some popular apps for compressing images include "Compress Photos & Pictures," "Image Size," and "JPEG / PNG Image File Converter." Each of these offers different features, so it’s worth trying a few to find the one that works best for you.
- Can I undo image compression on my iPhone? No, once an image has been compressed, you cannot restore it to its original quality unless you have a backup of the uncompressed version. It’s always a good idea to keep backups before compressing images.
Conclusion
Compressing images on your iPhone is a great way to save storage space without sacrificing too much quality. Whether you choose to use the built-in tools or third-party apps, there are plenty of options available to help you manage your photo library more efficiently. Just remember to consider the trade-offs between image quality and file size, and back up your original photos before making any changes. By following the tips and methods shared in this guide, you can keep your iPhone running smoothly, ensure you have enough space for new content, and make sharing your photos quicker and easier. It’s all about finding the right balance for your needs!

 admin
admin


