If you're looking for a robust yet free image editing tool, GIMP (GNU Image Manipulation Program) is an excellent choice. It provides a wealth of features that cater to beginners and professionals alike. Whether you're touching up photos, creating stunning graphics, or designing web images, GIMP's versatility is hard to beat. The user-friendly interface, combined with powerful tools, allows you to manipulate images in ways that meet your creative vision. Let’s dive in and learn how to center an
Why Centering an Image is Important

Centering an image is one of those fundamental skills that every GIMP user should master. But why is it so crucial? Let’s unpack some of the reasons:
- Aesthetic Appeal: A well-centered image often looks more balanced and visually appealing. It draws the viewer's attention and presents a professional quality.
- Focus: Centering helps to guide the viewer’s focus to the most important part of the image, ensuring that the message or subject you want to convey is clear.
- Consistency: Whether you're designing a webpage, creating a flyer, or editing personal photos, consistent image placement establishes a cohesive look across all your designs. This uniformity enhances brand recognition and confers reliability.
- Printing and Framing: If you're printing images or framing them, centering ensures that your composition fits aesthetically within the space, preventing awkward cropping or empty space in your final presentation.
Moreover, when it comes to digital platforms, centered images tend to work better. Social media platforms often favor images that are designed for centering, allowing for a more polished appearance in feeds. Think about how often you see an unbalanced image that draws your eye away from the subject. In the creative world, maintaining viewers' attention is key, and centering helps you achieve that.
Lastly, if you’re working with multiple images in a single layout, centering enables seamless alignment. Inserting images into brochures, web layouts, or portfolios can create a visually jarring experience if the images are not correctly aligned. Correctly centered images build a streamlined, professional look that enhances user experience.
In conclusion, centering your images is not just a small detail; it’s a vital aspect of composition that can vastly improve the effectiveness of your visuals. By learning how to center images in GIMP, you're not just learning a skill; you’re enhancing your overall artistic expression and professionalism. Stay tuned for the rest of our guide on image centering techniques in GIMP!
Also Read This: Adding Images in Blender: A Guide
3. Step-by-Step Guide to Centering an Image in GIMP
Centering an image in GIMP might sound daunting, but it’s actually a straightforward process once you get the hang of it. Whether you’re working on a project for personal use or creating something professional, following these simple steps can make a huge difference in your design. Here's how you can do it:
- Open Your Image: Start by launching GIMP and opening the image you want to center. You can do this by going to File > Open, or simply drag and drop your image into the GIMP workspace.
- Set the Canvas Size: If you want to center your image with respect to a specific canvas size, go to Image > Canvas Size. Here, you can adjust the width and height of the canvas to meet your specific needs.
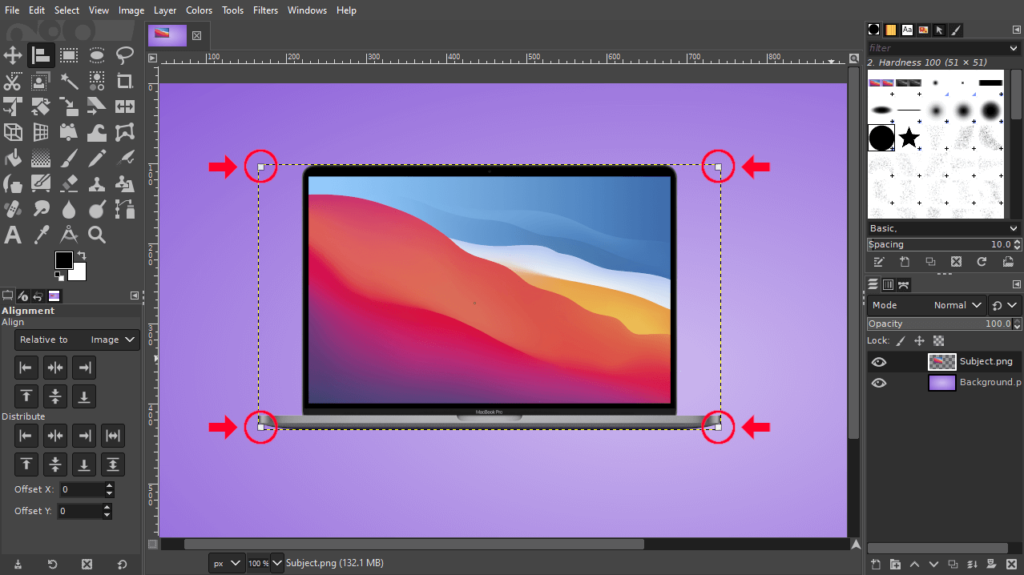
- Activate the Alignment Tool: To center your image, you’ll need the Alignment Tool. You can find it in the toolbox, or you can access it by going to Tools > Transform Tools > Align.
- Select Your Image: Once you have your alignment tool active, click on your image to select it. You’ll notice a bounding box around it, indicating that it’s ready to be centered.
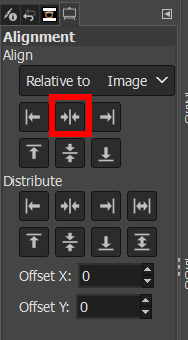
- Open the Tool Options: With the Alignment Tool selected and your image chosen, look for the Tool Options. Here, you’ll find various alignment options.
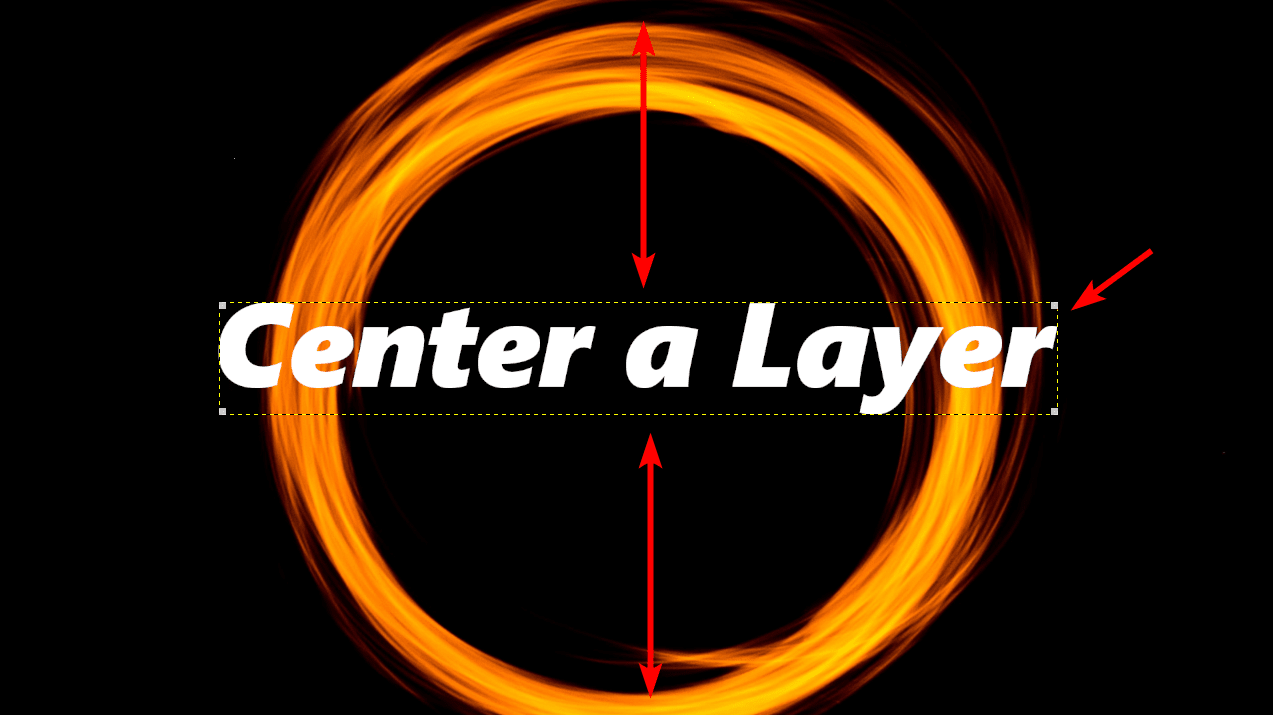
- Center the Image: To center your image horizontally and vertically, click on the Align Horizontal Centers and Align Vertical Centers buttons within the Tool Options. Your image should now be perfectly centered on the canvas!
- Export Your Centered Image: Lastly, once you're satisfied with the centering, you can export your work. Go to File > Export As and choose your desired format.
And that’s it! You’ve successfully centered your image in GIMP. Practice these steps a few times, and you’ll find that it becomes second nature.
Also Read This: How to Join Rumble and Create Engaging Content
4. Tips for Perfect Image Centering
Now that you know how to center an image in GIMP, let’s explore some useful tips to ensure that your centering skills are top-notch! Having a few tricks up your sleeve can make a world of difference in your design projects.
- Use Grids and Guides: Enable grids and guides to provide a visual reference for centering. You can toggle grids by going to View > Show Grid. Adjusting the grid settings can help you align with precision.
- Snap to Guides: Make sure that the ‘Snap to Guides’ feature is enabled. This will help your image snap into place when you drag it near the center of your canvas. You can find this option under View.
- Keep Aspect Ratio in Mind: Always ensure your image maintains its aspect ratio if resizing is involved. This keeps your image looking professional without distortion. Use the chain link icon in the scaling tool options.
- Check Your Alignment: After you've centered your image, zoom in and double-check the alignment. Sometimes, a fresh look can make all the difference to spot any misalignments.
- Experiment with Different Layouts: Not every project needs perfect centering. Explore asymmetrical layouts or unique compositions that may enhance the overall aesthetic of your work.
By implementing these tips, you’ll not only become proficient in centering images in GIMP but also enhance your overall graphic design skills. Happy designing!
Also Read This: A Comprehensive Guide to Downloading Vectors from 123RF
5. Common Issues When Centering Images in GIMP
Centering images in GIMP might seem straightforward, but sometimes users encounter a few hiccups along the way. Understanding these common issues can help you navigate the process with greater ease. Let’s dive into some of the problems you may face and how to resolve them:
- Layer Selection: One of the most frequent mishaps is forgetting to select the correct layer. If you're working with multiple layers, you'll want to ensure that the layer containing the image you wish to center is active. If the wrong layer is selected, you might be moving or aligning something that's not your intended image.
- Wrong Alignment Tool: GIMP offers various alignment tools, and if you're not using the right one, your image may not center properly. Make sure you utilize the "Align" tool and select the appropriate options such as aligning with the canvas or relative to other layers.
- Image Boundaries: If your image has transparent areas or is a part of a larger canvas, you might be centering the visible portion instead of the entire image. Always check the boundaries of the image itself to avoid misalignment.
- Misunderstanding Guides and Grids: Guides and grids can be extremely helpful for alignment, but if you're unaware of how to use them correctly, they can create confusion. Ensure you know how to toggle guides and snapping options to streamline your center alignment task.
- Canvas Size Discrepancies: If your image dimensions don't match the canvas size, it might not look centered even if you’ve technically aligned it perfectly. Adjusting the canvas size or scaling the image can resolve this.
Each of these issues has a straightforward solution, so don't get discouraged if things don't work out on the first try. With a little practice and familiarity with GIMP’s tools, you’ll be centering images like a pro in no time!
6. Conclusion and Additional Resources
Centering images in GIMP is an essential skill that can greatly enhance your creative projects. Whether you're preparing graphics for social media, designing a flyer, or editing photos, knowing how to center your images adds a polished touch to your work.
As you continue to explore GIMP, here are some key takeaways:
- Always ensure the correct layer is selected before you center your image.
- Familiarize yourself with effective alignment tools and options.
- Pay attention to the boundaries of your image and canvas size to avoid misalignment.
- Utilize guides and grids to aid in the centering process.
For those looking to deepen their knowledge of GIMP or tackle more advanced image editing techniques, here are some additional resources:
- GIMP Official Tutorials - A treasure trove of guides covering everything from basics to advanced techniques.
- YouTube GIMP Tutorials - Visual learners can benefit from video tutorials that demonstrate a variety of GIMP skills in action.
- GIMP Forums - Join the community to ask questions, seek advice, and share your projects with fellow GIMP users.
- Udemy Courses on GIMP - Consider enrolling in structured courses that can provide in-depth training on specific skills.
With these tools and tips at your disposal, you should feel empowered to create stunning, well-centered images in GIMP. Happy editing!
 admin
admin


