Flipping images in PowerPoint is a simple yet powerful way to enhance your presentations. Whether you need to mirror an image or create a visual effect, flipping can help you achieve the look you want. It's a straightforward feature, but many users overlook its potential. In this guide, we’ll explore the basics of flipping an image and how it can improve your slides. From making images look more dynamic to correcting an orientation, flipping gives you greater control over your visual content.
Why You Might Want to Flip an Image

Flipping an image may seem like a minor adjustment, but it can make a big impact on your presentation. Here are a few reasons why flipping an image could be useful:
- Creating Mirror Images: Sometimes, you want a reflection effect or to mirror a visual element for balance. Flipping can give you the perfect symmetry.
- Fixing Orientation: If you've inserted an image that’s rotated the wrong way, flipping it can be a quick fix.
- Improving Visual Appeal: Flipping can alter the perspective of an image and make it more visually engaging, especially when combined with other editing tools.
- Design Consistency: For some designs, flipping an image can help maintain alignment and create a cohesive look across your slides.
Flipping doesn’t just change the direction of an image; it opens up creative possibilities. By experimenting with flipped images, you can find new ways to make your presentations more striking and effective.
Steps to Flip an Image in PowerPoint

Flipping an image in PowerPoint is a simple process that doesn’t require any advanced skills. Follow these easy steps to get started:
- Select the Image: Click on the image you want to flip to select it. If you have multiple images, make sure you click the one you want to edit.
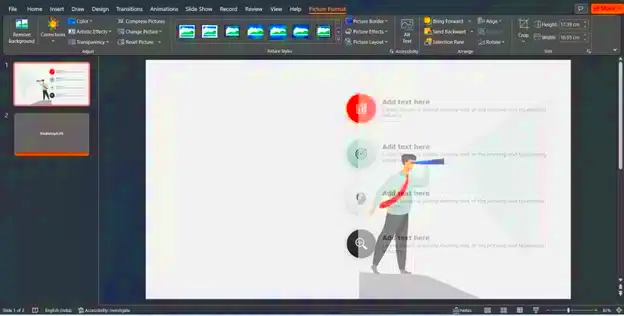
- Go to the Format Tab: Once the image is selected, go to the "Format" tab in the toolbar. This tab is where you’ll find various editing options for your image.
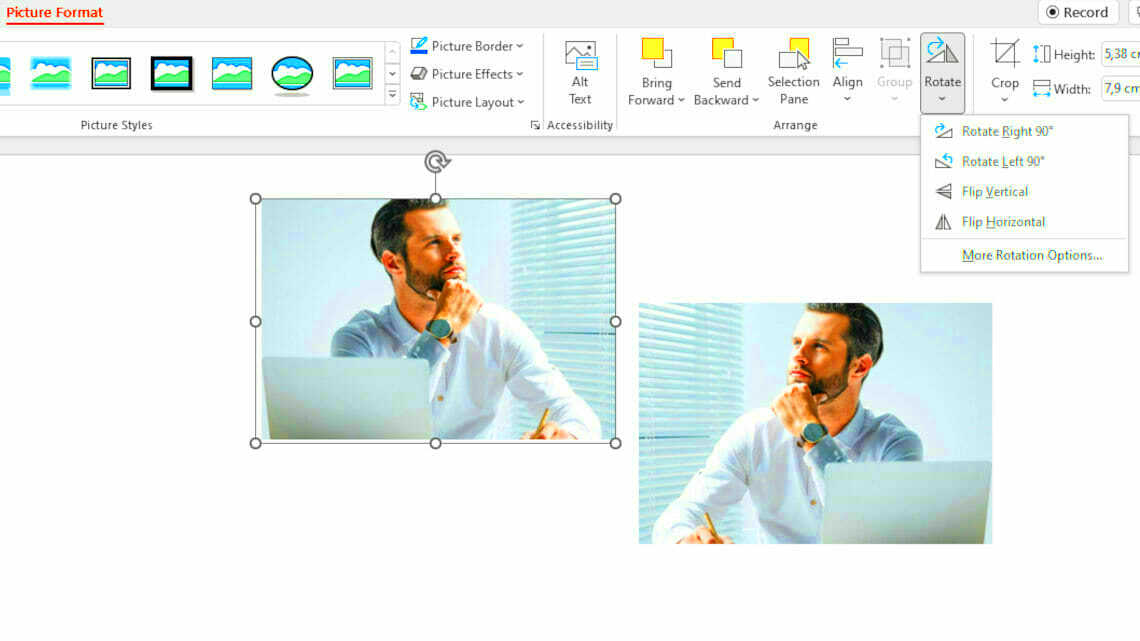
- Click on Rotate: In the "Format" tab, find the "Rotate" button. This will open a dropdown menu with several options.
- Choose Flip Horizontal or Flip Vertical: You’ll see two options: "Flip Horizontal" and "Flip Vertical." Click on the one you need based on how you want the image flipped.
- Adjust as Needed: After flipping the image, you may want to adjust its position or resize it. You can do this by dragging the image or using the resizing handles.
Once you've flipped the image, your presentation will instantly look more polished and dynamic. Whether you need a simple horizontal flip or a more dramatic vertical flip, PowerPoint makes it easy to adjust your images to suit your needs.
How to Flip Images Using the Format Tab
Flipping images using the Format tab in PowerPoint is quick and easy. This method gives you full control over the direction and orientation of your image. Whether you're looking to mirror an image horizontally or flip it vertically, the Format tab offers all the tools you need. Let’s walk through the steps to do this:
- Select the Image: Click on the image you wish to flip. If the image isn't selected, the flip options won't be available.
- Open the Format Tab: Once the image is selected, navigate to the "Format" tab in the ribbon at the top of PowerPoint. This tab houses all the tools for editing and adjusting your image.
- Find the Rotate Option: In the Format tab, look for the "Rotate" button. It’s usually located on the far right side of the toolbar. Clicking on this will display a dropdown menu with various rotation and flipping options.
- Choose Flip Horizontal or Flip Vertical: To flip the image, you’ll see two main options in the dropdown: "Flip Horizontal" and "Flip Vertical." Select the one that best fits your needs.
- Refine Positioning: After flipping the image, you may want to adjust its positioning on the slide. You can simply drag the image to move it, or use the arrow keys for more precise placement.
By using the Format tab, you have full flexibility over your image's rotation and orientation. This method is perfect for quickly flipping images without any hassle, and it works seamlessly with both simple and complex presentations.
Using Keyboard Shortcuts for Flipping Images
If you’re looking to speed up your workflow, keyboard shortcuts for flipping images in PowerPoint can be a real game-changer. Instead of navigating through the ribbon and menus, you can flip images in just a couple of keystrokes. This can save you time, especially when working on multiple images in a presentation.
Here’s how to flip images using keyboard shortcuts in PowerPoint:
- Flip Horizontal: Select the image you want to flip, then press Alt + H, followed by O to flip the image horizontally.
- Flip Vertical: Similarly, to flip an image vertically, press Alt + H, then V.
These keyboard shortcuts provide an efficient way to quickly flip your images without losing focus on the task at hand. While this might take a bit of practice to get used to, it’s an excellent time-saver for frequent PowerPoint users. Once you get the hang of it, flipping images with keyboard shortcuts becomes second nature and can make your image-editing process much faster.
Common Issues When Flipping Images and How to Fix Them
While flipping images in PowerPoint is simple, sometimes issues can arise. These problems are usually easy to fix once you know what to look for. Let’s go over some common issues and how to solve them:
- Image Gets Distorted: Sometimes, when you flip an image, it may appear stretched or distorted. This typically happens when the image has already been resized. To avoid this, make sure to maintain the image’s aspect ratio. Hold down the Shift key while resizing the image to keep it proportional.
- Image Won’t Flip: If the "Flip" options are grayed out or unavailable, it could be because the image is locked or grouped with other objects. Try selecting the image again, or ungroup any objects that might be restricting its movement.
- Flip Option Not Working for Some File Types: Certain image formats, like vector images (SVG), might not respond to flipping in the same way as raster images (JPEG, PNG). If this is the case, try converting the image to a different format, or use PowerPoint’s "Picture Tools" to edit the image in other ways.
- Flipped Image Isn’t Aligned Properly: After flipping, the image may appear misaligned with the rest of your slide’s content. To fix this, use PowerPoint’s "Align" tool found under the Format tab to ensure everything lines up perfectly.
By keeping these tips in mind, you’ll be able to troubleshoot any issues quickly. Most problems when flipping images are easy to resolve, and understanding these fixes can make your presentation-building process smoother and more efficient.
Tips for Enhancing Images After Flipping
Once you've flipped an image in PowerPoint, you might want to enhance its appearance to make it stand out even more. Flipping changes the image’s orientation, but you can take it a step further by adjusting other settings. Here are a few tips to make your flipped images look even better:
- Adjust Brightness and Contrast: Flipped images may appear darker or lighter depending on their orientation. Adjust the brightness and contrast to ensure the image looks clear and vibrant. You can do this by selecting the image, then navigating to the "Picture Format" tab and using the "Corrections" button.
- Apply a Picture Style: PowerPoint offers a variety of picture styles, including borders, shadows, reflections, and 3D effects. After flipping your image, experiment with these styles to give your image more depth and interest.
- Use Artistic Effects: If you want to add a creative touch, PowerPoint’s "Artistic Effects" can turn your image into a sketch, painting, or other visual styles. This can be especially useful if you want to create a unique design for your presentation.
- Resize and Reposition: After flipping, the image’s new orientation might require repositioning or resizing to fit well within your slide layout. Make sure it’s placed where it complements your text and other elements.
- Adjust Transparency: If you want to use the flipped image as a background, consider adjusting its transparency. This ensures the image doesn’t overpower other slide content, while still being noticeable.
By making these adjustments, you can turn a simple flipped image into a polished, professional-looking visual that enhances your presentation.
Conclusion: Mastering Image Flipping in PowerPoint
Flipping images in PowerPoint may seem like a basic function, but when used correctly, it can have a big impact on your presentation’s design. By understanding how to flip images both horizontally and vertically, you can create more balanced and visually appealing slides. Remember, flipping is just one part of the process. Enhancing your flipped images with adjustments to brightness, contrast, and style can take your design to the next level.
With the steps and tips shared in this guide, you now have the tools to flip and fine-tune images with confidence. Whether you’re fixing orientation issues, creating dynamic effects, or refining the design of your presentation, mastering image flipping is an essential skill for any PowerPoint user.
Don’t hesitate to experiment with these tools to find what works best for your project. The more you practice, the more naturally this technique will become part of your workflow, leading to more polished, engaging presentations.
FAQ
Q1: Can I flip images in PowerPoint without distorting them?
Yes, as long as you maintain the image’s aspect ratio while resizing. Hold down the Shift key when resizing the image to prevent distortion.
Q2: Can I flip an image multiple times?
Absolutely! You can flip an image multiple times—just remember that flipping horizontally twice will return the image to its original orientation, and the same goes for vertical flips.
Q3: Will flipped images remain the same quality?
Flipping an image does not affect its quality. However, if you resize the image significantly after flipping, it may lose clarity. Always try to use high-resolution images to maintain quality.
Q4: Can I flip vector images like SVG in PowerPoint?
Yes, you can flip vector images in PowerPoint, but their appearance might not change as dramatically as raster images like JPEG or PNG. You might need to adjust the formatting or convert them to another format for better results.
Q5: How do I undo a flip if I change my mind?
If you’ve flipped an image by mistake or want to revert to the original orientation, simply press Ctrl + Z to undo the action. You can also right-click the image and choose "Undo" from the context menu.

 admin
admin


