A JAR file, short for Java Archive, is a package file format commonly used to aggregate multiple files into one. It is mainly associated with Java applications but can hold a variety of file types like images, text files, and executable code. JAR files make it easy to distribute and manage Java programs as a single unit.
Images often end up in JAR files because they are essential components of many applications. For instance, user interfaces might require icons, backgrounds, or logos, all of which are typically stored as image files within the JAR. By bundling these resources together, developers can ensure their applications are complete and self-contained.
To access these images, you’ll need to extract them from the JAR file. Don’t worry—it’s a straightforward process with the right tools!
Tools You Can Use to Open JAR Files

Opening a JAR file requires specific tools designed to handle this format. Here are some commonly used options:
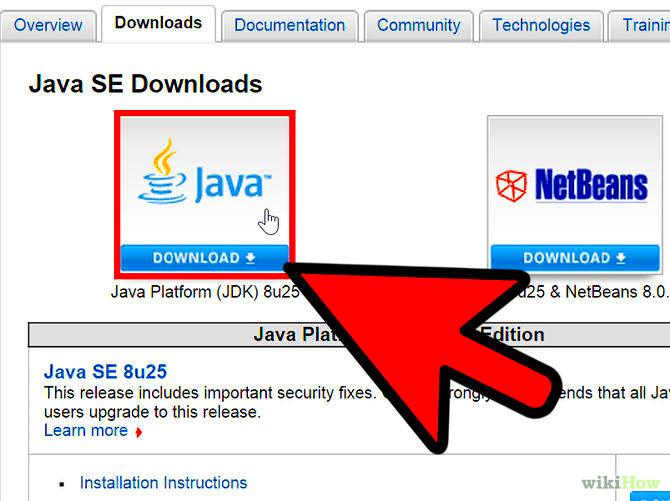
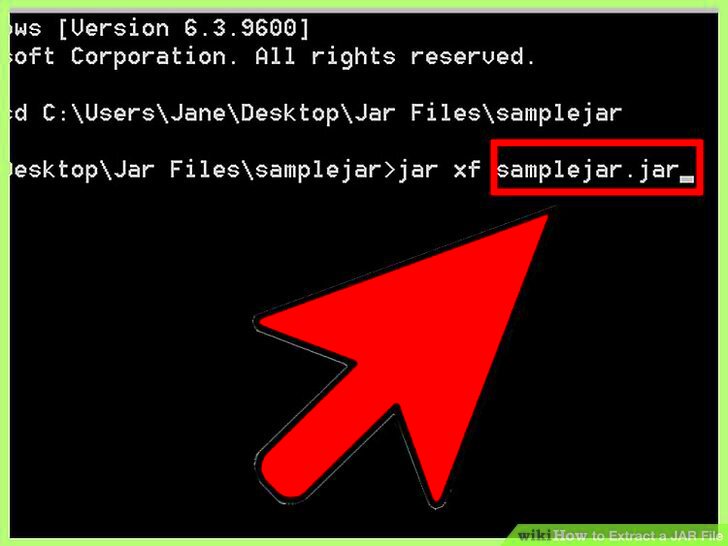
- Java Development Kit (JDK): The JDK includes a command-line tool called
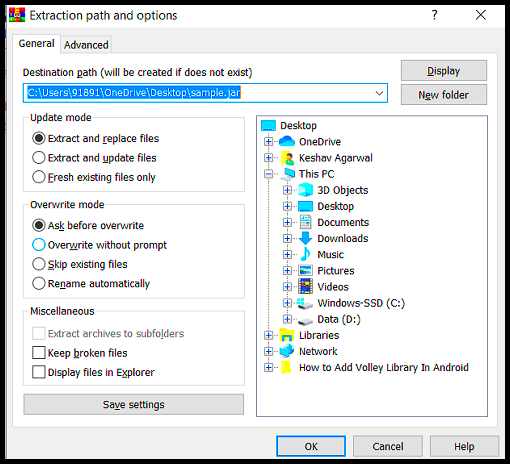
jarthat can help you extract files easily. - WinRAR or 7-Zip: These file compression tools can open JAR files as if they were ZIP files, allowing you to access their contents.
- Online JAR Extractors: Some websites offer free tools to extract JAR files directly in your browser.
- Integrated Development Environments (IDEs): Tools like Eclipse and IntelliJ IDEA can browse and extract contents from JAR files during development.
Choose a tool based on your comfort level and operating system. Most are free and easy to use!
Steps to Extract Image Files from a JAR File

Extracting images from a JAR file is a simple task if you follow these steps:
- Choose a tool: Select one of the tools mentioned above, such as 7-Zip or the JDK
jarcommand. - Locate the JAR file: Find the JAR file on your computer. It usually has a
.jarextension. - Open the JAR file:
- For 7-Zip or WinRAR, right-click the JAR file and choose “Open with.”
- If using the JDK, run the command
jar -xf filename.jarin the terminal.
- Find the images: Navigate through the extracted folders to locate the image files. They are typically in subdirectories labeled
imagesorresources. - Extract and save: Copy the images to a separate folder for easy access and organization.
By following these steps, you can quickly extract the image files and use them for your intended purposes. Just ensure you respect any copyright or licensing agreements associated with the images.
Common Issues While Extracting Images from JAR Files
Extracting images from JAR files can sometimes feel tricky due to technical hurdles. Knowing the common issues ahead of time can save you frustration and help you find quick solutions.
Here are some frequent problems you might encounter:
- File not opening: This happens when your system doesn’t have the right tool or software to handle JAR files. Installing tools like 7-Zip or the JDK can fix this.
- Corrupted JAR file: If the JAR file is damaged or incomplete, you won’t be able to extract its contents properly. Download the file again or check its source.
- Hidden or inaccessible files: Some files inside the JAR might be hidden or protected. You may need to adjust your tool’s settings or permissions to access these files.
- Incorrect extraction method: Using the wrong tool or command might lead to errors. Ensure you follow the specific steps required by your tool of choice.
- File compatibility issues: Certain images might use formats that are not readily supported by your viewer. Converting the file format might help.
If you face any of these issues, double-check the tools and methods you’re using. Often, a simple adjustment can resolve the problem quickly.
Tips for Keeping Extracted Images Organized
Once you’ve extracted images from a JAR file, organizing them efficiently can save you time and effort in the long run. Here are some practical tips:
- Create a dedicated folder: Store all extracted images in one main folder, and give it a clear name that reflects the project or purpose.
- Use subfolders: Organize images by categories such as
icons,backgrounds, orthumbnails. This makes searching for specific files much easier. - Rename files: Rename images with descriptive names, such as
button-icon.pngorhomepage-banner.jpg, to identify them at a glance. - Add metadata: If possible, add metadata to the images, like tags or descriptions, to keep track of where they came from or how they’re used.
- Backup regularly: Always create backups of your organized images, either on cloud storage or an external drive, to avoid losing them.
Good organization ensures you can quickly find and use your images when needed without the stress of sifting through a chaotic collection.
How to Ensure the Quality of Extracted Images
Maintaining the quality of images extracted from JAR files is essential, especially if you plan to use them in high-resolution projects. Here are some tips to ensure the images retain their original quality:
- Use reliable tools: Opt for trusted software like 7-Zip, WinRAR, or the JDK to avoid corrupting files during extraction.
- Avoid re-compression: When extracting images, ensure the tool doesn’t compress the files again, as this can lead to quality loss.
- Check the resolution: After extraction, open the images to verify their resolution and ensure no visual artifacts or pixelation have occurred.
- Save in lossless formats: If you need to re-save the files, use formats like PNG or TIFF to preserve their quality.
- Inspect for corruption: Sometimes, files can become corrupted during extraction. Open the images in an editor or viewer to confirm they display correctly.
Following these steps ensures that your images remain in top condition and ready for use in any project, whether personal or professional.
FAQs About Extracting Images from JAR Files
Here are some frequently asked questions about extracting images from JAR files. These answers can help clear up common doubts and make the process easier for you:
| Question | Answer |
|---|---|
| Can I open a JAR file without installing Java? | Yes, you can use tools like WinRAR, 7-Zip, or online extractors to open JAR files without needing Java. |
| Do I need special permissions to extract files from a JAR? | In most cases, no. However, if the JAR file is protected or part of a secured application, you might need the right permissions or access keys. |
| Why are some images missing after extraction? | This could be due to hidden files or improper extraction methods. Ensure you’re using a reliable tool and check all subdirectories within the JAR. |
| Can I edit the images after extraction? | Yes, once extracted, you can edit the images like any other file. Just make sure to use software that supports the image format. |
| Are there any risks in extracting images from JAR files? | There’s minimal risk if the file is from a trusted source. Be cautious with files from unknown origins to avoid malware. |
If you have more specific questions, you might want to consult the documentation of the tools you’re using or seek advice from a technical expert.
Conclusion
Extracting images from JAR files is a straightforward process when you have the right tools and knowledge. Whether you are troubleshooting issues, organizing extracted files, or ensuring their quality, following best practices will save time and effort. With the tips and FAQs provided here, you’re now equipped to handle JAR files confidently and make the most of their contents.

 admin
admin


