When you’re working with Adobe Lightroom, exporting high-resolution images is a crucial step in ensuring that your photos retain their quality for printing, sharing, or archiving. Whether you're a photographer or a designer, knowing how to export images effectively can make all the difference in achieving professional results. In this guide, we'll walk you through the process of exporting your images in the best possible resolution, ensuring they look sharp and vibrant wherever they are displayed or printed.
Understanding the Importance of High-Resolution Images
High-resolution images are essential for various purposes, including printing, professional work, and preserving fine details. The term "high resolution" typically refers to images that have a larger number of pixels per inch (PPI), resulting in sharper, clearer pictures. Here’s why it’s important:
- Sharpness: High-resolution images provide more detail and clarity, which is important when printing or viewing at larger sizes.
- Quality Preservation: When editing or resizing images, maintaining high resolution ensures that you don't lose important details.
- Versatility: High-resolution images can be resized and cropped without sacrificing quality, making them flexible for different uses.
- Professionalism: High-quality images are necessary for showcasing your work in a professional manner, especially in fields like photography, graphic design, and marketing.
Now that you understand the importance of high-resolution images, let’s dive into the process of preparing and exporting them in Lightroom.
Also Read This: Tips for Maintaining Privacy by Hiding Activity on LinkedIn
Preparing Your Images for Export in Lightroom
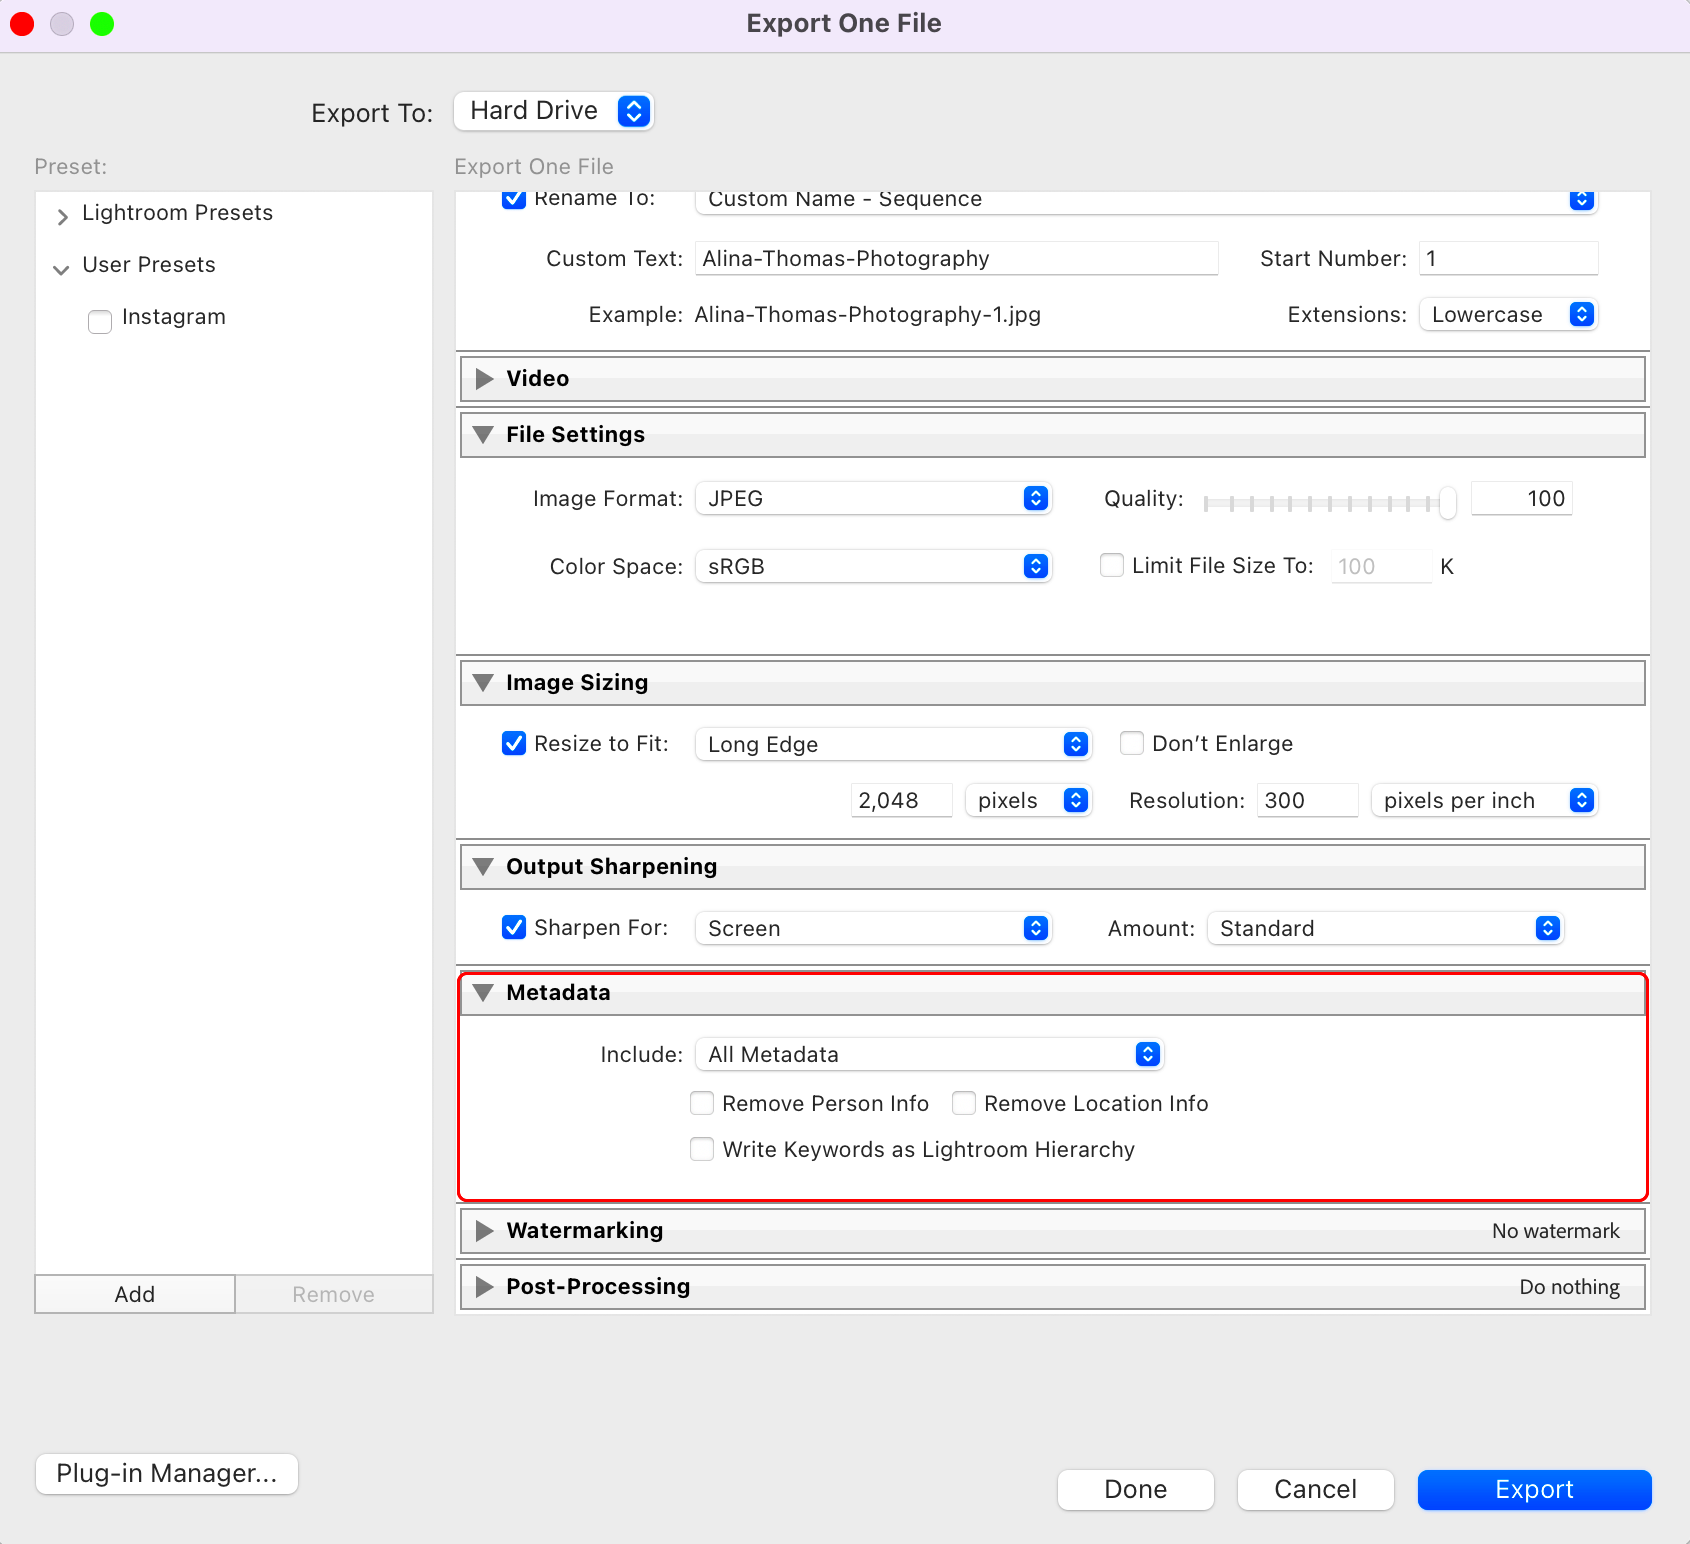
Before exporting high-resolution images from Lightroom, it’s essential to ensure your photos are properly edited and ready for export. Here's how you can prepare your images effectively:
- Edit for optimal quality: Make sure your images are fully edited and adjusted, including exposure, white balance, contrast, and any other enhancements that improve the overall look.
- Check for cropping and alignment: Crop and align your images as necessary. This step ensures that the composition is exactly how you want it before exporting.
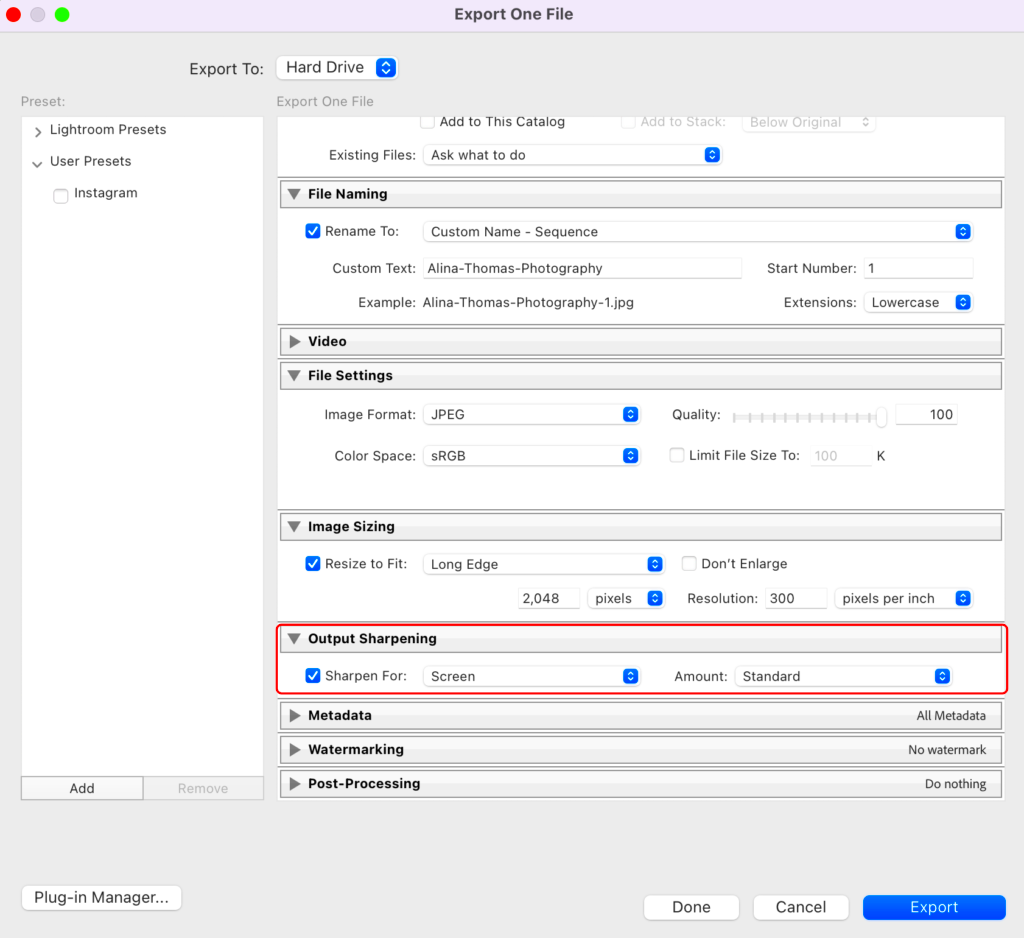
- Apply sharpening: Lightroom allows you to apply sharpening to your image before export. This will help in preserving details, especially for printed images.
- Remove noise: If your image contains noise (graininess), use Lightroom's noise reduction tools to clean it up before exporting.
- Use Lightroom's "Reference View": This tool helps you check your image against a reference for consistency in exposure and color grading.
By completing these steps, you ensure that your image is in the best possible state before exporting it in high resolution.
Also Read This: How to Increase Telegram Download Speed for Faster File Transfers
Steps for Exporting High-Resolution Images from Lightroom
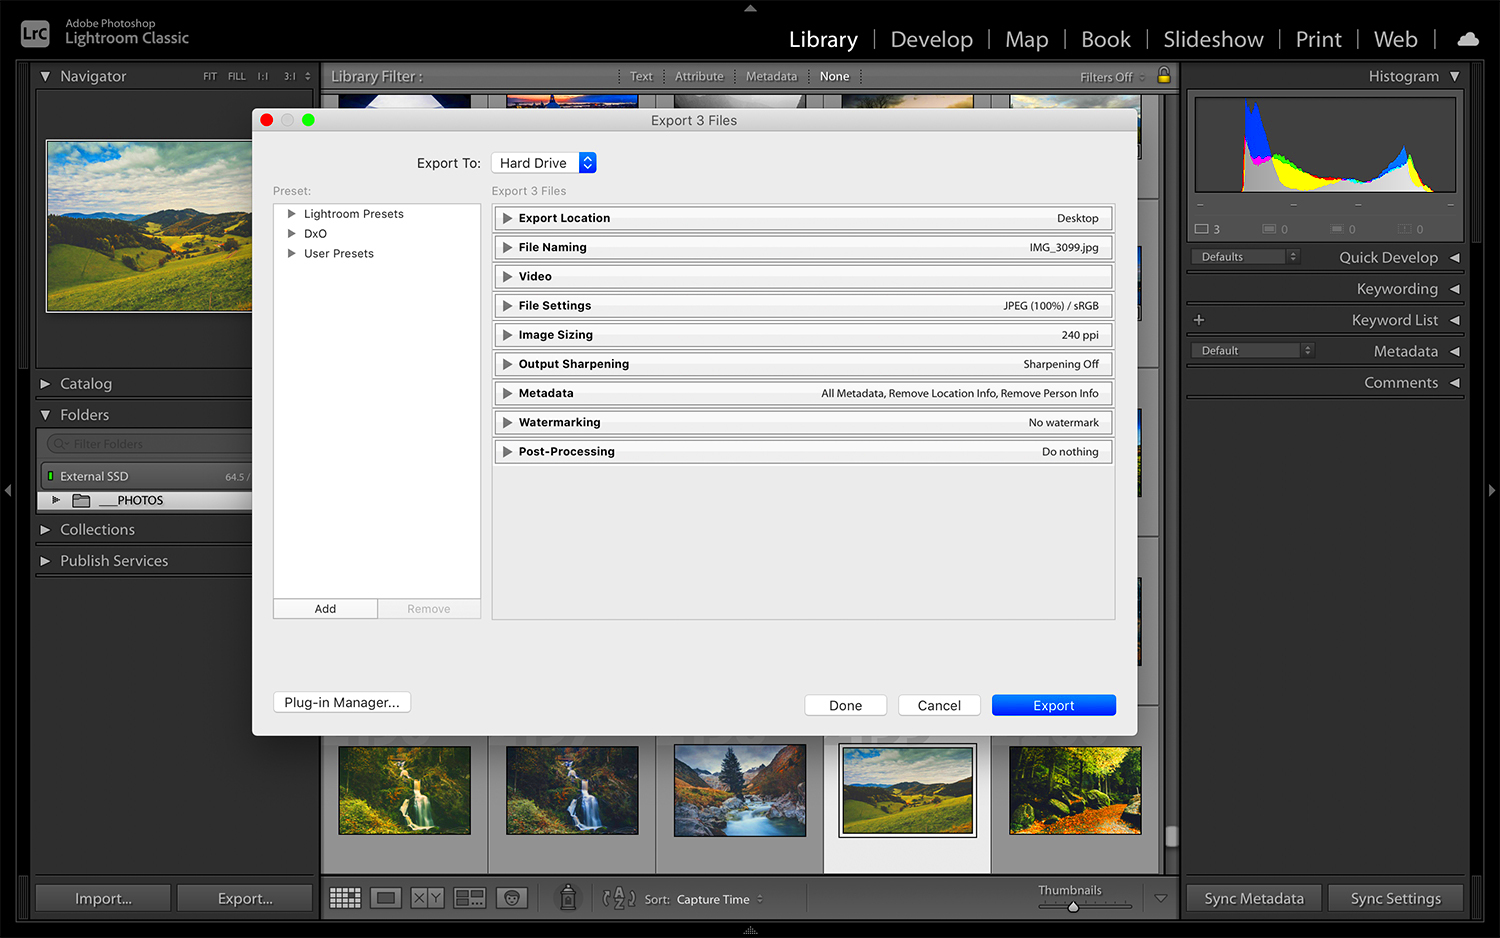
Exporting high-resolution images from Lightroom is a straightforward process, but it requires attention to detail to ensure that your images maintain their quality. Here’s a simple step-by-step guide to help you export your photos with ease:
- Select Your Image: First, select the photo or photos you want to export. You can do this by clicking on the image thumbnail in the Library module.
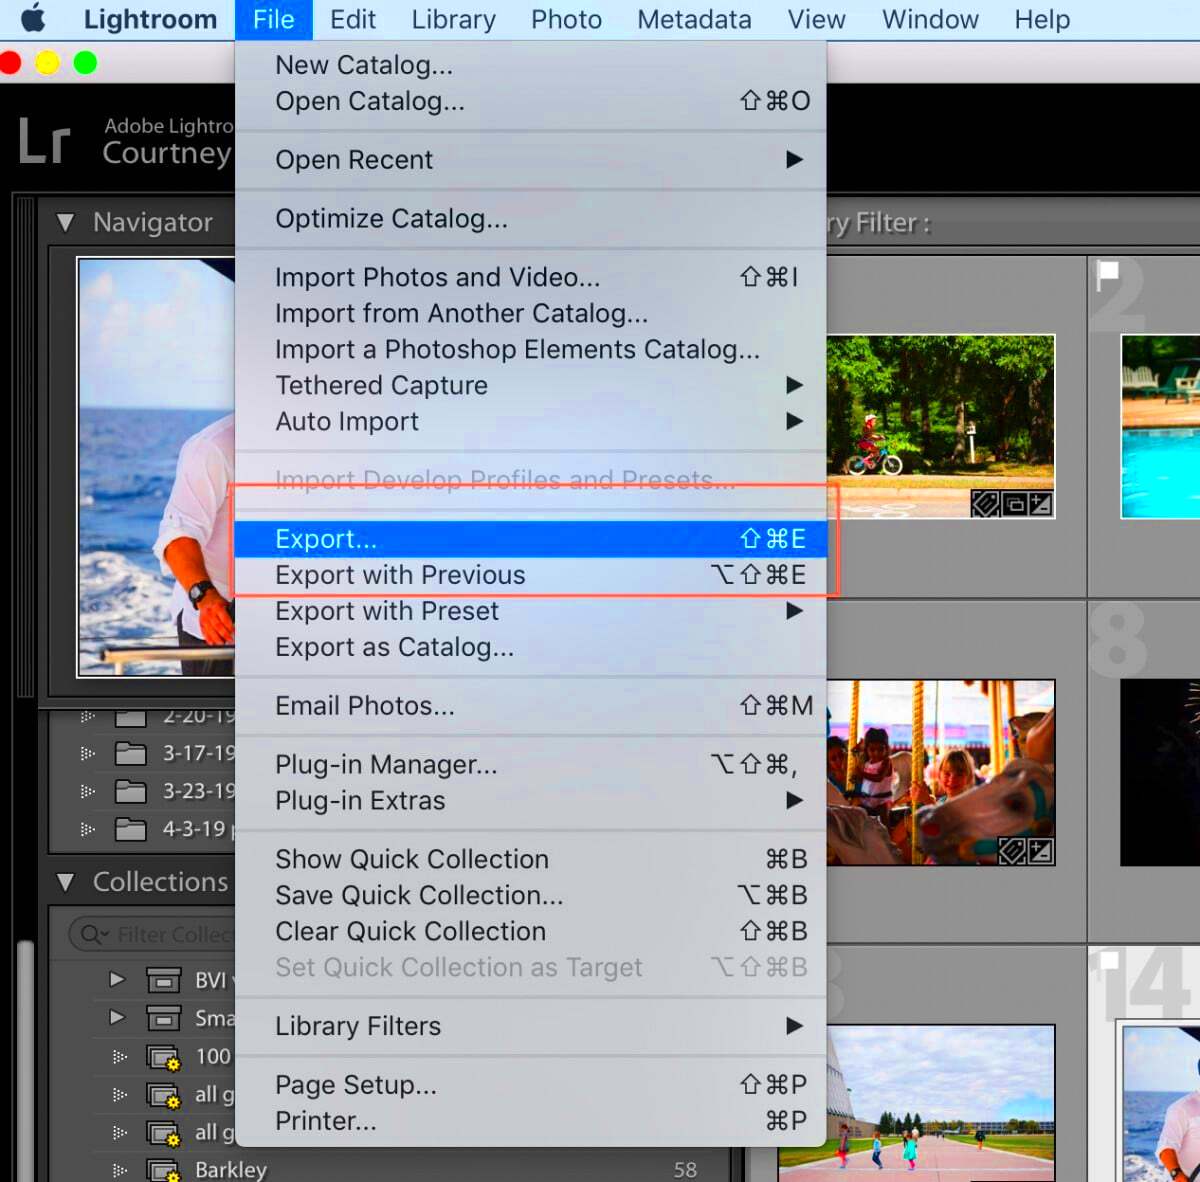
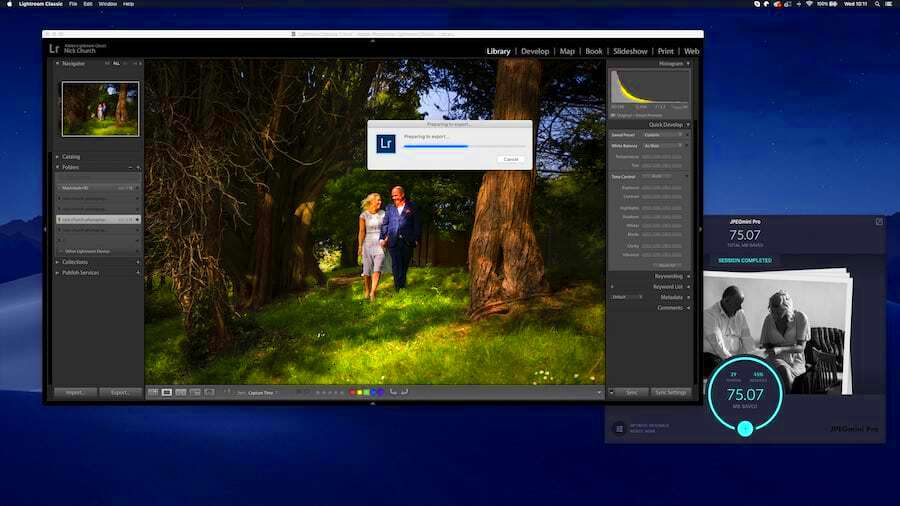
- Open the Export Dialog: Once your image is selected, click on the “Export” button located in the lower-left corner of the Library module. This will open the Export dialog box.
- Choose Export Location: In the Export dialog, choose where you want your image to be saved. You can select a specific folder or use the default location set by Lightroom.
- File Settings: Under the “File Settings” section, select your desired file format. For high resolution, it’s typically best to use TIFF or PNG, but JPEG can also work depending on your needs.
- Image Sizing: Under “Image Sizing,” make sure the “Resize to Fit” box is unchecked if you don’t want Lightroom to alter the dimensions. Set the resolution to 300 pixels per inch (PPI) for the best print quality.
- Output Sharpening: Lightroom offers output sharpening for screen or print. For high-quality prints, choose “High” sharpening.
- Click Export: Once all settings are in place, click “Export,” and your high-resolution image will be saved according to your specifications.
Also Read This: Are Parrot Videos on YouTube Scripted
Choosing the Right Export Settings for Quality
The key to getting the best output quality from Lightroom lies in selecting the right export settings. Here are some important factors to consider:
| Setting | Recommended Value | Why It Matters |
|---|---|---|
| File Format | TIFF or PNG | These formats preserve high image quality without losing details. JPEG may be used for web use but compresses quality. |
| Resolution | 300 PPI | A higher resolution ensures better print quality, especially when the image is resized. |
| Color Space | AdobeRGB or ProPhoto RGB | These color spaces retain more color information, ideal for professional work and printing. |
| Sharpening | High (for prints), Standard (for screens) | Sharpens your image, compensating for any softness from resizing and optimizing the details. |
By adjusting these settings carefully, you ensure that your image retains the highest possible quality for whatever use you have in mind, whether it's for print or digital display.
Also Read This: Discover How to Save a Photo from Pinterest With This Effortless Method
How to Export Multiple Images at Once in Lightroom
If you have multiple images to export, Lightroom makes it easy to batch process them. Here’s how to export multiple high-resolution images at once:
- Select Your Images: In the Library module, click on the images you wish to export. You can use the Shift or Ctrl keys to select multiple images at once.
- Open the Export Dialog: Once your images are selected, click the “Export” button at the bottom of the Library module to open the Export dialog box.
- Choose Export Settings: Set up the export settings as you would for a single image. These settings will be applied to all selected images.
- Specify Output Location: Decide where to save the exported images. Lightroom will create individual files for each photo, but you can specify a folder for all of them to go into.
- Export: After finalizing your settings, click “Export.” Lightroom will process all selected images and save them with the chosen settings, in the folder you designated.
By following these simple steps, you can quickly export a batch of high-resolution images, saving you time and ensuring consistency across your files.
Also Read This: how to upgrade adobe stock plan
Common Issues While Exporting and How to Fix Them
When exporting high-resolution images from Lightroom, you may encounter a few common issues that can affect the quality or efficiency of your export process. Don't worry though—most of these problems can be easily fixed with a few adjustments. Here’s a rundown of some typical issues and how to solve them:
- Low Image Quality: If your exported images appear blurry or pixelated, it could be due to incorrect export settings. Double-check the resolution (300 PPI is ideal for print) and the file format (TIFF or PNG for high quality). Avoid overly compressing JPEGs if print quality is important.
- Incorrect Color Output: Sometimes, colors may look different after export, especially when moving between different devices. This usually happens due to mismatched color profiles. Ensure you select a color space like AdobeRGB or ProPhoto RGB during export to preserve color accuracy.
- Exported Images Are Too Large: High-resolution images can result in large file sizes, making them difficult to share. If the file size is too large, consider resizing the image under the “Image Sizing” section in the Export dialog, but keep the resolution high (around 300 PPI for print).
- Exporting Takes Too Long: If Lightroom is taking longer than expected to export, try reducing the number of images being exported at once, or ensure your computer has enough available memory and processing power. You can also try exporting in smaller batches.
- Failed Export Process: Sometimes the export process might fail entirely. If this happens, ensure Lightroom has the necessary permissions on your computer and try restarting Lightroom or exporting to a different folder.
By understanding these common issues and applying the right fixes, you can ensure that your export process runs smoothly and your images maintain their quality.
Also Read This: How to Make GIFs on Telegram
FAQ
Here are some frequently asked questions about exporting high-resolution images from Lightroom, along with helpful answers:
- What is the best file format for exporting high-resolution images?
The best formats for high-resolution exports are TIFF and PNG, as they retain the most detail. JPEG can also work but may compress the image quality. - How can I ensure my images are print-ready?
To ensure your images are print-ready, export them at 300 PPI, choose a high-quality file format like TIFF, and select the correct color space (AdobeRGB or ProPhoto RGB) to preserve color accuracy. - Can I export multiple images at once?
Yes, Lightroom allows you to export multiple images simultaneously. Just select the images you want to export, adjust your export settings, and click “Export” to batch process them. - Why is my exported image too large?
Large file sizes can result from high resolution and minimal compression. To reduce file size, resize the image or adjust the compression settings if using JPEG, while keeping the resolution high for quality. - How do I fix color issues after export?
Ensure you use the correct color space (AdobeRGB or ProPhoto RGB) in the export settings. If you're seeing color shifts, this may be due to a mismatch between your Lightroom and display monitor’s color profiles.
Conclusion
Exporting high-resolution images from Lightroom doesn’t have to be a complex task. By following the proper steps and using the right export settings, you can ensure your images retain their quality for any purpose, whether it's for printing, sharing, or archiving. Understanding common issues, selecting the best file formats, and using proper resolution settings will help you achieve professional-looking results. So, with these tips in mind, you can confidently export your high-resolution images, ensuring that every photo you share or print looks its absolute best!
 admin
admin


