Welcome to
Shutterstock! If you're anything like me you'll find that the path to transforming your creative moments into stock photos is an adventure filled with excitement and a hint of challenge. With countless images uploaded every day making your photos stand out involves more than just snapping a picture of a stunning view.It's also about refining your shots to align with
Shutterstock's criteria and catch the attention of potential buyers. Allow me to share some tips and personal experiences to assist you in enhancing your images and increasing your success on this platform.
Understanding Shutterstock's Requirements for Images
 Shutterstock
 has specific criteria when it comes to accepting images. Its not solely about the quality there are various other factors you should keep in mind.
- Resolution: Your image should be at least 4 MP (megapixels) to ensure it's sharp and clear. This helps in maintaining quality when the image is zoomed in or printed in larger formats.
- Composition: Shutterstock looks for well-composed images. Avoid clutter and ensure your subject is well-framed. A good rule of thumb is the rule of thirds—imagine your image divided into nine equal parts and place your main subject along these lines or their intersections.
- Technical Quality: Watch out for noise (graininess) and ensure your image is well-lit. Post-processing should be done with care—over-editing can make your image look unnatural.
- Relevance: Make sure your images fit within Shutterstock's popular categories and current trends. This means understanding what buyers are looking for and aligning your content accordingly.
At the beginning I found these rules a bit daunting. However as time went on I came to view them as a helpful guide for creating images that not only meet standards but also resonate with a diverse range of viewers.
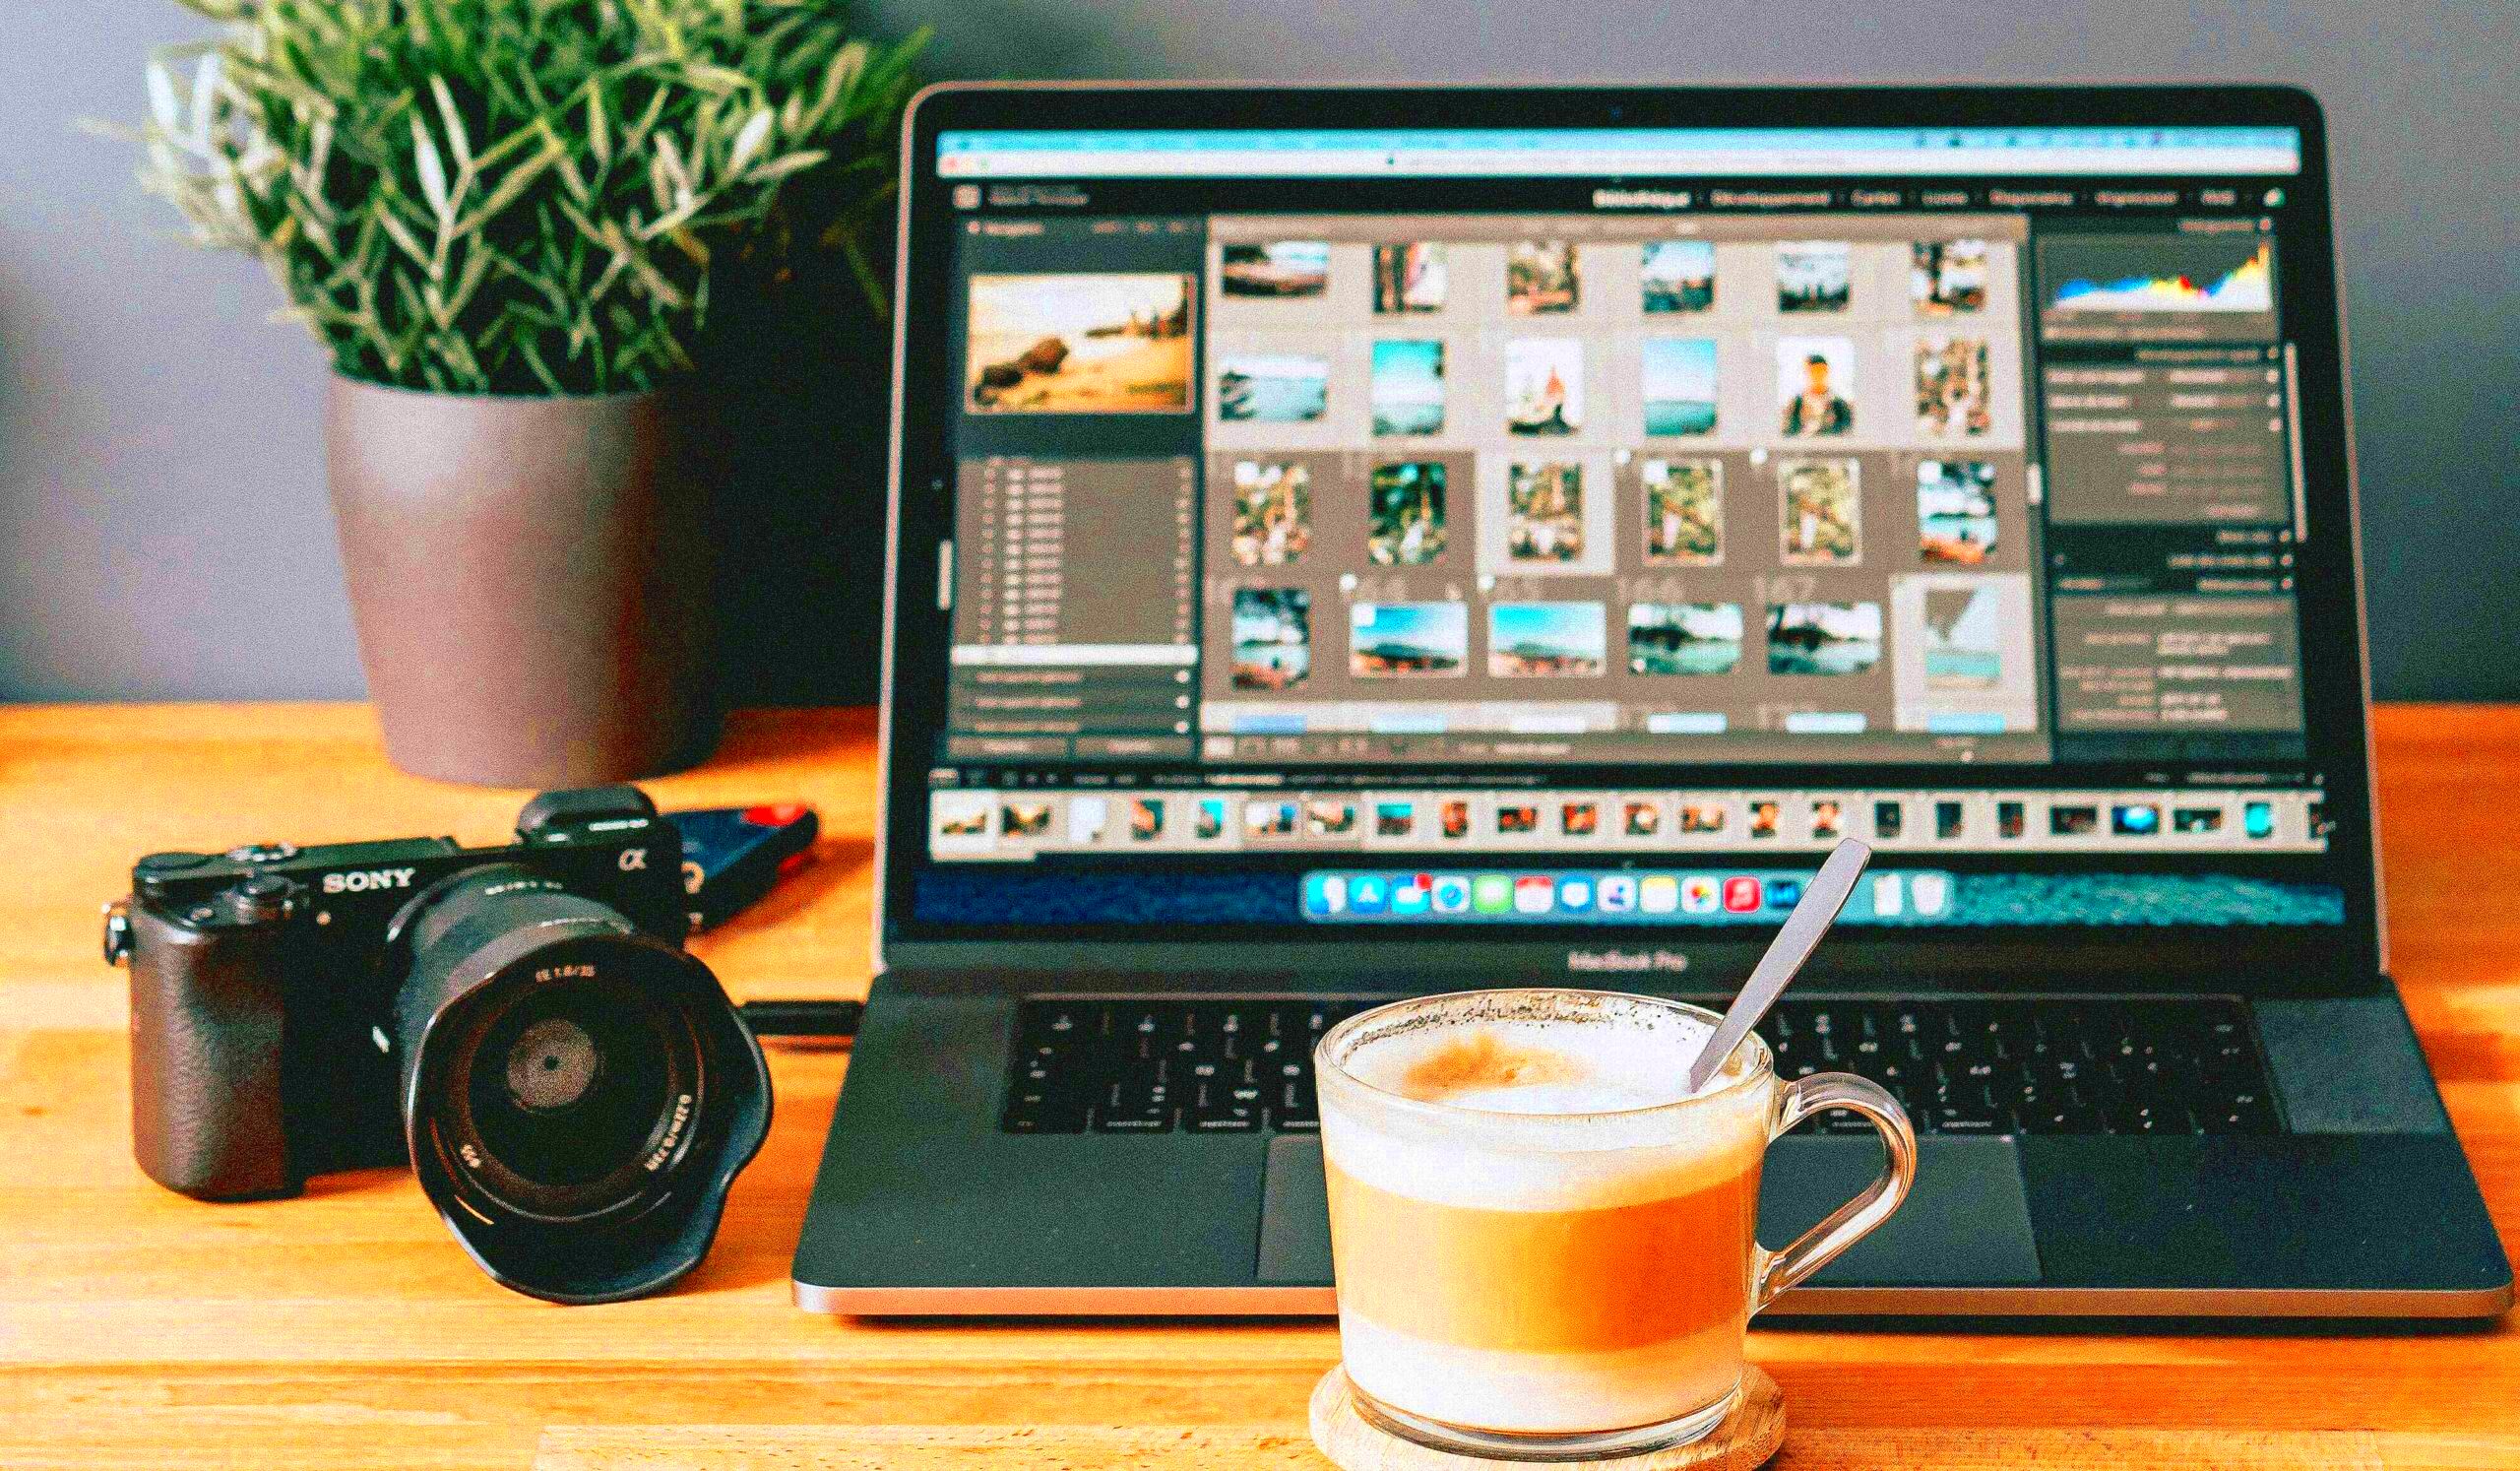
Preparing Your Photos for Upload
After nailing that ideal picture getting your image ready for sharing online entails a few important processes.
- Initial Editing: Start by cropping and adjusting your image to improve composition. Tools like Adobe Lightroom or even free apps like GIMP can help with this.
- Color Correction: Ensure the colors in your photo are vibrant and true-to-life. Adjust the brightness, contrast, and saturation to enhance the image without overdoing it.
- File Format and Size: Save your image in JPEG format for Shutterstock, with a high-quality setting to balance file size and quality. Avoid formats like PNG unless required for specific types of images.
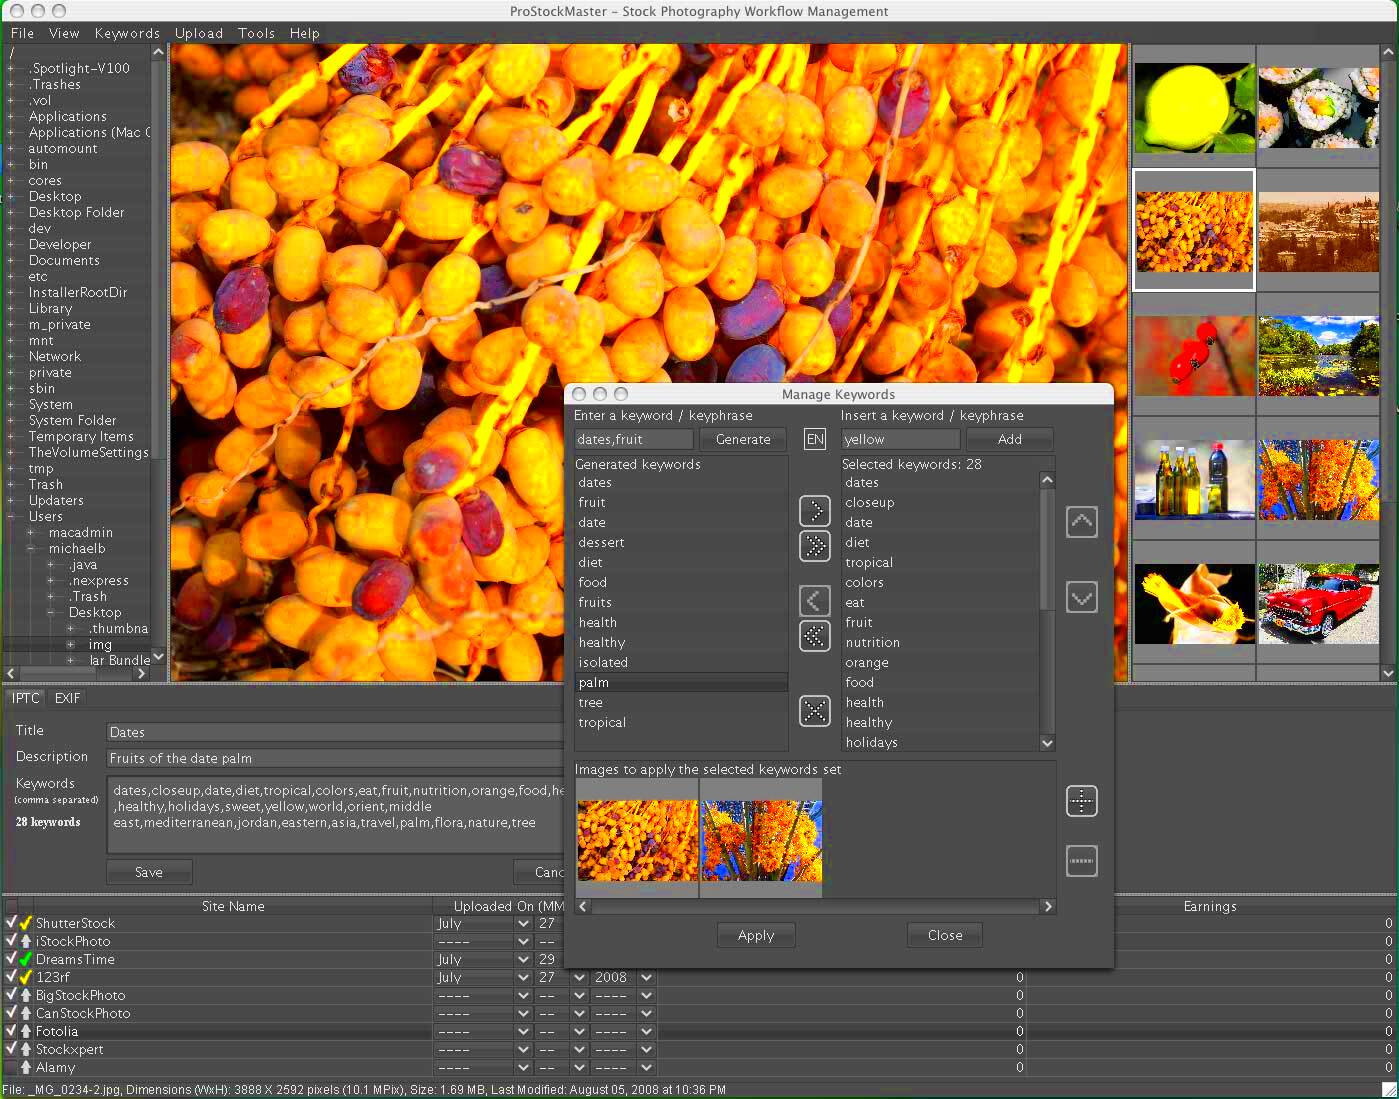
- Metadata and Keywords: Adding appropriate keywords and metadata is crucial. Think about what buyers might search for and include relevant terms that describe your image accurately.
Based on what I've seen it's common to miss these aspects when you're hurriedly sending in pictures. Nevertheless investing time in carefully getting each photo ready can greatly impact your chances of success. Trust me the energy you invest, in this procedure will yield rewards over time!
Editing Tips to Enhance Image Quality
Editing is the stage where your picture evolves from a basic shot into a refined work of art. I recall the times when my photos appeared decent on my camera but didn't quite hit the mark once uploaded. That's when it dawned on me that editing isn't solely about correcting errors—it's also about bringing out the best in your image. Here are a few suggestions to maximize your editing journey.
- Adjust Exposure and Contrast: A well-exposed image is a great start. If your photo looks too bright or too dark, adjust the exposure settings. Contrast can make your image pop, giving it more depth and richness. Just remember, less is more—subtle adjustments often work best.
- Enhance Colors: Use color correction tools to make sure the colors in your image are vibrant but natural. I often use tools like Adobe Lightroom to fine-tune colors. Be cautious with saturation—overdoing it can make your image look unrealistic.
- Sharpness and Clarity: Enhance the sharpness of your image to highlight details. A touch of clarity can also help make textures and fine details stand out, but avoid making the image too sharp, which can introduce noise.
- Remove Imperfections: Use retouching tools to remove any blemishes or distractions from your photo. Whether it’s a stray object or a small imperfection, fixing these can make a big difference in the overall quality.
- Crop Wisely: Cropping helps to improve composition and remove unwanted areas. Ensure the crop enhances the focus of your image without cutting out important elements.
Refining your work requires time and effort and there are moments when it can feel like a creative expression. As you gain more experience you'll discover your own distinct approach and tastes. It's important to keep in mind that the purpose of editing is to enrich rather than change the core of your image.
Choosing the Right Keywords and Categories
Selecting keywords and categories is similar to giving your pictures a voice. When I began I used to toss in random keywords believing that quantity mattered. However I soon realized that careful tagging is essential for being seen. Here are some tips on how to pick keywords and categories for
Shutterstock:
- Think Like a Buyer: Put yourself in the shoes of someone looking for stock photos. What terms would they use? Include both broad and specific keywords that accurately describe your image.
- Use Relevant Tags: Instead of generic terms, use tags that reflect the content of your image. For example, if you have a photo of a traditional USAn festival, include specific terms like “Diwali,” “festive lights,” and “USAn culture” along with general tags like “celebration” or “holiday.”
- Category Selection: Choose categories that best fit the subject matter of your image. Shutterstock has various categories such as “Business,” “Nature,” or “Food.” Placing your photo in the right category helps it reach the right audience.
- Use Descriptive Phrases: Sometimes, a short phrase can be more effective than single keywords. For example, “freshly brewed chai tea” might be more specific than just “tea.”
- Review and Refine: After adding your keywords, review them to ensure they accurately represent your photo. Refining your tags can help improve searchability and increase the chances of your photo being found.
While the process of selecting keywords and categories may feel monotonous, it plays a crucial role in ensuring your images receive attention. With time you’ll improve your ability to anticipate what resonates and what falls flat.
Common Mistakes to Avoid When Uploading Images
We all mess up sometimes and that includes when it comes to uploading pictures to
Shutterstock. I’ve had my own moments of blunders throughout the process. Here’s a rundown of typical errors to steer clear of so you can sidestep the missteps I’ve faced.
- Ignoring Guidelines: Each stock photo platform has its own set of guidelines. Not adhering to them can lead to rejections. Always read and follow Shutterstock’s image requirements carefully.
- Uploading Low-Quality Images: Uploading images that are poorly composed, blurred, or overexposed can hurt your chances. Make sure each image is well-edited and meets the quality standards before submission.
- Overloading Keywords: While it’s tempting to use as many keywords as possible, overloading can be counterproductive. Focus on relevant and precise keywords rather than cramming too many tags.
- Neglecting Model Releases: If your images feature people, ensure you have proper model releases. This is crucial to avoid legal issues and ensure your images are accepted.
- Skipping Metadata: Metadata helps in indexing your images. Omitting this information can reduce your image’s discoverability. Always include detailed and relevant metadata for better visibility.
- Ignoring Image Trends: Stock photo trends change over time. Be aware of current trends and tailor your submissions accordingly. Sticking to outdated themes might limit your image’s appeal.
By steering clear of these pitfalls you can boost your likelihood of being accepted and also increase your overall success on
Shutterstock. Taking lessons from previous missteps and consistently honing your strategy will pave the way, for accomplishments.
Tools and Software to Help with Optimization
When it comes to enhancing images for Shutterstock using the right tools can really make a difference. I’ve dedicated a lot of time experimenting with different software and I’ve discovered a few hidden gems that consistently produce great results. Whether you're an experienced photographer or just beginning your journey these tools can assist you in perfecting your pictures to meet Shutterstock's criteria.
- Adobe Lightroom: This is my go-to for most of my photo editing needs. It offers a wide range of features for color correction, exposure adjustments, and noise reduction. Its user-friendly interface makes it accessible for beginners while still powerful enough for professionals.
- Adobe Photoshop: For more detailed editing, Photoshop is a fantastic tool. It allows you to retouch images, correct distortions, and enhance details with precision. It’s perfect for making those fine adjustments that can turn a good photo into a great one.
- GIMP: If you’re looking for a free alternative to Photoshop, GIMP is an excellent choice. It provides many similar features and can handle most editing tasks, from basic adjustments to more advanced editing.
- Capture One: This tool is particularly good for managing large batches of photos. It offers powerful color grading and correction tools and is known for its excellent raw image processing.
- Canva: For quick and easy graphic design, Canva can be quite useful. It’s not as advanced for photo editing but can be handy for creating promotional materials or adding text to images.
Throughout the years, I’ve come to understand that putting money into the tools can both save you time and improve the quality of your work. Give these choices a try and see which ones align with your style of working.
Review and Final Checks Before Submission
Before you hit the submit button on Shutterstock, take a moment to review your images one last time. This crucial step can determine whether your upload is a success or gets rejected. To help you make sure your images are ready for submission here’s a personalized checklist drawn from my own experiences.
- Check Resolution and Quality: Verify that your image meets Shutterstock’s resolution requirements and is free of any quality issues like blurriness or pixelation. A good practice is to view your image at 100% zoom to check for any imperfections.
- Review Metadata and Keywords: Double-check that your keywords and metadata accurately describe the image. This helps in proper indexing and improves your image’s chances of being found by potential buyers.
- Verify Model Releases: If your image includes people, ensure you have signed model releases. Without these, your image might be rejected or face legal issues down the line.
- Ensure Proper Categorization: Make sure your image is categorized correctly. Misclassified images can go unnoticed by buyers looking for specific types of content.
- Check for Compliance with Guidelines: Revisit Shutterstock’s submission guidelines to ensure your image complies with all requirements. This includes checking for any specific content restrictions or technical specifications.
- Final Quality Check: Take one last look at the image for any overlooked issues. Sometimes, stepping away from the image for a bit and coming back with fresh eyes can help spot any remaining problems.
While it may feel tedious to go through these last minute checks they are essential for boosting your chances of success on Shutterstock. Believe me putting in the effort to make sure everything is spot on is worth it.
FAQ About Optimizing Pictures for Shutterstock
When it comes to optimizing images for Shutterstock it can lead to a lot of inquiries. Drawing from my own experiences and the questions I've received from other photographers here are some commonly asked questions along with their responses.
What file formats does Shutterstock accept?
- Shutterstock primarily accepts JPEG files for images. It’s best to save your photos in high-quality JPEG format to balance image quality and file size.
How important is image resolution?
- Image resolution is crucial. Shutterstock requires images to be at least 4 MP (megapixels) to ensure high quality. Higher resolution images provide better clarity and are preferred by buyers.
Can I upload images with watermarks?
- No, Shutterstock does not accept images with watermarks or any other form of branding. Your images should be clean and ready for use by buyers.
What should I do if my image gets rejected?
- If your image is rejected, review the feedback provided by Shutterstock. Common reasons include poor quality or failure to meet guidelines. Use this feedback to make necessary adjustments and resubmit.
How often should I update my portfolio?
- Regularly updating your portfolio with new and relevant images keeps your collection fresh and engaging. It also helps you stay aligned with current trends and buyer preferences.
Do I need to include model releases for all people in my images?
- Yes, for any recognizable individuals in your photos, you must have a signed model release. This legal document ensures that you have permission to use their likeness in commercial contexts.
These frequently asked questions aim to address some of the common issues. As you progress on your path, keep in mind that perseverance and carefulness are crucial for achieving success on Shutterstock.
Conclusion: Maximizing Your Shutterstock Success
Succeeding on Shutterstock goes beyond taking pictures; it involves grasping the subtleties of the platform and consistently enhancing your strategy. Every aspect, from improving image quality and choosing the keywords to steering clear of pitfalls is vital for achieving overall success.Looking back on my own experience I've realized that being detail oriented and open to change are essential. Embracing the journey honing your abilities and staying informed about trends will not only make your photos shine but also boost your prospects, in the dynamic realm of stock photography.

 admin
admin


