When it comes to improving the quality of your images, Photopea is an excellent, free tool to help you achieve professional-level results. Whether you’re working with product photos, social media images, or personal projects, enhancing image quality can make a huge difference in how your visuals appear. Photopea is a versatile online image editor that offers powerful features similar to Adobe Photoshop, making it accessible to beginners and advanced users alike.
In this guide, we’ll walk you through the steps and techniques for enhancing your images in Photopea. From adjusting brightness and contrast to removing noise and sharpening, you’ll learn how to make your photos look clearer, sharper, and more professional. Let’s dive into how you can improve your image quality in just a few simple steps.
Understanding Image Quality and Resolution

Before diving into the specifics of enhancing image quality, it’s important to understand what image quality and resolution are. These two factors play a significant role in how your
Image quality refers to the overall sharpness, clarity, and color accuracy of a photo. High-quality images are clear, well-defined, and visually appealing. Poor-quality images tend to be blurry, pixelated, or dull in color.
Resolution refers to the number of pixels that make up your image. A higher resolution means more pixels, which leads to more detail and a sharper image. The resolution is often measured in DPI (dots per inch) for print, or in pixel dimensions (width x height) for digital images.
To improve your image quality, you’ll often need to work with both resolution and other image settings, such as contrast, sharpness, and color adjustments. Here are a few key concepts:
- Low resolution: May look fine on small screens but will appear pixelated when enlarged.
- High resolution: Essential for print and larger displays, providing better detail and clarity.
- Image compression: Reducing file size may reduce quality; aim for balance between quality and file size.
Also Read This: Getty Images vs Adobe Stock: Comparing Two Prominent Stock Image Providers
How to Use Photopea for Image Enhancement

Photopea is a powerful online image editing tool that can help you enhance your images in a variety of ways. Here’s a step-by-step guide on how to get started with improving your photo quality using Photopea:
1. Upload Your Image
The first step is to upload the image you want to enhance. Simply go to Photopea's website and drag your image file into the workspace, or use the “File” menu to open an image from your computer. Once your image is open, you’re ready to begin editing.
2. Adjust Brightness, Contrast, and Exposure
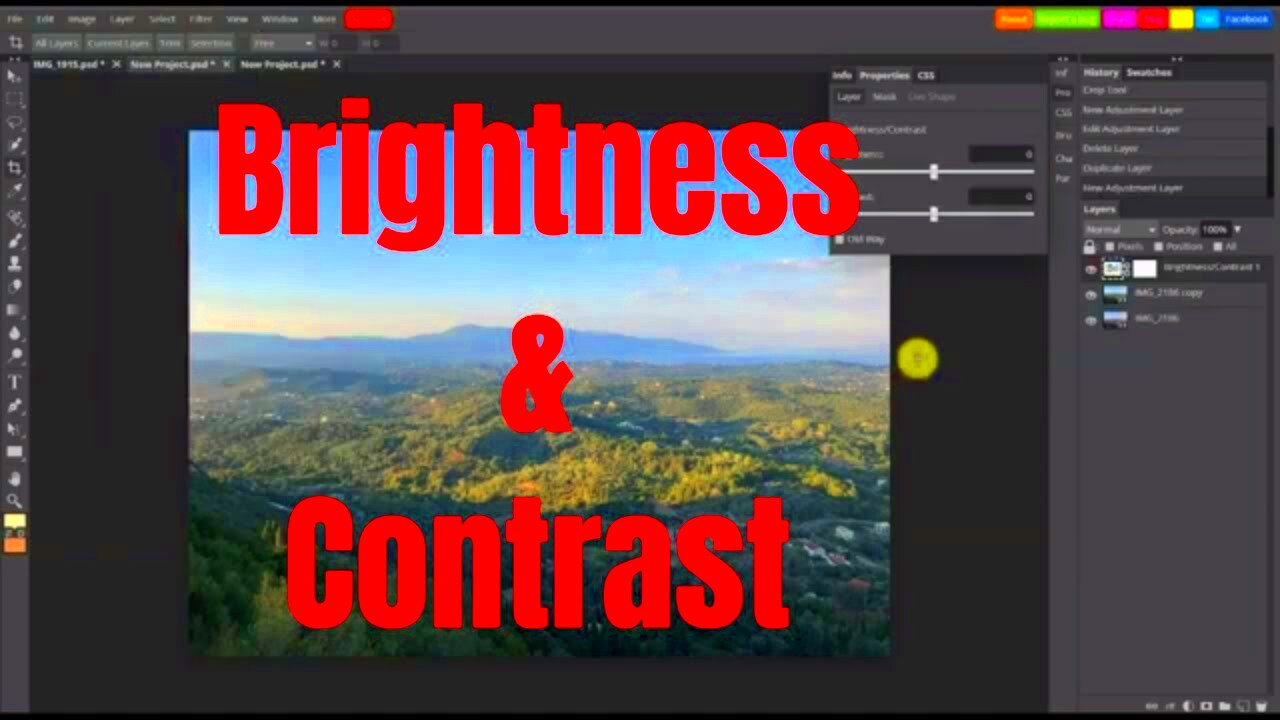
One of the easiest ways to improve an image is by adjusting its brightness and contrast. You can do this by going to the “Image” menu, selecting “Adjustments,” and then choosing “Brightness/Contrast.” Moving the sliders allows you to make your image brighter or darker and adjust how the dark and light areas of the image balance.
- Brightness: Increases or decreases the overall lightness or darkness of your image.
- Contrast: Controls the difference between light and dark areas of the image, making it appear more vibrant.
- Exposure: Useful for correcting overexposed or underexposed images.
3. Sharpen Your Image
If your image looks a bit soft or blurry, Photopea has a great sharpening tool. To sharpen, go to “Filter” > “Sharpen” > “Unsharp Mask.” This tool helps enhance details by increasing the contrast between adjacent pixels, making your image appear crisper.
4. Remove Noise
Sometimes images come with unwanted noise, which can make them look grainy or rough. To reduce noise, go to “Filter” > “Noise” > “Reduce Noise.” This will smooth out the noise while keeping the image’s sharpness intact.
5. Apply Filters and Effects
Photopea offers a wide range of filters and effects to make your images look more professional. Go to the “Filter” menu to explore options such as “Blur,” “Noise,” and “Distort.” Experimenting with these can add a creative touch or enhance details in your photo.
6. Save and Export Your Enhanced Image
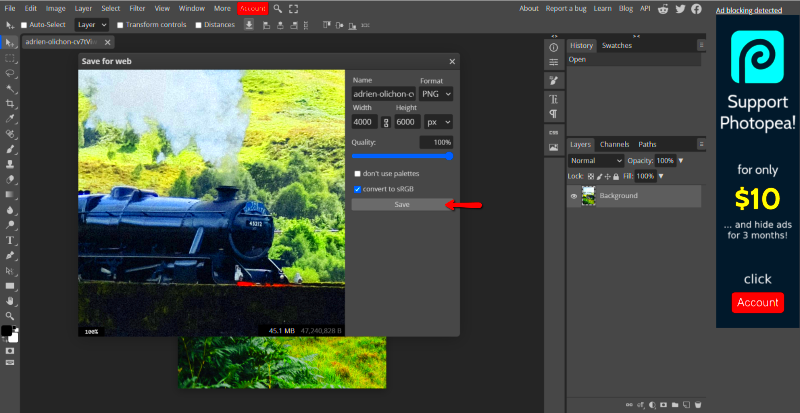
Once you’ve made all your adjustments, it’s time to save your work. To ensure you don’t lose quality when saving, go to “File” > “Export As” and choose your preferred file format, such as PNG or JPEG. Be sure to select the highest quality settings for the best result.
By following these steps, you can enhance any image using Photopea’s wide array of tools. Whether you're correcting exposure, sharpening details, or applying creative effects, Photopea offers the flexibility you need to improve your images effectively.
Also Read This: Guide to Downloading Your Adobe Stock Images
Adjusting Brightness, Contrast, and Saturation in Photopea

When it comes to enhancing your images, one of the quickest and most effective ways to make a noticeable difference is by adjusting brightness, contrast, and saturation. These settings allow you to fine-tune the overall mood and visual appeal of your image. Whether you’re looking to make your photo pop or create a more subtle, balanced look, Photopea gives you the tools to adjust these elements easily.
Brightness affects the overall lightness or darkness of an image. Increasing brightness makes the image lighter, while decreasing it darkens the image. Adjusting brightness is especially useful for correcting photos that are too dark or overexposed.
Contrast controls the difference between the dark and light areas in your photo. High contrast results in more pronounced shadows and highlights, which can make an image appear sharper. Lower contrast tends to soften the image, making it more evenly lit and less harsh.
Saturation affects the intensity of colors in your image. Increasing saturation makes the colors more vivid and vibrant, while lowering it can give your image a more muted or even black-and-white look.
Here’s how you can adjust these settings in Photopea:
- Brightness/Contrast: Go to “Image” > “Adjustments” > “Brightness/Contrast” and adjust the sliders.
- Saturation: Select “Image” > “Adjustments” > “Hue/Saturation” to change the color intensity.
By tweaking these settings, you can make your images look more dynamic, balanced, or even stylized to match your specific vision.
Also Read This: how do i get 10 free adobe stock images
Using Filters and Effects for Better Image Results
Filters and effects are a great way to enhance your images and take them to the next level. Whether you’re looking to add creative effects, correct imperfections, or give your image a new artistic feel, Photopea’s filter options provide a wide variety of tools to play with. These tools can completely transform the look and feel of your images in just a few clicks.
Photopea offers a wide selection of filters that can be used for different purposes, such as improving image sharpness, blurring areas for emphasis, or adding texture for a unique look.
Here are some popular filters and effects you can apply in Photopea:
- Blur: Apply blur effects to soften parts of an image or create a bokeh effect. Go to “Filter” > “Blur” and choose from options like Gaussian Blur or Motion Blur.
- Noise: Add noise to an image to create a grainy texture. This is useful for a vintage or film-like look. Go to “Filter” > “Noise” > “Add Noise.”
- Sharpen: Enhance the fine details of your image by applying a sharpen filter. Go to “Filter” > “Sharpen” > “Unsharp Mask” for better focus.
- Distort: Use distortion effects to create visual interest or correct perspective. Try the “Liquify” filter under “Filter” > “Distort” to reshape parts of your image.
Additionally, Photopea allows you to combine multiple filters to create a customized look. Play around with the options to discover how subtle or dramatic changes can completely alter the feel of your image.
With filters and effects, you can turn a regular photo into something special, whether you want to fix imperfections or add a creative flair.
Also Read This: How to Frame by Frame YouTube Videos
Removing Noise and Sharpening Images in Photopea
When working with images, noise and blur can often be unwanted distractions that lower the quality of the final result. Thankfully, Photopea provides tools to help you remove noise and sharpen images, bringing them closer to professional-quality standards. Whether you’re dealing with grainy photos or soft details, Photopea has you covered.
Noise refers to the grainy texture or specks that appear in some images, especially in low-light situations or when using high ISO settings on a camera. Removing noise is essential for achieving a cleaner, smoother image.
Sharpening helps bring out fine details in your photo by enhancing the contrast between pixels. This is especially useful if your image feels soft or out of focus.
Here’s how you can remove noise and sharpen your images in Photopea:
- Removing Noise: To reduce noise, go to “Filter” > “Noise” > “Reduce Noise.” You can adjust the sliders for strength and preserve details while reducing the graininess.
- Sharpening: To sharpen your image, go to “Filter” > “Sharpen” > “Unsharp Mask.” This will help enhance details, making the image look more crisp and clear.
Photopea allows you to fine-tune the level of noise reduction and sharpening to get just the right balance. It’s important not to overdo it—removing too much noise can soften the image, and over-sharpening can cause unwanted artifacts.
By mastering these tools, you can drastically improve the overall clarity and quality of your images, making them look professional and polished. Don’t be afraid to experiment with different settings to achieve the best result!
Also Read This: Using Partial Images for Full Image Inference
Saving and Exporting High-Quality Images in Photopea
Once you’ve spent time enhancing your image in Photopea, the next crucial step is saving and exporting it in the best quality possible. The way you save your image can significantly affect its final appearance, especially when you plan to use it for printing, websites, or social media. Photopea offers multiple file formats and settings that help you preserve the quality of your work, so it's important to choose the right options when exporting.
File Formats: Photopea allows you to export images in a variety of formats, each serving a different purpose. The most common formats include:
- JPEG: Great for photographs and images with many colors. Use this format for web and online use.
- PNG: Ideal for images that need transparency, like logos or icons. PNG also preserves better quality than JPEG for images with sharp edges.
- GIF: Suitable for simple graphics with fewer colors or animations.
- PSD: Photopea’s native format, ideal for saving projects with multiple layers that you may want to edit later.
Here’s how to save and export your image:
- Save as PSD: Go to “File” > “Save as PSD” to keep your layers intact for future editing.
- Export as PNG/JPEG: To save your image for web use, go to “File” > “Export As” and choose the format you prefer.
- Adjust Quality Settings: If you’re exporting in JPEG format, you can adjust the quality slider to balance file size and image quality. A higher quality number gives you better image clarity but a larger file size.
Remember, the right export settings depend on your intended use. By understanding how to save and export your images properly, you ensure that your hard work doesn’t lose its quality in the process.
Also Read This: How to Make Adobe Stock Images Transparent
Common Mistakes to Avoid When Enhancing Images in Photopea
While enhancing images in Photopea is straightforward, there are a few common mistakes that beginners and even experienced users often make. These mistakes can affect the final quality of your image, so it’s important to be mindful of them during your editing process. Here are some key errors to watch out for:
- Over-Editing: It’s easy to get carried away with adjustments like brightness, contrast, or sharpness. Over-editing can lead to unnatural-looking images that may lose their appeal. Always take a step back and review your image to ensure it still looks realistic.
- Not Working with a Copy: Always work with a copy of your original image. This way, if you make a mistake or want to start over, you won’t lose your original work.
- Ignoring Resolution: While it’s tempting to focus on adjustments like colors or contrast, resolution is just as important. Ensure your image has a high enough resolution for the desired output, whether it’s for print or web use.
- Using Too Many Filters: Filters are fun, but using too many can make your image look overly processed. Keep filters subtle, and always use them to enhance your image, not overpower it.
- Neglecting to Save Regularly: Always save your work regularly to prevent losing your progress. Photopea can autosave, but it’s still a good idea to manually save your file as you go.
Avoiding these mistakes will help you create professional-looking images that are clear, natural, and visually appealing. Remember to always take your time and experiment carefully with the tools at your disposal.
Also Read This: Searching for Free Images on Depositphotos Tips for Finding No-Cost Photos
FAQ
Here are answers to some of the most frequently asked questions about enhancing images in Photopea:
1. Can I work with multiple layers in Photopea?
Yes, Photopea supports working with multiple layers, just like Adobe Photoshop. You can adjust individual elements of your image without affecting the others, which is perfect for detailed editing.
2. How do I resize my image in Photopea?
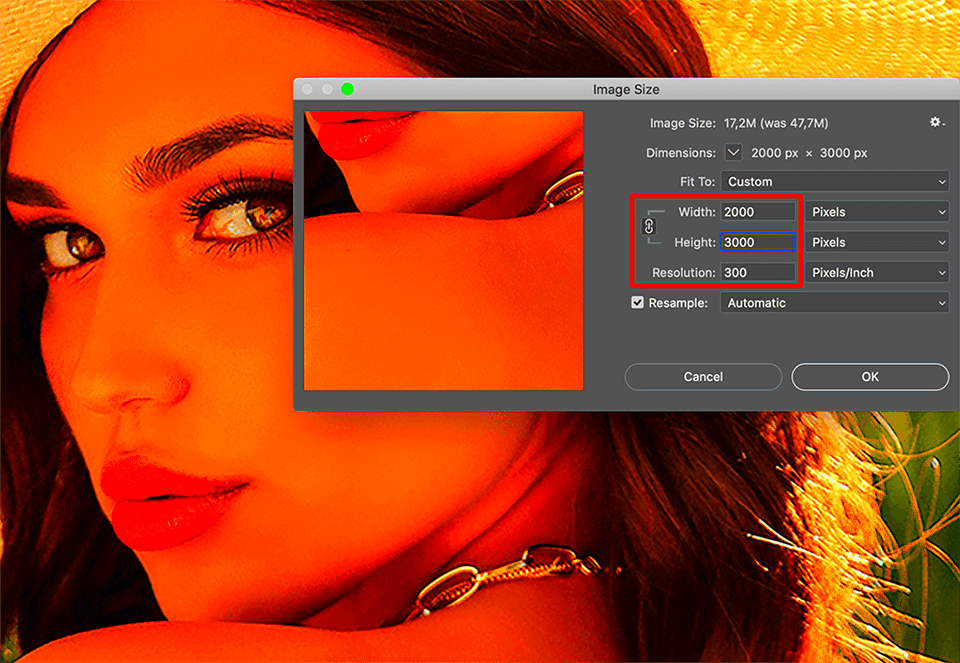
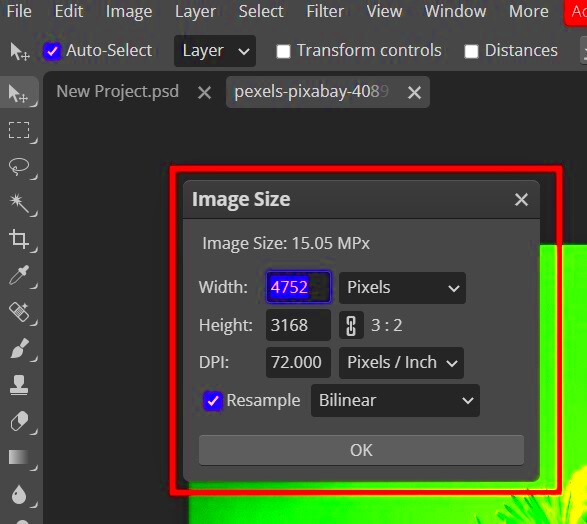
To resize your image, go to “Image” > “Image Size” and adjust the width and height. You can also maintain the aspect ratio by ensuring the “Constrain Proportions” box is checked.
3. What’s the difference between PNG and JPEG?
PNG files preserve image quality without compression and support transparency, making them perfect for logos and graphics. JPEG files are compressed, which reduces quality slightly but results in smaller file sizes, ideal for photographs and web use.
4. Can I use Photopea offline?
Photopea is an online tool, so it requires an internet connection. However, you can work offline if you download the Photopea offline version or use the browser’s cache, but functionality may be limited.
5. How can I fix an image that’s too dark?
If your image is too dark, you can adjust the brightness in Photopea. Go to “Image” > “Adjustments” > “Brightness/Contrast” and increase the brightness slider until the image is properly lit.
6. Is Photopea free to use?
Yes, Photopea is free to use, though there are some premium features available with a subscription. The free version offers most tools for image editing and enhancement.
Conclusion
Enhancing image quality in Photopea is an accessible and effective way to improve your images, whether you're looking to make small adjustments or undertake more advanced edits. By adjusting brightness, contrast, and saturation, experimenting with filters and effects, and removing noise and sharpening your images, you can achieve professional-level results without expensive software. Always remember to save your work in the right format to preserve the image quality, and avoid common mistakes like over-editing or neglecting resolution. With practice, Photopea can become an invaluable tool for enhancing your images and bringing your creative ideas to life.

 admin
admin


