Embedding images in Adobe Illustrator is an essential process when working with graphic designs, logos, and other visual content. It allows you to include images directly in your Illustrator document, ensuring that the image is saved with the file. This is different from linking, where the image remains outside the file. Embedding images gives you more control over your project, as all assets are contained within the same file, making it easier to manage and share.
Why You Should Embed Images in Adobe Illustrator

Embedding images in Adobe Illustrator offers several advantages:
- File Portability: When you embed an image, it becomes part of the Illustrator file. This makes sharing the document easier since you don't have to worry about missing linked images.
- Consistency: The image remains the same even if the original file is moved or deleted. This prevents broken links or missing images in your design.
- Better Performance: Embedded images can improve the performance of your Illustrator file, as the image resolution is stored within the document, avoiding the need for external references.
- No Dependency on External Files: Once embedded, there’s no need for access to the original image location, making it ideal for projects that need to be worked on across different devices or teams.
Also Read This: How to Enhance Your Viewing Experience by Downloading Subtitles for YouTube Videos
Steps to Embed Images in Adobe Illustrator
Follow these steps to embed an image in Adobe Illustrator:
- Open Your Document: Start by opening your existing Illustrator file or create a new one.
- Place the Image: Go to File > Place and select the image you want to embed. Once selected, click Place to insert it into your document.
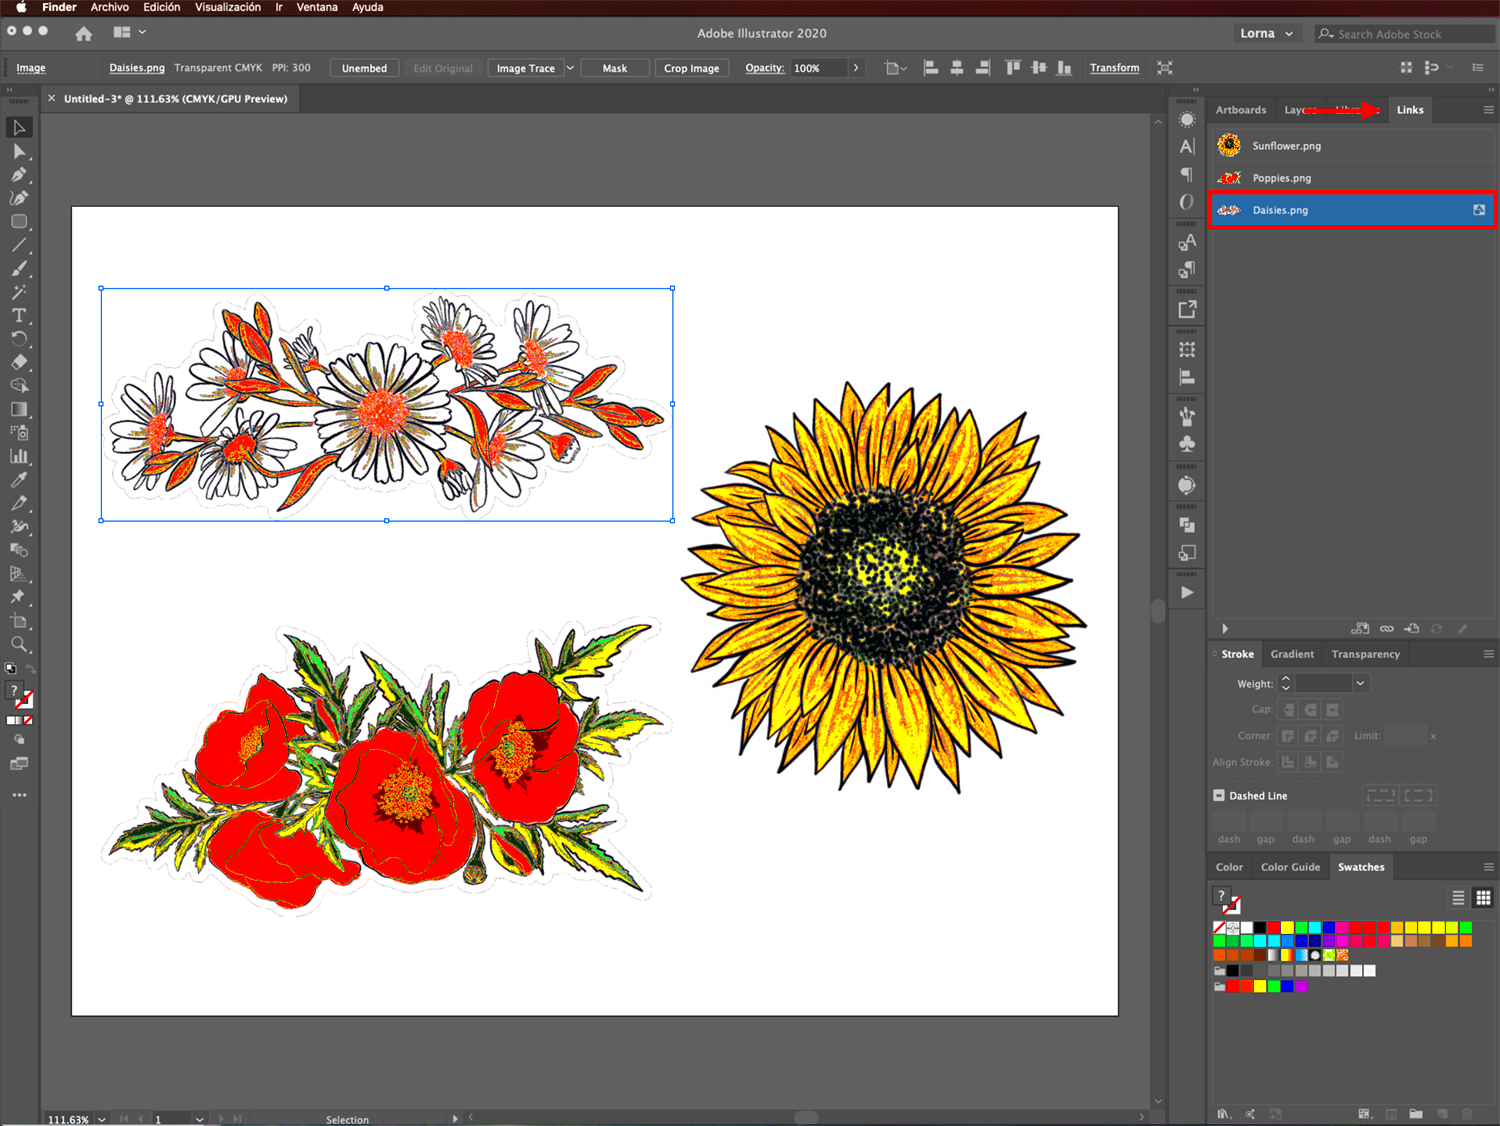
- Embed the Image: After placing the image, select it by clicking on it. In the top menu, you'll see an option labeled Embed. Click on this option to embed the image directly into the document.
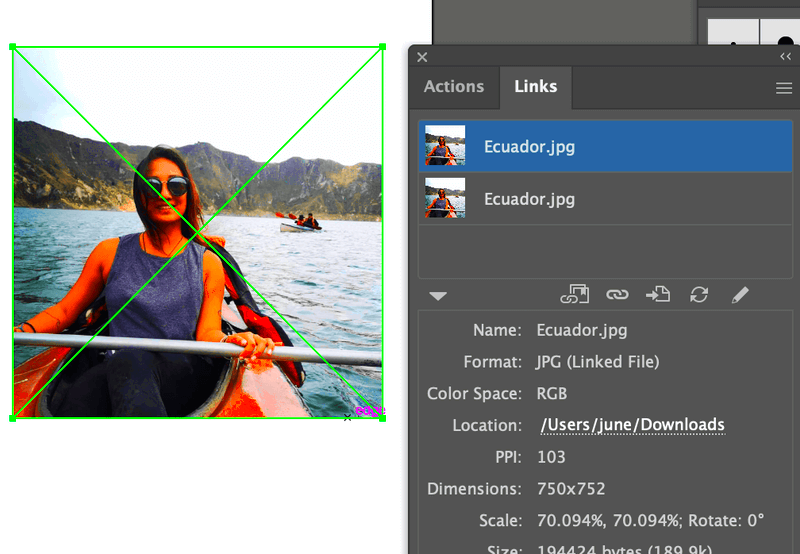
- Check the Links Panel: To confirm that the image is embedded, open the Links panel (Window > Links). If the image is embedded, it will show a small icon next to the image file name.
- Save Your Document: After embedding, save your file as usual. The image is now part of the Illustrator file and won't be lost even if the original file is moved or deleted.
Also Read This: How to Remove the Open to Work Banner from Your LinkedIn Profile
Using the Links Panel to Manage Embedded Images
The Links panel in Adobe Illustrator is an essential tool for managing your embedded and linked images. It provides an overview of all the assets in your document, showing you which images are linked and which are embedded. By using this panel, you can easily track and organize your images, whether they’re embedded or not. Let’s take a look at how to use the Links panel effectively.
- Opening the Links Panel: To open the Links panel, go to Window > Links. This will display a list of all images in your document.
- Identifying Embedded Images: Embedded images will show a small icon next to their name in the Links panel. You can differentiate between linked and embedded images quickly by looking for this icon.
- Embedding an Image from the Links Panel: If you’ve placed a linked image and decide you want to embed it, simply select the image in the Links panel and click the Embed button at the bottom. This will convert the linked image into an embedded one.
- Relinking or Updating Images: If you decide to use a different version of the image, you can relink the image by clicking the Relink button in the Links panel. This allows you to update or replace images without having to manually place them again.
- Managing Multiple Images: If your document contains multiple embedded or linked images, the Links panel gives you a quick way to manage all of them in one place. You can even select multiple images and embed or unlink them in bulk.
Also Read This: Preparing Your Photos for Adobe Stock in Lightroom
Editing Embedded Images in Adobe Illustrator
Editing embedded images in Adobe Illustrator is easy and provides flexibility when refining your design. Since the image is part of the Illustrator file, you can apply edits without worrying about the external file. Here's how you can make changes to an embedded image.
- Direct Edits within Illustrator: Once an image is embedded, you can edit it using basic Illustrator tools. You can crop, resize, or even apply filters directly to the image. To crop, use the Clipping Mask or the Crop Image tool available in the properties bar.
- Editing the Image in Photoshop: If you need to make more advanced changes to the image, you can edit the image in Photoshop and have those edits reflect in Illustrator. To do this, select the image, right-click, and choose Edit Original (if Photoshop is installed and the image is a compatible format).
- Adjusting the Image Appearance: For adjustments like brightness, contrast, or color balance, Illustrator’s Image Trace feature allows you to convert embedded raster images into vector shapes. This gives you greater control over the image's appearance.
- Resizing the Image: You can resize the embedded image directly by selecting it and using the transform handles. Be mindful that scaling an image too much can affect the image quality, so try to keep it proportional.
- Maintaining Image Quality: When editing embedded images, always aim to keep the resolution high to avoid pixelation. Illustrator won’t automatically adjust the resolution, so if you need to preserve detail, consider adjusting the image in Photoshop before embedding it.
Also Read This: A Comprehensive Guide to Downloading Vectors from 123RF
Saving and Exporting Your Document with Embedded Images
Once you’ve embedded your images and finalized your design in Adobe Illustrator, it's time to save and export your document. Saving your file with embedded images ensures that everything stays intact when sharing or transferring the document. Here’s what you need to know about saving and exporting Illustrator files with embedded images:
- Saving Your Document: To save your document with embedded images, simply go to File > Save As or Save. If you’re working with a file that already has embedded images, Illustrator will automatically save them within the document.
- Exporting for Different Formats: When exporting, you have multiple options depending on the use of your design. If you’re exporting for print, you might choose PDF, while for web or social media, formats like PNG, JPEG, or SVG might be more suitable. Go to File > Export > Export As to choose the appropriate format and ensure the images remain embedded.
- Optimizing File Size: While embedding images ensures the document is self-contained, it can increase the file size. To keep your file manageable, consider adjusting the resolution or using compression tools before exporting, especially for web usage.
- Checking the Links Panel Before Export: Before exporting, it’s a good idea to open the Links panel and double-check that all images are embedded. If any are still linked, you may encounter issues when transferring the file to other devices or platforms.
- Saving with Different Settings: You can also save your document with different settings based on the file type. For example, when exporting as PDF, you might choose settings that preserve the highest image quality or compress the images for a smaller file size.
Also Read This: how to superimpose images on android
Common Issues When Embedding Images and How to Solve Them
While embedding images in Adobe Illustrator can simplify your workflow, it’s not always without its challenges. Some common issues may arise, but don’t worry—there are easy fixes. Here are a few problems you might encounter when embedding images and how to solve them.
- Image Quality Loss: Sometimes, embedded images might appear pixelated or blurry. This usually happens if the resolution of the original image is too low. To solve this, make sure the image you are embedding has a high resolution (300 dpi for print or 72 dpi for web). If the resolution is too low, try sourcing a higher-quality image.
- Increased File Size: Embedding images directly into your Illustrator document can increase the file size significantly, especially if you are using high-resolution images. To address this, try compressing the image before embedding it or use vector images when possible, as they tend to have smaller file sizes.
- Missing Image after Embedding: If an image doesn’t appear after embedding, it could be due to a corruption during the embedding process. Try placing the image again or using the Relink option in the Links panel. If the issue persists, restarting Illustrator or updating the software may help.
- Unwanted Transparency or Color Shifts: Occasionally, when embedding certain image formats like PNG, the transparency may not render correctly, or colors may shift unexpectedly. To solve this, ensure the image format is compatible with Illustrator or use Photoshop to convert it to a more suitable format like TIFF or JPEG before embedding.
- Image Not Updating After Edits: If you edited an embedded image in another program like Photoshop, Illustrator might not reflect the changes immediately. Try re-embedding the image or use the Edit Original option in the Links panel to update the image.
Also Read This: How to Download a Clip from a YouTube Video Easily
Frequently Asked Questions
Here are some frequently asked questions about embedding images in Adobe Illustrator, along with their answers:
- Can I embed images in Illustrator without losing quality? Yes, if you use high-resolution images and ensure they are properly formatted, you can embed them without losing quality. Be mindful of the resolution to avoid pixelation.
- What’s the difference between embedding and linking images in Illustrator? When you embed an image, it becomes part of your Illustrator file, whereas linking keeps the image external and refers to its file location. Embedding makes the image more portable but increases the file size.
- How do I check if an image is embedded in Illustrator? Open the Links panel (Window > Links). Embedded images will show an icon next to their name indicating they are part of the Illustrator document.
- Can I edit an embedded image in Illustrator? Yes, you can edit an embedded image within Illustrator using basic tools like cropping or applying effects. For more advanced edits, you may need to use Photoshop and then re-embed the updated image.
- How can I reduce the file size when embedding images? You can reduce the file size by using lower-resolution images, compressing the image before embedding, or opting for vector-based images, which tend to have smaller file sizes.
Conclusion
Embedding images in Adobe Illustrator is a simple yet powerful technique that ensures your images are contained within the document, making it easy to share and maintain your designs. While there may be some challenges, such as file size increases or image quality issues, they can be easily addressed with the right steps. By using tools like the Links panel and understanding the common issues, you can embed images smoothly and ensure your Illustrator files remain professional and easy to work with.
Remember to always check image resolution, use compatible formats, and manage your document’s file size carefully. With these tips in mind, you’ll be able to create stunning designs with embedded images that are easy to share, export, and maintain.

 admin
admin


