Welcome to the beautiful world of Mehndi! This intricate art form, also known as henna, is a traditional practice that dates back centuries, primarily in South Asian cultures. Mehndi is more than just body art; it's a way to celebrate special occasions, express creativity, and share joy. Whether it’s for a wedding, festival, or just for fun, Mehndi designs can transform the mundane into something magical. In this blog, we'll walk you through easy Mehndi design steps, complete with video instructions to help you master this enchanting craft!
Tools and Materials Needed for Mehndi
Before diving into the designs, let’s gather all the essential tools and materials you’ll need. Having everything ready will ensure a smooth and enjoyable Mehndi application experience. Here’s a handy list to get you started:
- Henna Paste: Look for high-quality, natural henna powder or pre-made cones. If you're using powder, mix it with lemon juice and sugar to create a smooth paste.
- Application Tools: You can use:
- Mehndi cones for precise application.
- Brushes or toothpicks for detailed work.
- Essential Oils: Adding a few drops of eucalyptus or lavender oil to your henna mix enhances the stain and aroma.
- Stencils (Optional): For beginners, using stencils can help create clean and beautiful patterns without the pressure of freehand drawing.
Now let’s talk about the workspace. Setting up a clean and comfortable area is crucial. You’ll want:
- A flat, non-slip surface to work on.
- Good lighting to see the details of your designs.
- Paper towels or wet wipes for quick clean-ups.
Lastly, ensure you have some aftercare materials ready. After applying Mehndi, it’s crucial to take care of your design for the best results. You'll need:
- Plastic wrap to cover your designs while they dry.
- Vaseline or coconut oil to moisturize the skin after removing the henna.
With these tools and materials, you’re all set to explore the art of Mehndi. In the next sections, we'll dive into the actual design steps, complete with video instructions to guide you through each twist and turn. Let’s get started and unleash your creativity!
Also Read This: Does Dailymotion Provide Superior Features with a Subscription?
3. Step-by-Step Guide to Easy Mehndi Designs
Are you ready to dive into the world of mehndi? It’s not just about beautiful patterns; it’s a form of art that connects you to tradition. Let’s walk through some easy steps to create stunning mehndi designs that will impress your friends and family!
Step 1: Gather Your Supplies
- Mehndi cone or henna paste
- Paper towels
- Olive oil or coconut oil
- Toothpick or a fine brush (for detailing)
- Design reference images (print them out or have them on your phone)
Step 2: Prepare Your Skin
Clean the area where you’ll apply the mehndi. This ensures that the henna sticks better. You can use a gentle scrub to remove any oils or lotions from your skin. Once cleaned, apply a thin layer of olive or coconut oil. This helps to enhance the color of the mehndi!
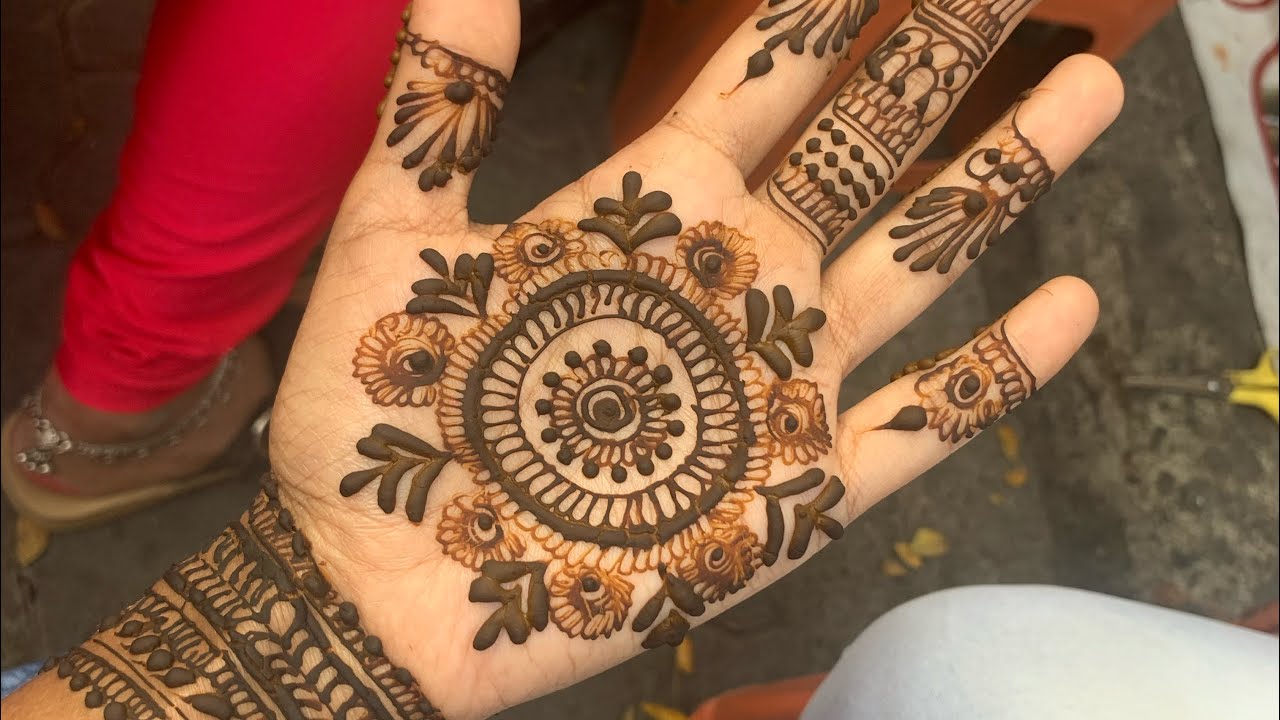
Step 3: Start with Simple Patterns
Begin with basic shapes. Here are some you can try:
- Circles: Start by drawing small circles. They can be the foundation of many designs.
- Lines: Draw straight lines and curves to connect your circles.
- Dots: These are great for filling gaps; they add texture and depth.
Step 4: Add Intricate Details
Once you’re comfortable with the basics, start adding details! Use a toothpick or a fine brush to create swirls, flowers, and leaves. Remember, it’s all about taking your time. If you make a mistake, don't stress—mehndi is about the journey, not perfection!
Step 5: Let It Dry
After completing your design, allow the mehndi to dry completely. This usually takes about 30 minutes to an hour. The longer you leave it on, the darker the stain will be! If you want to prolong the drying time, you can wrap the design in tissue or apply a little sugar and lemon juice mixture to keep it moist.
Step 6: Remove the Mehndi
Once you’re ready, gently scrape off the dried henna using a toothpick or your fingers. Avoid using water at this stage, as it can fade the color. Instead, apply some more oil to help the stain develop further.
Also Read This: How to Make a Purse Cake – Detailed Tutorial on Dailymotion
4. Video Instructions for Visual Learners
Learning through videos can be incredibly beneficial, especially for visual learners. Sometimes, seeing someone perform the steps makes all the difference. That’s why we’ve compiled some fantastic video tutorials to accompany our step-by-step guide!
Video 1: Basic Mehndi Patterns
This video walks you through creating simple mehndi designs, focusing on the foundational patterns. You’ll see how to combine shapes like lines, circles, and dots to create beautiful designs. Watch it here!
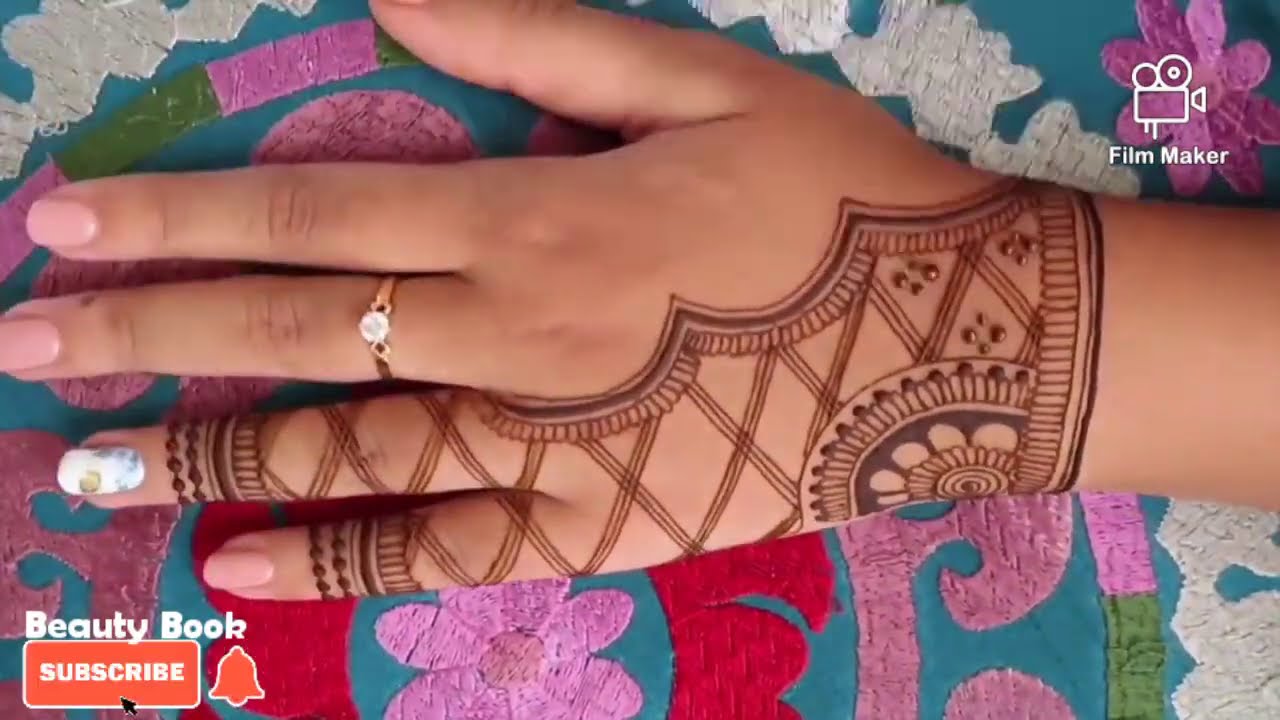
Video 2: Intricate Design Techniques
If you’re ready to spice things up, check out this video focusing on intricate detailing techniques. It covers how to make your mehndi designs pop with beautiful floral and geometric patterns. Catch it here!
Video 3: Troubleshooting Mehndi Application
Having trouble with your mehndi application? This video addresses common mistakes and how to fix them, ensuring you achieve that perfect design every time. Learn more here!
Remember, practice makes perfect! Don’t hesitate to refer back to these videos as you hone your mehndi skills. Happy designing!
Also Read This: Step-by-Step Guide to PowerPoint Presentations: Watch on Dailymotion
5. Common Mistakes to Avoid When Applying Mehndi
Applying mehndi can seem like a straightforward task, but there are several common mistakes that can trip you up. Avoiding these pitfalls will help you achieve that stunning design you desire!
- Rushing the Process: One of the most common mistakes is hurrying through the application. Mehndi needs time and patience. Take your time to ensure every detail is perfect.
- Not Preparing the Skin: Applying mehndi on oily or wet skin can affect the stain quality. Always cleanse your hands thoroughly and consider using a mild alcohol-based astringent to prep the area. This helps the mehndi adhere better.
- Using Poor-Quality Henna: Ensure you’re using high-quality, natural henna. Cheap, synthetic products can lead to poor color and even skin irritation. Look for brands that are well-reviewed.
- Ignoring Aftercare: How you care for your mehndi after application can make or break the final color. Avoid water for the first 24 hours and apply a mix of lemon juice and sugar gently on the design to enhance the stain.
- Applying Too Thick: While it might seem like a thicker application would yield a darker stain, it can actually hinder the drying process and lead to smudging. A medium thickness is ideal.
By avoiding these common mistakes, you’ll be on your way to achieving beautiful mehndi designs. Remember, practice makes perfect!
6. Tips for Perfecting Your Mehndi Technique
Perfecting your mehndi technique is all about practice and understanding a few key principles. Here are some tips to help you elevate your mehndi game!
- Master the Cone: The cone is your primary tool. Practice filling and controlling it. A well-filled cone with a fine tip will give you more precision in your designs.
- Start Simple: If you’re a beginner, start with simple patterns. Practice basic shapes like flowers and leaves before moving on to intricate designs. This helps build your confidence.
- Work on Steady Lines: A steady hand is crucial for clean lines. When drawing, keep your hand relaxed and use gentle pressure. Try practicing on paper before applying on skin.
- Utilize Guides: Don’t hesitate to use stencils or printed designs as a guide. You can trace over them to get an idea of how the final design will look, especially for complex patterns.
- Keep It Light: When practicing, remember to keep your designs light. Use a soft touch initially, and you can always go back and darken areas as you gain confidence.
With these tips in hand, you’ll be able to refine your mehndi skills. Enjoy the process, and remember that every design is a step towards mastery!
 admin
admin


