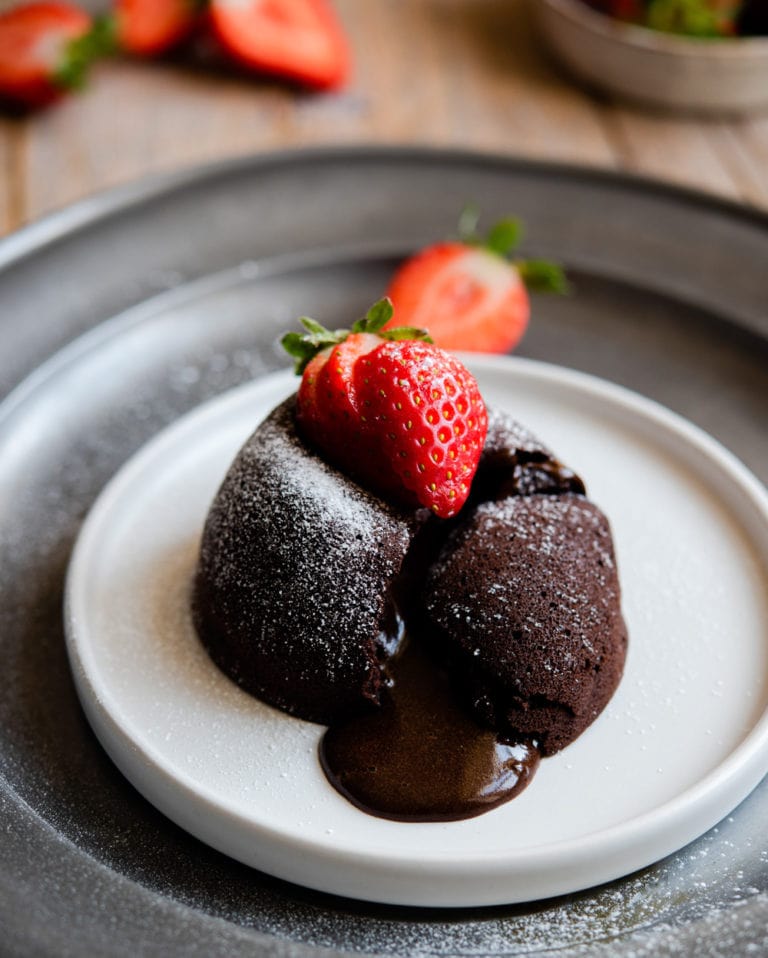
Welcome to the delicious world of DIY lava cakes! If you’re looking to impress your friends or treat yourself to a decadent dessert, you’ve landed in the right spot. With molten chocolate centers that ooze goodness, lava cakes are not just a treat for your taste buds; they're a feast for the eyes as well. In this step-by-step guide, we’ll walk through everything you need to know to create these delightful little cakes right from the comfort of your own kitchen. So, let’s dive in and start baking!
Ingredients Needed

Before you roll up your sleeves and get started, it’s crucial to gather all the ingredients you'll need for the perfect lava cake. Here’s a checklist to make your shopping easier:
- 6 ounces of semi-sweet chocolate - This is the star of our show! Choose a good quality chocolate for the best flavor.
- ½ cup (1 stick) of unsalted butter - It helps to create that rich, buttery flavor we all love.
- 1 cup of powdered sugar - A sweet addition that gives the cake its delightful taste and texture.
- 2 large eggs - The binding agents that help hold everything together.
- 2 large egg yolks - Adding extra richness and flavor to our lava cake.
- ½ cup of all-purpose flour - This is needed for the cake to rise and hold its shape.
- 1 teaspoon of vanilla extract - A hint of vanilla goes a long way, enhancing the chocolate flavor.
- Pinch of salt - Just a little bit to bring out the sweetness.
With these ingredients in hand, you’re well on your way to creating a luscious lava cake that’s bound to impress. So, let’s move on to the fun part—baking!
Also Read This: Why AdBlock Fails on YouTube and How to Resolve It
3. Equipment Required

Let’s get down to the nitty-gritty of what you’ll need to whip up those delicious DIY lava cakes! Having the right equipment can make all the difference in your baking adventure. Here’s a handy list to get you started:
- Oven: A reliable oven is essential for baking, so preheat it before you start!
- Ramekins or Soufflé Dishes: These small, round dishes are perfect for holding your lava cake batter. Aim for 6-ounce ramekins for the best results.
- Mixing Bowls: You’ll need at least a couple—one for melting chocolate and another for mixing your batter.
- Whisk or Electric Mixer: A whisk can work wonders for combining ingredients, but an electric mixer can save you some elbow grease.
- Measuring Cups and Spoons: Precision is key in baking, so make sure you have your measuring tools handy.
- Spatula: A silicone or rubber spatula is perfect for scraping the sides of your bowls and folding ingredients together.
- Baking Sheet: Place your ramekins on a baking sheet for easy transfer to and from the oven.
- Cooling Rack: Once your lava cakes are done baking, let them cool on a rack to prevent sogginess.
With this equipment at your side, you’ll be well-prepared to dive into the wonderful world of lava cake making!
Also Read This: DIY Makeup Base at Home Easy Steps on Dailymotion
4. Preparation Steps
Now that you have your equipment ready, it’s time to get your hands dirty and prepare those tantalizing lava cakes! Follow these steps, and you'll be savoring rich, molten goodness in no time.
- Preheat Your Oven: Set your oven to 425°F (220°C). This high temperature is crucial for achieving that gooey center.
- Prepare Ramekins: Grease your ramekins with butter and dust them lightly with cocoa powder. This helps the cakes to release easily after baking.
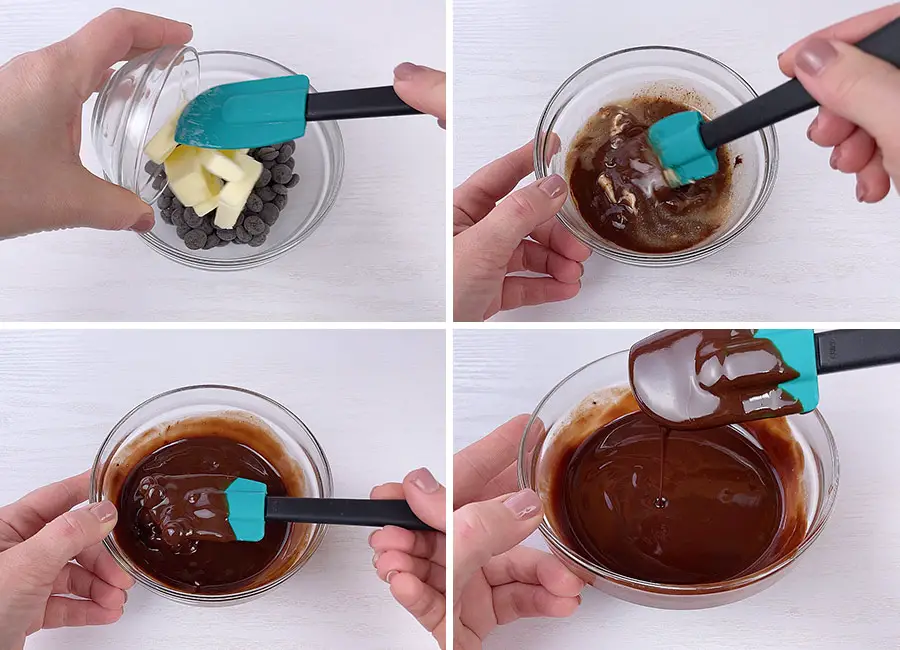
- Melt the Chocolate: In a microwave-safe bowl, combine the chocolate and butter. Microwave in short bursts of 20 seconds, stirring in between until fully melted and smooth.
- Mix Ingredients: In another bowl, whisk together the eggs, sugar, and vanilla until combined. Gradually add this mixture to the melted chocolate, stirring to combine.
- Add Dry Ingredients: Gently fold in the flour, being careful not to overmix. You want a nice, smooth batter.
- Fill Ramekins: Pour the batter into the prepared ramekins, filling them about 2/3 full. Be careful not to overfill!
- Bake: Place the filled ramekins on your baking sheet and place them in the oven. Bake for about 12-14 minutes; the edges should be firm while the center remains soft.
- Let Them Rest: Once baked, remove the ramekins from the oven and let them cool for about 1 minute. This is key to ensuring they set perfectly.
And there you have it! Follow these steps, and you’ll create the most delicious lava cakes that are sure to impress your friends and family. Enjoy every gooey bite of your creation!
Also Read This: Mastering Mascara Application with a Step-by-Step Video Tutorial
Baking the Lava Cake
Alright, it's finally time to get that delicious lava cake into the oven! Preheating your oven to the right temperature is key to achieving that perfectly gooey center. Let’s break down the steps to ensure your lava cake comes out just right:
- Preheat the Oven: Preheat your oven to 425°F (220°C) for about 20 minutes. This ensures that your cakes start baking at the right temperature.
- Prepare the Ramekins: Generously butter your ramekins to prevent sticking. You can dust them with cocoa powder as well for an extra chocolatey flavor.
- Fill the Ramekins: Carefully pour your batter into the prepared ramekins, filling them about ¾ full. Leaving space at the top allows the cakes to rise.
- Bake: Place the ramekins on a baking sheet and pop them in the oven. Bake for around 12-14 minutes. You want the edges to be firm, while the centers remain soft and slightly wobbly.
- Cool Slightly: Once you take them out, let your cakes cool for about 1-2 minutes. This short resting time allows the lava cakes to settle a bit, making them easier to invert.
Remember, every oven is a bit different, so keep an eye on them as they bake. Once they’re done, you’re ready for the next exciting step: serving!
Also Read This: Download Thumbnail from Dailymotion with Few Clicks With This Free Tool
Tips for Perfect Lava Cakes
Now that you’ve baked your lava cakes, let's talk about some handy tips to ensure that your dessert turns out perfectly every time. Here’s what you need to keep in mind:
- Quality Ingredients: Use high-quality chocolate since it’s the star of the dish. Opt for 60-70% cacao for a rich flavor.
- Don’t Overmix: When mixing the batter, be gentle. Overmixing can lead to dense cakes rather than a tender, airy texture.
- Timing is Everything: Keep an eye on your baking time! Every minute can make a big difference between a fully baked cake and a gooey lava one.
- Experiment with Fillings: While traditional lava cakes are filled with chocolate, you can get creative. Consider adding a spoonful of peanut butter, Nutella, or fruit preserves for an unexpected twist.
These tips can help you nail that gooey center and fluffy texture. So don’t hesitate to practice, because with each attempt, you’ll become a lava cake pro!
Also Read This: Creating a Stunning Floral Crown on Dailymotion
7. Serving Suggestions
When it comes to serving your delectable DIY lava cake, the presentation is just as important as the taste. Here are some delightful serving suggestions that will undoubtedly impress your friends and family:
- Iced Cream Dreams: A scoop of vanilla ice cream is the classic pairing for lava cake. The warm, gooey center contrasts beautifully with the cold, creamy ice cream, creating a delightful temperature play.
- Fresh Berries: Add a handful of fresh strawberries, raspberries, or blueberries on the side. They bring a pop of color to your plate and their tartness complements the sweetness of the cake.
- Chocolate Sauce Drizzle: Elevate the chocolate flavor by drizzling some warm chocolate sauce over the cake just before serving. You can use store-bought sauce or whip up a quick homemade version.
- Mint Leaves: A fresh mint leaf on top of each lava cake adds a touch of elegance and a refreshing flavor that brightens the dish.
To take it up a notch, consider serving the lava cakes in individual ramekins, which not only makes for a beautiful presentation but also adds a personal touch. You can even sprinkle some powdered sugar on top for that extra flair. Whatever you choose, just remember: the goal is to make your lava cake experience both delicious and visually appealing!
8. Conclusion
And there you have it, your very own DIY lava cake! This scrumptious dessert is not only easy to make but also incredibly rewarding. Whether you're hosting a dinner party, celebrating a special occasion, or simply treating yourself, molten chocolate lava cakes are sure to impress.
Remember, the secret to achieving that ooey-gooey center is in the baking time. Overbaking is the main culprit that turns a potential lava cake into a regular chocolate cake. So keep an eye on those timer alerts!
As we've discussed, there are endless possibilities for serving this decadent treat. From pairing it with ice cream or fresh fruits to garnishing with sauces and herbs, you can make each serving unique.
Ready to dive into that rich, flowing chocolate? Go ahead and dig in! Sharing a homemade lava cake is not only about the food but also about the joy it brings to the table. So roll up your sleeves and enjoy this delightful dessert adventure. Happy baking!
 admin
admin


