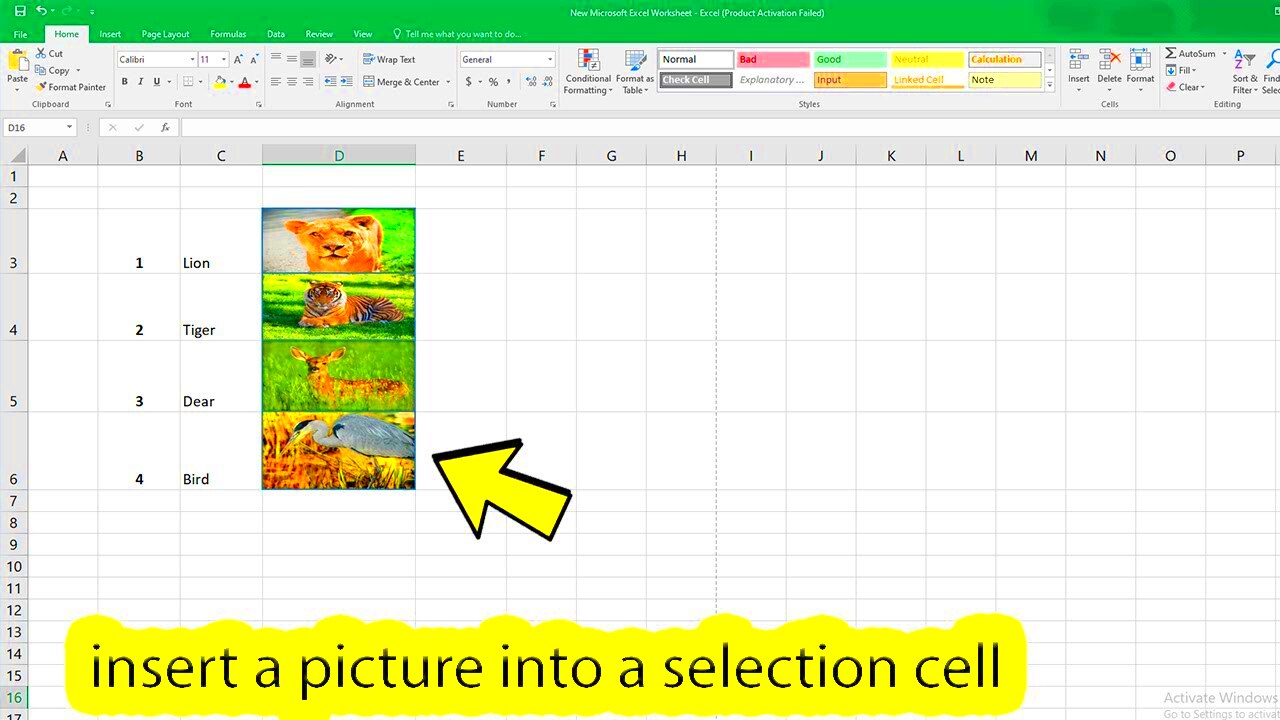
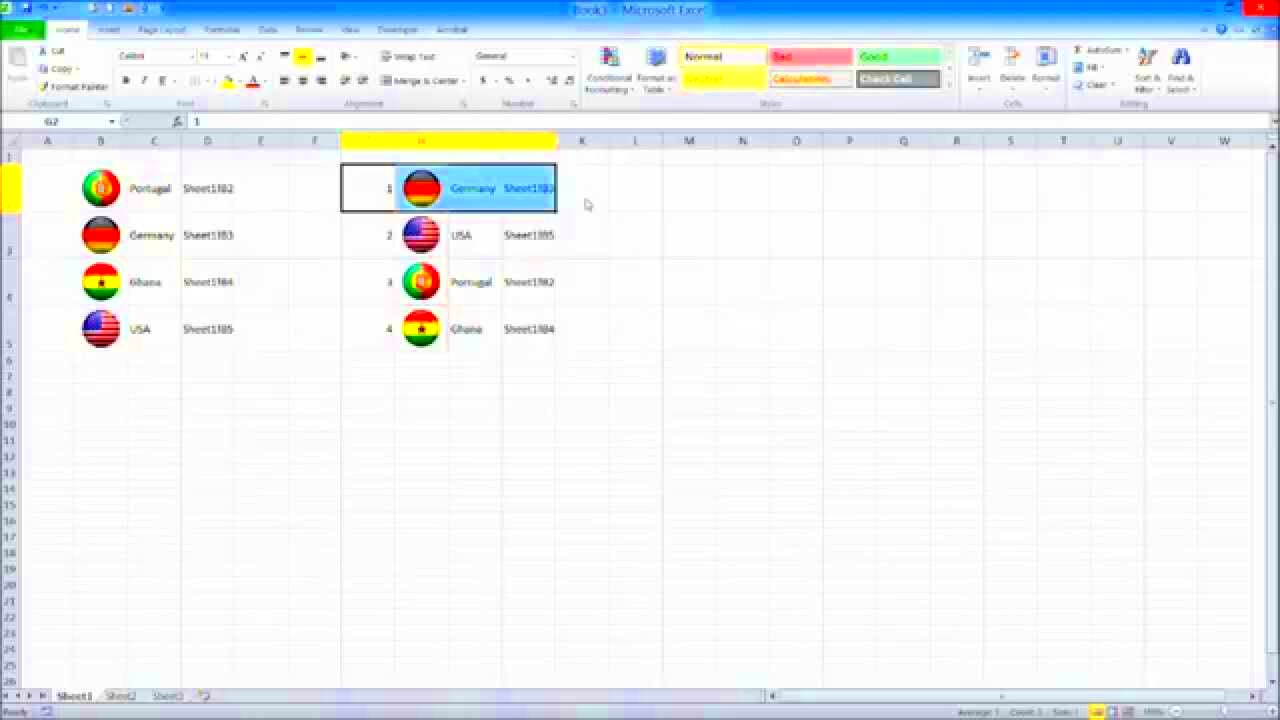
Excel is a powerful tool for organizing and analyzing data, but did you know you can also display images based on the values in cells? This feature can add a layer of visual clarity to your spreadsheets, making them more interactive and easier to interpret. Whether you're working with product catalogs, inventory lists, or even custom dashboards, linking images to cell values can improve the presentation and functionality of your Excel file.
In this guide, we'll walk you through how to display images dynamically based on specific cell values. This can save time, reduce clutter, and make your Excel sheets more visually appealing.
Understanding Excel's Image Insertion Capabilities

Before diving into displaying images based on cell values, it's essential to understand how Excel handles image insertion. In Excel, images are not inserted into individual cells like text or numbers. Instead, images float above the cells, which can make it tricky to control where and how they appear in relation to your data.
There are two primary ways to insert images into Excel:
- Manual Insertion: You can insert an image by going to the "Insert" tab and selecting "Pictures." This method places the image on the worksheet, but you must manually adjust its position.
- Linked Insertion: This allows you to insert an image that is linked to a specific file. It's more efficient when working with large sets of images that may need to be updated or replaced regularly.
To display images based on cell values, you'll need to take things a step further and learn how to use formulas or even Visual Basic for Applications (VBA) scripting to make the images appear dynamically when specific conditions are met.
How to Link Images to Cell Values in Excel

Linking images to cell values in Excel can be done in several ways, depending on the complexity of the task and the version of Excel you're using. The most straightforward method involves using Excel’s built-in "Insert Picture" feature along with the "Name Manager" and formulas to make images appear based on cell content.
Here's a step-by-step guide to help you link images to cells:
- Step 1: Prepare Your Images
Before you start, make sure all the images you want to display are stored in an accessible location on your computer or a shared drive. This will make it easier to link them to your Excel file.
- Step 2: Insert the Images into Excel
Go to the "Insert" tab, click "Pictures," and choose the images you want to insert. Position them in a way that they don't overlap with data entries or other visuals.
- Step 3: Use the Name Manager
Next, use Excel’s Name Manager to create a dynamic link between the images and the values in your cells. To do this, go to the "Formulas" tab and click "Name Manager." You'll then assign a unique name to each image you want to link to a cell value.
- Step 4: Apply the Formula
Now, use a formula to display an image when specific conditions are met. For example, the formula
=IF(A2="Value", "ImageName", "")can link an image to a value in cell A2. When A2 contains "Value," the corresponding image will appear in the designated location. - Step 5: Adjust Image Display Settings
Ensure that the images are set to move and resize with cells by right-clicking the image, selecting "Format Picture," and choosing the appropriate options under the "Size & Properties" tab.
With this method, your images will automatically update based on changes in your cells, making your Excel sheet more dynamic and interactive.
Setting Up the Data for Image Display
Before you can display images in Excel based on cell values, it’s important to organize your data properly. Having a clear structure ensures that the images will be displayed correctly and consistently. A well-structured data set will also make it easier to manage the images as your Excel workbook grows.
Here’s how you can set up your data for image display:
- Column for Image Names or Identifiers: Make sure you have a dedicated column where you can specify what image should appear based on the cell value. This can be an image name or identifier that corresponds to your image files.
- Column for Conditions: Another column should contain the criteria or conditions that will trigger the image to appear. For example, you might have a product name in one column and a reference to a product image in another column.
- Organize Image Files: Store your image files in a consistent folder on your computer or network. Having all the images in one place will make linking them easier.
- Ensure Data Integrity: Double-check that the values you’re using to link images are consistent and accurate. Any typos or mismatches can prevent the images from being displayed properly.
By setting up your data correctly, you ensure that Excel can display the right images every time the condition is met. This step is crucial for keeping your spreadsheet neat and functional, especially when dealing with large datasets.
Using Excel's Conditional Formatting for Image Display
Conditional formatting in Excel is a powerful tool that allows you to apply formatting based on the values in your cells. While it’s mostly used for color-coding or highlighting cells, you can also use it to control the display of images based on cell conditions.
To set this up, follow these steps:
- Step 1: Insert Your Images
First, insert all the images you want to use in your Excel sheet. Place them outside the main data range so they don’t interfere with your data. You can insert images using the "Insert" tab and selecting "Pictures."
- Step 2: Use the 'Format Cells' Option
Right-click on the cell where you want to display the image, and select "Format Cells." Then, go to the "Fill" tab and select "Picture" from the list of options. Now, you can choose a picture to apply to the selected cell.
- Step 3: Set Conditions
To make the image change based on a condition, use Excel’s conditional formatting options. Click on "Conditional Formatting" in the "Home" tab, then "New Rule." Choose "Use a formula to determine which cells to format" and enter the condition (e.g.,
=A2="Product1"). - Step 4: Link the Image
After applying the conditional formatting rule, link the images to the condition. Excel will display the relevant image only when the specified condition is met. You can repeat this process for other conditions and images.
Conditional formatting is a great way to manage image displays based on dynamic data, ensuring your spreadsheet remains visually organized and intuitive without cluttering the sheet with manual image placement.
Using VBA to Automatically Display Images
For more advanced functionality, you can use Visual Basic for Applications (VBA) to automatically display images in Excel based on cell values. VBA allows you to write custom code that reacts to changes in your spreadsheet, making it possible to show or hide images as needed without any manual intervention.
Here’s a simple guide to get started with VBA for image display:
- Step 1: Open the VBA Editor
To access VBA, press
Alt + F11in Excel. This opens the Visual Basic for Applications editor where you can write your custom code. - Step 2: Insert a Module
In the VBA editor, right-click on "VBAProject (YourWorkbook)" in the left pane and choose "Insert" > "Module." This will create a new module where you can paste your code.
- Step 3: Write the VBA Code
Here’s an example of VBA code that automatically displays an image based on a cell value:
Sub DisplayImage() Dim img As String img = Range("A1").Value 'The value in cell A1 is used to find the image' ActiveSheet.Pictures.Insert("C:\Images\" & img & ".jpg").Select Selection.ShapeRange.LockAspectRatio = msoFalse Selection.Width = 100 'Adjust the width of the image' Selection.Height = 100 'Adjust the height of the image' End Sub - Step 4: Link the VBA Script to a Cell
To make the VBA code run automatically when a cell value changes, link the script to an event like
Worksheet_Change. This way, when the value in the specified cell changes, the VBA code will run and display the appropriate image. - Step 5: Test the Script
Go back to your worksheet and change the value in the referenced cell. The corresponding image should appear automatically in the specified location.
VBA allows for a high degree of flexibility when working with images in Excel, especially when dealing with complex conditions or a large number of images. With the right code, you can create highly customized solutions that respond to any data change in your workbook.
Common Challenges and How to Overcome Them
Displaying images in Excel based on cell values can be a powerful tool, but there are some common challenges you might face along the way. Whether you're struggling with image alignment, performance issues, or unexpected behavior when using VBA or formulas, understanding these challenges can help you find solutions faster.
Here are some common challenges and tips on how to overcome them:
- Image Alignment and Size Issues:
Sometimes, images don't align properly with cells, making the spreadsheet look disorganized. To fix this, ensure that the image is set to move and resize with the cell. Right-click the image, select "Format Picture," and choose "Move and size with cells" under the "Properties" tab.
- Excel Performance Slowdowns:
Inserting multiple images into a large Excel file can cause performance issues. One way to reduce this is to keep your images in a separate folder and use links to them instead of embedding them. This will reduce the file size and improve performance.
- Broken Links and Missing Images:
If you store images externally, ensure the file paths are correct. If the images are missing, Excel won’t display them. Always double-check the path when using external image references.
- VBA Script Errors:
Writing VBA code can sometimes result in errors, especially if you’re new to it. Ensure your code is referring to the correct image paths and cell values. Use Excel’s debugger to catch any issues in your script.
While these challenges may seem daunting, they are manageable with a bit of patience and the right approach. Always test your methods on a smaller dataset before scaling up to ensure smooth functionality.
Best Practices for Displaying Images in Excel
When incorporating images into your Excel files, it's important to follow best practices to ensure they enhance the functionality and visual appeal of your work without causing problems down the line. Here are some key tips to make your images more effective in Excel:
- Organize Image Files Efficiently:
Keep your images in a centralized folder that’s easy to access. This will help when linking to the images and avoid broken file paths. Also, name your image files systematically to make referencing them easier.
- Use Image Compression:
Large image files can bloat your Excel file and cause performance issues. Consider using image compression tools to reduce the size of your images before inserting them into Excel.
- Align Images Properly:
To keep your spreadsheet neat, ensure that images are aligned with the relevant cells. Use the "Move and size with cells" option to make sure the images stay properly positioned when rows or columns are resized.
- Limit the Number of Images:
While it’s tempting to insert many images, too many can slow down Excel. Only use images where they add real value, and avoid cluttering your worksheet with unnecessary visuals.
- Use Named Ranges for Dynamic Image References:
If you’re using formulas to display images based on cell values, consider creating named ranges for image references. This makes your formulas easier to understand and manage.
- Test and Optimize:
Always test your workbook with a smaller dataset to ensure everything works as expected before scaling it up. Regularly optimize your workbook to prevent any slowdowns or issues.
By following these best practices, you can make sure that your Excel files remain efficient, visually appealing, and easy to maintain, even as you add more images.
FAQ
Q1: Can I display multiple images based on different cell values in Excel?
Yes, you can display multiple images by creating separate conditions for each image. Using conditional formatting, VBA, or formulas, you can set different criteria for displaying different images based on cell values.
Q2: Why aren’t my images displaying properly in Excel?
There could be several reasons. Make sure the image paths are correct, and if you’re using VBA, check that the code is pointing to the right cells and image files. Also, ensure that the "Move and size with cells" option is selected for image alignment.
Q3: How can I reduce the file size of my Excel sheet with images?
You can reduce the file size by compressing your images before inserting them. Additionally, linking to images rather than embedding them directly into the sheet can help keep the file size smaller.
Q4: Is it possible to automate image display using VBA?
Yes, VBA can be used to automate the display of images based on cell values. By writing a simple VBA script, you can have Excel automatically show or hide images when data changes in your cells.
Q5: Can Excel display images for all types of data, including text and numbers?
Yes, images can be linked to any type of data in Excel, whether it’s text, numbers, or even dates. Just ensure your conditions or formulas are set up correctly to respond to the data in the cells.
Conclusion
Displaying images in Excel based on cell values is a practical way to enhance the visual appeal and functionality of your spreadsheets. Whether you're working with product catalogs, inventories, or data dashboards, linking images dynamically to data entries can help make your work easier to understand and more visually engaging. By following the tips, best practices, and methods outlined above, you can avoid common pitfalls and ensure that your images display correctly every time. With Excel's image insertion capabilities, conditional formatting, and VBA, you can create dynamic and professional spreadsheets that respond to changes in your data, improving both presentation and workflow.

 admin
admin


