Cutting out images in Procreate is a powerful way to manipulate artwork or photos for various projects. Whether you're creating digital illustrations, editing photos, or crafting designs for social media, Procreate offers a wide range of tools that make cutting out images easier and more precise. This feature is especially useful when you want to separate elements from their background, resize them, or integrate them into different compositions. With just a few simple steps, you can master the technique and enhance your creative process. Let’s dive into how you can do it effectively!
Why You Should Use Procreate for Cutting Out Images

Procreate is one of the most popular drawing and editing apps for iPad, offering a variety of tools for creating and modifying images. Here’s why cutting out images in Procreate stands out:
- Precision: Procreate offers advanced selection tools like the “Selection Tool” and “QuickShape” for precise cutting, allowing you to focus on the details.
- User-friendly Interface: With its intuitive interface, Procreate makes it easy to navigate between tools and adjust settings, even for beginners.
- Layering Options: Procreate lets you work with multiple layers, making it easy to separate your cut-out image and manipulate it independently.
- High-Quality Output: Images retain their high quality even after cutting and editing, making Procreate perfect for both personal and professional use.
- Flexibility: Whether you’re cutting out images for digital painting, photo editing, or graphic design, Procreate provides the flexibility you need to work efficiently.
Also Read This: How to Give Access to Your YouTube Channel in a Step-by-Step Guide for Managing Permissions
Preparing Your Image for Cutting in Procreate

Before you start cutting out your image in Procreate, it’s important to properly prepare it. This ensures smoother results and better control over the cutting process. Here are the key steps to follow:
- Import Your Image: Begin by importing the image you want to work on. Tap on the wrench icon in the upper left corner, go to the "Insert a Photo" option, and select your image from the gallery.
- Adjust the Canvas Size: Ensure your canvas is the right size for your image. To adjust the size, go to the Actions menu (wrench icon), select "Canvas," and choose "Crop and Resize."
- Remove Unwanted Layers: If your image has multiple layers, select the ones you want to cut out and hide the rest. You can do this in the Layers panel.
- Check the Resolution: High resolution ensures your cut-out looks sharp when zoomed in. Adjust your image’s resolution in the settings if needed to keep it clear and detailed.
By preparing the image properly, you'll save time and effort during the cutting process, ensuring better accuracy and more control over the final result.
Also Read This: Explore How to Upload Photos to Shutterstock
Step-by-Step Guide to Cutting Out an Image in Procreate
Cutting out an image in Procreate can seem tricky at first, but once you break it down into steps, it becomes much easier. Here’s a simple step-by-step guide to help you get started:
- Open Your Image: Start by importing your image into Procreate. Tap on the wrench icon at the top left, select "Insert a Photo," and choose the image you want to cut.
- Choose the Selection Tool: Go to the "Selection" tool from the top toolbar. You’ll see different options like "Automatic," "Freehand," and "Rectangle." The “Freehand” tool is usually best for more detailed cuts.
- Outline Your Cut: Use the selection tool to carefully trace around the object you want to cut out. For best results, zoom in to follow the contours closely.
- Adjust Your Selection: If needed, use the “Modify” button to adjust the selection by adding or subtracting areas you may have missed or selected by accident.
- Cut the Image: Once you’re happy with your selection, tap on the “Cut” option. Your selected area will be separated from the rest of the image.
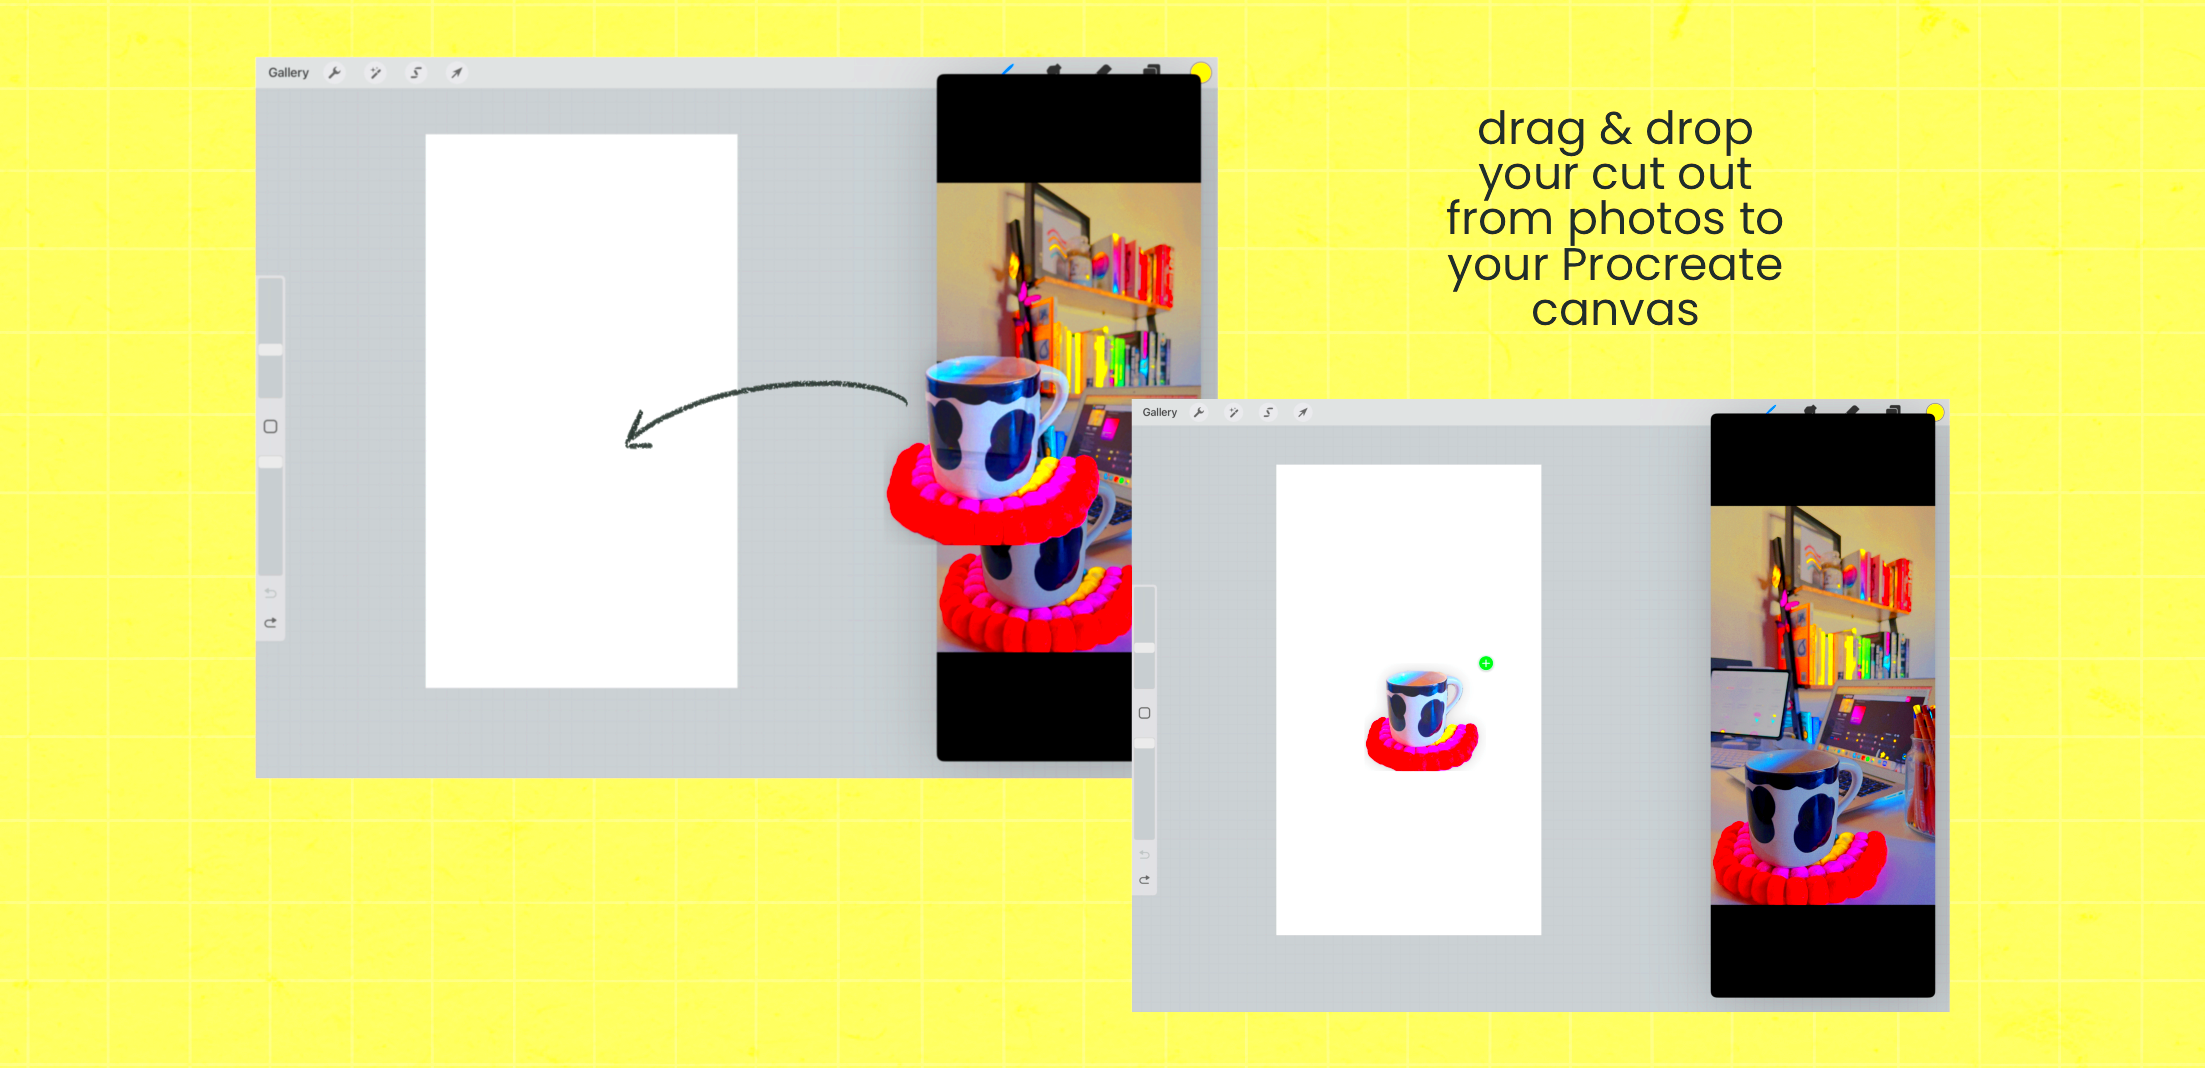
- Paste the Cut Image: After cutting, tap the “Paste” option to create a new layer with your image cut-out. You can now move, resize, or edit it independently.
With these simple steps, you can cut out almost any object from an image. Procreate’s tools allow for a lot of flexibility and control, so you can refine your cut and get it just right.
Also Read This: Mastering Audio Extraction from YouTube Videos for Editing and Personal Use
Using the Selection Tool for Precise Cuts
The Selection Tool in Procreate is one of the most powerful features for cutting out images with precision. It gives you control over how much or how little of an image you want to isolate. Let’s look at how to use it effectively:
There are several types of selection methods available:
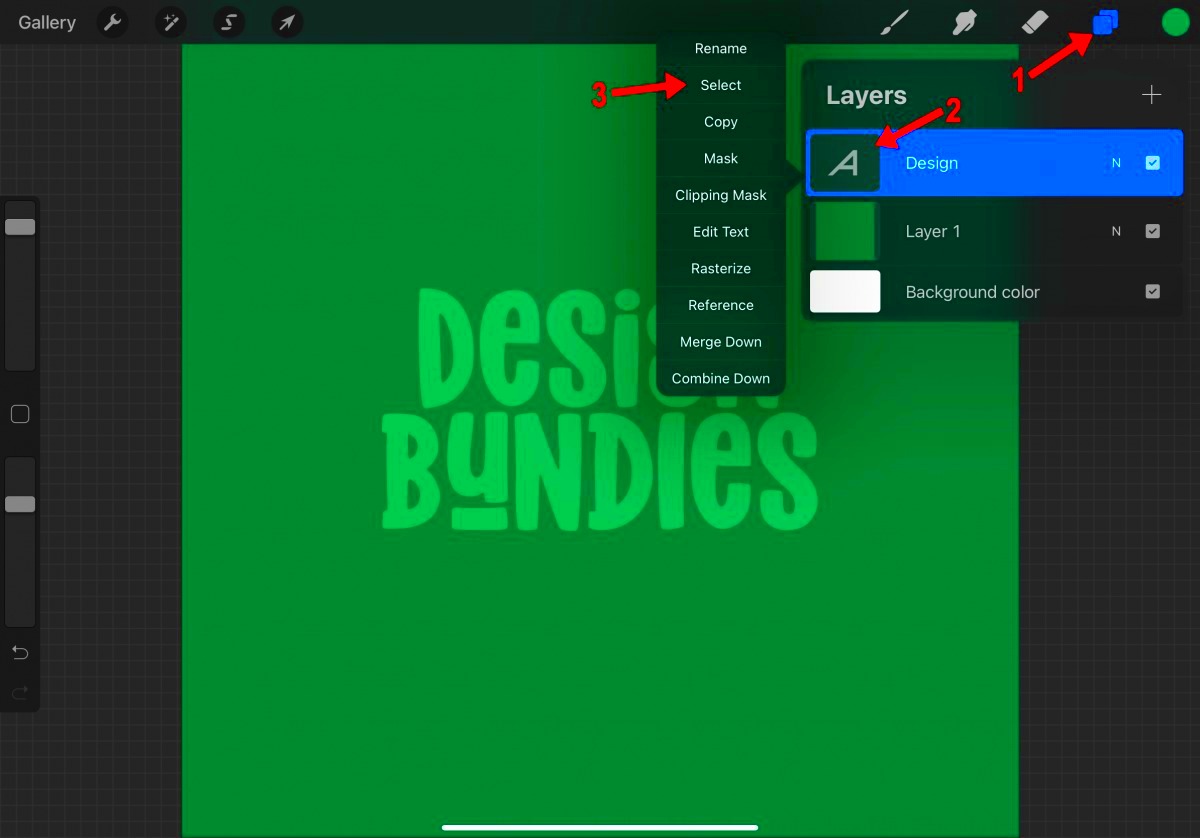
- Automatic: This tool is great for selecting large areas of a single color or similar tones. Tap on the area you want to select, and Procreate will automatically fill in the selection.
- Freehand: The Freehand selection tool allows you to draw around the object you want to cut. This gives you complete control over the edges, making it ideal for more complex shapes.
- Rectangle/Polygon: These tools are great for cutting out rectangular or straight-edged shapes. Simply draw around the area with straight lines for quick cuts.
To use the Selection Tool effectively:
- Zoom In: Zoom in on your image for more precision. This will help you trace edges accurately, especially around complex shapes or details.
- Refine Edges: Once you’ve selected the area, Procreate lets you adjust the selection by adding or removing parts using the Modify option.
- Use QuickMenu: Access frequently used actions like "Cut," "Copy," and "Paste" by holding down on the screen to open the QuickMenu.
With the Selection Tool, you can cut out images with remarkable accuracy, whether you're working with complex shapes or simple outlines.
Also Read This: how to add an image to email signature
How to Refine Your Cut and Make It Perfect
After cutting out an image, refining the edges is key to making it look seamless. Sometimes, the cut can leave jagged edges or unwanted artifacts, but don't worry – Procreate has a few tricks to smooth out your work.
Here are some ways to refine your cut and make it perfect:
- Use the Eraser Tool: After cutting out an image, the edges might need a little cleaning up. Use the eraser tool to carefully remove any extra pixels or areas that weren’t perfectly selected.
- Feather the Edges: To soften the edges of your cut-out image, go to the selection menu and use the “Feather” option. This helps create a smooth transition between the cut-out area and the background, avoiding harsh lines.
- Refine with Smudge Tool: For even smoother edges, use the Smudge tool. It blends the pixel boundaries of your cut image, creating a more natural look.
- Check for Missing Parts: Sometimes, small areas might get missed during selection. Zoom in and carefully inspect the edges. Use the Freehand tool to add in those small pieces, or use the Eraser tool to clean up any unwanted parts.
- Adjust Layers: If your cut-out doesn’t align perfectly, adjust the layer position. Procreate’s layer system lets you move your image freely without affecting the rest of the canvas.
By following these steps, you can ensure that your cut-out image looks professional and smooth, ready to be used in your design or artwork. Refined edges make all the difference in achieving a polished final result!
Also Read This: Leading Telecommunication Technology Companies Operating in the USA
Exporting Your Image After Cutting
Once you’ve successfully cut out your image in Procreate, it’s time to export it. Whether you're using the image for another project or sharing it with others, Procreate makes it easy to save your work in various formats. Here's how to export your image after cutting:
- Select the Correct File Format: Procreate allows you to export in several formats, such as PNG, JPEG, and PSD. For a transparent background (after cutting out your image), PNG is usually the best option. Choose the format by tapping on the wrench icon, selecting "Share," and then picking the format you want.
- Adjust Export Settings: Depending on the quality you need, you can adjust the resolution of your image. Procreate gives you control over the DPI (dots per inch) setting. For high-quality prints, make sure you choose a resolution of 300 DPI, while 72 DPI is fine for web use.
- Share Directly: You can directly share your image to other apps, email, or cloud services like iCloud, Google Drive, or Dropbox. Tap "Share," and choose where you want to send it.
- Save to Files: For later use or editing, you can save the image to your device’s file system. Tap on "Share," and choose "Save to Files" to keep it easily accessible.
Exporting your cut-out image is quick and straightforward in Procreate. No matter how you choose to share or store your work, the process is smooth, making it easy to take your creative projects to the next level.
Also Read This: How to Download the Transcript of a YouTube Video for Reference
Tips and Tricks for Efficient Cutting in Procreate
Cutting out images in Procreate can be a time-consuming process, especially if you're working with detailed designs. But with the right techniques, you can make the process more efficient. Here are some tips and tricks to save you time and improve your results:
- Use the QuickMenu: The QuickMenu in Procreate lets you access frequently used tools, like cut, copy, paste, and undo, all with a single touch. This feature can significantly speed up the cutting process.
- Zoom In for Detail: Zoom in as much as possible to get more accuracy when using the selection tools. This will help you follow the edges closely and avoid cutting out unwanted parts.
- Use Layers for Better Control: Create separate layers for different parts of your image. This allows you to cut out sections independently and make adjustments without affecting other parts of the design.
- Refine Selections Using the Modify Option: After making your initial selection, use the "Modify" button to fine-tune the edges by adding or subtracting areas. This gives you more control over the selection.
- Use the Smudge Tool for Smoothing: After cutting out the image, use the Smudge tool to blend the edges and make your cut look more natural. It helps to smooth out any rough or jagged lines.
- Save Your Progress Often: Make sure to save your work frequently. Procreate's AutoSave feature works well, but saving manually ensures you don't lose your progress if something goes wrong.
By following these tips and tricks, you'll be able to cut out images more efficiently in Procreate, saving time while still achieving great results.
Also Read This: Mastering Photography for Getty Images to Create Profitable Photos
FAQ
1. What’s the best tool for cutting out detailed images in Procreate?
The "Freehand" Selection Tool is usually the best option for detailed cuts. It allows you to trace around the edges of an image accurately, making it perfect for intricate designs.
2. How do I ensure that my cut-out image has a transparent background?
When exporting your image, select PNG as the file format. PNG preserves transparency, ensuring that the background remains clear and your cut-out image is ready to use without a background.
3. Can I adjust the edges of my cut-out image after it's been separated?
Yes, you can refine the edges of your cut-out by using Procreate’s eraser tool, smudge tool, or by modifying your selection. These tools help you clean up any imperfections and smooth out the edges.
4. How do I cut out multiple elements from one image?
To cut out multiple elements, work on separate layers. Use the Selection Tool to isolate each part, then cut and paste each element onto its own layer. This gives you more flexibility when editing each section.
5. Can I use Procreate to cut out objects in a photo?
Absolutely! Procreate works great for photo editing, and the selection tools can help you isolate objects from their background for further manipulation.
Conclusion
Cutting out images in Procreate is a highly effective and creative way to manipulate artwork or photos. With the right tools and techniques, you can easily separate objects from their backgrounds, refine the edges, and prepare your image for use in various projects. Procreate's user-friendly interface, combined with powerful selection tools and layer options, makes it an ideal app for both beginners and professionals. By following the steps outlined and using tips to streamline the process, you can quickly master image cutting and enhance your creative workflow. Whether you’re creating digital art, photo edits, or design assets, Procreate offers the flexibility you need to bring your ideas to life with precision and ease.

 admin
admin


