Cutting out an image in Adobe Illustrator is an essential skill for designers. Whether you're creating a logo, designing a website, or working on any graphic project, knowing how to isolate or remove certain parts of an image can save you time and help you create cleaner designs. In this blog post, we’ll walk you through the basics of cutting out images using Illustrator’s powerful tools. You’ll learn the techniques that will allow you to work with vector graphics and ensure your cut-outs are precise and professional.
What Does It Mean to Cut Out an Image?

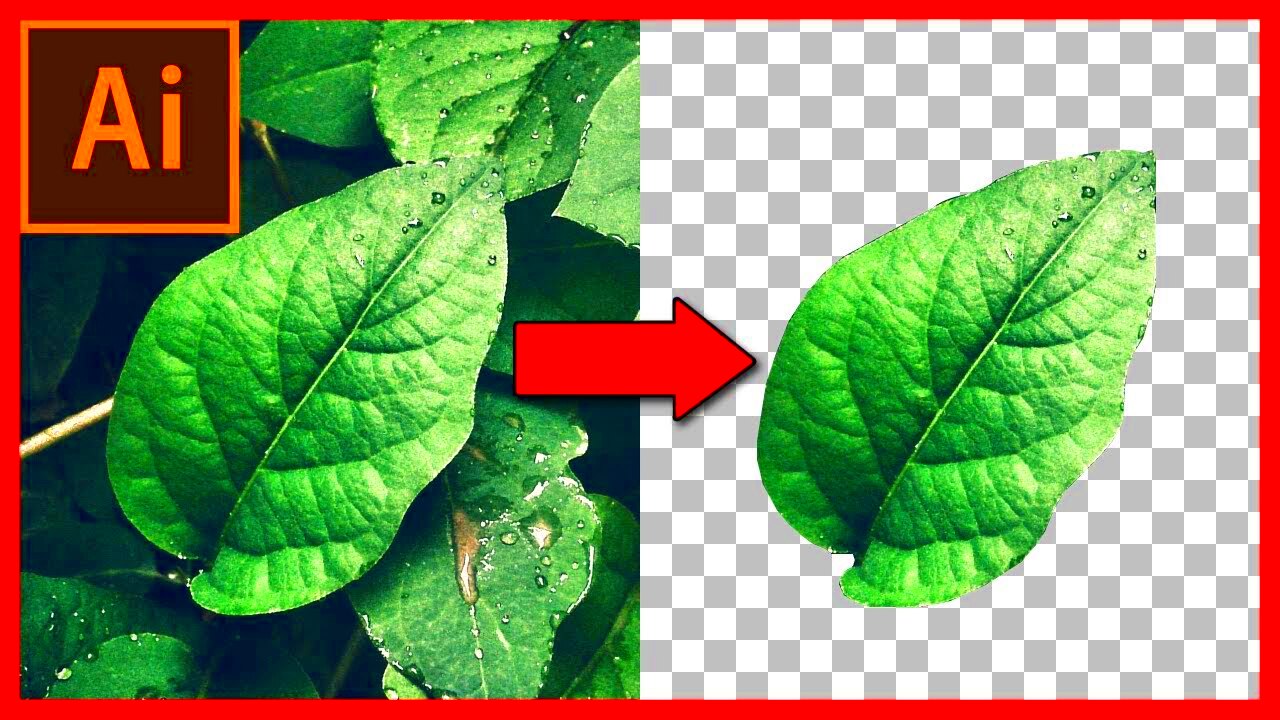
Cutting out an image typically refers to removing a portion of the image to isolate it from its background. This is a common task when working with graphics, as it helps focus on the subject or element of interest while discarding unnecessary parts. In Illustrator, this process involves using various tools that allow you to create paths around the object or area you want to cut out.
Essentially, the goal is to “clip” an object or part of an image, keeping only the area you need. It’s important to understand that cutting out an image in Illustrator isn’t like simply cropping a photo in Photoshop. Instead, Illustrator allows you to work with vector shapes, which provide greater flexibility and precision.
There are several ways to cut out an image, but the most common methods include:
- Pen Tool: Used to create precise paths around an object.
- Clipping Masks: Help you hide parts of the image without deleting them.
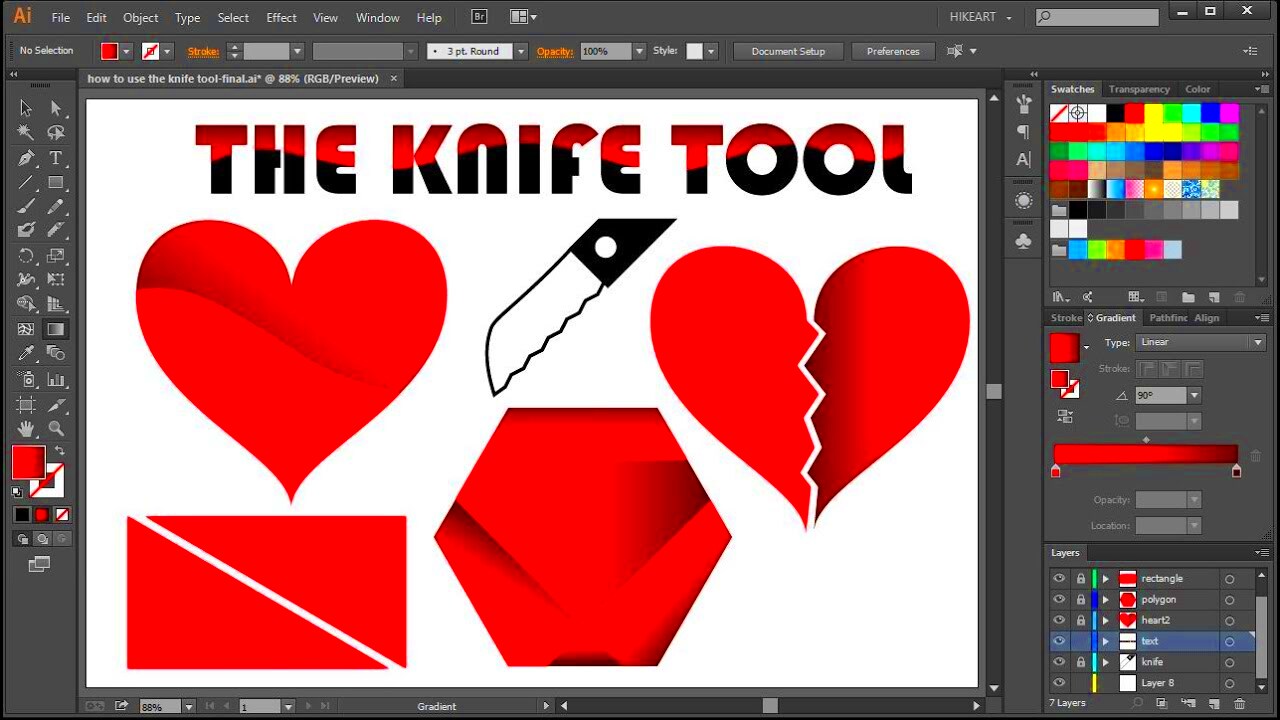
- Shape Builder Tool: Allows you to quickly combine or delete parts of a shape.
Also Read This: how to print an image across multiple pages
Step-by-Step Guide to Cutting Out an Image in Illustrator

Cutting out an image in Illustrator can seem intimidating at first, but once you understand the process, it’s quite manageable. Here’s a simple, step-by-step guide to get you started:
Preparing the Image
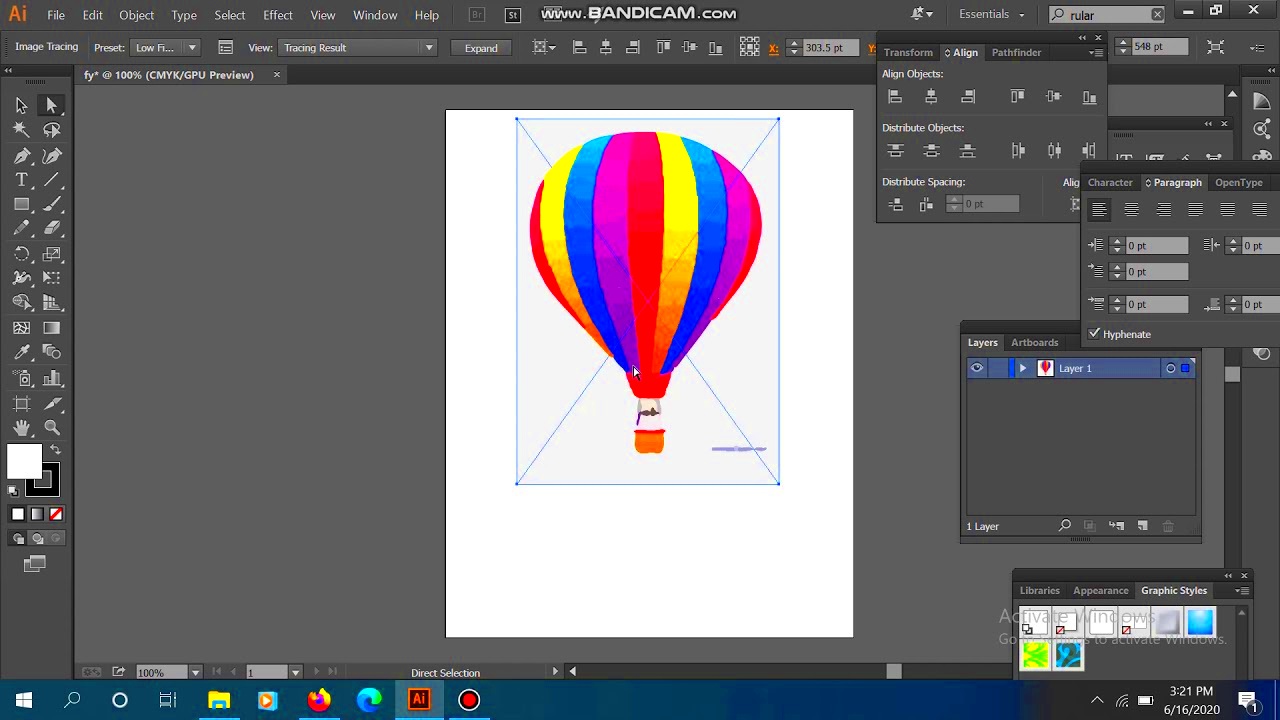
Before you start cutting, make sure your image is in the right format. Illustrator works best with vector images, but if you’re working with a raster image (like a JPG or PNG), you’ll need to convert it into a format Illustrator can work with. You can do this by tracing the image with the Image Trace tool or by using a raster-to-vector conversion method.
Once you have your image ready, place it on your artboard by going to File > Place. This will allow you to use the image as a reference while cutting out the subject.
Using the Pen Tool for Precision
The Pen Tool is one of the most precise tools in Illustrator. It allows you to create a path around the object you want to cut out. Here’s how to use it:
- Activate the Pen Tool by pressing P or selecting it from the toolbar.
- Click on the points around your object to create anchor points. Connect the dots to form a path around the object.
- As you create the path, use the direct selection tool to adjust the anchor points for better accuracy.
- Once the path is complete, you can close it by clicking on the starting point.
Refining Your Cut-Out
Now that your path is in place, it’s time to refine the cut-out. You might find that there are small adjustments you need to make to perfect the curve or angle of your path. Here’s how to refine your work:
- Use the Direct Selection Tool (A) to select and adjust anchor points.
- If the curve is too sharp or too soft, hold down the Ctrl (Cmd) key and drag the direction handles to adjust the curve.
- If needed, zoom in for a more detailed view to make sure your cut-out is clean and sharp.
Once your path is refined, you can use a Clipping Mask or simply delete the unwanted areas, leaving only the object you want.
Also Read This: How to Edit Text on an Image
Common Tools Used in Illustrator for Cutting Out Images
When working in Illustrator to cut out images, you’ll find a range of tools at your disposal. Each tool has its unique features and applications, which makes it easy to choose the right one for the task at hand. Whether you're isolating a subject from the background or creating complex shapes, these tools will help you get the job done accurately and efficiently. Let’s go through some of the most commonly used tools for cutting out images in Illustrator:
- Pen Tool (P): The Pen Tool is a go-to tool for creating precise paths around an image. It allows you to draw anchor points and curves, making it ideal for detailed cutouts. While it takes some practice to master, it offers the highest level of control.
- Direct Selection Tool (A): Once you’ve drawn a path, the Direct Selection Tool allows you to adjust and refine your anchor points. This is particularly useful for smoothing out curves or making precise edits to your path.
- Image Trace: If you’re working with a raster image (like a JPG), the Image Trace tool converts it into a vector graphic. This can be especially helpful for turning complex images into clean, scalable artwork for easy cutting.
- Clipping Mask (Ctrl+7): A Clipping Mask is a powerful way to hide part of an image without actually deleting it. It allows you to use a vector shape as a mask to define the visible area of an image, making it an excellent tool for cutting out objects while preserving the original image.
- Shape Builder Tool (Shift+M): If you’re working with multiple shapes, the Shape Builder Tool can help you merge or remove parts of those shapes. It’s a great way to combine objects and eliminate unnecessary portions in one simple move.
Each of these tools has its own strengths, and by mastering them, you’ll be able to cut out any image with ease and precision.
Also Read This: A Comprehensive List of Image Processing Companies in the USA
How to Use the Clipping Mask for Cutting Out Images
The Clipping Mask is a simple yet powerful feature in Illustrator that allows you to hide parts of an image based on a vector shape. It’s a great way to cut out an image because it doesn’t actually delete the parts you don’t need, leaving the image intact for future use. Here’s how you can use the Clipping Mask to cut out an image:
Step-by-Step Process for Using the Clipping Mask
- Step 1: Prepare your image. Place your image on the artboard by going to File > Place. You can resize it as needed.
- Step 2: Create a vector shape. Use the Pen Tool or any other shape tool (e.g., rectangle, ellipse) to create a shape over the area of the image you want to keep.
- Step 3: Position the shape above the image. Make sure your vector shape covers only the part of the image you want visible.
- Step 4: Select both the image and the vector shape. You can do this by holding Shift and clicking on both the image and the shape.
- Step 5: Apply the Clipping Mask. Right-click and select Make Clipping Mask or press Ctrl+7 (Cmd+7 on Mac).
Your image is now “cut out,” showing only the portion within the vector shape. The beauty of this method is that the image is still intact behind the mask. You can move or edit the shape at any time without affecting the original image.
Also Read This: How to Cancel Adobe Stock Without Fees
Tips for Better Image Cutting in Illustrator
Cutting out images in Illustrator can be a bit tricky, especially when you're aiming for precision and smooth results. Here are some tips to help you improve your cutting skills and make the process more efficient:
- Practice with the Pen Tool: The Pen Tool is one of the most powerful tools in Illustrator, but it requires practice to use effectively. Spend time learning how to control anchor points and direction handles for smoother curves.
- Use Zoom for Precision: When cutting out complex shapes, zooming in will help you work more precisely. Use Ctrl + (Cmd +) to zoom in and Ctrl - (Cmd -) to zoom out.
- Refine Your Paths: Once you’ve created your path, take time to refine it using the Direct Selection Tool. Small adjustments can make a big difference in the final result.
- Use Layers: Organize your work into layers. This will make it easier to manage different elements of your image and prevent accidental edits or deletions. Lock or hide layers as needed to keep your workspace clean.
- Combine the Shape Builder Tool: If you’re working with multiple vector shapes, the Shape Builder Tool can help you quickly merge or delete unwanted parts. This is especially useful when cutting out complex or overlapping images.
- Keep Backup Copies: Before making any permanent changes to an image, it’s always a good idea to duplicate your file or save a backup copy. This way, if something goes wrong, you won’t lose your original work.
With these tips, you’ll be able to cut out images more efficiently and with greater precision. Over time, you'll develop your own workflow that works best for your specific design needs.
Also Read This: Discovering Free Stock Photos on Adobe
What to Do After Cutting Out the Image
After you’ve successfully cut out an image in Illustrator, the next steps involve refining the result and deciding how to use the isolated image in your design. Whether you're planning to place the cut-out into a different background, use it for a logo, or integrate it into a larger artwork, here’s what you can do after the cut-out is complete:
Refining Your Cut-Out
Even after cutting out an image, there may still be some rough edges or areas that need further attention. Use tools like the Direct Selection Tool or the Pathfinder Panel to adjust anchor points and smooth out curves. If necessary, use the Smooth Tool to clean up any jagged edges or imperfections around the cut-out.
Adding Effects and Enhancements
Once you’re satisfied with the cut-out, you can add various effects to enhance it. Some common techniques include:
- Adding Drop Shadows: A subtle shadow behind your cut-out can give it more depth and make it stand out.
- Applying Gradients: Use gradients to add shading and a sense of volume to your cut-out object, making it feel more three-dimensional.
- Blurring Edges: If you want to soften the edges of your cut-out, applying a slight blur can help make it blend better with the rest of the design.
Using the Cut-Out in Your Design
Now that your image is cut out, you can place it into your final design project. You might:
- Place it over a new background: This is common when isolating a product or object to highlight it in a clean, minimalistic way.
- Combine it with other elements: You can combine your cut-out with text, shapes, and other graphic elements to create a cohesive composition.
- Save it for future use: If you think you’ll need this cut-out later, save it as a separate vector file (.AI) or export it to a more universal format like .PNG or .SVG.
After completing these steps, you’re ready to integrate the cut-out into your broader design, ensuring it looks polished and professional.
Also Read This: Understanding the Size of Behance’s User Community
FAQ
Here are some frequently asked questions about cutting out images in Illustrator:
1. What’s the best tool for cutting out images in Illustrator?
The Pen Tool is the most accurate tool for cutting out images because it gives you complete control over your paths. However, if you’re working with simpler shapes, the Shape Builder Tool or the Clipping Mask can be more efficient options.
2. How do I cut out an image from a complex background?
For complex backgrounds, start by using the Pen Tool to trace around the object you want to cut out. If the background is too intricate, you might need to adjust anchor points and curves carefully. You can also use Image Trace to convert the image into a vector and refine it from there.
3. Can I use a raster image for cutting out in Illustrator?
Yes, you can. If you're using a raster image (like a JPG or PNG), you can use the Image Trace tool to convert it into a vector graphic. Once traced, you can proceed with cutting out the image using Illustrator’s vector tools.
4. How do I make a smooth cut-out with no rough edges?
To avoid rough edges, pay close attention while tracing with the Pen Tool. Zoom in to ensure anchor points are placed accurately. After completing the path, you can use the Direct Selection Tool to refine anchor points and curves, and the Smooth Tool can help you further smooth out any jagged edges.
5. How do I export my cut-out image for use on a website?
Once your image is cut out, you can export it in a variety of formats depending on your needs. For web use, export it as a PNG file with a transparent background. To do this, go to File > Export > Export As and select PNG as the file format, ensuring the Use Artboards and Transparent Background options are checked.
Conclusion: Final Thoughts on Cutting Out Images in Illustrator
Cutting out an image in Illustrator is a fundamental skill for graphic designers, illustrators, and anyone working with vector-based artwork. Whether you’re isolating a product, removing a background, or creating a clean design element, the tools and techniques available in Illustrator provide endless possibilities.
Remember, the key to success is precision and practice. Tools like the Pen Tool and Clipping Mask are your best friends, and with some time, you’ll become more confident in using them. Once you’ve cut out your image, you can easily integrate it into your designs, apply effects, or even save it for later use in other projects.
With these tips and methods, you’re now equipped to cut out images efficiently and professionally in Adobe Illustrator. Keep practicing, and soon, you’ll be cutting out images like a pro!

 admin
admin


