When working in Revit, images play a crucial role in enhancing your designs. However, sometimes these images need to be cropped to fit the specific area or scale of your project. Cropping helps in eliminating unnecessary parts of an image and allows you to focus on the relevant details. This simple process can save space, improve the clarity of your design, and ensure that the image integrates seamlessly into your Revit project.
Why Cropping Images is Important in Revit

Cropping images in Revit is important for several reasons:
- Improves Focus: Cropping ensures that only the most relevant parts of the image are visible, making your design look cleaner and more professional.
- Saves Space: Large images with unnecessary areas can clutter your project. Cropping eliminates this extra space, optimizing the use of resources.
- Better Fit: Cropping helps the image fit perfectly within your project layout, whether it’s for rendering, presentation, or documentation.
- Improves Performance: Large, un-cropped images can slow down your Revit project. Cropping reduces the file size and enhances the overall performance.
Overall, cropping images is a practical and efficient way to manage the visuals in your Revit projects, making them look more polished and easier to work with.
Steps to Crop an Image in Revit

Follow these simple steps to crop an image in Revit:
- Step 1: Insert the Image: Start by inserting the image into your Revit project. Go to the "Insert" tab and click on "Image." Choose the image file you wish to use.
- Step 2: Select the Image: Click on the image in the workspace to select it. Once selected, you'll see a boundary box around the image.
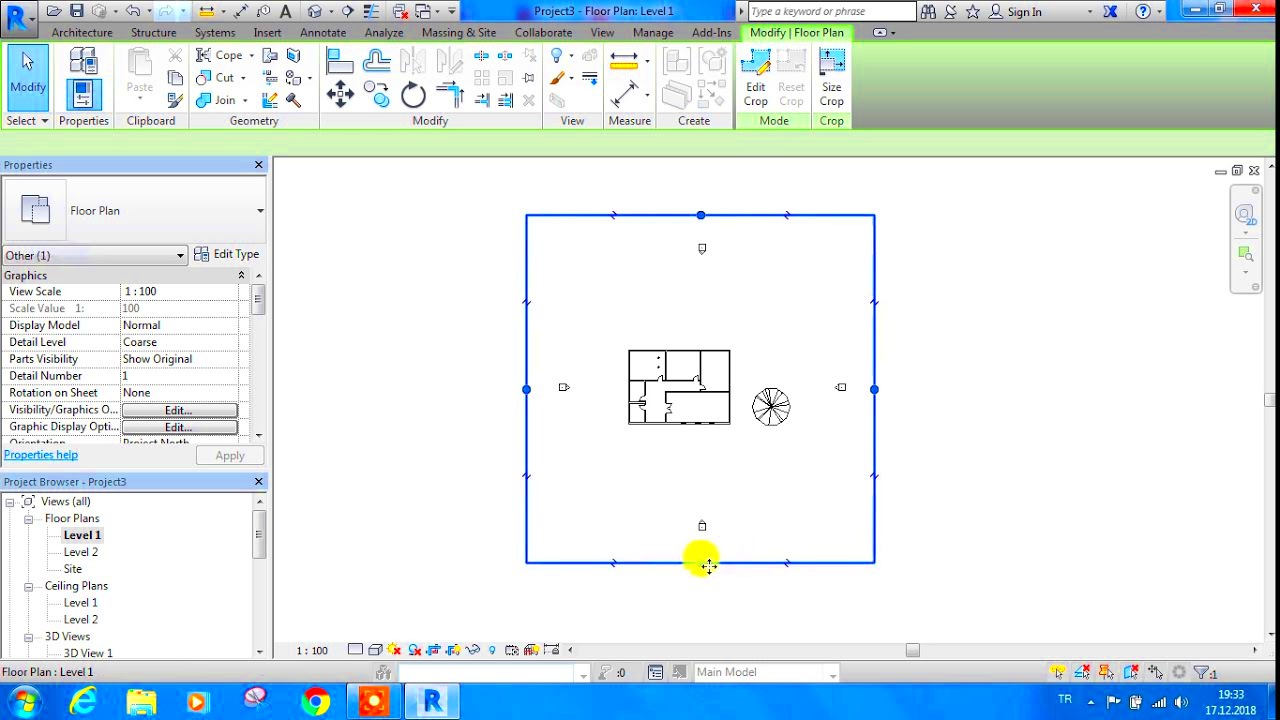
- Step 3: Enable Cropping: With the image selected, go to the "Modify" tab and click on "Crop Region." This will enable the cropping handles around the image.
- Step 4: Adjust the Crop Region: Click and drag the handles to adjust the crop region. You can resize or reposition the crop area to remove unwanted parts of the image.
- Step 5: Finalize the Crop: Once you're happy with the crop, press "Enter" or click outside the image. The cropped area will now be the only visible part of the image in your Revit project.
These steps allow you to easily crop images in Revit, ensuring they fit perfectly into your design and meet the needs of your project.
Adjusting the Crop Region in Revit
Once you've cropped an image in Revit, you might need to adjust the crop region to fine-tune the area that's visible in your project. Revit allows you to easily modify the crop region, making it simple to resize or reposition the crop boundaries as needed. This step ensures that the image fits perfectly within your design layout, helping you achieve a more polished and professional result.
Here's how you can adjust the crop region:
- Step 1: Select the Cropped Image: Click on the image you’ve already cropped. A boundary box with crop handles will appear around the image.
- Step 2: Adjust the Crop Handles: Click on any of the crop handles and drag them to resize the crop area. You can make the crop region larger or smaller, depending on what part of the image you want to keep.
- Step 3: Move the Crop Region: To reposition the entire crop region, click inside the crop box and drag it to a new location. This is helpful if you need to move the focus to a different part of the image.
- Step 4: Finalize Adjustments: Once you've made the necessary changes, click outside the image or press "Enter" to apply the new crop region.
By adjusting the crop region, you can quickly adapt the image to fit your project's needs, ensuring that it aligns perfectly with your design vision.
Using the Cropped Image in Your Project
After cropping your image, it’s time to incorporate it into your Revit project. A cropped image can serve many purposes, such as enhancing your visual presentations, improving documentation, or providing more detailed views of certain areas within your design. The flexibility of cropped images allows you to focus on the most important aspects of your project, making your work clearer and more impactful.
Here’s how you can use your cropped image effectively:
- Incorporate in Renderings: Cropped images can be used in your project renderings to highlight specific textures, features, or background elements.
- Include in Views: Cropped images can be inserted into floor plans, elevations, or sections to provide context or a visual reference for the design.
- Enhance Presentations: A well-cropped image can enhance presentation slides or sheets, focusing only on the most relevant details.
- Documentation: Use cropped images in technical documentation to clarify specific aspects of the design, such as materials or structural details.
By strategically using cropped images, you can make your Revit project more visually appealing and effective in conveying key information to stakeholders.
Common Issues When Cropping Images in Revit
While cropping images in Revit is a straightforward process, there are some common issues that you might encounter. Understanding these problems and knowing how to address them can save you time and frustration in your projects.
Here are some common cropping issues in Revit:
- Image Quality Loss: Sometimes, cropping images can result in a loss of resolution or clarity. This often happens if the image was scaled down significantly before cropping. To avoid this, make sure your images are high resolution before inserting them into Revit.
- Crop Region Not Showing: Occasionally, after cropping, the crop region may not appear properly. This could be due to incorrect visibility settings. Ensure that the "Visibility/Graphics" settings are configured to show crop regions for images.
- Accidental Cropping of Important Details: When adjusting the crop region, it’s easy to accidentally cut off important parts of the image. To prevent this, always double-check the crop before finalizing it.
- Difficulty Adjusting the Crop Region: Sometimes, moving or resizing the crop region can be tricky, especially if the image is locked or grouped with other elements. Make sure the image is not locked and is selected properly before making adjustments.
- Performance Issues: Large images, even when cropped, can still slow down Revit. Try to optimize the image size before inserting it into the project to avoid performance lag.
By being aware of these potential issues, you can troubleshoot effectively and ensure that your image cropping process goes smoothly in Revit.
Tips for Better Image Cropping in Revit
Cropping images in Revit is a simple task, but there are a few tips that can help you achieve even better results. By applying these tips, you can make sure your images look sharp, fit seamlessly into your project, and enhance the overall design presentation.
Here are some practical tips for better image cropping in Revit:
- Use High-Resolution Images: Always use high-resolution images to avoid pixelation when cropping. Low-quality images can look blurry or distorted, especially when resized or cropped.
- Crop Before Inserting: If possible, crop the image using an external tool (like Photoshop or GIMP) before importing it into Revit. This allows you to have more control over the quality and size of the image.
- Enable Image Visibility Settings: Make sure the image is set to be visible in the "Visibility/Graphics" settings. This ensures that your cropped images are displayed properly across different views in your project.
- Align Images Properly: Use Revit’s alignment tools to make sure the image is positioned correctly within your design. This ensures a clean, professional look and avoids any awkward cropping or misalignment.
- Limit Image Size: Large images can slow down your Revit project. Crop out unnecessary parts of the image to reduce the file size and improve project performance.
- Use Crop Regions for Consistency: Consistently use crop regions to maintain uniformity in your design. It’s helpful when you need to crop multiple images to the same aspect ratio or size.
By following these tips, you can improve the quality and efficiency of your image cropping process, resulting in cleaner, more polished designs in Revit.
FAQ
Here are answers to some common questions about cropping images in Revit:
- Can I crop multiple images at once in Revit?
No, Revit allows you to crop images individually. However, you can group multiple images and crop them one by one. - Will cropping an image reduce its quality?
Cropping doesn’t directly reduce image quality, but if you crop too much and enlarge the image afterward, the resolution may degrade. Always use high-quality images. - How do I reset a crop in Revit?
To reset the crop, simply click on the "Clear Crops" option under the "Modify" tab. This will remove the crop region and restore the image to its original size. - Can I crop an image in a specific shape in Revit?
Revit allows you to crop images into rectangular shapes, but it doesn’t provide advanced cropping options like circles or custom shapes. For more complex shapes, you may need to crop the image externally before importing it. - What if my cropped image is not appearing in the drawing?
Check the "Visibility/Graphics" settings to ensure the crop region is enabled. Also, make sure the image is visible in the current view settings.
Conclusion
Cropping images in Revit is a simple yet effective way to streamline your design process and ensure your project looks polished and professional. Whether you're trimming away unnecessary details, adjusting the crop region for a better fit, or using the cropped image in your project, following the right steps can save time and improve your work.
By following the tips shared in this post, you can enhance your workflow, reduce file size, and make sure your images complement your design without cluttering the project space. Keep in mind the common issues and troubleshooting steps we’ve discussed to ensure your images are always clear, relevant, and impactful.
Ultimately, mastering image cropping in Revit will help you create cleaner, more efficient designs that are easy to present and share with others. Happy designing!

 admin
admin


