Cropping images is one of the most essential steps in using Cricut Design Space. Whether you’re designing custom projects or personalizing crafts, cropping helps you focus on specific parts of your image and remove any unnecessary elements. This tool ensures your designs are clean and precise, which is crucial for making high-quality Cricut creations. If you're new to Cricut, learning how to crop images will make your projects more manageable and tailored to your needs.
What is Cricut Design Space?
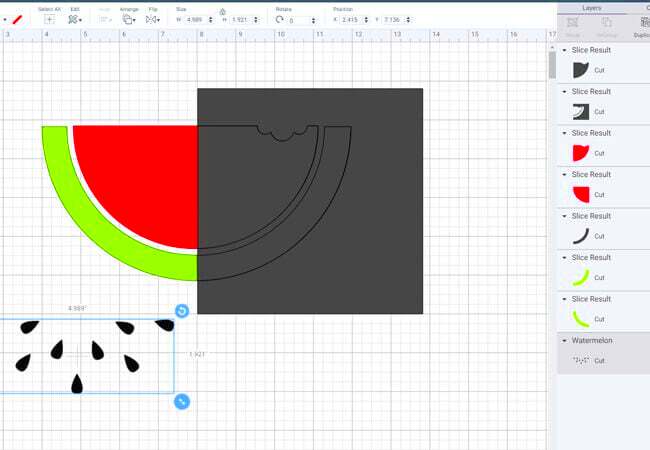
Cricut Design Space is the software that connects your Cricut machine to your creative ideas. It’s a cloud-based design platform that allows you to create, edit, and cut designs for various projects like cards, t-shirts, home decor, and more. Design Space provides a wide range of tools for uploading images, drawing, and even working with text to create personalized crafts. It's compatible with Cricut’s cutting machines and offers an intuitive interface, making it easy for both beginners and experienced crafters to bring their designs to life.
Here’s a quick overview of some key features in Cricut Design Space:
- Image Uploading: Upload your own images or use thousands of pre-made designs available in the Cricut library.
- Editing Tools: Resize, rotate, or crop images to fit your design perfectly.
- Fonts and Text: Add text to your designs with customizable fonts and adjust them to suit your project.
- Cutting Options: Choose from a variety of materials to cut your designs with precision.
Also Read This: Creative Handmade Bag Tutorials to Watch on Dailymotion
Why Cropping is Important for Cricut Projects
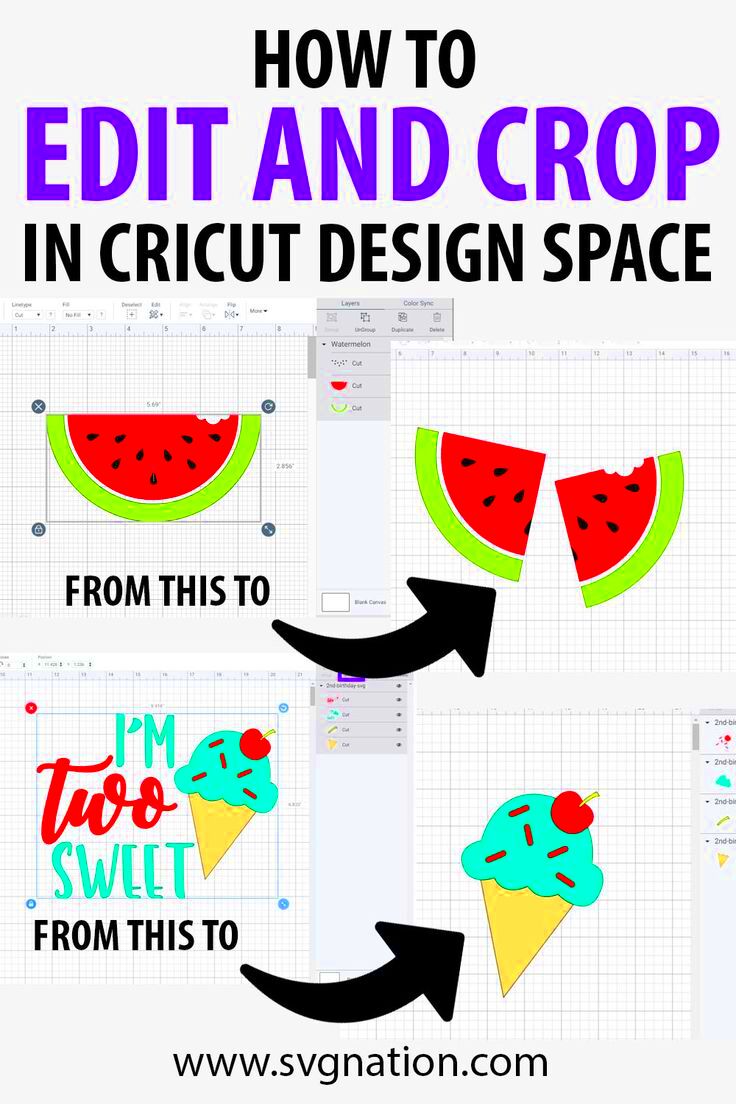
Cropping images is vital when you want to focus on specific details of a design or remove unnecessary parts of an image. This step helps you improve your design's composition and avoid wasting material during the cutting process. By cropping, you can ensure that only the essential parts of the image are included, which also makes your project cleaner and more professional-looking. In Cricut Design Space, cropping allows you to fine-tune your
Here are some reasons why cropping is so important for Cricut projects:
- Space Optimization: Cropping helps you make the most out of your materials by removing excess parts of an image, saving space and reducing waste.
- Enhanced Design: A cropped image looks more polished and focused, making your project visually appealing and professional.
- Customization: Cropping gives you complete control over your design. You can adjust the size, shape, and position of the image, ensuring it fits perfectly in your project.
- Efficiency: Cropping images helps you quickly prepare them for cutting, eliminating unnecessary details that can slow down your work.
In summary, cropping is a key step that contributes to a more organized, professional, and efficient design process in Cricut Design Space.
Also Read This: Easy Steps to Give Image Attribution Correctly
Step-by-Step Guide to Cropping Images in Cricut Design Space
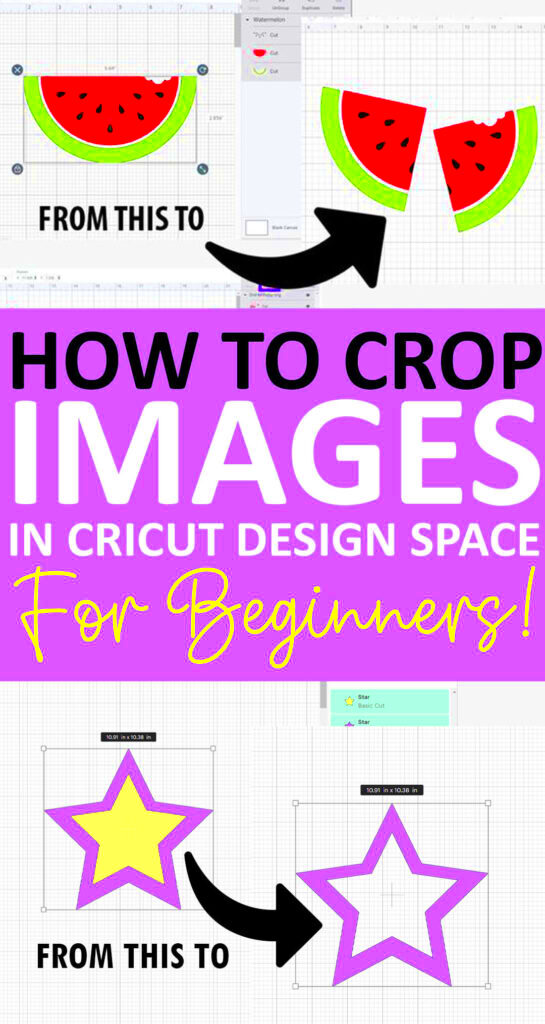
Cropping images in Cricut Design Space is a simple process, but knowing the right steps can make a big difference in the final result. Whether you're using an image you uploaded or one from the Cricut library, the process is the same. Here’s a step-by-step guide to help you crop your images like a pro.
- Step 1: Upload Your Image
- Step 2: Select the Image
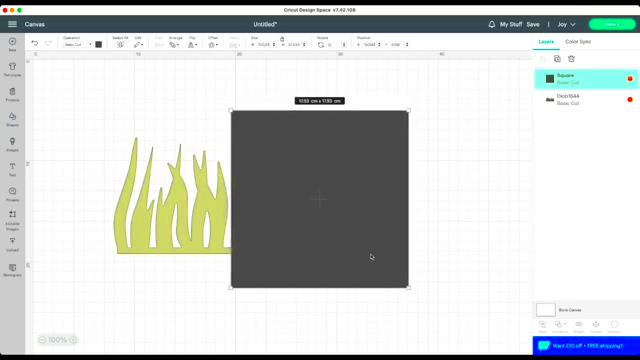
- Step 3: Use the Crop Tool
- Step 4: Adjust the Crop Area
- Step 5: Apply and Save
Start by uploading the image you want to crop. You can either upload an image from your computer or select one from Cricut's library.
Click on the image you want to crop. This will bring up the editing options.
Once your image is selected, click on the "Crop" button on the toolbar. This tool allows you to drag the corners of the image to remove parts you don't need.
Drag the crop handles to adjust the image’s frame. You can resize it or reposition it to include only the part of the image you need. Release the handles when you’re happy with the cropped area.
Once you're satisfied with your crop, click "Apply" to save the changes. Your image will now be ready for use in your Cricut project.
That's it! Cropping your images in Cricut Design Space is quick and straightforward. You can now proceed to the next steps in your design, whether you're resizing or cutting.
Also Read This: How to Refine an Image in MidJourney
Different Cropping Tools Available in Cricut Design Space
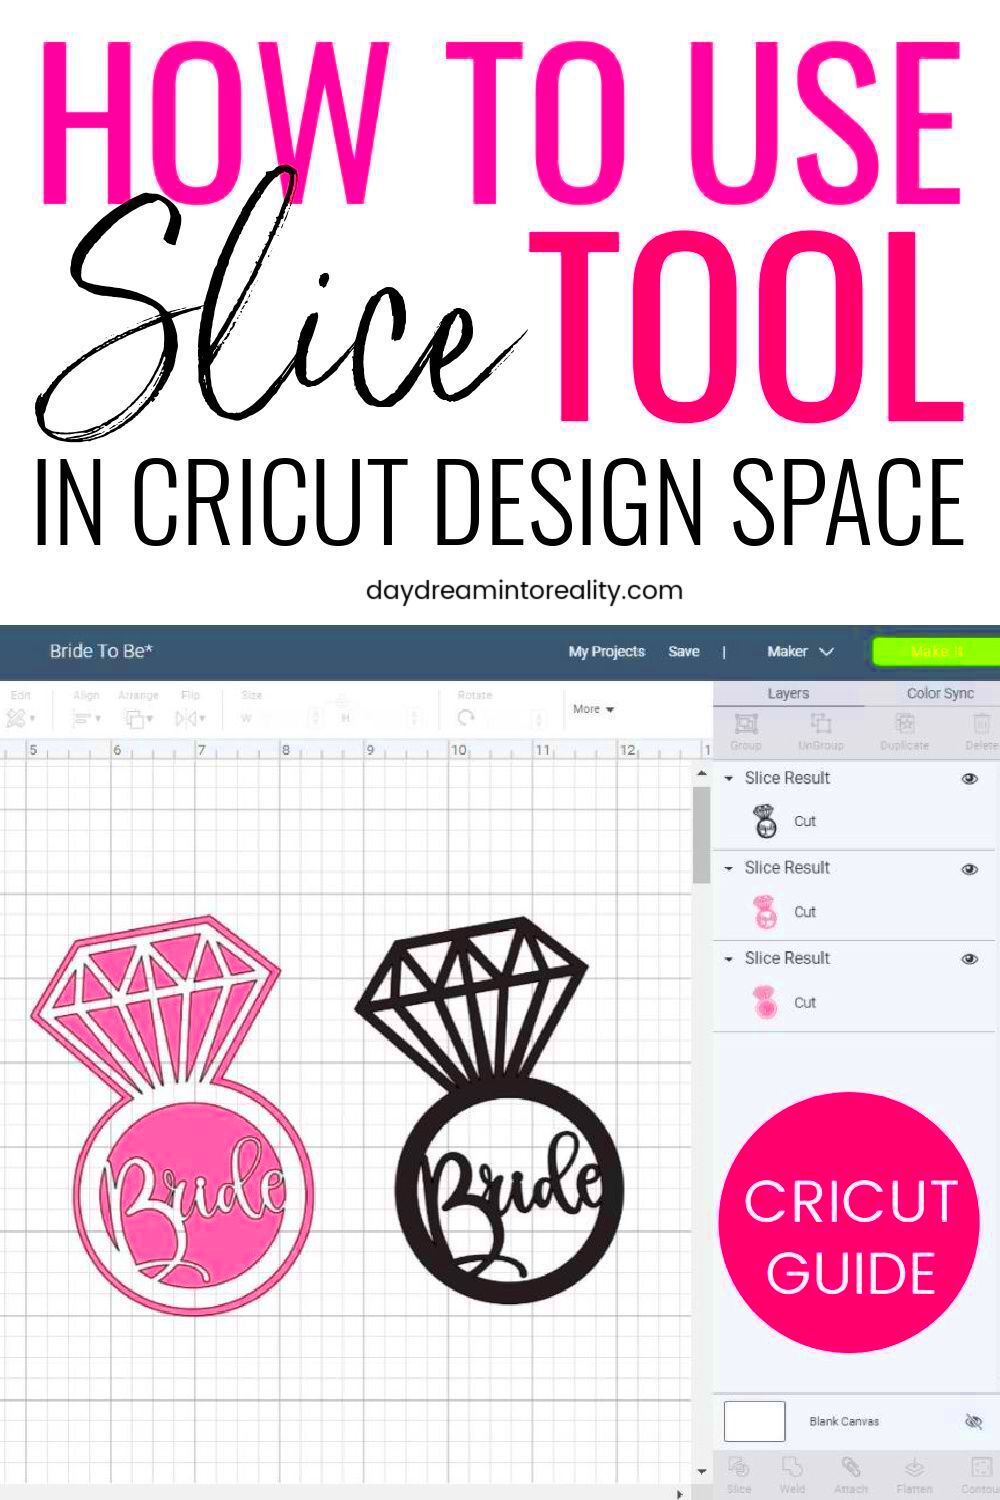
Cricut Design Space offers a variety of cropping tools that help you manipulate images with precision. Whether you’re cropping for a project or just cleaning up your image, these tools can make your task easier. Here’s a look at the most common cropping tools available:
- Basic Crop Tool: This is the simplest tool, allowing you to remove unwanted areas by dragging the edges of the image. It’s perfect for basic image adjustments.
- Contour Tool: Use this to hide specific parts of the image instead of cropping them. It's great when you want to remove unwanted areas without losing them permanently.
- Slice Tool: The Slice tool can be used to cut an image into smaller sections. It’s a more advanced cropping method that allows you to divide images for more detailed customization.
- Weld Tool: While not a cropping tool per se, the Weld tool can be used after cropping to merge the remaining parts of an image into a single unit, especially when working with text or multiple shapes.
- Resize Tool: This tool helps you resize your cropped image to fit it perfectly into your project. You can scale your image up or down while maintaining its aspect ratio.
Each of these tools is helpful for different purposes. The basic crop tool works well for quick edits, while the contour and slice tools are more suited for intricate, detailed work. Understanding how and when to use these tools will improve your overall design experience in Cricut Design Space.
Also Read This: How to Make Bags from Old Jeans Creative Recycling Project on Dailymotion
Tips and Tricks for Better Cropping in Cricut Design Space
While cropping images in Cricut Design Space is fairly easy, there are a few tips and tricks that can help you achieve the best results. By fine-tuning your technique, you can create sharper, more precise designs. Here are some helpful tips to keep in mind:
- Use the Zoom Feature: When cropping small images, zoom in to get a better view. This will allow you to crop with more accuracy and avoid cutting off important details.
- Use the Grid: Enable the gridlines in Design Space to align your image perfectly. This will help keep your crops straight and even.
- Duplicate Your Image: Before cropping, create a duplicate of your image. This way, you can always go back to the original if you’re not happy with your crop.
- Crop Multiple Images: If you have several images to crop, you can do them one at a time or use the grouping tool to keep them together for easier editing.
- Consider Image Resolution: High-resolution images will crop better without losing quality. Always work with the best quality image you can find to ensure crisp results after cropping.
- Use the Undo Button: If you make a mistake while cropping, don’t worry! Use the undo button to go back and make adjustments until you get it just right.
These tips will help you get more out of the cropping tools in Cricut Design Space and produce cleaner, more professional designs. By practicing and experimenting with these features, you’ll become an expert at cropping images in no time!
Also Read This: How to Resize Image Pixels Effectively
Common Problems and How to Fix Them When Cropping Images
While cropping images in Cricut Design Space is usually a straightforward process, sometimes you may encounter issues. These problems can arise from image quality, tool limitations, or even simple user mistakes. Understanding these common issues and how to fix them can save you time and frustration. Here’s a list of problems you may face and how to resolve them:
- Image Quality Decreases After Cropping: If your image appears blurry or pixelated after cropping, it's likely due to low resolution. To fix this, always start with a high-resolution image. If you’re working with an image that’s already low-quality, try using the “contour” tool to hide parts of the image rather than cropping them entirely.
- Parts of the Image are Cut Off: This can happen if you accidentally crop too much of the image. The solution is to duplicate your image before cropping. That way, you can always return to the original if you need to adjust your crop.
- Uneven Crops: If your cropped image isn’t aligned properly, it may look uneven. Use the gridlines in Cricut Design Space to align your image more precisely. You can also zoom in on the image for a better view of the edges to ensure accuracy.
- Image Isn’t Positioned Correctly: After cropping, sometimes the image doesn’t fit the project or cutting area properly. To fix this, resize or reposition the image on the canvas before finalizing your design. You can also use the “align” tools to center the image or place it where you need it.
- Unable to Undo the Crop: If you realize your crop was a mistake but can’t undo it, check the layers panel for an earlier version of the image. Alternatively, you can always duplicate the image before cropping, so you have a backup.
By being aware of these common issues and their solutions, you can troubleshoot and fix problems easily, ensuring your cropping process goes smoothly.
Also Read This: Guide to Using Adobe Stock on 99designs
Conclusion
Learning how to crop images in Cricut Design Space is a valuable skill for any crafter. Cropping allows you to focus on the details that matter most, optimize your materials, and create professional-looking projects. With the right tools and techniques, you can make your designs as precise and personalized as you want. Whether you're a beginner or an experienced user, mastering the cropping tools will help take your Cricut projects to the next level. Keep practicing, and soon cropping will become second nature!
FAQ
- Can I crop an image after uploading it to Cricut Design Space?
Yes, you can crop an image at any time after uploading it. Simply select the image, then use the crop tool to adjust it.
- Why is my image blurry after cropping?
Blurry images usually result from low resolution. Make sure to use high-quality images for better results when cropping. If you have a blurry image, consider using the contour tool to hide parts instead of cropping.
- How do I crop an image without losing details?
Use the "contour" tool to hide unnecessary parts of the image without actually cropping them. This method allows you to preserve the details in the rest of the image while removing what you don't need.
- Can I crop multiple images at once in Cricut Design Space?
Currently, Cricut Design Space does not allow cropping multiple images at once. You’ll need to crop each image individually.
- What should I do if the crop tool is not working?
If the crop tool isn't working properly, make sure the image is selected. You may also want to check if the image is grouped with other layers or elements, as this can prevent cropping. Try ungrouping or selecting the image alone before cropping.
 admin
admin


