Cropping images in Revit can enhance your project presentations and make your drawings clearer. Whether you are using images for backgrounds, references, or annotations, cropping allows you to focus on the most important parts of the image. This guide will take you through the essentials of cropping
Understanding the Importance of Image Cropping

Image cropping is crucial for various reasons:
- Clarity: Cropping helps eliminate unnecessary details, allowing viewers to focus on the relevant parts of your design.
- Space Management: It optimizes the use of space in your drawings, preventing clutter and enhancing readability.
- Professional Appearance: Well-cropped images give a polished look to your presentations, reflecting professionalism and attention to detail.
- Customization: You can tailor images to fit specific areas in your projects, making them more relevant to the context.
By understanding the importance of cropping, you can elevate the quality of your Revit projects significantly.
Step by Step Guide to Crop Images

Cropping images in Revit is a straightforward process. Here’s a step-by-step guide:
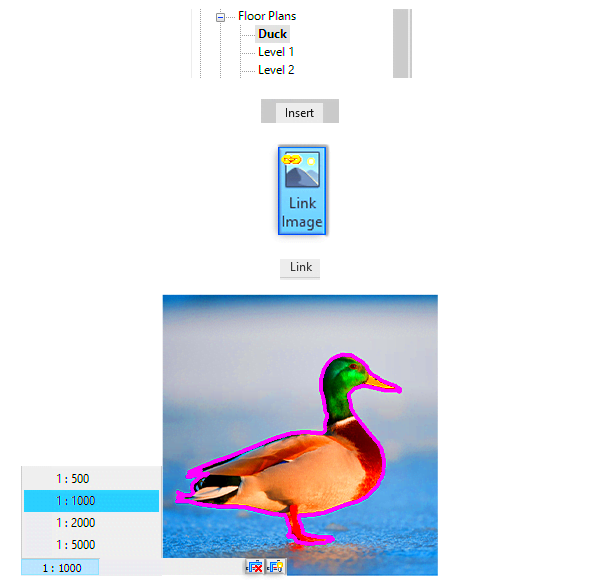
- Import Your Image: Go to the Insert tab, and select the 'Image' option to import your image file.
- Select the Image: Click on the image you wish to crop to make sure it’s highlighted.
- Activate the Crop Tool: On the Modify tab, find and click the 'Crop' tool. This will allow you to define the cropping area.
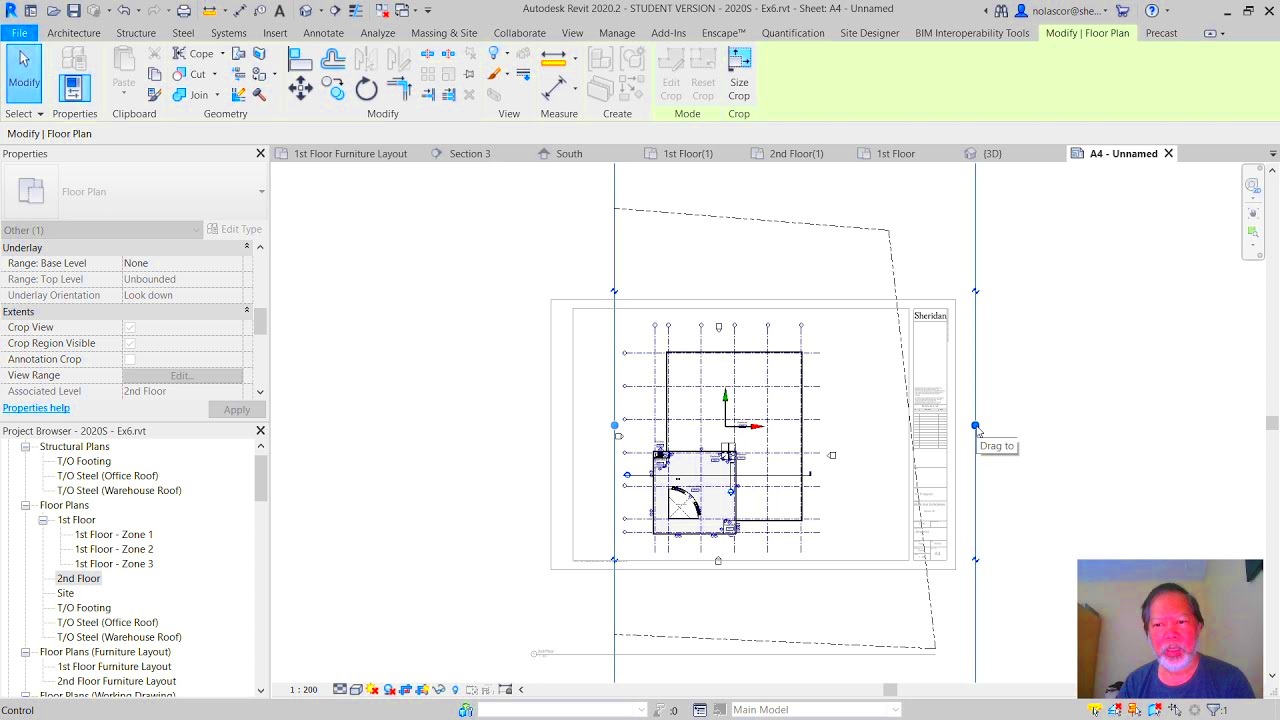
- Adjust the Crop Region: A crop region will appear around your image. Drag the edges or corners to adjust the size and shape of the crop.
- Finish Cropping: Once satisfied with the cropping, click outside the crop region to apply the changes.
- Check Image Properties: Adjust any additional image properties, like brightness or contrast, for better integration into your project.
This simple process will help you effectively manage images within your Revit projects, enhancing both aesthetics and functionality.
Using the Crop Region Tool

The Crop Region Tool in Revit is a powerful feature that allows you to define which parts of your image you want to keep. This tool gives you flexibility and control over how your images appear in your projects. Let’s walk through how to use it effectively.
To access the Crop Region Tool, you’ll first need to select the image you’ve inserted into your Revit project. Once selected, look for the "Crop" button in the Modify tab. Here’s how to use it:
- Select Your Image: Click on the image to activate it. You should see a border around the image.
- Activate the Crop Tool: Click on the "Crop" button in the Modify tab. This will create a new crop region around your image.
- Adjust the Crop Region: Drag the edges or corners of the crop region to resize it. You can also move the entire region by clicking inside it and dragging.
- Finish Cropping: Once you’re happy with the crop, click outside the region to apply the changes. Your image will now only show what’s inside the crop region.
Using the Crop Region Tool not only enhances the focus of your images but also helps maintain a clean and organized layout in your Revit project.
Adjusting Image Properties After Cropping
After cropping your images, you might want to fine-tune their appearance to ensure they fit seamlessly into your project. Adjusting image properties can significantly improve how your images look and feel. Here are some key properties you can modify:
- Brightness: Increase or decrease the brightness to make the image stand out or blend in.
- Contrast: Adjust the contrast to enhance details. Higher contrast makes images sharper, while lower contrast can create a softer look.
- Transparency: If you want to overlay the image, adjusting its transparency can help it integrate with the background.
- Scale: Resize the image to fit the space properly, ensuring that it maintains its quality without distortion.
To access these properties, select the image and look for the Properties panel. From there, you can make all necessary adjustments. Remember, these tweaks can greatly enhance the visual impact of your project.
Best Practices for Cropping in Revit
Implementing best practices when cropping images in Revit can save you time and improve the quality of your work. Here are some tips to consider:
- Plan Before Cropping: Think about the final look you want to achieve. Planning helps you crop effectively without wasting time.
- Use High-Quality Images: Start with high-resolution images to ensure clarity even after cropping. Low-quality images can look pixelated.
- Keep It Simple: Avoid over-cropping. Sometimes, less is more. Focus on the key elements without cutting out too much context.
- Test Different Crops: Experiment with various crop options to see what best fits your design. You might be surprised by the results.
- Review and Revise: Always review your cropped images in the context of your project. Make adjustments if they don’t look right.
By following these best practices, you can enhance your Revit projects, making them more professional and visually appealing.
Common Issues and Troubleshooting Tips
When working with images in Revit, you might run into some common issues while cropping. These can be frustrating, but they are usually easy to fix. Let’s look at a few problems you might encounter and how to troubleshoot them effectively.
- Cropped Images Not Updating: Sometimes, after cropping, you might not see the changes immediately. If this happens, try zooming in and out or refreshing the view. If that doesn’t work, save and reopen the project.
- Image Appears Blurry: If your cropped image looks blurry, it might be due to using a low-resolution file. Always start with high-quality images to maintain clarity after cropping.
- Crop Region Not Visible: If you can’t see the crop region, ensure it’s activated. Check the visibility settings in your view to make sure the crop region is enabled.
- Difficulty in Resizing: Sometimes, dragging the edges of the crop region can be tricky. Make sure you click precisely on the edges. Zooming in can help with this.
- Images Overlapping: If your images overlap in ways you didn’t intend, use the “Bring Forward” or “Send Backward” options in the right-click menu to adjust the layering.
By being aware of these common issues and knowing how to troubleshoot them, you can streamline your image cropping process in Revit and avoid unnecessary headaches.
FAQs
Here are some frequently asked questions about cropping images in Revit, along with their answers:
- Can I crop images multiple times? Yes, you can crop images as many times as you need. Just make sure to reselect the image and activate the Crop tool each time.
- What file types can I use for images? Revit supports several formats, including JPG, PNG, and BMP. Choose formats that maintain quality for the best results.
- Does cropping affect image quality? Cropping does not affect the overall image quality, but if you crop too much, you may lose important details.
- Can I undo a crop? Absolutely! If you don’t like the cropped result, you can simply use the Undo feature (Ctrl + Z) to revert to the original image.
- How can I save my cropped images? Once you crop an image, the changes are saved in your Revit project. If you need the cropped image for other uses, consider exporting it separately.
If you have more questions, don’t hesitate to reach out to the Revit community or consult the software’s help resources.
Conclusion
Cropping images in Revit is an essential skill that can greatly enhance the quality of your projects. By following the steps outlined in this guide, you can effectively manage your images, ensuring they contribute positively to your designs. Remember, using the Crop Region Tool gives you the flexibility to focus on what matters most, while adjusting image properties allows you to fine-tune their appearance.
As you practice cropping, keep in mind the common issues and troubleshooting tips we discussed. And if you run into any questions, the FAQs section can provide quick answers to common concerns. By applying best practices and maintaining high standards, your Revit projects will look polished and professional. Happy cropping!

 admin
admin


